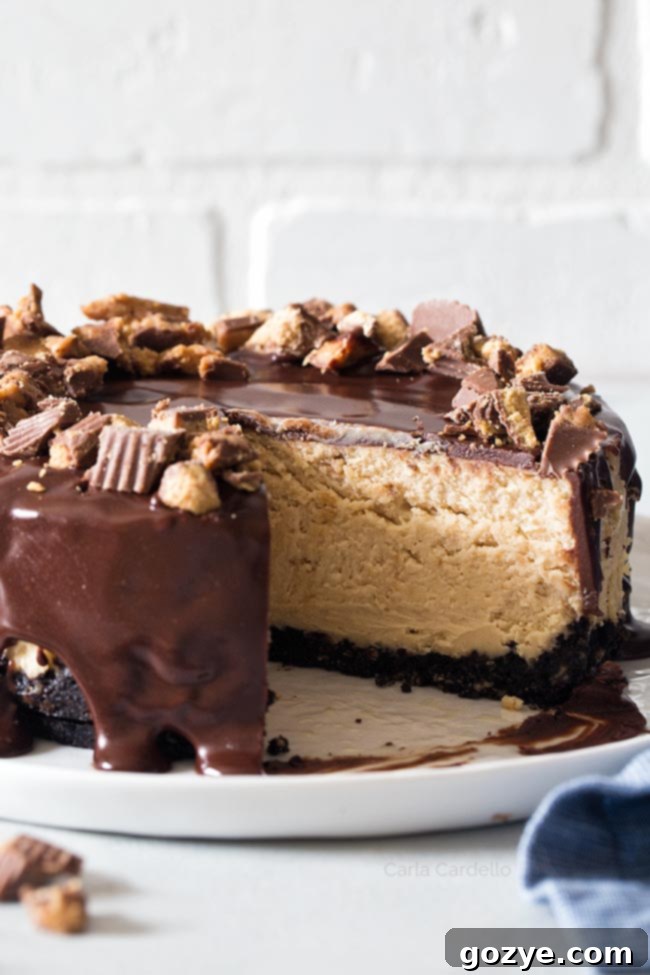
Decadent 6-Inch Peanut Butter Cheesecake: An Irresistible Homemade Treat with Oreo Crust and Chocolate Ganache
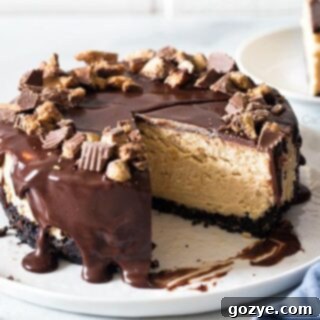
Peanut butter lovers, prepare yourselves for an absolute delight! This small, yet incredibly rich, Peanut Butter Cheesecake recipe is designed to captivate your taste buds. Featuring a crunchy Oreo crust, a velvety smooth peanut butter filling, and crowned with a luscious chocolate ganache, it’s the ultimate dessert for any occasion. Whether you’re celebrating a special moment or simply craving a sweet escape, this homemade peanut butter chocolate cheesecake is surprisingly easy to make and guaranteed to impress.
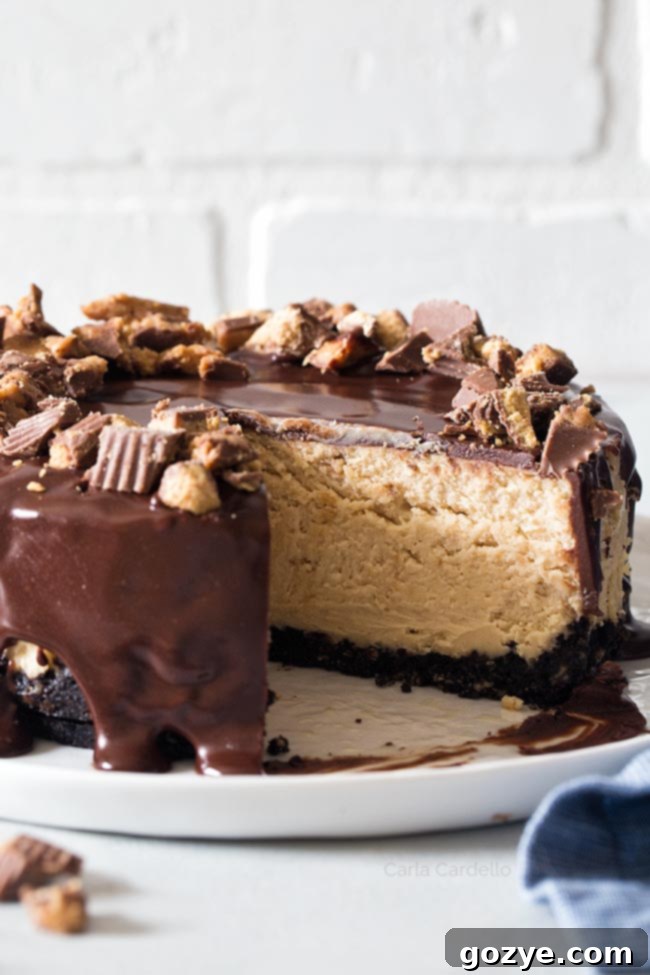
The magic of peanut butter cheesecake isn’t entirely new to our culinary adventures. We’ve explored the delicious combination in various forms, from delightful peanut butter cheesecake bars that are perfect for sharing, to indulgent peanut butter cheesecake brownies that blend two favorite desserts. However, one classic presentation has been noticeably absent from our collection: a standalone peanut butter cheesecake baked in a springform pan.
Many of you, and even close friends, have wondered why this essential recipe hasn’t made its appearance sooner. Well, the wait is over! Inspired by our popular 6-inch cheesecake recipe, this version is meticulously crafted as a small peanut butter dessert, yielding approximately 4-6 generous slices. It’s the perfect size for a cozy gathering, a romantic dinner for two, or simply to ensure you have delicious leftovers for the week – because, let’s be honest, who can stop at just one slice of heavenly cheesecake?
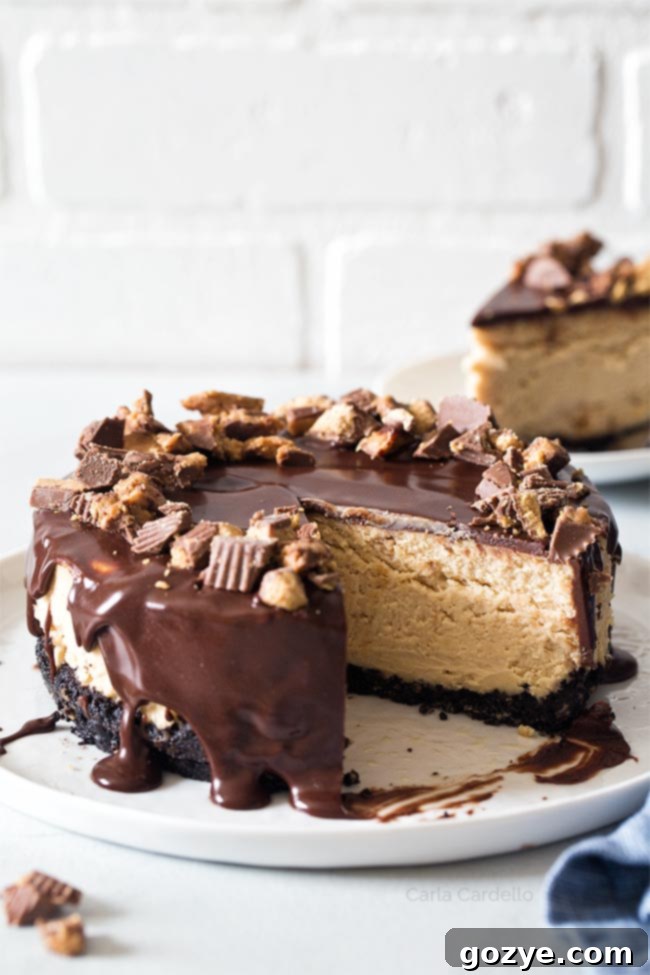
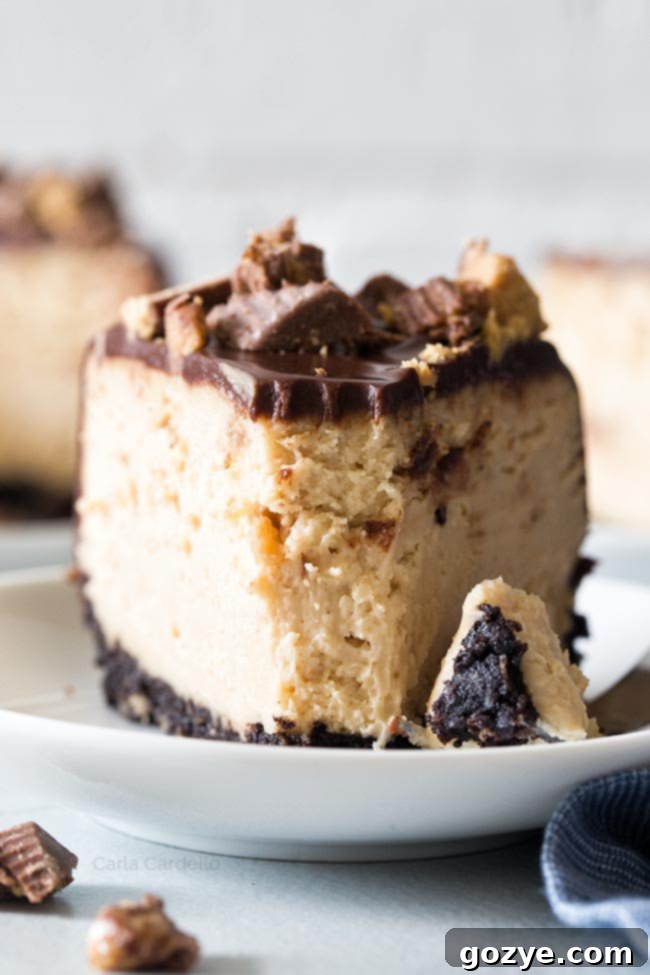
And of course, we couldn’t resist elevating this peanut butter dream into a full-fledged chocolate peanut butter cheesecake masterpiece. It starts with a foundational Oreo crust, boasts a rich, creamy peanut butter center, and is then lavishly covered in a silky chocolate ganache. For the ultimate decadence, consider topping it with chopped peanut butter cups, transforming it into an unforgettable treat that celebrates the iconic duo of chocolate and peanut butter.
Choosing the Right Pan for Your Peanut Butter Cheesecake
To successfully create this exquisite small peanut butter cheesecake, the right equipment is key. For this specific recipe, a 6-inch springform pan is absolutely essential. A springform pan is designed with a removable side, which allows you to gently release your delicate cheesecake without flipping or inverting it, preserving its beautiful shape and preventing any potential damage, unlike a traditional cake.
The specific pan used for this recipe is a 6 x 2 inch springform pan (Amazon affiliate link), which is perfectly sized to create a cheesecake with an ideal height and texture. While a 6 x 3 inch springform pan is also an option (Amazon affiliate link), it will simply provide a little more headroom at the top, which won’t significantly alter the outcome but is worth noting. Using a standard round cake pan is not recommended for cheesecake as it would be exceptionally difficult to remove the baked cheesecake without damaging it.
Can I Adapt This Recipe for a 7-Inch Pan?
Absolutely! The versatility of cheesecake recipes often allows for slight adjustments. As demonstrated with our popular 7-inch cheesecake recipe, you can easily make this 6-inch peanut butter cheesecake recipe in a 7-inch springform pan without needing to make any significant ingredient adjustments. The cheesecake might be slightly less tall, but the baking time and creamy texture will remain consistent, offering a slightly wider yield.
What About a 9-Inch Springform Pan?
If you don’t own a 6-inch or 7-inch springform pan, fear not! You can still enjoy this incredible peanut butter cheesecake by making a few simple adjustments for a larger 9-inch pan. To do so, follow the comprehensive directions provided in our 9-inch Triple Chocolate Cheesecake recipe. However, you’ll need to omit the chocolate from that recipe and instead incorporate 3/4 cup of smooth peanut butter into the batter. This will ensure you get the right consistency and flavor profile for a larger peanut butter cheesecake.
Alternatively, if you’re looking to make an even smaller batch than the 6-inch, you can halve this recipe and follow the specific instructions for our 4-inch Chocolate Cheesecake, adapting it with peanut butter for a miniature delight.
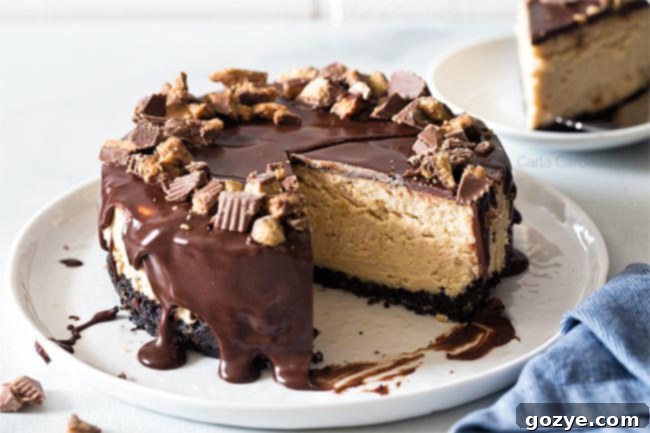
Essential Ingredients for Your Perfect Peanut Butter Cheesecake
Crafting a truly divine chocolate peanut butter cheesecake requires a few key ingredients. Each plays a crucial role in achieving that rich flavor and signature creamy texture. Here’s a closer look at what you’ll need:
- Oreo Cookie Crumbs: These form the irresistible base of our chocolate peanut butter cheesecake. For an intensified peanut butter flavor, consider using peanut butter-filled Oreos. Otherwise, traditional Oreos work perfectly. There’s no need to remove the cream filling; simply crush the whole cookies in a food processor or by hand for fine crumbs.
- Butter: Melted butter is essential for binding the cookie crumbs together, creating a firm and flavorful crust that won’t crumble.
- Full-Fat Cream Cheese: This is the heart of any great cheesecake! Blocks of full-fat cream cheese are crucial for achieving that characteristic rich, dense, and creamy texture. Avoid low-fat or fat-free versions, as they contain more water and can result in a runny or curdled cheesecake. Similarly, whipped cream cheese from a tub is not suitable for baking due to its airy texture and added stabilizers. Ensure it’s at room temperature for a smooth, lump-free batter.
- Smooth Conventional Peanut Butter: For the best results in terms of texture and stability, we recommend using smooth, conventional peanut butter brands like Jif or Skippy. Natural peanut butter, which often separates into oil and solids, can negatively impact the cheesecake’s texture and consistency. Its oil content can also cause the batter to curdle or become greasy during baking.
- Granulated Sugar: Just the right amount of granulated sugar is added to sweeten the filling and balance the slight tanginess of the cream cheese, creating a harmonious flavor profile.
- Large Eggs: As with most baking recipes, large eggs are the standard. It’s incredibly important that your eggs are at room temperature. Cold eggs can cause the batter to curdle or seize, leading to a lumpy texture and an uneven bake. They also incorporate more smoothly into the batter when not cold.
- Vanilla Extract: A touch of vanilla extract is a flavor enhancer, adding depth and warmth to the cheesecake filling and making all the other flavors truly pop.
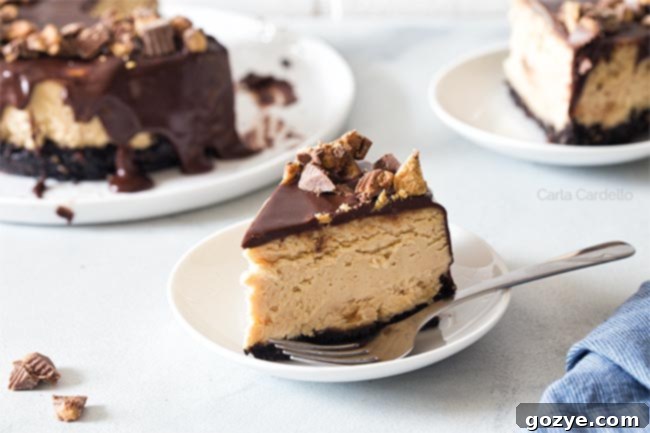
Mastering the Art of Making Peanut Butter Cheesecake
Creating this decadent peanut butter cheesecake is a rewarding process. Follow these steps carefully to ensure a perfect result every time:
Before you even begin mixing, make sure all your refrigerated ingredients, especially the cream cheese and eggs, are at room temperature. This is a critical step that ensures a silky, lump-free batter. Cold ingredients can cause the batter to seize and curdle, making it difficult to achieve that signature smooth cheesecake texture.
- **Prepare the Crust:** Combine your crushed Oreo cookie crumbs with melted butter and a pinch of salt. Press this mixture firmly and evenly into the bottom of your prepared 6-inch springform pan. Pre-bake the crust for about 10 minutes. This step is vital to prevent a soggy crust once the creamy filling is added, providing a crisp foundation for your cheesecake.
- **Mix the Filling:** In a large mixing bowl, beat together the softened cream cheese, smooth peanut butter, and granulated sugar until the mixture is incredibly smooth and light. Be sure to scrape down the sides of the bowl frequently to ensure all ingredients are fully incorporated and there are no lumps.
- **Add Eggs and Vanilla:** Gently beat in the eggs, one at a time, just until they are incorporated. The key here is not to overbeat the eggs, as excessive air can lead to cracks in your cheesecake during baking or cooling. After the eggs, stir in the vanilla extract until just combined.
- **Bake with a Water Bath:** Pour the creamy peanut butter batter over your pre-baked crust. Place the springform pan into a larger pan (like an 8×8 baking dish). Carefully pour hot water into the larger pan until the springform pan is halfway submerged. This water bath is crucial for even baking, preventing cracks, and ensuring a creamy, silky texture. Bake in a preheated oven at 325°F (160°C) for 65-75 minutes, or until the internal temperature reaches 150°F (65°C). The center will still have a slight wobble, which is perfectly normal. Trust your thermometer over visual cues for doneness.
- **Cooling is Key:** Once baked, carefully remove the cheesecake from the water bath and run a thin knife around the edge of the pan to prevent sticking as it cools and contracts. Let it cool completely at room temperature for at least an hour, then refrigerate for at least 4 hours, or ideally overnight. This slow cooling process is essential for preventing cracks and achieving the perfect firm texture.
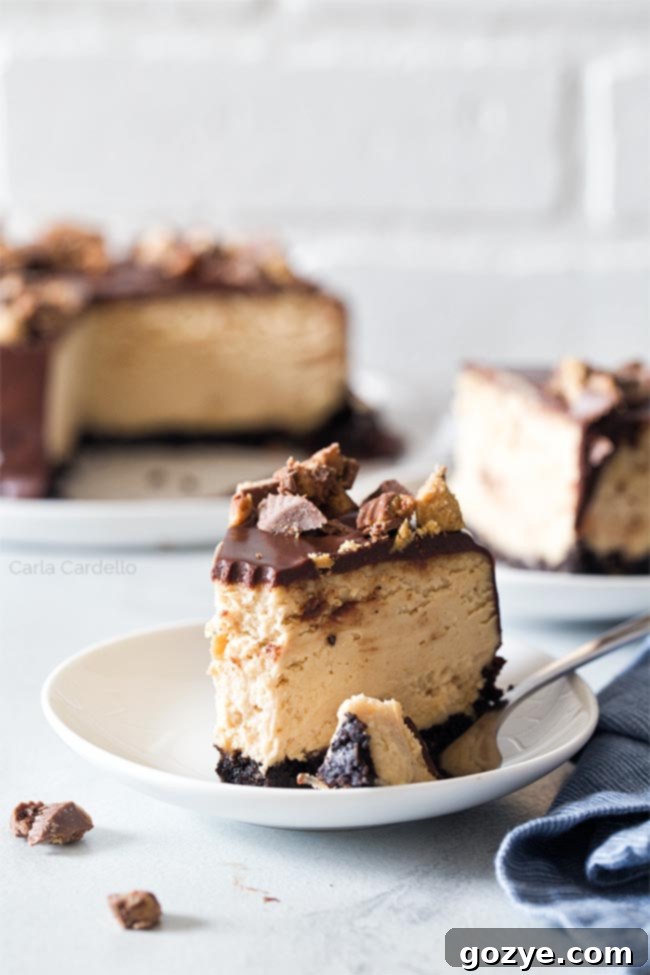
The Essential Role of a Water Bath in Cheesecake Baking
For any thick, creamy cheesecake, especially our 6-inch peanut butter cup cheesecake, a water bath (also known as a bain-marie) is not just recommended, it’s truly indispensable. This method is the secret to achieving that perfectly smooth, crack-free top and an evenly baked, luxurious texture throughout the cheesecake.
Here’s why a water bath is so important and how to set one up:
- **Even Baking:** The hot water bath creates a moist, consistent heat environment around the cheesecake. This gentle, indirect heat prevents the edges from baking too quickly and becoming dry or crumbly before the center has a chance to set, ensuring a uniformly creamy texture.
- **Preventing Cracks:** Rapid changes in temperature cause cheesecake to expand and contract too quickly, leading to unsightly cracks on the surface. The steam from the water bath slows down the baking process and keeps the top moist, allowing the cheesecake to set gradually and preventing surface cracking.
- **Silky Texture:** The added moisture in the oven from the water bath contributes to a noticeably smoother and silkier cheesecake filling.
To prepare your water bath:
- **Foil Wrap:** Start by tightly wrapping the outside of your springform pan with heavy-duty aluminum foil. Use at least two layers to create a secure barrier that prevents any water from seeping into the pan and ruining your delicious Oreo crust.
- **Placement:** After filling your foil-wrapped springform pan with the peanut butter cheesecake batter, place it inside a larger baking pan. An 8×8 inch square pan or any pan larger than your springform will work.
- **Hot Water:** Carefully pour hot (but not boiling) water into the larger pan. The water should come about halfway up the sides of your springform pan. Be extremely cautious during this step to avoid splashing any water onto or into the foil-wrapped cheesecake.
- **Transfer and Bake:** Gently transfer the entire setup (larger pan with water bath and springform pan) to your preheated oven and bake according to the recipe instructions.
Once baked, you’ll be rewarded with a beautifully smooth, uniformly cooked peanut butter cheesecake that is a testament to the power of a simple water bath.
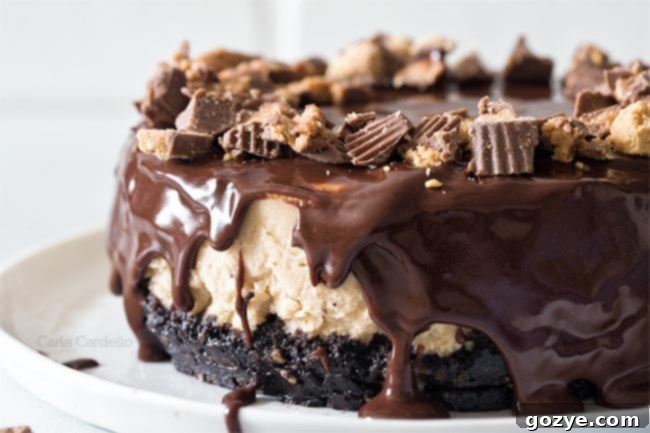
Creative Ways to Garnish Your Peanut Butter Cup Cheesecake
Once your peanut butter chocolate cheesecake has cooled to perfection, it’s time to add the finishing touches! The garnish not only enhances its visual appeal but also adds another layer of flavor and texture. Here are several delectable options:
- **Classic Chocolate Ganache:** Our preferred method involves a rich, silky smooth chocolate ganache. This glossy topping provides a beautiful contrast to the creamy peanut butter and a decadent chocolatey finish. You can learn how to make ganache with step-by-step photos for a perfect pour. Before the ganache fully sets, sprinkle generously with chopped peanut butter cups for the ultimate “peanut butter cup” experience.
- **Light & Fluffy Whipped Cream:** If you prefer a lighter, airier topping, a homemade whipped cream is an excellent choice.
- **Chocolate Whipped Cream:** For a continuing chocolate theme, whip up a batch of small batch homemade chocolate whipped cream.
- **Peanut Butter Whipped Cream:** To double down on the peanut butter flavor, opt for a small batch homemade peanut butter whipped cream.
- **Vanilla Whipped Cream:** For a simple yet elegant touch, classic vanilla whipped cream provides a refreshing balance.
- **Additional Toppings:** Beyond peanut butter cups, consider other garnishes like a drizzle of melted peanut butter, mini chocolate chips, a sprinkle of sea salt flakes to enhance the flavors, or a decorative swirl of chocolate syrup.
Making Peanut Butter Cheesecake Without Chocolate (Still Delicious!)
While the combination of chocolate and peanut butter is a match made in culinary heaven – much like peanut butter and jelly – there are times when you might simply prefer a pure, unadulterated peanut butter experience. It’s easy to adapt this recipe to be entirely chocolate-free without sacrificing any flavor or texture.
To create a delicious peanut butter cheesecake without chocolate:
- **Crust:** Instead of using Oreo cookies for the crust, substitute them with peanut butter sandwich cookies (like Nutter Butters) for an all-peanut butter base. Simply crush them and combine with butter as directed.
- **Topping:** Skip the chocolate ganache entirely. Instead, crown your cheesecake with a generous dollop of peanut butter whipped cream for an intense peanut butter flavor, or a light and airy vanilla whipped cream for a classic, understated elegance. You could also garnish with roasted peanuts, a drizzle of warm peanut butter, or even a sprinkle of chopped Reese’s Pieces for a burst of color and crunch.
This chocolate-free variation highlights the rich, creamy essence of peanut butter, offering a delightful alternative for those who prefer their peanut butter unmixed.
Tips for Cheesecake Success
- **Room Temperature Ingredients:** This cannot be stressed enough! Cream cheese and eggs at room temperature ensure a smooth, lump-free batter.
- **Don’t Overmix:** Overmixing the batter, especially after adding eggs, can incorporate too much air, leading to cracks in your cheesecake as it bakes and cools. Mix just until combined.
- **Gentle Egg Incorporation:** Add eggs one at a time, mixing on low speed until just incorporated.
- **Water Bath is Your Friend:** Embrace the water bath for an even bake, creamy texture, and crack-free surface.
- **Slow Cooling:** Allow the cheesecake to cool slowly, first in the water bath, then on a wire rack, and finally in the refrigerator. This gradual temperature change is key to preventing cracks.
- **Chill Thoroughly:** Cheesecake needs time to set properly. Refrigerate for at least 4 hours, preferably overnight, for the best flavor and texture.
Storage and Make-Ahead Instructions
This peanut butter cheesecake is not only delicious but also convenient for make-ahead planning. Once your cheesecake has fully cooled and chilled (ideally overnight), you can store leftovers in an airtight container in the refrigerator for up to 5-7 days. For longer storage, you can freeze individual slices or the entire cheesecake (without ganache topping) for up to 1 month. To freeze, wrap slices tightly in plastic wrap, then a layer of aluminum foil. Thaw in the refrigerator overnight before serving.
More Small Cheesecake Recipes to Explore
Loved this perfectly portioned dessert for two (or a small group)? Dive into more of our favorite small cheesecake recipes, ideal for when you want a decadent treat without the commitment of a full-sized cake:
- Small Chocolate Cheesecake: A rich, classic chocolate delight.
- Red Velvet Oreo Cheesecake: A vibrant, creamy, and chocolaty showstopper.
- Small Pumpkin Cheesecake: Perfect for autumn flavors in a manageable size.
- Instant Pot Pumpkin Cheesecake: For a quick and easy pumpkin fix.
- Mini Cheesecakes: Bite-sized perfection for individual servings.
- Small Batch Strawberry Cheesecake Bars: Fruity and creamy bars for easy enjoyment.
Peanut Butter Cheesecake (6 Inch)
4-6 servings
20 minutes
1 hour 15 minutes
5 hours
6 hours 35 minutes
Peanut butter lovers will rejoice with this Peanut Butter Cheesecake! It’s a small peanut butter cheesecake recipe with an Oreo crust then covered in chocolate ganache.
Ingredients
- 1 cup chocolate sandwich cookie crumbs, such as Oreo
- 2 tablespoons unsalted butter, melted
- Pinch of salt
- 16 ounces (2 blocks or 16 tablespoons) full-fat cream cheese, room temperature and not cold to the touch (do not sub fat free or whipped)
- 1/2 cup smooth conventional peanut butter (not natural)
- 1/2 cup granulated sugar
- 2 eggs, room temperature and not cold to the touch
- 1 teaspoon vanilla extract
- 1/2 cup chopped peanut butter cups
Garnish (Pick One)
- Ganache
- Chocolate Whipped Cream
- Peanut Butter Whipped Cream
- Vanilla Whipped Cream
Instructions
- Preheat oven to 325F (160°C). Wrap the outside of a 6×2 or 6×3 inch springform pan with heavy-duty foil. Lightly grease the inside of the pan. This recipe will also work in a 7-inch springform pan without adjustments.
- In a large bowl, mix together the cookie crumbs, melted butter, and salt until well combined. Press firmly and evenly into the bottom of the prepared springform pan. Bake for 10 minutes to set the crust.
- Meanwhile, in a large mixing bowl, using a medium-high speed mixer (fitted with a paddle attachment if using a stand mixer), beat together the softened cream cheese, peanut butter, and granulated sugar until the mixture is light, fluffy, and completely smooth, about 2-3 minutes. Make sure to scrape down the bowl as needed to ensure all ingredients are incorporated.
- Beat in the eggs, one at a time, mixing for about 1 minute after each addition until just smooth. Be careful not to overbeat, as this can incorporate too much air and lead to cracks.
- Scrape down the bowl one last time, then beat in the vanilla extract until just combined.
- Carefully transfer the smooth batter to the pre-baked crust in the springform pan (if using a 6×2 pan, it will fill almost to the top). Place the springform pan inside a larger baking pan, such as an 8×8 inch pan or a roasting pan.
- Pour hot water into the outside pan until the springform pan is halfway submerged in the water. Exercise caution to ensure no water splashes into the foil-wrapped springform pan.
- Bake for 65-75 minutes, or until the edges appear set and slightly browned, the center has a slight jiggle, and an instant-read thermometer inserted into the center reaches an internal temperature of 150°F (65°C).
- Remove the pan from the oven and carefully run a thin knife along the edge of the cheesecake to loosen it from the pan sides. Allow the cheesecake to cool for 15 minutes in the hot water bath.
- Carefully remove the springform pan from the water bath and place it on a wire rack to cool completely at room temperature for at least 1 hour.
- Once cooled, cover the cheesecake loosely and refrigerate for at least 4 hours, or ideally overnight, to allow it to fully set. Before serving, top with your chosen garnish (ganache or whipped cream) and chopped peanut butter cups. Store any leftovers in an airtight container in the refrigerator for up to 5-7 days.
Notes
- For a 9-inch peanut butter cheesecake, follow our recipe for 9 Inch Chocolate Cheesecake. Omit the chocolate from that recipe and incorporate 3/4 cup of smooth peanut butter into the batter.
- Looking for more perfectly sized small cheesecake recipes? Explore our popular 6 Inch Cheesecake (classic vanilla), Chocolate Cheesecake with Oreo Crust, Small Pumpkin Cheesecake, and the festive Red Velvet Oreo Cheesecake.
- If you’re a true peanut butter enthusiast and want more peanut butter desserts, don’t miss our Peanut Butter Cheesecake Bars and the delightful Peanut Butter Cheesecake Brownies.
Recommended Products
As an Amazon Associate and member of other affiliate programs, I earn from qualifying purchases.
- 6 Inch Springform Pan
Did you make this recipe?
Let me know what you think! Rate the recipe above, leave a comment below, and/or share a photo on Instagram using #HITKrecipes
