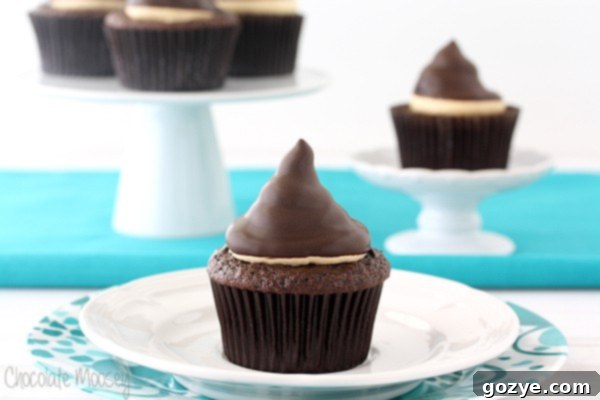
Decadent Chocolate Caramel Hi Hat Cupcakes: Your Guide to Bakery-Style Treats at Home
Prepare to be amazed by these truly decadent yet surprisingly simple Chocolate Caramel Hi Hat Cupcakes. Once you master the art of these impressive treats, you’ll find yourself inspired to dip everything imaginable in luscious, hardened chocolate. Get ready to elevate your baking game and delight everyone with these visually stunning, bakery-quality cupcakes!
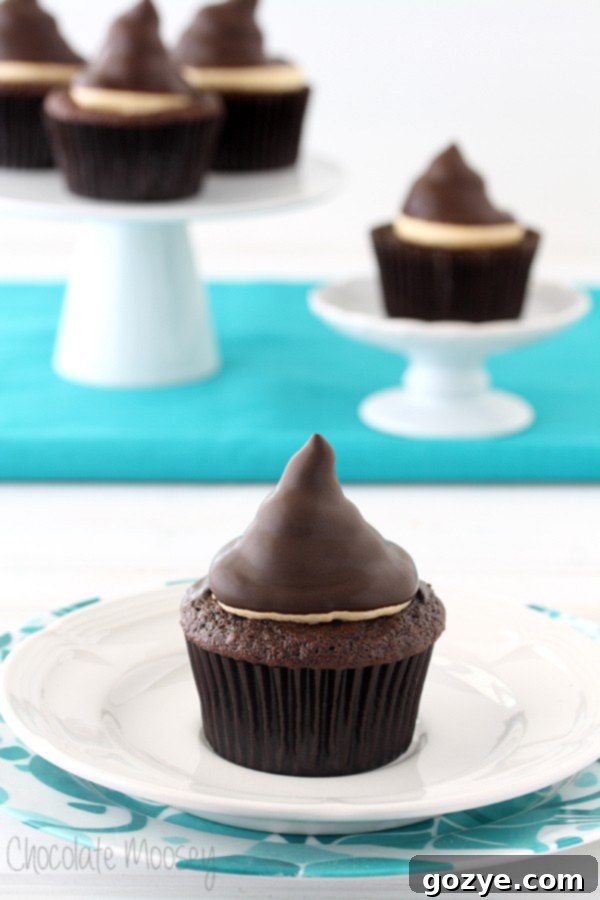
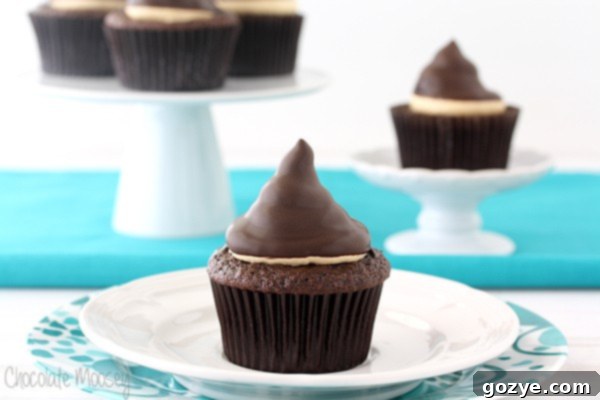
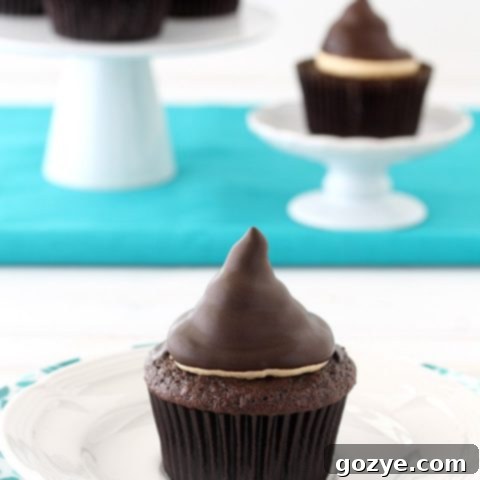
Today, I am absolutely thrilled to unveil a recipe that has been a long-standing aspiration on my culinary bucket list: the magnificent Chocolate Caramel Hi Hat Cupcake. There’s a certain magic in taking a humble cupcake and transforming it into an elegant confectionery masterpiece, and these Hi Hat Cupcakes do exactly that. They promise a delightful surprise with every bite – a tender chocolate cake base, topped with a cloud of creamy caramel frosting, all encased in a satisfyingly crisp chocolate shell.
What Are Hi Hat Cupcakes? The Ultimate Chocolate-Dipped Delight Explained
Perhaps you’ve come across these charming confections before, but for those unfamiliar, a “Hi Hat Cupcake” is a cupcake adorned with an exceptionally tall, generous swirl of frosting. This towering peak of sweetness is then completely enrobed in a layer of melted chocolate that hardens into a shiny, crackable shell. Imagine the nostalgic joy of a chocolate-dipped ice cream cone, but reimagined in an irresistible cupcake form – that’s the essence of a Hi Hat! The whimsical name perfectly captures their iconic silhouette, resembling a tall hat worn on a night out.
Despite their sophisticated appearance, I’m here to demonstrate just how straightforward it is to create these stunning Chocolate Caramel Hi Hat Cupcakes in your very own kitchen. Many home bakers, myself included, initially harbor fears about the frosting collapsing, melting, or the chocolate not setting correctly. Rest assured, with a few key techniques and the right ingredients, those worries will vanish, leaving you with perfect, picture-worthy results every single time. Prepare to conquer your baking fears and create something truly special!
The Unsung Hero: Why High-Quality Chocolate is Non-Negotiable
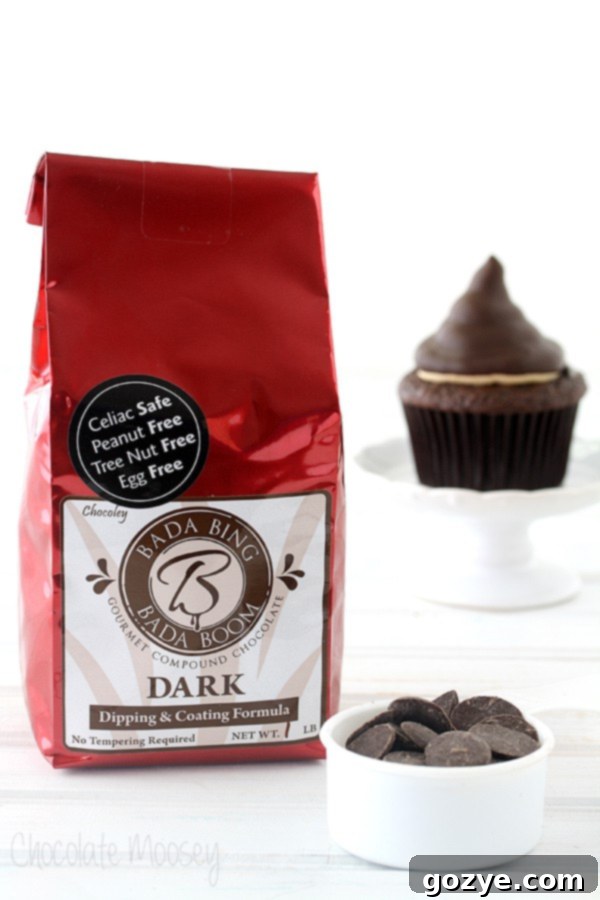
While I’m always on the lookout for smart ways to save money during grocery shopping, there’s one ingredient that I firmly believe should never be compromised on: chocolate. Especially when chocolate plays such a pivotal role, as it does in these show-stopping Chocolate Caramel Hi Hat Cupcakes, its quality can fundamentally impact the success and flavor of your dessert.
I learned this valuable lesson through a regrettable experience years ago. I once tried to cut corners by purchasing baking chocolate from a very budget-friendly grocery store – the kind where you need a quarter to unlock a shopping cart. It was a mistake I vowed never to repeat. The cheap chocolate simply didn’t melt smoothly; it was grainy, tasted waxy, and created a brittle, unpleasant shell that detracted from the entire cupcake. From that day forward, I committed to using only high-quality chocolate for all my baking. Investing in good melting wafers, couverture chocolate, or even a premium bar of baking chocolate will make all the difference. It ensures a beautifully smooth melt, a glossy and durable shell, and a rich, satisfying chocolate flavor that truly elevates these cupcakes from simple homemade treats to gourmet delights.
Mastering the Melt: Tips for Perfect Chocolate Dipping for Your Hi Hat Cupcakes
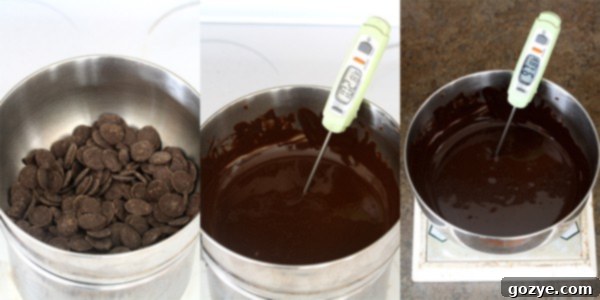
The journey to a flawless hi-hat shell begins with gently melting your chocolate. This isn’t a step to rush; patience and careful temperature control are your best friends here. I highly recommend using a double boiler method, which involves placing a heatproof bowl over a saucepan filled with about an inch of simmering water. This indirect heat prevents the chocolate from scorching, ensuring a silky-smooth consistency.
Add your chosen high-quality chocolate disks or finely chopped chocolate to the bowl and stir occasionally. Continue until the chocolate is entirely smooth and free of any lumps. If you happen to have a candy thermometer, aim for the chocolate to reach a temperature between 100-105°F (38-41°C) – this range is ideal for a fluid dip. Don’t fret if you don’t have a thermometer; the chocolate will reach the proper temperature shortly after it has completely melted. Once smooth, remove the bowl from the heat immediately. It’s crucial to allow the chocolate to cool slightly before dipping, ideally to a temperature between 96-98°F (36-37°C). If you’re estimating, let it cool for about 10 minutes. This cooling step is vital; it helps the chocolate set quickly, achieving that signature crisp, non-sticky, and wonderfully snappy finish on your Hi Hat Cupcakes.
The Art of the Dip: Achieving That Signature Hi-Hat Look and Perfect Set
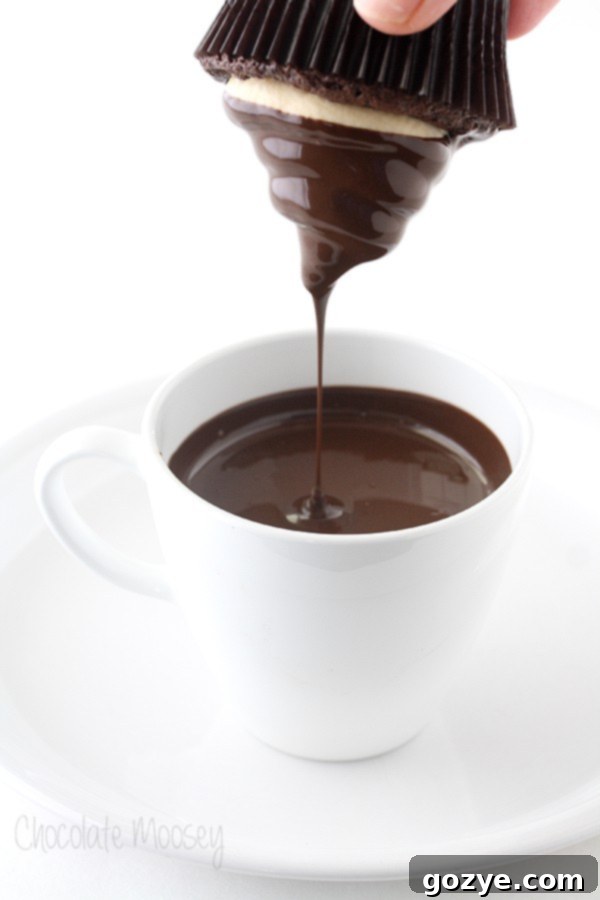
One of the most satisfying moments when making these Chocolate Caramel Hi Hat Cupcakes is the actual dipping process. Not only does the properly melted chocolate coat the frosting beautifully, but I was genuinely astonished at how rapidly the chocolate shell solidified on contact with the cold frosting. Many of the cupcakes didn’t even require refrigeration to fully harden – they set up almost instantly at room temperature!
You’ll know your chocolate shell is perfectly set and ready when its appearance changes from a glossy, reflective sheen to a dull or matte finish. This visual cue indicates that the chocolate has properly crystallized, signaling it’s ready to be enjoyed. A non-negotiable step for achieving this quick set and stable shell is ensuring your frosted cupcakes are thoroughly chilled. I learned this through experimentation: attempting to dip cupcakes with room-temperature frosting inevitably leads to the frosting melting and collapsing under the chocolate’s warmth. Therefore, always refrigerate your generously frosted cupcakes for a minimum of 30 minutes (or until the frosting is firm and cold to the touch) before attempting to dip them. This stark temperature contrast between the cold frosting and the slightly cooled melted chocolate is the secret to a fast, clean set and a wonderfully stable, crackable chocolate shell.
Simplifying the Frosting: Marshmallow Fluff Magic for Creamy Caramel Perfection
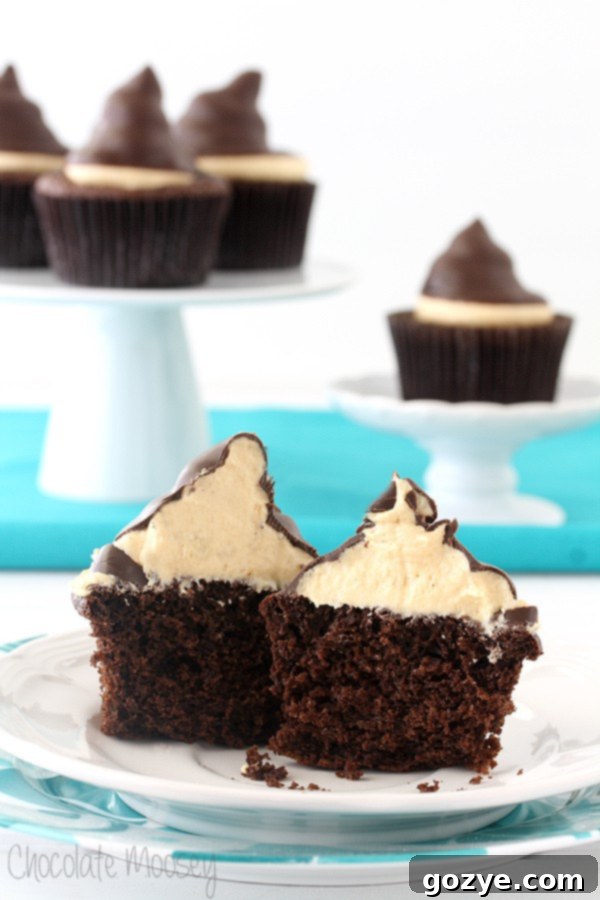
Traditionally, the iconic tall frosting for classic hi hat cupcakes is a meringue-based creation often referred to as “7-minute frosting.” This light, airy, and slightly sticky frosting bears a strong resemblance to homemade marshmallow fluff. While I’m generally a firm believer in the joys of baking from scratch, for these Chocolate Caramel Hi Hat Cupcakes, I deliberately sought a way to simplify and accelerate the frosting preparation, making the entire process more approachable for the home baker.
The conventional 7-minute frosting demands constant attention; it requires you to continuously beat the mixture over simmering water for a full seven minutes using a hand mixer. You can’t simply set it in a stand mixer and step away, which can be quite a challenge for those of us juggling numerous tasks and projects. As someone who values efficiency without compromising quality, I wanted a frosting solution that was both reliable and less labor-intensive.
My brilliant workaround? I opted for high-quality, store-bought marshmallow fluff and ingeniously incorporated my homemade caramel sauce (store-bought caramel works wonderfully too!). This simple yet effective substitution dramatically slashes the frosting preparation time, allowing you to allocate more focus and energy to the exciting and visual dipping stage of the cupcakes. Marshmallow fluff provides an incredibly stable, wonderfully smooth, and consistently perfect base for your caramel frosting, eliminating the finicky nature of egg whites often associated with traditional 7-minute frosting. You’ll achieve a beautiful, fluffy, and undeniably delicious caramel-infused topping that holds its majestic shape flawlessly under the crisp chocolate shell every single time.
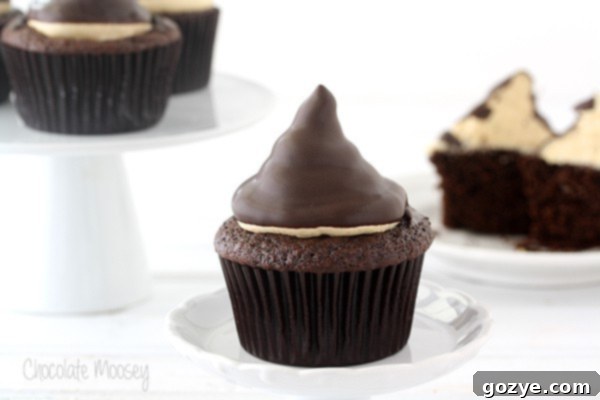
Chocolate Caramel Hi Hat Cupcakes Recipe
12 Decadent Cupcakes
Ingredients
For the Chocolate Cupcakes
- 1/2 cup (1 stick or 4 ounces) unsalted butter
- 2 ounces semisweet chocolate, chopped (high quality recommended)
- 1/2 cup unsweetened cocoa powder
- 3/4 cup all-purpose flour
- 1/2 teaspoon baking soda
- 1/4 teaspoon salt
- 2 large eggs
- 3/4 cup granulated sugar
- 1 teaspoon pure vanilla extract
- 1/2 cup buttermilk (room temperature is best)
For the Caramel Marshmallow Fluff Frosting & Chocolate Dip
- 1 cup (2 sticks or 8 ounces) unsalted butter, softened
- 1 cup marshmallow fluff (store-bought for ease)
- 1 cup powdered sugar (confectioners’ sugar), sifted
- Pinch of salt
- 1 teaspoon pure vanilla extract
- 1/2 cup caramel sauce (homemade or good quality store-bought)
- 1 cup chocolate melting disks (or high-quality chopped chocolate for dipping)
Instructions
Part 1: Preparing the Delicious Chocolate Cupcakes
- Preheat your oven to 350°F (175°C). Line a standard 12-cup muffin or cupcake pan with paper liners.
- In a medium, heavy-bottomed saucepan, gently melt the unsalted butter and chopped semisweet chocolate over low heat, stirring constantly until smooth. Remove from heat and set aside to cool slightly.
- In a large mixing bowl, whisk together the unsweetened cocoa powder, all-purpose flour, baking soda, and salt. Ensure there are no lumps and set aside.
- In another large bowl, using an electric mixer, beat together the eggs, granulated sugar, and vanilla extract until the mixture is light and fluffy, about 2-3 minutes. Gradually beat in the slightly cooled melted chocolate mixture until well combined.
- Add about one-third of the dry flour mixture to the wet ingredients, mixing on low speed until just combined. Then, add half of the buttermilk and mix. Repeat with another third of the flour mixture, then the remaining buttermilk, and finally the last third of the flour mixture. Mix until just incorporated; be careful not to overmix. The batter will be thick.
- Evenly fill each lined cupcake cup about 2/3 full with the chocolate batter. Bake for 18-20 minutes, or until a wooden toothpick inserted into the center of a cupcake comes out with only moist crumbs attached (not wet batter).
- Allow the cupcakes to cool in the pan for 10 minutes before carefully transferring them to a wire rack to cool completely. This step is critical; ensure cupcakes are fully cooled before frosting.
Part 2: Crafting the Creamy Caramel Marshmallow Fluff Frosting
- In a large mixing bowl, using an electric mixer, beat together the softened unsalted butter, marshmallow fluff, sifted powdered sugar, and a pinch of salt until the mixture is smooth, light, and wonderfully creamy. This should take approximately 2-3 minutes.
- Add the pure vanilla extract and the caramel sauce to the frosting mixture. Continue to beat for another 2-3 minutes until everything is thoroughly combined, fluffy, and perfectly uniform in consistency.
- Spoon the prepared caramel marshmallow fluff frosting into a piping bag fitted with a large round tip (or a star tip if you prefer). Generously frost each cooled chocolate cupcake, creating a tall, elegant swirl – aim for about 2 to 2.5 circles high to achieve the classic hi-hat shape.
- Once all cupcakes are frosted, immediately transfer them to the refrigerator. Chill for at least 30 minutes, or until the frosting is firm and thoroughly cold. This chilling is essential for the chocolate dipping process.
Part 3: The Art of Dipping for the Signature Hi-Hat Shell
- Prepare your double boiler for the chocolate dip: Add about an inch of water to a saucepan and bring it to a gentle simmer over low heat. Turn off the heat and place a heatproof bowl (ensure the bottom does not touch the water) on top of the saucepan. Add the chocolate melting disks (or chopped chocolate) to the bowl.
- Gently melt the chocolate, stirring occasionally, until it is completely smooth and fluid. For best results, the temperature should be between 100-105°F (38-41°C). Once melted, remove the bowl of chocolate from the heat and let it cool for about 10 minutes. The ideal dipping temperature should be between 96-98°F (36-37°C). This slight cooling is crucial for a thin, crisp shell.
- If needed, transfer the cooled melted chocolate to a narrow, deep cup or bowl – it needs to be deep enough to fully submerge the frosting swirl of a cupcake.
- Working with one thoroughly chilled cupcake at a time, hold it by the base and swiftly dip the frosted top straight into the melted chocolate, covering the entire frosting swirl. Immediately lift the cupcake, allowing any excess chocolate to drip back into the bowl. Do not swirl or twist; a quick, decisive dip is best.
- Place the dipped cupcake on a parchment-lined baking sheet. Repeat this process for each cupcake. Let them sit at room temperature until the chocolate has fully hardened. You’ll observe the chocolate transforming from a glossy, shiny finish to a dull, matte appearance, indicating it’s perfectly set. Enjoy your spectacular Chocolate Caramel Hi Hat Cupcakes!
Did you make this recipe?
We’d love to hear from you! Rate the recipe above, leave a comment below sharing your experience, and/or share a photo of your magnificent Chocolate Caramel Hi Hat Cupcakes on Instagram using #HITKrecipes. Happy baking!
Tips for Success & Delightful Variations
- Choosing Your Cupcake Base: While our recipe includes a phenomenal scratch-made chocolate cupcake, feel absolutely free to use your favorite chocolate cupcake recipe or even a high-quality boxed mix if you’re looking for a quicker preparation. The most important thing is to ensure your cupcakes are completely cool before you even think about frosting them.
- Caramel Sauce Choices: Homemade caramel sauce offers an unparalleled depth of flavor and richness. However, if time is of the essence, a good quality, thick store-bought caramel sauce will work perfectly and still deliver that delightful caramel kick to your frosting.
- A Sprinkle of Sea Salt: For an extra gourmet touch, consider sprinkling a tiny pinch of flaky sea salt (such as Maldon) onto the wet chocolate shell immediately after dipping, before it fully sets. This creates a delectable salted caramel effect that beautifully complements the sweet and chocolatey layers.
- Storage Recommendations: Once your Chocolate Caramel Hi Hat Cupcakes are fully dipped and the chocolate has set, they can be stored in an airtight container. They will keep beautifully at room temperature for up to one day, or in the refrigerator for up to 3-4 days. For the best texture and flavor experience, allow them to come to room temperature for about 15-20 minutes before serving.
- Make Ahead Strategies: To break up the work, you can bake the cupcakes a day in advance and store them in an airtight container at room temperature. The caramel marshmallow fluff frosting can also be prepared a day ahead, stored in an airtight container in the refrigerator, and then given a quick whip with an electric mixer before piping. For the freshest appearance and crispiest shell, we recommend dipping the cupcakes on the day you plan to serve them.
Frequently Asked Questions About Hi Hat Cupcakes
- Can I use a different type of frosting for Hi Hat Cupcakes?
- While our caramel marshmallow fluff frosting is specially formulated for its stability and ease, you could experiment with a very firm buttercream. However, meringue-based frostings (like traditional 7-minute frosting) or our marshmallow fluff variation are generally the best choices. They firm up beautifully when chilled, providing a strong, stable foundation for the chocolate shell without succumbing to melting.
- My chocolate seized when I tried to melt it. What went wrong?
- Chocolate seizing is a common issue that occurs when it comes into contact with even a tiny amount of water or when it gets overheated. Always ensure your melting bowl and all utensils are completely dry. Using the double boiler method (indirect heat) helps prevent scorching. If your chocolate does seize, unfortunately, it’s difficult to revert it for dipping purposes, though it might still be usable in other baked goods where texture isn’t as critical.
- Why isn’t my chocolate shell setting quickly on the cupcakes?
- The most frequent reason for a slow-setting chocolate shell is that the frosting wasn’t cold enough before dipping. The dramatic temperature contrast between the firm, chilled frosting and the slightly cooled melted chocolate is what facilitates a rapid set. Additionally, ensure your melted chocolate isn’t too hot, as excessively warm chocolate can melt the frosting and hinder the setting process.
- Can I use standard chocolate chips instead of melting disks for dipping?
- Standard chocolate chips typically contain stabilizers that prevent them from melting as smoothly and thinly as chocolate melting disks or high-quality chopped baking chocolate (couverture). While you can certainly try, you might not achieve the same glossy, thin, and beautifully crisp shell that is characteristic of perfect Hi Hat Cupcakes. For the very best results, we highly recommend using melting disks or a premium bar of baking chocolate designed for tempering or melting.
You Might Also Love These Chocolate & Caramel Delights!
If the irresistible combination of chocolate and caramel in these Hi Hat Cupcakes has captured your heart, you’ll surely be thrilled to explore these other fantastic recipes that celebrate similar indulgent flavors:
