Irresistible Small Batch Brownies: Your Go-To Recipe for Fudgy, Chewy, & Crackly-Topped Delights in a Loaf Pan
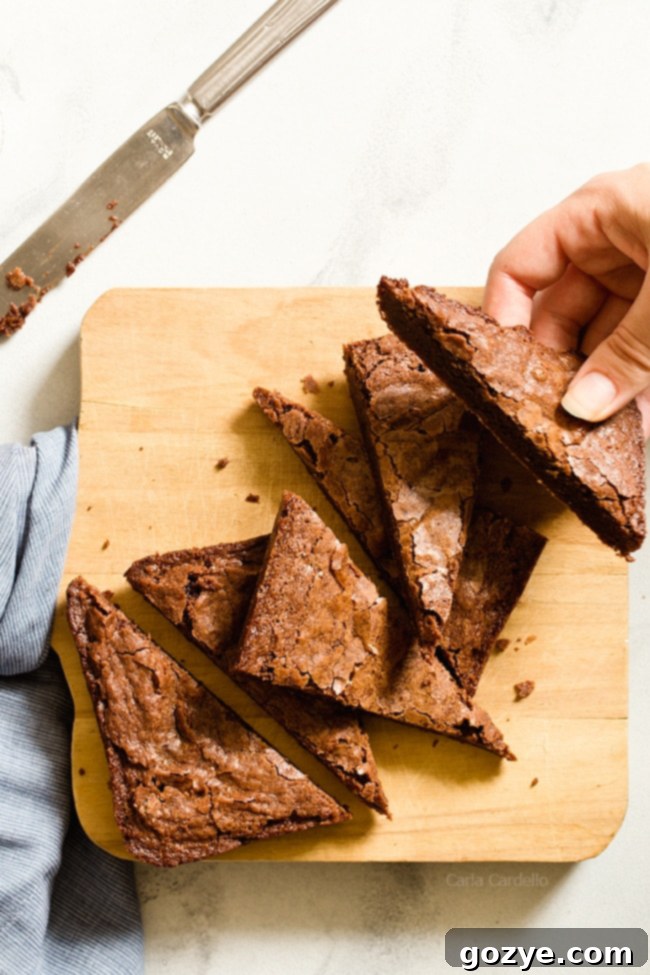
When that intense craving for warm, gooey, fudgy brownies strikes, but you’re only baking for two (or just yourself!), a full 9×13 pan can feel overwhelming. That’s where these Small Batch Brownies come to the rescue! This perfect recipe is designed to deliver all the rich, chewy, and irresistibly fudgy texture you desire, complete with those coveted shiny, cracked tops, all baked conveniently in a standard loaf pan. Say goodbye to excessive leftovers and hello to fresh, homemade brownie bliss whenever the mood strikes.
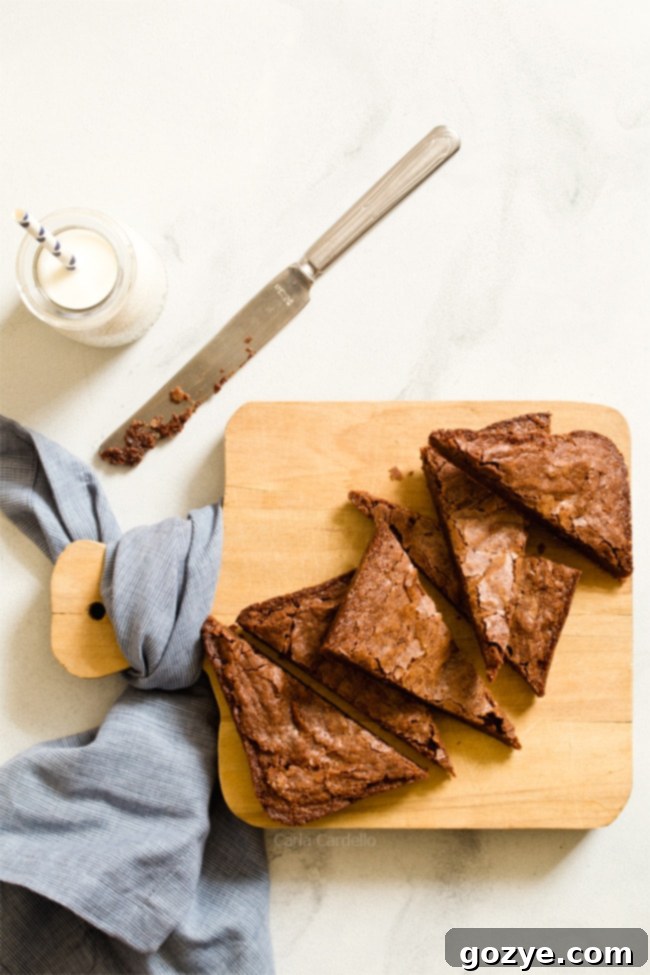
Baking for smaller portions can often feel like a culinary challenge, especially when it comes to desserts. Unlike cooking, baking is a precise science where ingredient ratios are crucial for success. This is particularly true for recipes involving eggs, which are notoriously difficult to divide accurately. How do you use half an egg, or even a quarter? You either end up with a disproportionate amount of liquid, requiring adjustments to dry ingredients, or you sacrifice texture and flavor.
That’s precisely why I’ve dedicated time to perfecting this small batch brownie recipe. My goal was to create a foolproof method for achieving bakery-quality brownies scaled down for intimate servings. This particular recipe first saw the light of day in October 2017, after extensive experimentation to find the ideal balance for a truly fudgy brownie experience designed for just a couple of people. The criteria were clear: they had to be undeniably chewy, profoundly fudgy, and boast those beautiful, signature shiny, cracked tops. Plus, I wanted them to be a straightforward, no-fuss treat – no extra time needed for frosting. Just bake, cool slightly, and enjoy straight from the loaf pan.
For those times when even a loaf pan seems too much, or you’re short on oven time, don’t miss my incredibly quick microwave brownie recipe! It’s essentially the same delicious flavor, scaled down to a single serving and cleverly made without any egg.
Essential Ingredients for Your Small Batch Brownies
Creating these delightful small batch brownies requires only a handful of common pantry staples. Each ingredient plays a vital role in achieving that perfect fudgy texture and rich chocolate flavor:
- Butter: Always opt for real butter, not a substitute like margarine. Butter provides unparalleled richness and helps achieve the desired chewy texture.
- Cocoa powder: Unsweetened natural cocoa powder is the star here, delivering deep, intense chocolate flavor without the added fat of melted chocolate.
- Sugar: This is a non-negotiable ingredient, not just for sweetness but crucially for the texture and that glossy, crackly top. Resist the urge to reduce the amount, or you’ll miss out on the signature brownie crust.
- Salt: A pinch of salt is essential to balance the sweetness and enhance the overall chocolate flavor, preventing your brownies from tasting bland.
- Egg: A standard large egg provides structure, moisture, and contributes significantly to the fudgy consistency. Ensure it’s at room temperature for better emulsification with the other ingredients.
- Vanilla extract: Don’t skip the vanilla! It’s a flavor enhancer that beautifully complements and deepens the chocolate notes.
- All-purpose flour: Just enough flour is used to bind the ingredients and give the brownies their structure without making them cakey.
Looking to switch things up? If you’re in the mood for a delightful peanut butter twist, be sure to check out my Small Batch Peanut Butter Brownies, also conveniently baked in a loaf pan.
Not craving chocolate at all? My Peanut Butter Blondies offer a delicious alternative with a similar chewy satisfaction.
Step-by-Step Guide: How To Make Small Batch Brownies
Making these small batch brownies is surprisingly simple and quick, perfect for satisfying those sudden dessert cravings. Follow these steps for perfect results every time:
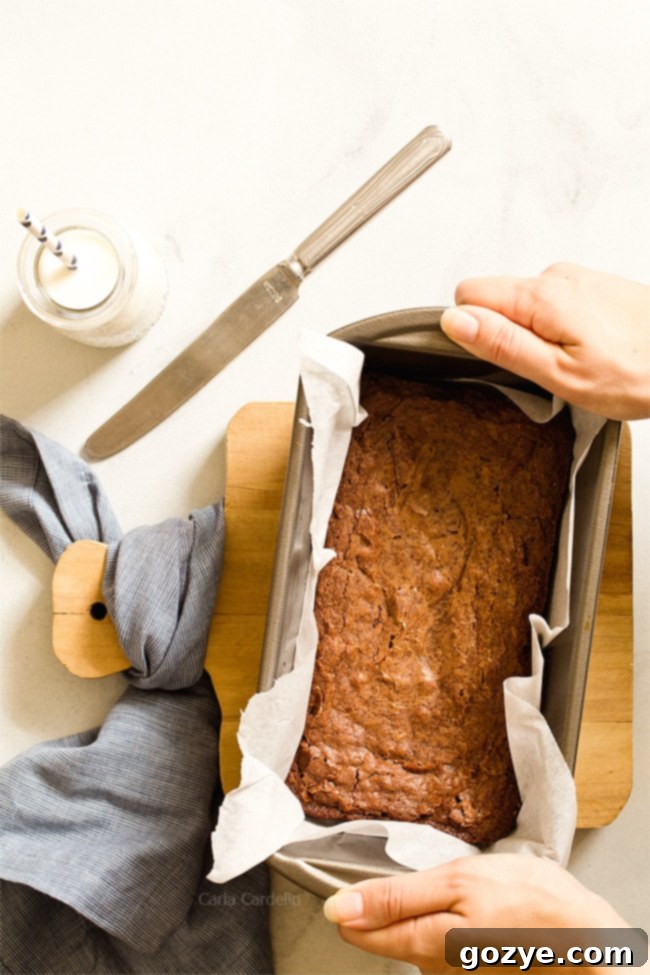
- Prepare Your Pan and Oven: First, preheat your oven to 350°F (175°C). Then, lightly grease a standard 9×5 loaf pan. Line it with parchment paper, leaving an overhang on the longer sides. This parchment “sling” makes it incredibly easy to lift the baked brownies out of the pan once cooled.
- Melt the Butter: In a medium-sized saucepan, melt the butter over low to medium heat. Keep a close eye on it to prevent burning.
- Combine Dry Ingredients (Initial Stage): Remove the saucepan from the heat. Immediately whisk in the granulated sugar, cocoa powder, and salt. At this stage, the mixture will appear quite thick and grainy. Don’t worry; this is exactly how it should look as these ingredients dissolve into the melted butter.
- Incorporate Wet Ingredients: Next, whisk in the room temperature large egg and vanilla extract. As you whisk, you’ll notice a magical transformation: the batter will become noticeably smoother, glossier, and beautifully moistened. Keep whisking until no streaks of egg are visible and the mixture is uniform.
- Add Flour and Mix-ins: Switch from a whisk to a sturdy rubber spatula. This prevents batter from getting trapped in the whisk, ensuring everything is thoroughly combined. Gently fold in the all-purpose flour until just combined. Be careful not to overmix, as over-developing the gluten can lead to tougher, more cake-like brownies. If you’re adding any optional mix-ins like chopped walnuts or chocolate chips, stir them in now until evenly distributed.
- Bake to Perfection: Transfer your rich brownie batter into the prepared loaf pan. Use your spatula to spread it into an even layer, ensuring consistent thickness for even baking. Bake for approximately 18-20 minutes. You’ll know they’re ready when the edges begin to pull away slightly from the sides of the pan, and the center no longer appears wet or jiggly.
- Cool and Serve: This step is crucial for fudgy brownies! Allow them to cool completely to room temperature in the pan before attempting to remove or cut them. This allows the brownies to set properly, ensuring that delightful fudgy texture. Overbaking is the enemy of fudgy brownies, as it can result in a drier, more cake-like consistency.
- Storage Tip: Once cooled and removed from the pan, store your small batch brownies in an airtight container at room temperature for up to 1 week.
Troubleshooting: Why Are My Brownies Sticking?
If your brownies are sticking to the pan, especially after adding chocolate chips, it’s usually because they are either still too warm or slightly underbaked. The chocolate chips can melt and act like glue when warm. A simple trick is to refrigerate them until they are completely cold and firm. Then, allow them to come back to room temperature before attempting to remove and cut them. This often resolves the sticking issue, allowing for clean cuts and perfect squares (or triangles!).
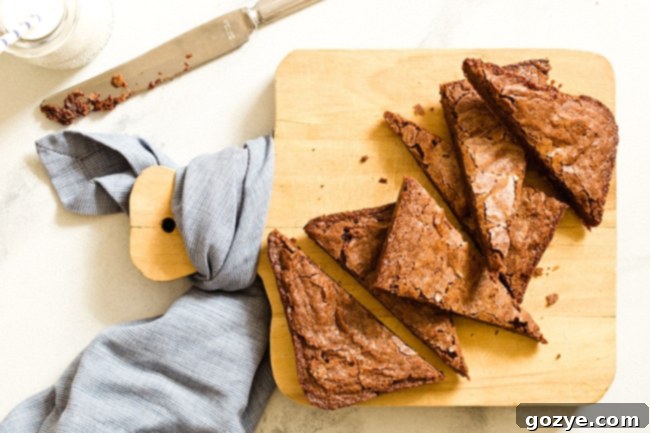
Mastering the Magic: How To Get Crackly Tops on Your Brownies
One of the most appealing characteristics of a truly great brownie is that beautiful, glossy, and crackly top. Many bakers wonder about the secret behind this coveted crust. The answer, surprisingly simple yet incredibly effective, lies in one key ingredient: sugar.
You might be surprised, as many assume it’s about technique or specific baking temperatures. However, through extensive trial and error, I discovered that the amount of granulated sugar in the recipe is paramount. When I first experimented with reducing the sugar content, thinking I might cut back on sweetness, the results were consistently disappointing. The tops came out dull and lacked that characteristic crackle. More importantly, the flavor balance was off; without enough sugar to complement the cocoa, the brownies tasted bitter rather than rich and sweet.
Here’s a glimpse into my baking journey to perfect this small batch recipe and achieve those shiny, cracked tops:
- Initial Attempt (Base Recipe): My first test followed a similar ingredient ratio to what you see now but resulted in very thin brownies. I wanted a slightly thicker, more substantial brownie, so minor ingredient adjustments were made.
- Sugar Reduction Experiment: I tried reducing the sugar to make the brownies less sweet. This resulted in dull, uncraftered, and rather bitter brownies. The cocoa flavor overpowered everything without sufficient sugar to balance it.
- Back to Original Sugar, Underbaked: Reverting to the higher sugar content, I ended up with brownies that were underbaked and stubbornly stuck to the pan, highlighting the importance of proper baking time.
- Perfecting Bake Time: A subsequent batch with the correct sugar amount and a longer, more precise baking time finally yielded results. While still on the thinner side (which I found to be a benefit, as their richness means less is truly more!), they were perfectly fudgy and easy to remove.
- Cocoa vs. Melted Chocolate: I also experimented with using melted unsweetened chocolate as a substitute for cocoa powder. While they worked in a pinch, the brownies made with all cocoa powder consistently offered a superior texture – more intensely fudgy and chewy – which became the preferred choice.
After five batches of dedicated experimentation, this recipe emerged as the clear winner. The takeaway is simple: stick with all cocoa powder for that deep chocolate flavor and do not be afraid of the specified amount of sugar. It’s the secret not just to sweetness, but to the desired texture and that beautiful, crackly sheen.
How Many Servings Do Small Batch Brownies Make?
The beauty of brownies in a loaf pan is their versatility in serving sizes, depending on your needs (or your mood!).
- If you’re aiming for indulgent, large bakery-sized squares, you’ll likely get 2 or 3 generous servings.
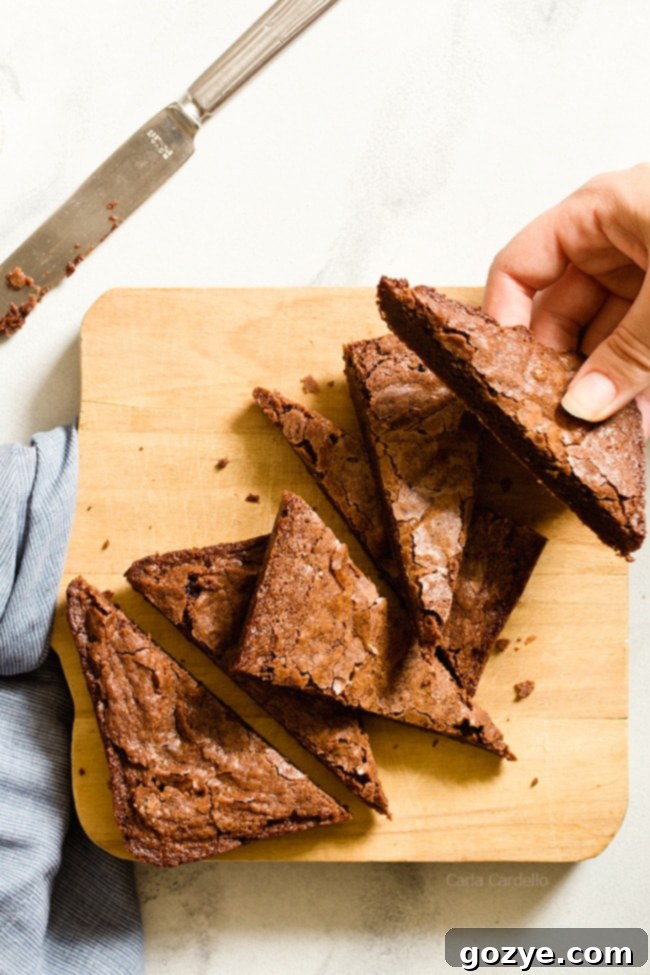
- For a more elegant presentation, cutting them into triangles (slice in half lengthwise, then cut diagonally) yields 6 perfect portions.
- If you prefer smaller, bite-sized treats, you can easily cut them into 8 modest squares.
- And, of course, on those particularly challenging days, a loaf pan can sometimes miraculously transform into a single, comforting serving!
These brownies are wonderful as a simple dessert, perhaps even for a special occasion like making Super Bowl food for two. If you’re feeling extra creative, you could even decorate them to resemble miniature footballs for a themed treat.
For those times when you literally need just two individual servings without any cutting, explore my Brownies For Two recipe, perfectly baked in ramekins.
If you’re unable to eat flour, you don’t have to miss out on brownie deliciousness! Check out the Gluten-Free Brownies recipe by Meaningful Eats for a fantastic alternative.
Tips for Success & Common Brownie Mistakes to Avoid
While this recipe is straightforward, a few key tips can elevate your small batch brownies from good to absolutely phenomenal:
- Don’t Overmix the Flour: Once you add the flour, mix until just combined. Overmixing develops gluten, which can lead to tougher, more cake-like brownies instead of the desired fudgy texture.
- Room Temperature Egg is Key: A room temperature egg emulsifies better with the butter and sugar, resulting in a smoother batter and a more uniform, fudgy texture.
- Parchment Paper is Your Friend: The parchment paper sling isn’t just for easy removal; it also helps prevent sticking and keeps your loaf pan cleaner.
- Trust the Baking Time (But Watch Your Oven): Oven temperatures can vary. The 18-20 minute baking time is a guideline. Look for the visual cues: edges pulling away, center no longer wet. A toothpick inserted into the center should come out with moist crumbs, not wet batter (underbaked) or completely clean (overbaked).
- Cool Completely: Patience is a virtue, especially with brownies. Cooling completely allows them to set and develop their fudgy texture. Cutting them too soon can result in a gooey mess and compromise the structural integrity.
More Delicious Loaf Pan Recipes
If you enjoyed the simplicity and effectiveness of baking this small batch brownie recipe in a loaf pan, you’ll be thrilled to discover how versatile this pan can be! It’s perfect for crafting smaller portions of your favorite treats and dishes. Explore these other fantastic recipes designed for your trusty loaf pan:
- Angel Food Cake In A Loaf Pan
- Small Batch Rice Krispie Treats
- Small Batch Lemon Bars
- Small Batch Chocolate Chip Cookie Bars
- Small Batch Cheesecake
- Raspberry Jam Bars
- Banana Bread recipe
- Lasagna For Two
Small Batch Brownies
6-8 servings
15 minutes
20 minutes
35 minutes
When you’re craving chewy, fudgy brownies but only baking for two, Small Batch Brownies are the answer! They’re made with all cocoa powder and baked in a loaf pan with shiny, cracked tops.
Ingredients
- 6 tablespoons unsalted butter
- 1/4 cup unsweetened cocoa powder
- 1 cup granulated sugar (do not reduce or you won’t have shiny, cracked tops)
- 1/4 teaspoon salt (preferably kosher)
- 1 large egg, room temperature
- 1/2 teaspoon vanilla extract
- 1/2 cup all-purpose flour
- 1/2 cup chopped walnuts or chocolate chips (optional)
Instructions
- Preheat oven to 350F. Lightly grease a 9×5 loaf pan and line with parchment paper.
- In a large saucepan, melt the butter.
- Remove from the heat and whisk in sugar, cocoa powder, and salt (batter will be thick and somewhat grainy).
- Whisk in the egg and vanilla. Batter should be smooth and moistened.
- Switch to a rubber spatula and stir in the flour and walnuts/chocolate chips if using.
- Spread into the pan. Bake 18-20 minutes or until the edges pull away from the sides and the center doesn’t look wet. Do not overbake or they won’t be fudgy.
- Cool to room temperature then remove from the pan. If brownies stick, refrigerate until cold, bring back to room temperature, then try again.
Store in an airtight container for up to 1 week.
Notes
- In the mood for peanut butter brownies? Check out my recipe for Small Batch Peanut Butter Brownies.
- Want literally two servings? Check out my Brownies For Two in ramekins.
- To make Brownie Ice Cream, follow the directions for my German chocolate ice cream using 4 ounces semisweet chocolate. Instead of adding frosting, add about half a pan of chopped brownies.
Recommended Products
As an Amazon Associate and member of other affiliate programs, I earn from qualifying purchases.
- 9×5 Loaf Pan
Did you make this recipe?
Let me know what you think! Rate the recipe above, leave a comment below, and/or share a photo on Instagram using #HITKrecipes
First published October 23, 2017
