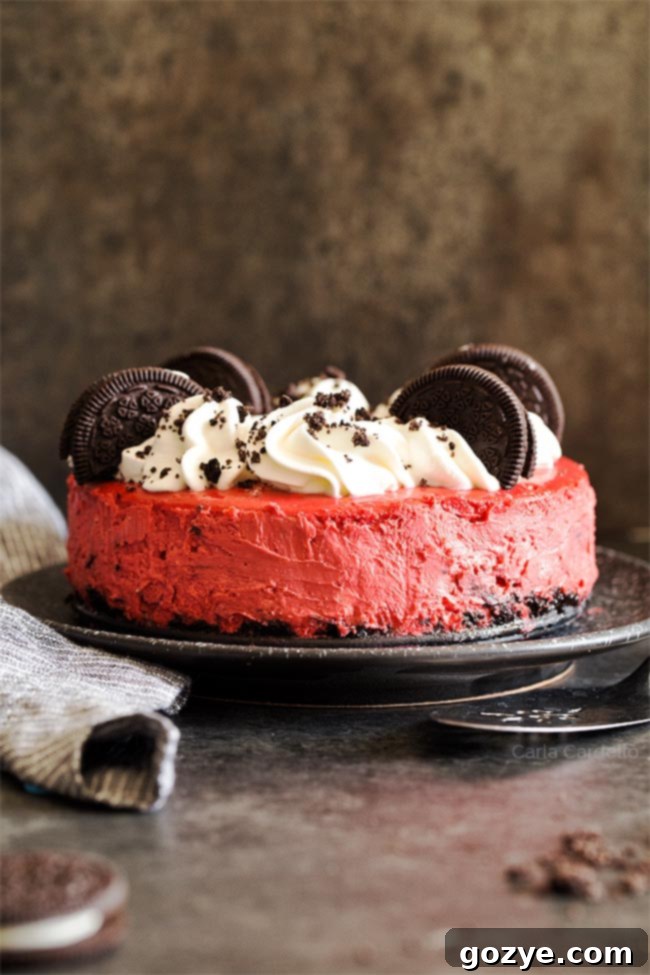
Decadent Red Velvet Oreo Cheesecake: The Ultimate Small Batch Recipe
Are you a fan of classic red velvet cake? Do you find yourself reaching for those irresistible Oreo cookies? Then prepare to fall in love with this extraordinary Red Velvet Oreo Cheesecake! This recipe brings together the best of both worlds: a rich, tangy red velvet cheesecake filling, perfectly complemented by a delightful chocolatey Oreo crust. Topped with a cloud of whipped cream and a scattering of chocolate cookies, it’s a dessert that promises pure indulgence.
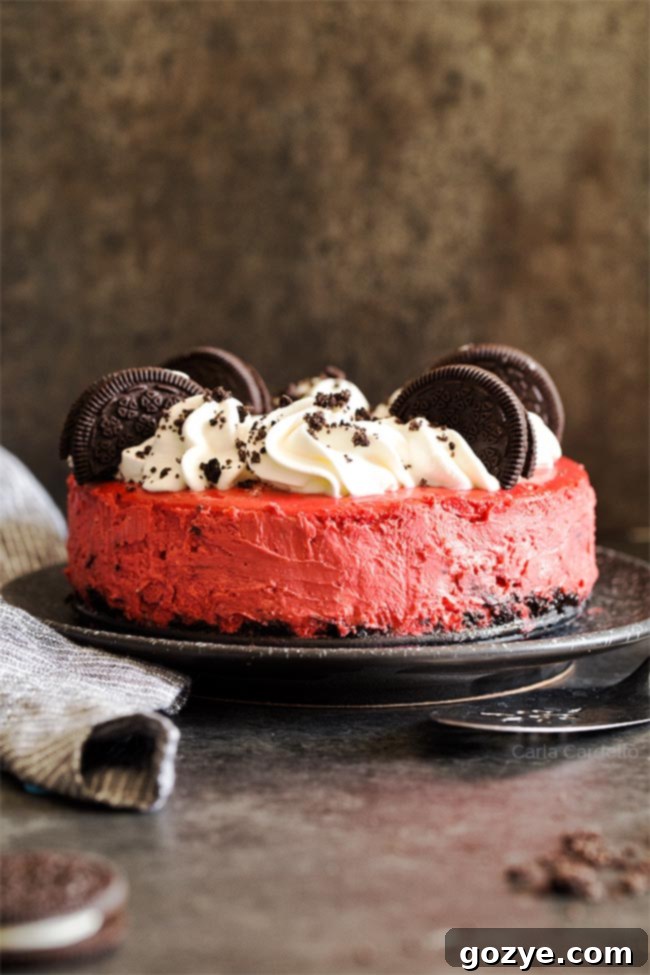
For a long time, red velvet wasn’t my go-to flavor. Perhaps it was a less-than-stellar experience with a dreadful red velvet coffee about a decade ago that initially turned me off. However, my perception completely shifted when I ventured into making my own Small Red Velvet Cake, Small Batch Red Velvet Cupcakes, and Red Velvet Lava Cakes. It was then that I truly began to appreciate the unique, subtle chocolate notes and characteristic tang that define this beloved flavor.
Given the immense popularity of my 6 Inch Cheesecake recipe, it felt only natural to combine that success with my newfound love for red velvet. The result is this perfectly portioned small Red Velvet Oreo Cheesecake – a dessert designed to impress without overwhelming you with leftovers.
This isn’t just my classic cheesecake with a splash of red food coloring. Oh no! This recipe has been carefully crafted to capture the authentic essence of red velvet. It incorporates cocoa powder for that subtle chocolate depth and sour cream to replicate the characteristic tanginess often found in traditional red velvet cake, which typically uses buttermilk. This thoughtful combination ensures a truly authentic and delicious flavor profile that will delight your taste buds.
And, of course, what would red velvet be without its iconic vibrant red hue? This striking color makes our cheesecake an absolutely perfect choice for festive occasions like Valentine’s Day, bringing a touch of romance to your table, or even for Christmas, adding a pop of holiday cheer. But don’t feel limited by the calendar! This stunning and delicious cheesecake is wonderful for any celebration, from birthdays and anniversaries to simple weekend indulgences or any special occasion that calls for a truly show-stopping dessert.
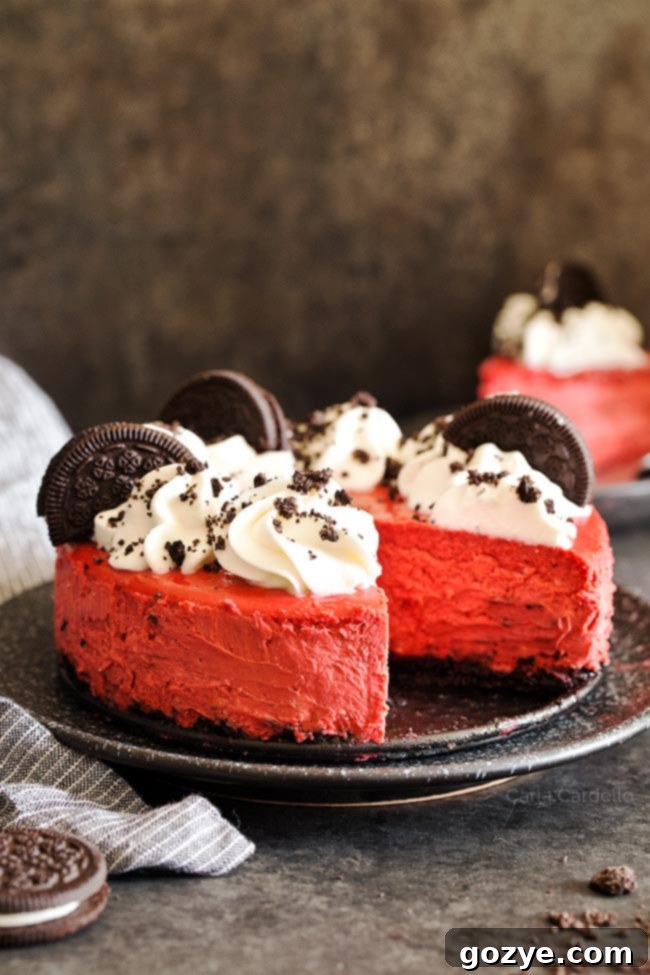
Understanding Red Velvet: More Than Just Color
Before diving into the cheesecake, let’s clarify what defines a true red velvet dessert. Traditional red velvet cake is a moist, tender chocolate cake with a distinct tang, usually achieved through ingredients like buttermilk and vinegar. The slight cocoa flavor, combined with these acidic components, creates a unique chemical reaction that, historically, enhanced the cake’s reddish hue even before the widespread use of red food coloring. Today, while food coloring ensures the vibrant signature red, the buttermilk/vinegar and cocoa elements remain crucial for authentic flavor.
The versatility of red velvet has led to countless delicious variations, including my popular red velvet sugar cookie recipe and delightful red velvet bars. When translating this beloved flavor into a cheesecake, my goal was to preserve these core elements: the signature tang, the subtle chocolate from cocoa powder, and, of course, the eye-catching red color.
For the cheesecake, instead of buttermilk, I opted for full-fat sour cream. Sour cream not only provides a similar tangy profile but its thicker consistency is also ideal for cheesecake batter, ensuring it remains rich and creamy without becoming too thin or watery. This careful ingredient choice guarantees a luscious, perfectly textured red velvet cheesecake that truly honors the original cake.
The Essential Tool: What Pan Do I Need for Red Velvet Oreo Cheesecake?
Creating a beautiful cheesecake, especially one as delicate and delicious as this Red Velvet Oreo Cheesecake, requires the right equipment. For this particular recipe, a 6-inch springform pan is absolutely essential. Unlike regular cakes that can often be inverted or easily removed from standard cake pans, cheesecakes are far too delicate. Attempting to flip a cheesecake would almost certainly result in disaster, compromising its pristine shape and smooth edges.
A springform pan solves this challenge perfectly. Its ingenious design allows you to release the sides of the pan without disturbing the cheesecake itself, ensuring it retains its flawless form as you lift it away. This means your beautifully baked cheesecake will be picture-perfect every time.
The pan I personally use and recommend is this 6 x 2 inch springform pan (Amazon affiliate link). While this recipe will fill this pan quite generously, reaching near the top, it’s designed not to overflow, giving you a wonderfully tall and impressive cheesecake. If you prefer a little more wiggle room at the top, or plan to add extra high toppings, you might consider a 6 x 3 inch springform pan (Amazon affiliate link). Either option will work beautifully.
It’s crucial to reiterate: this recipe will not work in a standard 6-inch cake pan. The struggle to remove the cheesecake without damaging it would be significant, and you’d miss out on the clean, professional finish a springform pan provides.
Scaling Up or Down: Pan Size Adaptations
Don’t have a 6-inch pan but still craving this deliciousness? Here’s how you can adapt:
- Can I make this recipe in a 7-inch pan? Yes, absolutely! As demonstrated with my popular 7 inch cheesecake recipe, you can use the exact same batter for this Red Velvet Oreo Cheesecake in a 7-inch springform pan without needing any adjustments. The cheesecake will simply be slightly less tall, but equally delicious.
- Can I make this red velvet cheesecake in a 9-inch springform pan? If a 6-inch pan isn’t an option, you can certainly scale this recipe to fit a larger 9-inch pan, but it will require some modifications. For the best results, I recommend following the instructions for my 9-inch Triple Chocolate Cheesecake. In that recipe, you would omit the chocolate components and instead incorporate 1/4 cup sour cream, 2 tablespoons unsweetened cocoa powder, and 1 tablespoon of red food coloring to achieve the desired red velvet flavor and color.
- Looking for an even smaller treat? You can also cut this recipe in half and follow the directions for my 4 Inch Chocolate Cheesecake for a miniature version.
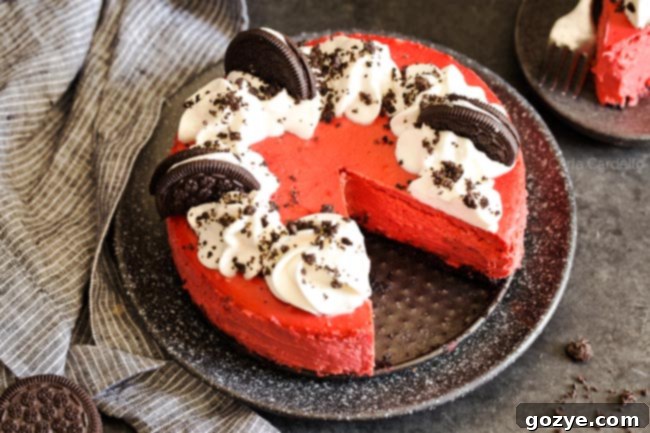
Key Ingredients For Your Decadent Red Velvet Oreo Cheesecake
To craft this irresistible red velvet cheesecake with an Oreo crust, each ingredient plays a crucial role in achieving that perfect balance of flavor, texture, and visual appeal. Here’s a detailed look at what you’ll need and why each component is so important:
- Oreo cookie crumbs: These iconic chocolate sandwich cookies are not just for snacking; they form the foundation of our cheesecake’s addictive crust. Their deep chocolate flavor and subtle bitterness beautifully complement the sweet and tangy red velvet filling. For convenience, you can crush them in a food processor, or for a more rustic texture, place them in a bag and crush by hand with a rolling pin. There’s no need to remove the cream filling – it adds extra richness!
- Butter: Melted butter acts as the binding agent for our Oreo crust. It helps the crumbs stick together, creating a firm and delicious base that holds its shape when sliced. Unsalted butter is preferred to control the overall saltiness of the dessert.
- Cream cheese: This is, of course, the star of any cheesecake! For the best results, always use blocks of full-fat cream cheese. Low-fat or fat-free versions contain more water, which can lead to a runny or watery cheesecake after baking. Similarly, avoid whipped cream cheese from a tub, as it’s formulated for spreading, not for the structural demands of baking. Ensure it’s at room temperature for a smooth, lump-free batter.
- Granulated sugar: Sugar adds essential sweetness to balance the tanginess of the cream cheese and sour cream, creating a harmonious flavor profile. It also contributes to the cheesecake’s tender texture.
- Sour cream: While many cheesecakes use only cream cheese, the addition of sour cream here is vital for achieving the characteristic tang of red velvet. It also adds moisture and a velvety smooth texture to the batter. Just like with cream cheese, use full-fat sour cream; lower-fat alternatives can introduce too much water, negatively impacting the consistency. Ensure it’s at room temperature.
- Eggs: Large eggs are crucial for binding the cheesecake batter and providing structure as it bakes. They contribute to the creamy, custard-like texture. It is extremely important that your eggs are at room temperature. Cold eggs can cause the batter to curdle or become lumpy when mixed with room-temperature cream cheese, affecting the final smooth texture of your cheesecake.
- Cocoa powder: A subtle yet essential element of red velvet flavor is a hint of chocolate. Unsweetened cocoa powder provides this depth without overpowering the other flavors, giving our cheesecake that classic red velvet complexity.
- Red food coloring: This is what gives red velvet its undeniable, vibrant red color. I personally use McCormick liquid red food coloring, which provides excellent saturation. However, depending on your location, not all food colorings are created equal. If McCormick is unavailable, you may need to research local brands to find one that delivers a rich, bright red hue to truly make your cheesecake pop.
- Vanilla extract: A touch of vanilla extract is a non-negotiable in almost any sweet baked good. It enhances and rounds out all the other flavors, making them more vibrant and delicious without necessarily tasting strongly of vanilla itself.
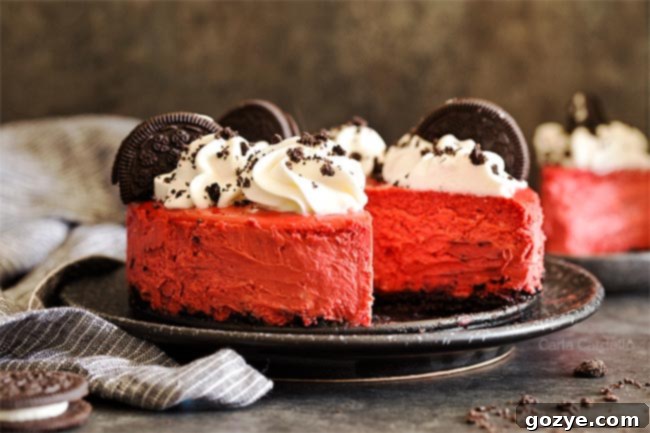
Crafting Perfection: How To Make a Red Velvet Oreo Cheesecake
Creating this stunning Red Velvet Oreo Cheesecake is a rewarding process. Follow these steps carefully to ensure a smooth, creamy, and crack-free dessert:
- Prepare the Oreo Crust: Begin by combining your crushed Oreo cookie crumbs with melted butter. Mix them thoroughly until the crumbs are evenly moistened. Press this mixture firmly and evenly into the bottom of your 6-inch springform pan. For an extra crispy crust that truly stands out, bake it for about 10 minutes before adding the cheesecake batter. This step helps set the crust and prevents it from becoming soggy.
- Achieve a Silky Batter: In a large mixing bowl, beat together the softened cream cheese, granulated sugar, and full-fat sour cream. It’s crucial to beat these ingredients until the mixture is incredibly smooth and light, with no lumps remaining. Make sure to scrape down the sides of the bowl frequently with a spatula to ensure everything is thoroughly incorporated. This step is key to a smooth cheesecake texture.
- Incorporate Eggs Gently: Add the eggs one at a time, beating just until each egg is fully incorporated into the batter. The golden rule here is do not overbeat the batter once the eggs are added. Overbeating introduces too much air, which can cause your cheesecake to puff up excessively during baking and then crack as it cools.
- Temperature Matters: A critical note: all your cold ingredients (cream cheese, sour cream, eggs) must be at room temperature before you begin. If they are cold, they won’t emulsify properly with the other ingredients, leading to a lumpy, inconsistent batter. Plan ahead and take them out of the refrigerator a few hours before you start baking.
- Infuse the Red Velvet Flavor: Finally, fold in the unsweetened cocoa powder, vibrant red food coloring, and vanilla extract. Mix gently until the color is uniform and there are no streaks. This adds the distinct red velvet flavor and its signature hue.
- Bake with a Water Bath: Carefully transfer your perfectly smooth red velvet batter into the prepared Oreo crust. Place the springform pan inside a larger baking pan (an 8×8 inch pan or larger works well) to create a water bath. Pour hot water into the outer pan until the springform pan is about halfway submerged.
- Bake to Perfection: Bake your cheesecake in a preheated oven at 325°F (160°C) for approximately 65-75 minutes, or until the internal temperature reaches 150°F (65°C). The water bath is crucial for even baking and preventing cracks.
The Secret to Perfection: Why You Need a Water Bath for Cheesecake
If you’re aiming for a perfectly smooth, creamy, and crack-free cheesecake, a water bath is not optional – it’s absolutely essential, especially for a thick dessert like our Red Velvet Oreo Cheesecake. Here’s why and how to execute it flawlessly:
A water bath (or “bain-marie”) provides a moist, even heat environment for your cheesecake as it bakes. This gentle, consistent heat prevents the edges of the cheesecake from baking too quickly and drying out, which is a common cause of cracks. It also ensures the center cooks thoroughly and slowly, resulting in that wonderfully silky, custard-like texture we all love, without overbrowning the top.
Setting Up Your Water Bath: Step-by-Step
- Prepare Your Springform Pan: Before filling your cheesecake pan, securely wrap the entire outside of your springform pan with heavy-duty aluminum foil. Use at least two layers, extending them high enough to cover the sides of the pan. This is crucial to create a watertight seal and prevent any water from seeping in and making your delicious Oreo crust soggy. Ensure the foil is tight and creased well around the base.
- Nest the Pans: After you’ve poured your cheesecake batter into the foil-wrapped springform pan, carefully place it inside a larger baking pan. An 8×8 inch pan or a roasting pan will typically work well for a 6-inch springform.
- Add the Hot Water: Next, pour hot water (preferably recently boiled or very hot tap water) into the larger outside pan. Pour slowly and carefully, ensuring the water level comes up about halfway on the sides of the springform pan. Be extremely cautious not to splash any water into the foil-wrapped cheesecake pan itself, as this can ruin your crust and affect the batter.
- Transfer to Oven: With your water bath assembled, carefully transfer the entire setup (the outer pan with water and the nested springform pan) into your preheated oven. Bake as directed.
The steam generated by the hot water creates the ideal baking environment, guaranteeing a uniformly baked cheesecake that’s moist, smooth, and free from unsightly cracks. Don’t skip this step for the ultimate cheesecake experience!
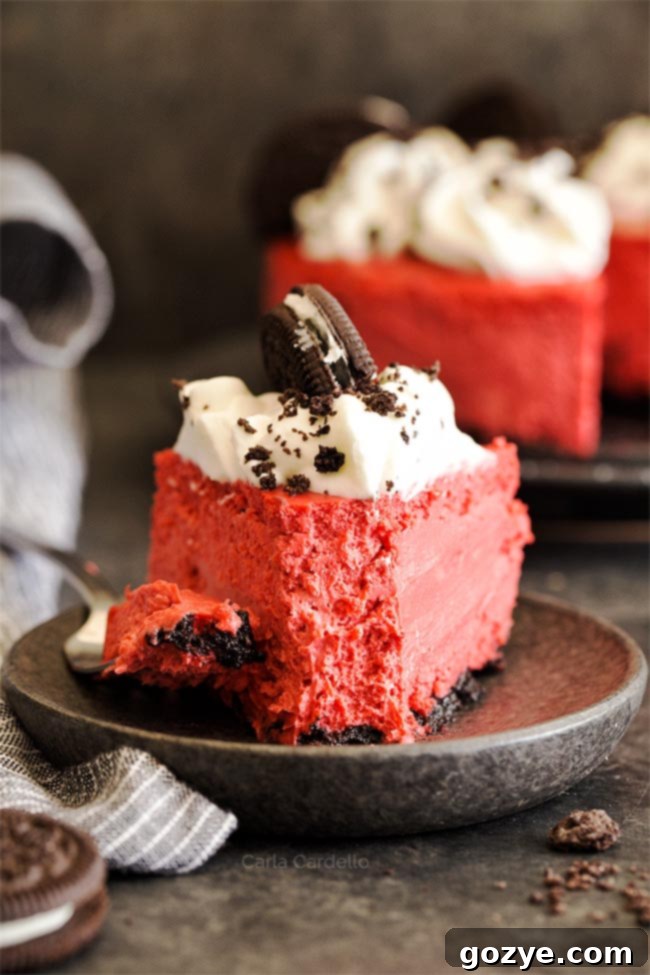
Mastering Doneness: How to Know When Your Cheesecake Is Done Baking
One of the most perplexing challenges for any cheesecake baker is knowing precisely when it’s perfectly done. Unlike cakes that spring back when touched, cheesecake is a delicate custard, and its doneness can be a bit elusive. Rest assured, with a few key indicators, you’ll achieve perfection every time.
The “Jiggle Test”
When your cheesecake is ready, the edges should appear firm and slightly browned. However, the very center (about a 1-2 inch circle) will still have a slight, gentle jiggle when the pan is carefully nudged. This slight movement is exactly what you want! If the entire cheesecake is completely firm and no longer jiggles, it means you’ve likely overbaked it, which can lead to a dry texture and, ironically, cracks as it cools.
The Digital Thermometer: Your Best Friend
For absolute certainty, the most reliable method is to use a digital instant-read thermometer. Carefully insert the thermometer into the center of the cheesecake, making sure it doesn’t touch the bottom of the pan. The ideal internal temperature for a perfectly baked cheesecake is 150°F (65°C). While this will leave a small hole in the top of your beautiful cheesecake, don’t fret! This can be easily covered and disguised later with a generous dollop of whipped cream or other toppings.
Post-Baking Cooling: A Crucial Step
Once baked, proper cooling is just as important as proper baking. First, remove the cheesecake from the oven and carefully run a thin knife around the inner edge of the springform pan to loosen the cheesecake from the sides. This helps prevent cracks during the cooling and shrinking process. Allow the cheesecake to cool in its water bath for about 15 minutes before carefully removing it. Then, let it cool completely at room temperature for at least an hour. Finally, transfer it to the refrigerator to chill for a minimum of 4-6 hours, or ideally, overnight. This long chilling period allows the cheesecake to fully set and develop its rich flavor and incredibly creamy texture. Patience is a virtue when it comes to cheesecake!
Elevate Your Treat: How To Decorate Red Velvet Oreo Cheesecake
Once your stunning Red Velvet Oreo Cheesecake is perfectly chilled and ready to serve, the fun truly begins with decoration! The rich, tangy cream cheese filling of a red velvet cheesecake pairs beautifully with toppings that offer a contrasting texture and complementary flavor. Here are some delectable ideas:
- Classic Whipped Cream: To balance the cheesecake’s richness, a light and airy whipped cream is always a fantastic choice. You can opt for a decadent cream cheese whipped cream for an extra layer of tangy creaminess, or a simple yet elegant homemade whipped cream. Pipe it in elegant swirls or dollop it generously over each slice.
- Traditional Cream Cheese Frosting: While I personally find a full cream cheese frosting a bit heavy for cheesecake, it’s the classic pairing for red velvet cake. If you’re a purist, my small batch cream cheese frosting recipe would be perfect for a lighter application. Spread a thin layer over the top for that authentic red velvet experience.
- Chocolate Decadence: For true chocolate lovers, drizzling the cheesecake with a luscious ganache is an exquisite option. A dark chocolate ganache would add a beautiful sheen and intensify the subtle chocolate notes within the red velvet.
- Oreo Extravaganza: Since this is a Red Velvet Oreo Cheesecake, don’t forget the cookie element! Crush some extra Oreos and sprinkle them generously over the whipped cream or ganache. You can also use mini Oreos or whole Oreo halves for a more dramatic presentation around the edges.
- Festive Touches: For holiday occasions, consider adding seasonal sprinkles, fresh berries (strawberries or raspberries pair wonderfully with red velvet), or chocolate shavings. A dusting of cocoa powder or powdered sugar can also add an elegant finish.
No matter how you choose to decorate it, this cheesecake is sure to be a showstopper!
Troubleshooting: Why Did My Cheesecake Crack?
It’s disheartening to pull a beautifully baked cheesecake from the oven only to discover an unsightly crack marring its perfect surface. Cheesecakes are notoriously finicky, but understanding the common culprits behind cracking can help you prevent them. Here are the main reasons why your cheesecake might crack and how to avoid them:
- Overbeating the Batter: This is a very common mistake. Overbeating the cream cheese mixture, especially after adding the eggs, incorporates too much air into the batter. This excess air causes the cheesecake to puff up higher than it should during baking. As the cheesecake cools and contracts, this trapped air escapes, causing the structure to collapse and creating cracks.
Solution: Only beat the cream cheese, sugar, and sour cream until smooth. Once you add the eggs, beat them in one at a time, just until they are incorporated – literally seconds per egg. Don’t try to beat out every tiny lump; if your ingredients were at room temperature, lumps should be minimal. - Overbaking the Cheesecake: It’s tempting to bake until the cheesecake looks completely firm, but this is a surefire way to cause cracks. Overbaking leads to a dry top layer that can’t handle the natural contraction as the cheesecake cools, resulting in fissures.
Solution: Rely on the internal temperature rather than just visual cues. Use a digital thermometer to confirm the cheesecake reaches 150°F (65°C) in the center. Remember, the center should still have a slight jiggle. Always use a water bath to ensure even, moist baking, which greatly reduces the risk of overbaking the edges. - Opening the Oven Door Too Much: While it’s fine to peek towards the end of baking to check for doneness, frequently opening the oven door, especially early on, is detrimental. Each time the door opens, a rush of cold air enters, causing a drastic and rapid temperature drop around the delicate cheesecake. This sudden change in temperature can shock the cheesecake, leading to uneven cooling and, ultimately, cracks.
Solution: Practice patience! Only open the oven door towards the very end of the baking time when you’re ready to check for doneness. Trust your oven and the recommended baking time. - Rapid Cooling: Allowing a cheesecake to cool too quickly can also cause cracks. A sudden transition from a hot oven to a cold countertop can cause the cheesecake to contract too rapidly.
Solution: After baking, turn off the oven and leave the cheesecake inside with the door ajar for about an hour. Then, remove it from the oven and let it cool completely at room temperature before transferring it to the refrigerator. This gradual cooling process helps prevent stress on the cheesecake’s structure.
More Irresistible Small Cheesecake Recipes
If you’ve fallen in love with the convenience and deliciousness of small-batch cheesecakes, you’re in luck! Here are more fantastic recipes for 6-inch cheesecakes that are perfect for intimate gatherings, holiday tables, or simply when you want a delightful dessert without a mountain of leftovers:
- Chocolate Cheesecake with Oreo Crust: For the ultimate chocolate lover, this rich cheesecake is a dream come true.
- Small Pumpkin Cheesecake: A creamy, spiced delight perfect for autumn and holiday celebrations.
- Instant Pot Pumpkin Cheesecake: A super easy and quick way to get that pumpkin fix, made effortlessly in your Instant Pot.
- Peanut Butter Cheesecake: A classic combination of creamy peanut butter and rich cheesecake that’s truly irresistible.
Red Velvet Oreo Cheesecake
4-6 servings
20 minutes
1 hour 15 minutes
5 hours
6 hours 35 minutes
Love red velvet cake? Then you’re going to love this Red Velvet Oreo Cheesecake with its decadent red cheesecake filling inside an Oreo crust!
Ingredients
- 1 cup chocolate sandwich cookie crumbs, such as Oreo
- 2 tablespoons unsalted butter, melted
- 16 ounces (2 blocks or 16 tablespoons) full-fat cream cheese, room temperature (do not sub fat free or whipped)
- 1/2 cup granulated sugar
- 2 tablespoons full-fat sour cream, room temperature
- 2 large eggs, room temperature
- 1 tablespoon unsweetened cocoa powder
- 2 teaspoons liquid red food coloring (McCormick brand or similar)
- 1 teaspoon vanilla extract
- Cream Cheese Whipped Cream or Small Batch Whipped Cream, for topping
Instructions
- Preheat oven to 325°F (160°C). Wrap the outside of a 6×2 or 6×3 springform pan with at least two layers of heavy-duty foil to create a watertight seal. Lightly grease the inside of the pan. This recipe will also work in a 7-inch springform pan without adjustments.
- In a large bowl, mix together the cookie crumbs and melted butter until well combined. Press this mixture evenly into the bottom of the prepared springform pan to form the crust. Bake for 10 minutes to help set the crust.
- Meanwhile, in a large mixing bowl (or the bowl of a stand mixer fitted with the paddle attachment), beat together the room temperature cream cheese, granulated sugar, and sour cream on medium-high speed until the mixture is light, fluffy, and completely smooth, about 2-3 minutes. Scrape down the bowl as needed to ensure even mixing.
- Beat in the room temperature eggs, one at a time, for about 30-60 seconds each, or just until smooth. Be careful not to overbeat the batter at this stage, as too much air can cause cracking.
- Scrape down the bowl again, then gently beat in the cocoa powder, red food coloring, and vanilla extract until they are fully incorporated and the batter has a uniform red color.
- Pour the red velvet cheesecake batter over the baked Oreo crust in the springform pan. If using a 6×2 inch pan, the batter will fill it close to the top. Place the springform pan inside a larger oven-safe pan (such as an 8×8 inch baking pan or a roasting pan).
- Pour hot water into the outside pan until the water level reaches about halfway up the sides of the springform pan. Be very careful not to get any water inside the foil-wrapped cheesecake pan. This creates a crucial water bath.
- Carefully transfer the pan to the preheated oven and bake for 65-75 minutes, or until the edges are set and slightly browned, the center has a slight wobble (about 1-2 inches in diameter), and the internal temperature reaches 150°F (65°C) with a digital thermometer.
- Remove the cheesecake from the oven. Carefully run a thin knife along the inner edge of the springform pan to loosen the cheesecake from the sides. Let the cheesecake cool in the water bath for 15 minutes.
- Remove the springform pan from the water bath and place it on a wire rack. Let the cheesecake cool at room temperature for 1 hour.
- Once cooled, cover the cheesecake tightly with plastic wrap and refrigerate for at least 4 hours, or ideally overnight, to allow it to fully set and chill. Before serving, top with desired whipped cream or frosting and additional Oreo pieces. Store any leftovers in an airtight container in the refrigerator for up to 5-7 days.
Notes
- For a 9-inch cheesecake: If you prefer a larger cheesecake, follow my recipe for 9 Inch Chocolate Cheesecake. In that recipe, omit all the chocolate components and instead add 1/4 cup full-fat sour cream, 2 tablespoons unsweetened cocoa powder, and 1 tablespoon red food coloring to achieve the red velvet flavor.
- Looking for more small cheesecake recipes? Explore my collection of other delicious small-batch cheesecakes, including my original 6 Inch Cheesecake, the delightful Chocolate Cheesecake with Oreo Crust, the seasonal Small Pumpkin Cheesecake, and the indulgent Peanut Butter Cheesecake.
- Craving more red velvet treats? If you can’t get enough of this classic flavor, be sure to check out my other red velvet creations: Small Red Velvet Cake, Red Velvet Cupcakes, Red Velvet Sugar Cookies, and Red Velvet Bars.
Recommended Products
As an Amazon Associate and member of other affiliate programs, I earn from qualifying purchases.
- 6 Inch Springform Pan
- Small Food Processor
Did you make this recipe?
Let me know what you think! Rate the recipe above, leave a comment below, and/or share a photo on Instagram using #HITKrecipes
