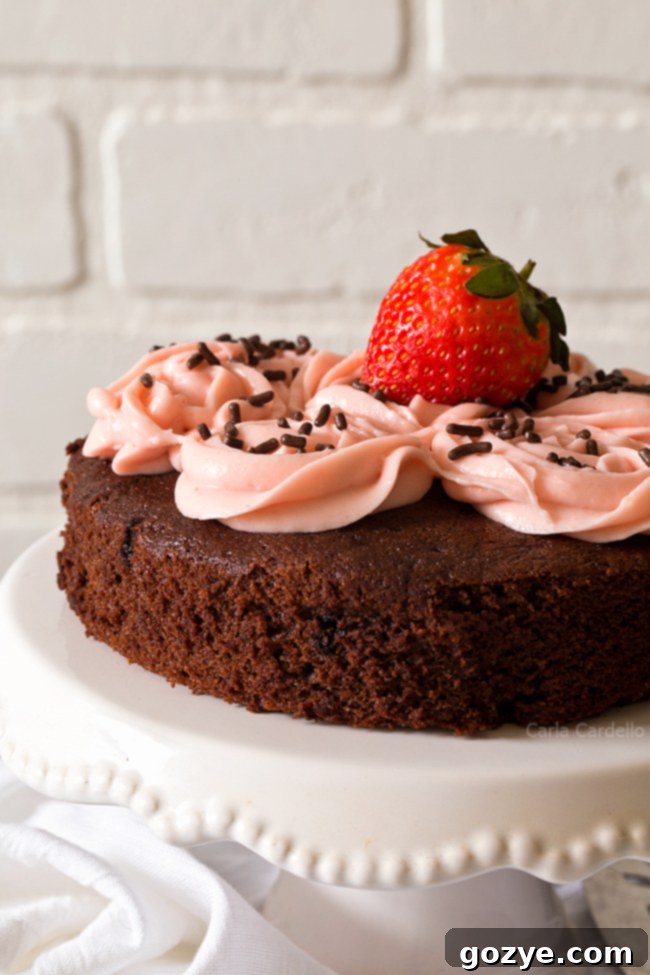
Decadent Small Chocolate Cake Recipe: Your Guide to a Perfect 6-Inch Dessert for Two
Indulge in the rich, moist perfection of this homemade Small Chocolate Cake recipe. This one-layer, 6-inch chocolate cake is made entirely from scratch, no cake mix required, and is perfectly sized for two to share. Follow our step-by-step photos and simple instructions to create an effortlessly elegant dessert. Whether you adorn it with a tangy strawberry cream cheese frosting or a luxurious chocolate ganache, this small-batch masterpiece is sure to impress.
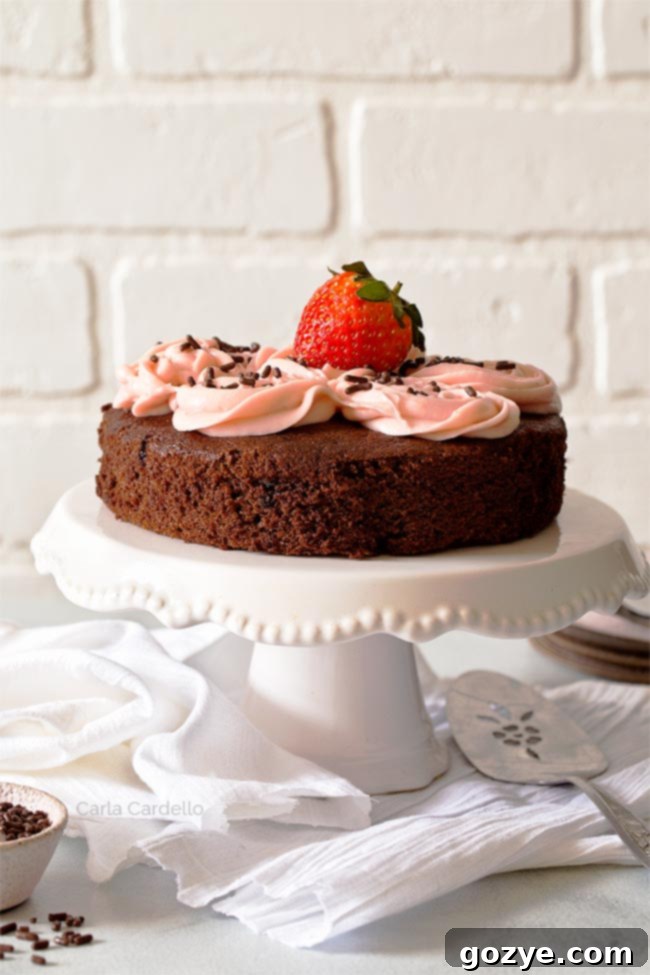
Chocolate cake often holds a special place in our memories, perhaps being one of the first homemade treats we ever savored. For many, childhood birthday cakes, lovingly decorated with frosting and names spelled out in colorful gel, were a yearly highlight. While those early cakes might have started from a convenient box mix, the sentiment and joy they brought were always 100% genuine.
As we grow older and our palates evolve, many of us develop a passion for baking from scratch. However, the downside of baking a large, traditional cake is often the abundance of leftovers. Whether it’s due to dietary changes, smaller households, or simply a desire for portion control, a full-sized cake can sometimes be too much. That’s precisely why this Small Chocolate Cake recipe is an absolute game-changer. It delivers all the rich, decadent flavor of a classic chocolate cake in a perfectly portioned, single-layer 6-inch size, ideal for two people, or a small family treat.
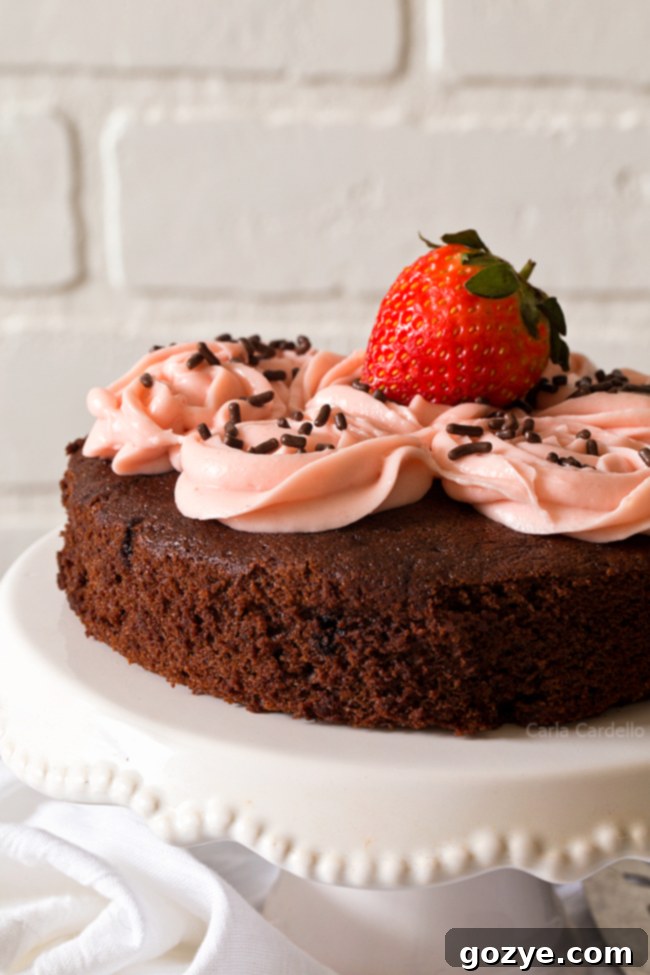
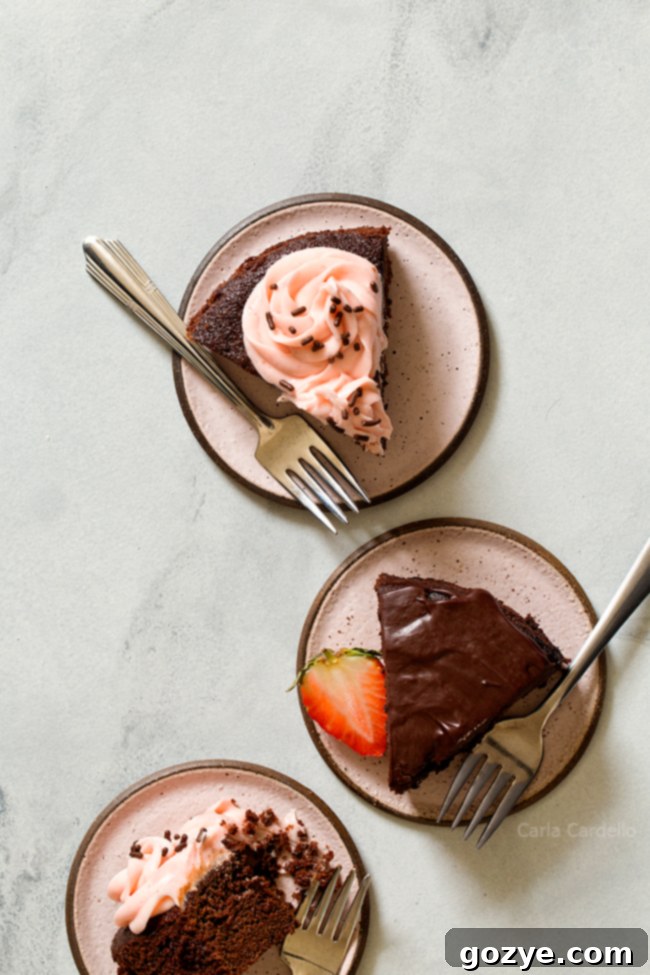
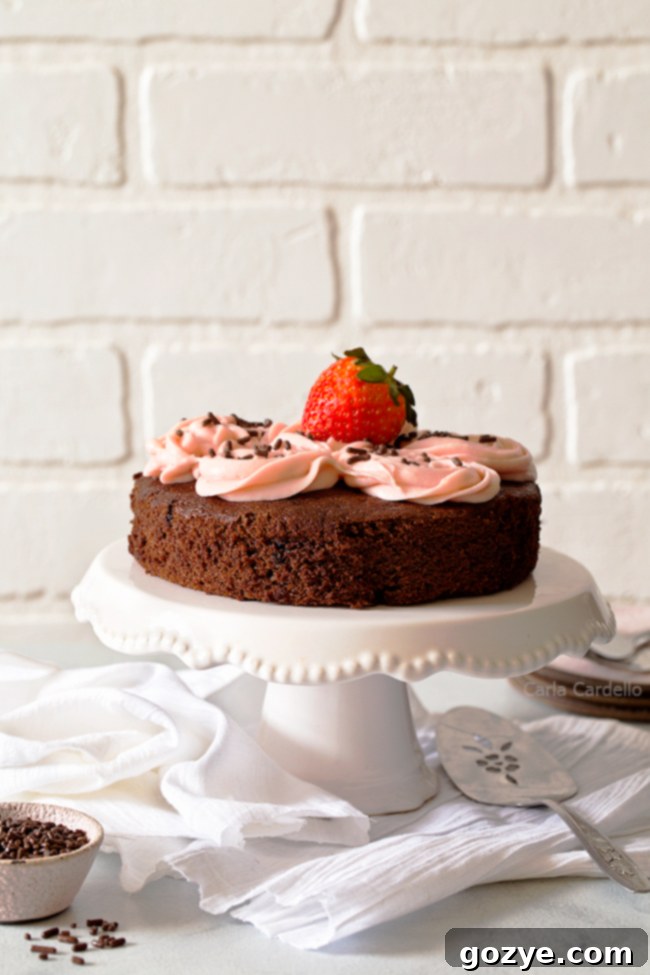
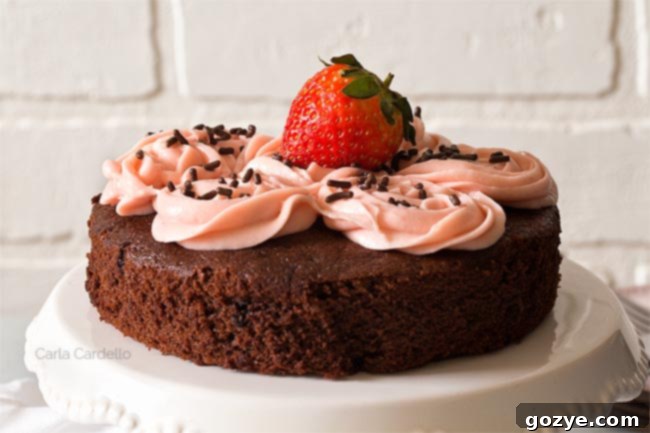
To truly elevate this small chocolate cake, consider its companions. To beautifully complement its deep chocolate notes, I often choose a bright and tangy strawberry cream cheese frosting. The vibrant flavor of strawberries creates a delightful contrast, reminiscent of a gourmet chocolate-covered strawberry. Alternatively, if you’re a true chocolate enthusiast looking to indulge in an intensely rich experience, a silky smooth chocolate ganache will transform this into an irresistible double chocolate delight.
There’s no need to wait for a special occasion to bake this wonderful treat. Sometimes, the craving for homemade chocolate cake hits hard, and this recipe is your perfect excuse. Whether you’re celebrating a milestone, comforting yourself after a long day, or simply enjoying a quiet evening in, this chocolate cake for two is an ideal choice. It’s perfect for romantic date nights, intimate gatherings, or just when you need a perfectly sized slice of happiness. Whatever the reason, this small chocolate cake recipe is destined to become a cherished favorite.
Essential Equipment: Buying A 6 Inch Cake Pan
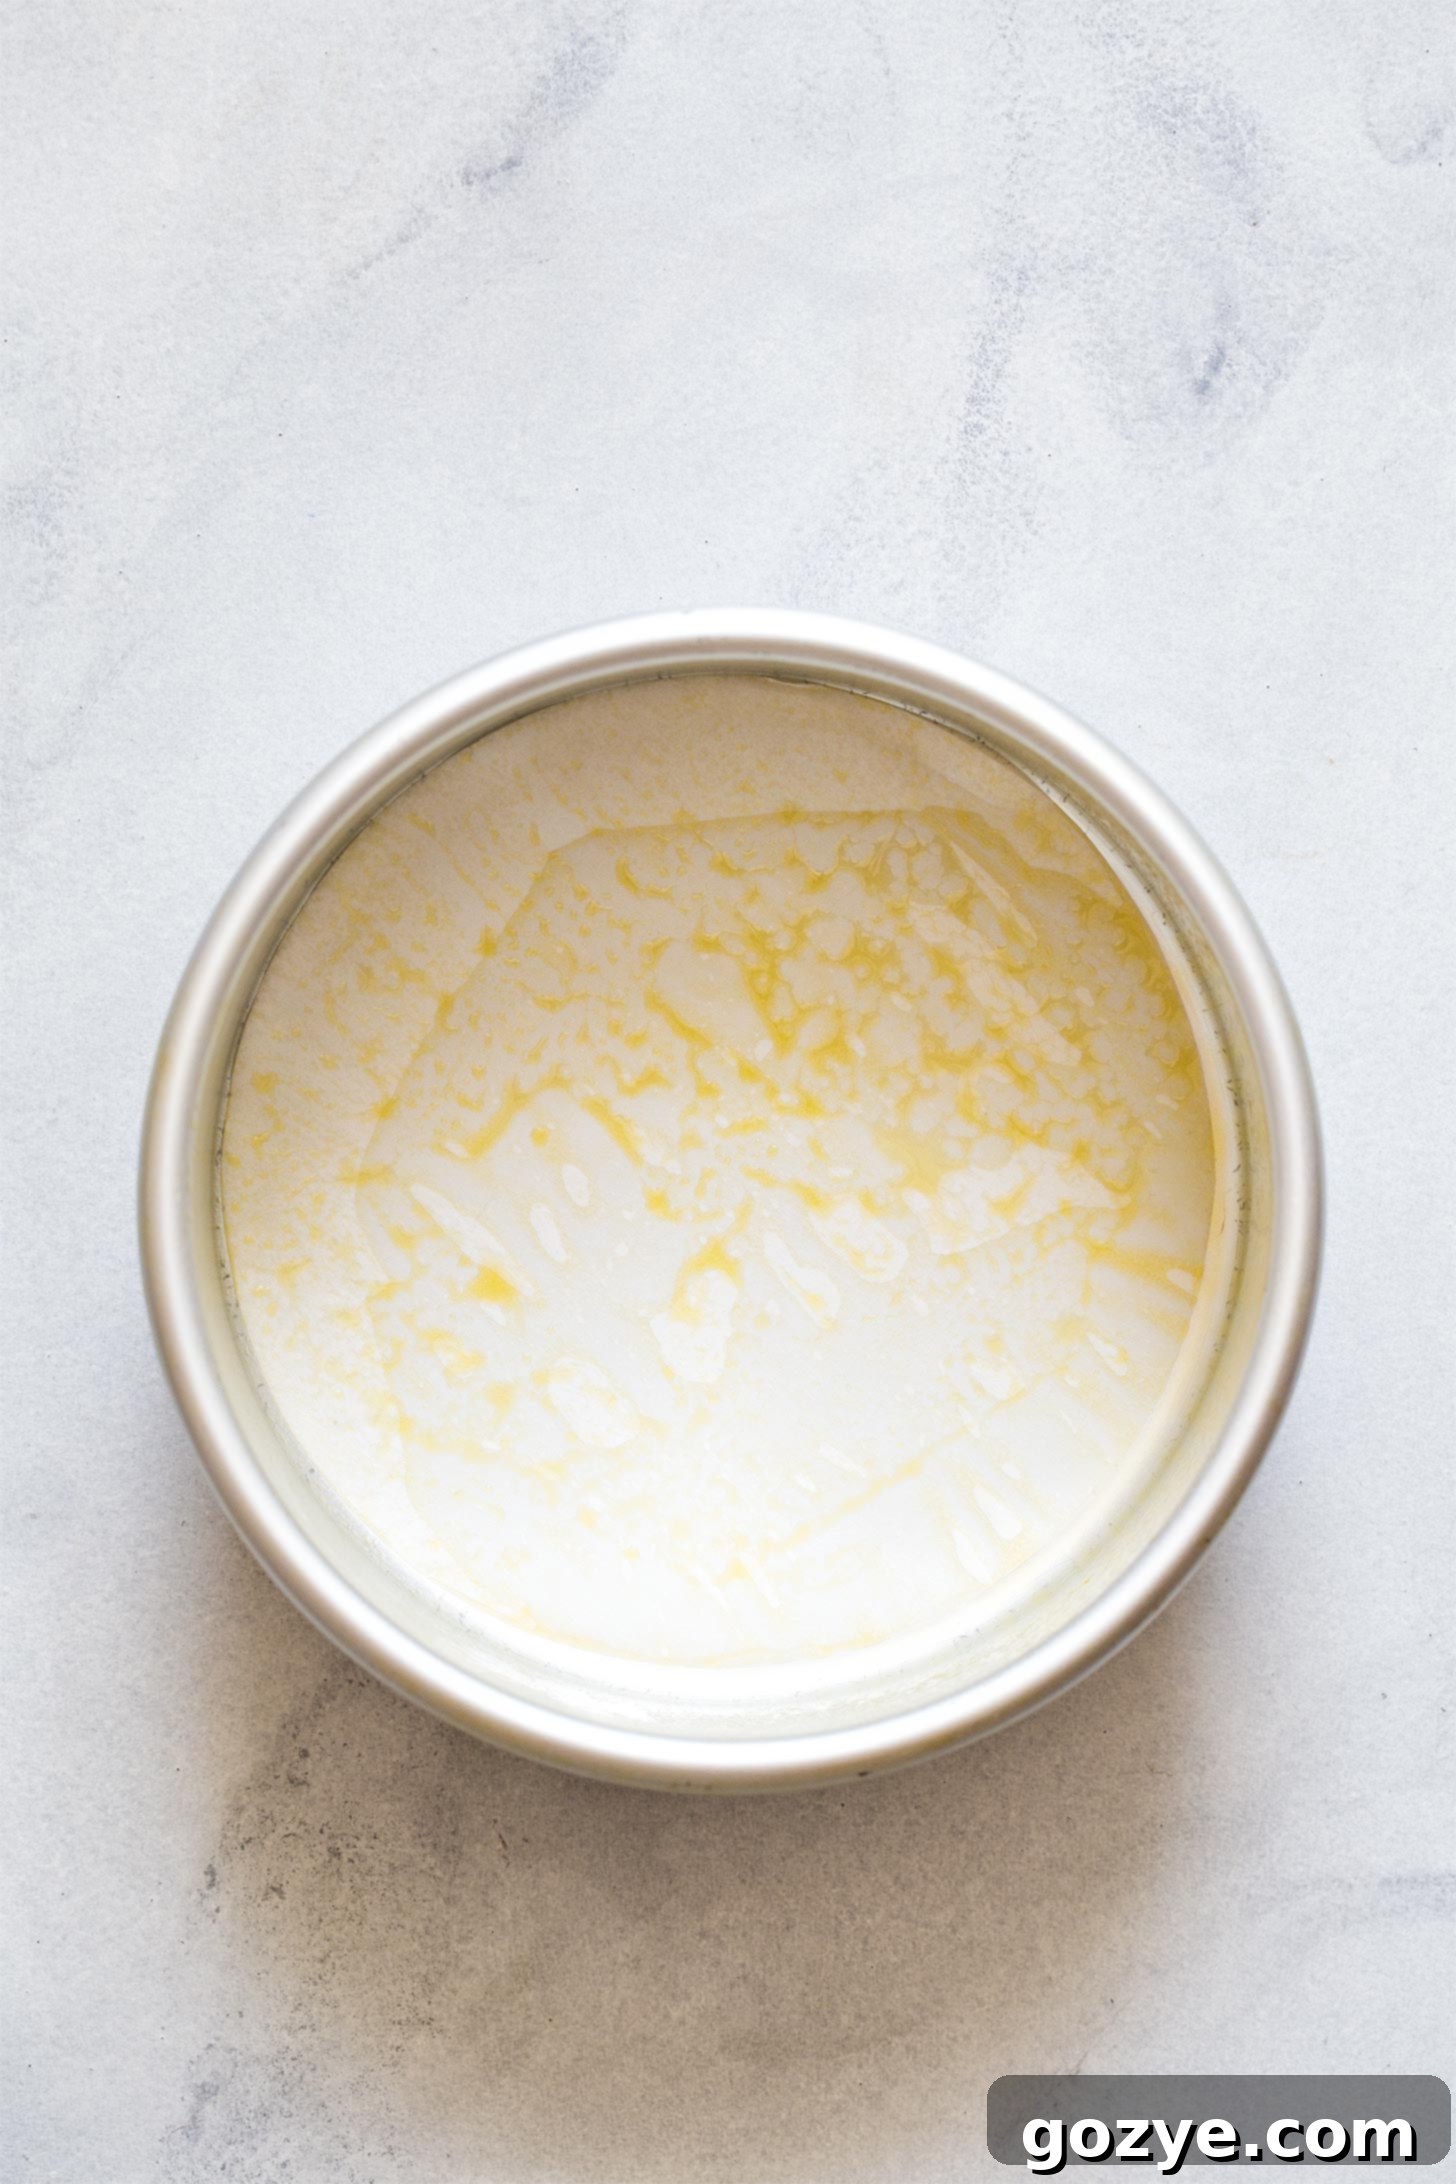
To embark on your journey of baking this delightful small chocolate cake, the first crucial step is acquiring the right equipment: a 6-inch cake pan. While it might seem like a niche item, it’s surprisingly versatile for small-batch baking and creating perfectly portioned desserts.
A standard 6 x 2 inch round cake pan typically boasts a volume of about 3 cups, perfectly accommodating approximately 2 cups of cake batter. This leaves just enough room at the top for your cake to rise beautifully without overflowing. You can easily find these pans online on Amazon (affiliate link for your convenience) or at the baking and cake decorating aisle of your local craft store. Investing in a good quality aluminum pan will ensure even heat distribution, leading to a consistently baked and perfectly golden cake.
If you don’t have a 6-inch pan readily available and are looking for an alternative, fear not! You might consider whipping up my Mini Lava Cakes, which are designed for ramekins and offer a similarly delightful individual dessert experience.
For an extra layer of ease and to guarantee your cake releases flawlessly every single time, I highly recommend using pre-cut 6-inch parchment paper circles. These save you the hassle of measuring and cutting, ensuring your cake never sticks to the bottom of the pan and always comes out looking pristine.
Versatility: How To Convert This Chocolate Cake Into Other Delicious Treats
Don’t have a 6-inch cake pan, or simply craving a different format for your chocolate indulgence? This incredibly adaptable small chocolate cake recipe can be easily transformed into a variety of other delicious desserts. I’ve successfully converted this very recipe into small batch chocolate cupcakes, perfect for individual servings, and even a charming small Bundt cake, which offers an elegant presentation.
For those who need a slightly larger cake without committing to a multi-layer masterpiece, I’ve also scaled this recipe up to bake beautifully in an 8-inch pan, resulting in a delightful one-layer chocolate cake that still retains all the moistness and flavor you love. The flexibility of this base recipe means you can enjoy homemade chocolate goodness in whatever form suits your occasion best.
Essential Ingredients for Your Small Chocolate Cake
Crafting the best 6-inch chocolate cake recipe requires a thoughtful selection of ingredients. Each component plays a vital role in achieving that perfect moist crumb and intense chocolate flavor. Here’s a detailed look at what you’ll need and why each element is important:
- Semisweet chocolate: This isn’t just for flavor; it contributes significantly to the cake’s moistness and richness. Baking chocolate is derived from ground cocoa nibs, containing both cocoa solids (for flavor) and cocoa butter (for richness and texture). Opt for a high-quality semisweet chocolate with around 55% cacao for a balanced, deep chocolate taste that isn’t overly bitter or sweet. The quality of your chocolate directly impacts the final flavor of your cake.
- All-purpose flour: The backbone of most baking recipes, all-purpose flour provides the cake’s structure. It’s crucial to measure it correctly using the “spoon and level” method. Spoon the flour into your measuring cup until it overflows, then level it off with a straight edge. Scooping directly from the bag can compact the flour, leading to an excess amount, which will result in a dry, dense cake.
- Cocoa powder: To achieve an exceptionally deep and complex chocolate flavor that baking chocolate alone cannot deliver, unsweetened cocoa powder is essential. Ensure you’re using unsweetened cocoa powder, as sweetened varieties will throw off the sugar balance in the recipe. This ingredient truly amplifies the chocolate intensity.
- Baking soda: This chemical leavening agent is critical for the cake’s rise and tender texture. It reacts with acidic ingredients in the batter (like buttermilk) to produce carbon dioxide, creating air pockets that make the cake light and fluffy. Without it, your cake would be dense and flat.
- Espresso powder: This might seem like an unexpected ingredient, but it’s a secret weapon for intensifying chocolate flavor. Adding a small amount of espresso powder doesn’t make your cake taste like coffee; instead, it deepens and enhances the chocolate notes, making them more pronounced and richer. You’ll notice its absence if you skip it!
- Salt: Far from merely making the cake salty, salt is a flavor enhancer. It balances the sweetness, brings out the nuanced chocolate flavors, and prevents the cake from tasting bland or one-dimensional. A small amount makes a huge difference.
- Butter: Unsalted butter provides crucial fat, which not only adds rich flavor but also contributes significantly to the cake’s tender crumb and moist texture. As butter melts during baking, its steam helps the cake rise by trapping carbon dioxide. Always use unsalted butter to control the overall salt content of your recipe, and avoid substituting margarine, as it has a different fat content and composition that can negatively impact the cake’s texture.
- Granulated sugar: This provides sweetness, contributes to the cake’s browning, and helps retain moisture, resulting in a softer crumb.
- Brown sugar: The molasses content in brown sugar adds an extra layer of moisture and a subtle caramel-like depth of flavor, making the cake even more tender and delicious than if only granulated sugar were used. Make sure your brown sugar is soft and moist, not hard and crumbly.
- Egg: A single large egg provides structure, binding, moisture, and richness. It’s essential for emulsifying the batter and allowing the cake to rise properly. Always bring your egg to room temperature before mixing; a cold egg can cause the batter to seize and affect the cake’s overall rise and texture.
- Vanilla extract: Much like salt and espresso powder, vanilla extract is a powerful flavor enhancer. It beautifully complements and deepens the chocolate notes, adding a fragrant, warm undertone to the cake. Use good quality pure vanilla extract for the best results.
- Buttermilk: The acidity in buttermilk is vital for activating the baking soda, contributing to the cake’s light and airy texture. It also helps create an incredibly moist and tender crumb. If you don’t have buttermilk, you can easily substitute it by adding 1 teaspoon of lemon juice or white vinegar to whole milk and letting it sit for 5-10 minutes until it slightly curdles. It is highly recommended to use whole milk for this substitution, as the higher fat content is crucial for maintaining the chocolate cake’s moistness; skim or low-fat milk can lead to a drier cake.
- Hot coffee: As mentioned with espresso powder, coffee (specifically hot coffee in this case) significantly enhances the chocolate flavor without making the cake taste like coffee. It provides a deeper, more robust chocolate profile. If you prefer not to use coffee, hot water can be substituted, but be aware that the chocolate flavor will be less intense. Warm beer is also an option for an interesting depth of flavor.
Unlocking Richness: What is Espresso Powder?
The secret ingredient that truly elevates this small chocolate cake recipe to its best potential is espresso powder. It’s a game-changer for any chocolate dessert.
Espresso powder consists of concentrated instant coffee crystals. Unlike regular instant coffee, it’s significantly stronger in flavor and designed to dissolve quickly and seamlessly into liquids. The magic of espresso powder in chocolate baking is that it doesn’t impart a coffee taste to your cake. Instead, it acts as a powerful flavor enhancer, much like how a pinch of salt makes other flavors pop. It deepens and intensifies the inherent chocolate notes, making the cake taste more profoundly chocolaty and less muted.
You can often find espresso powder in Italian grocery stores or in the international or coffee section of larger supermarkets. If you’re struggling to locate it, instant coffee can be used as a substitute, but be aware that the flavor enhancement won’t be as intense or pronounced. Some readers occasionally ask if they can omit espresso powder entirely. While the recipe will still technically work without it, please understand that your small chocolate cake won’t achieve the same remarkable depth and richness of chocolate flavor that makes this recipe truly special.
Effortless Baking: How To Make Your Small Chocolate Cake
Crafting this delightful chocolate cake for two from scratch is a straightforward and rewarding process. Here’s a detailed guide to ensure your cake turns out perfectly moist and flavorful every time:
- Prepare Your Dry Ingredients: In a medium bowl, start by sifting together your all-purpose flour and unsweetened cocoa powder. Sifting helps to aerate the ingredients and prevent lumps, ensuring a smooth batter. Once sifted, stir in the baking soda, espresso powder, and salt. Whisk these dry ingredients together thoroughly to ensure they are evenly distributed.
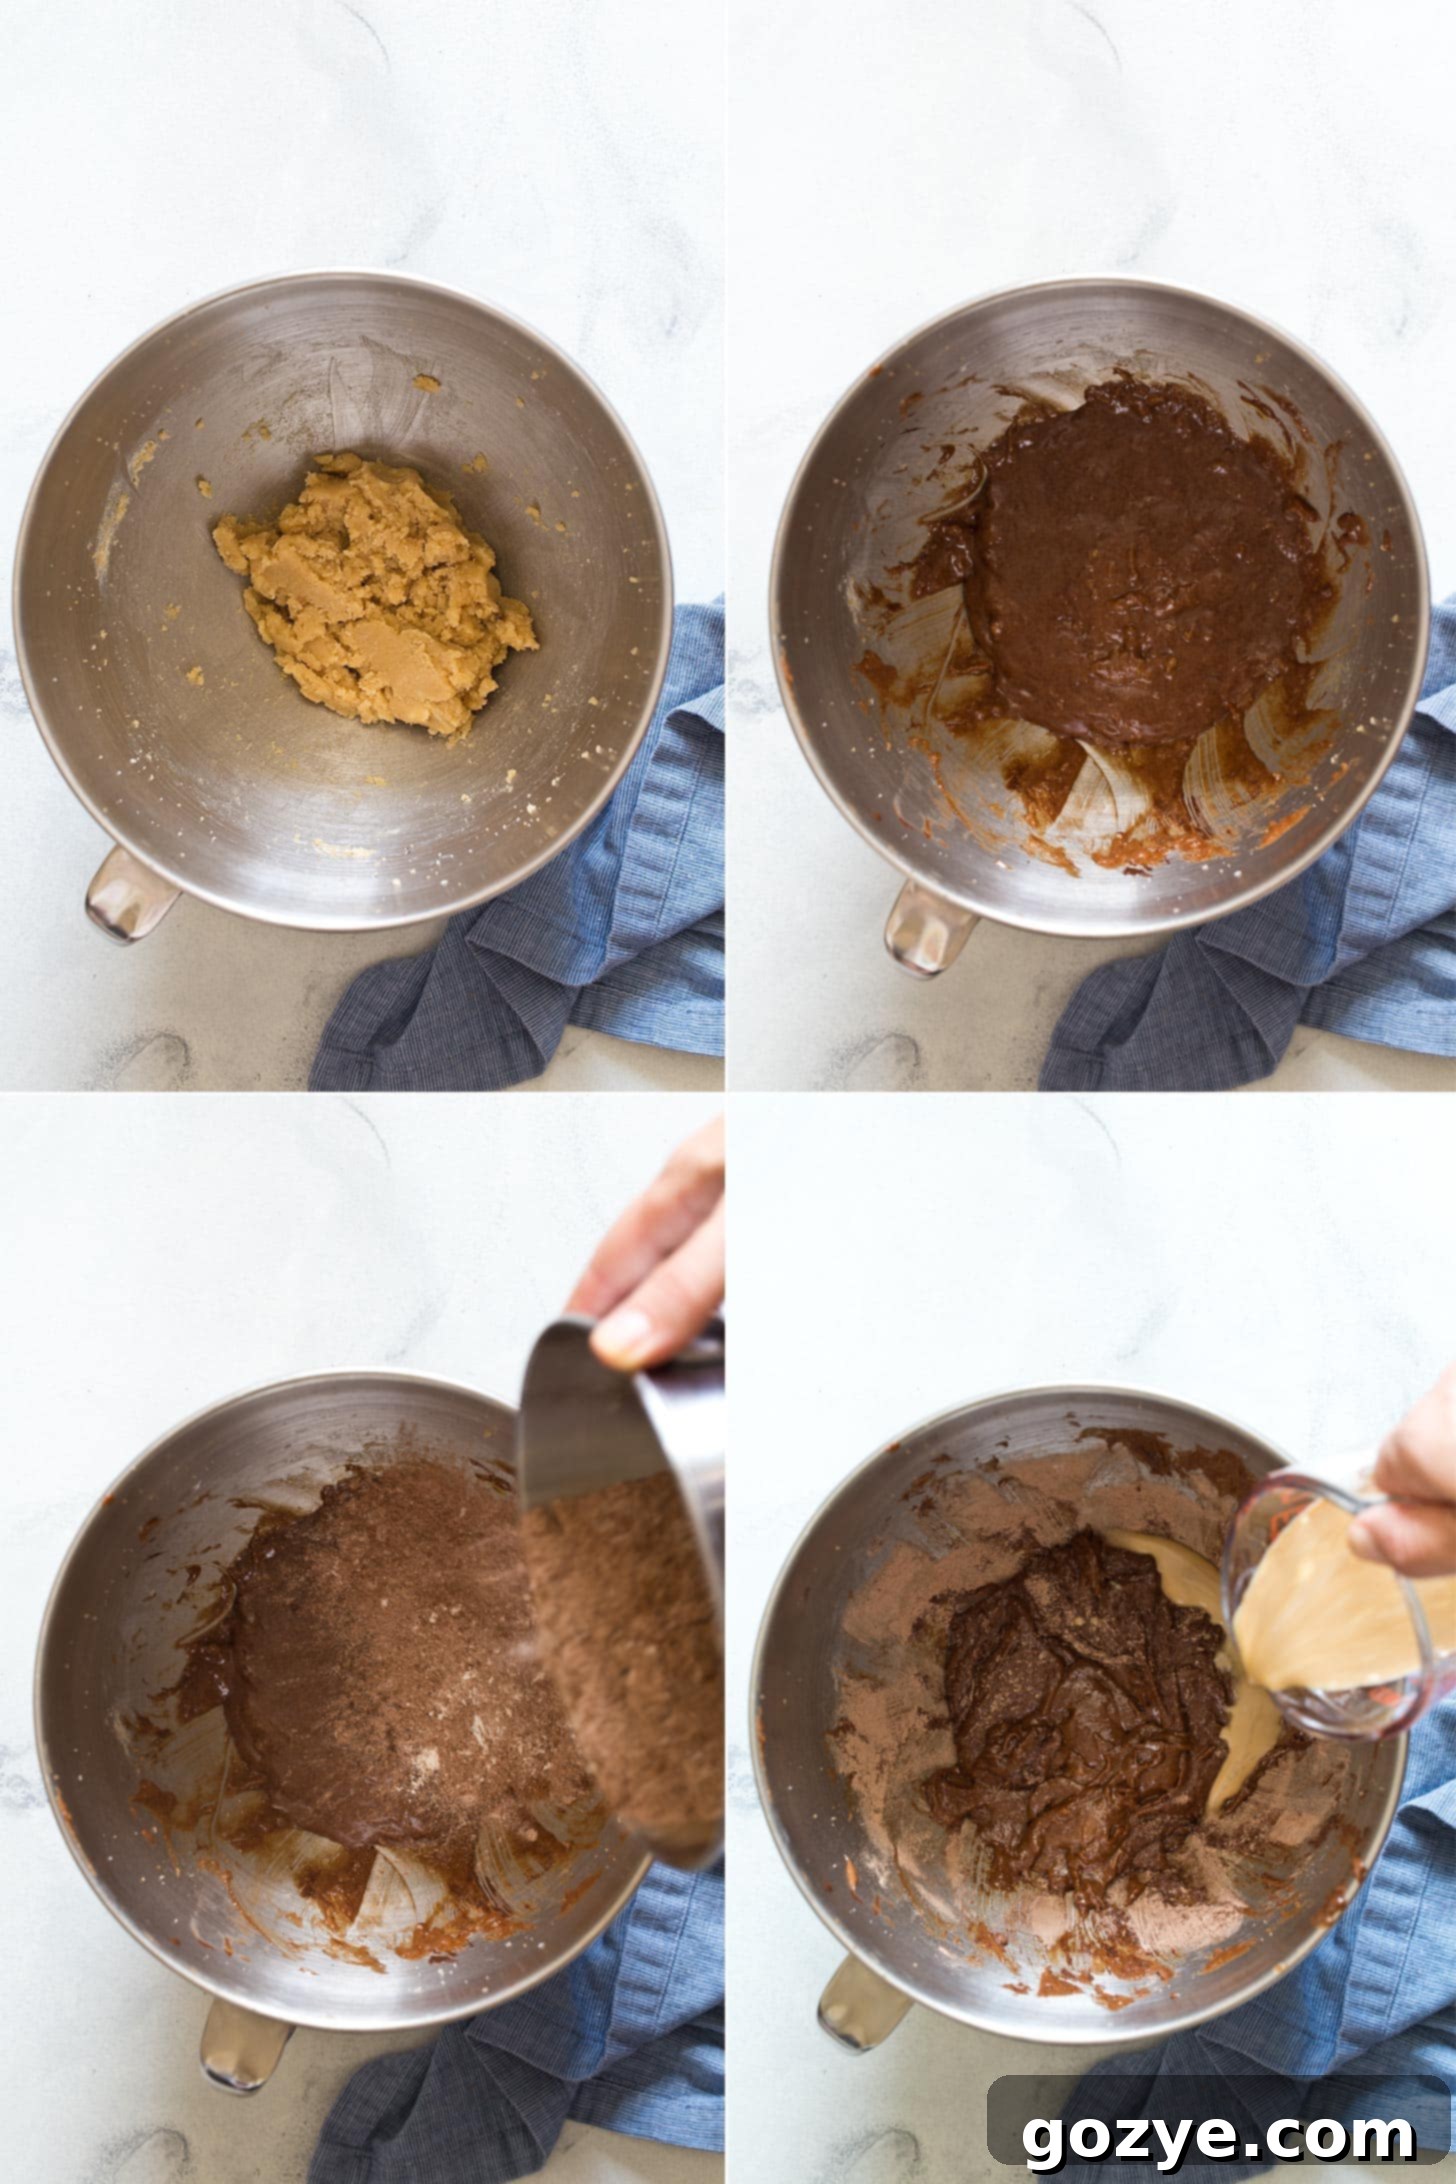
- Cream Butter and Sugars: In a large mixing bowl, preferably using a stand mixer with a paddle attachment or a hand mixer, beat together the softened unsalted butter with both granulated sugar and packed brown sugar. Beat on medium-high speed for about 1-2 minutes until the mixture is light, fluffy, and creamy. This creaming process incorporates air into the mixture, which is crucial for achieving a tender crumb and helping the cake rise.
- Incorporate Wet Ingredients: Scrape down the sides of your bowl to ensure all ingredients are well combined. Then, beat in the room temperature large egg, vanilla extract, and the cooled melted semisweet chocolate. Continue beating until everything is thoroughly incorporated and smooth. If necessary, scrape down the bowl once more to catch any unmixed ingredients.
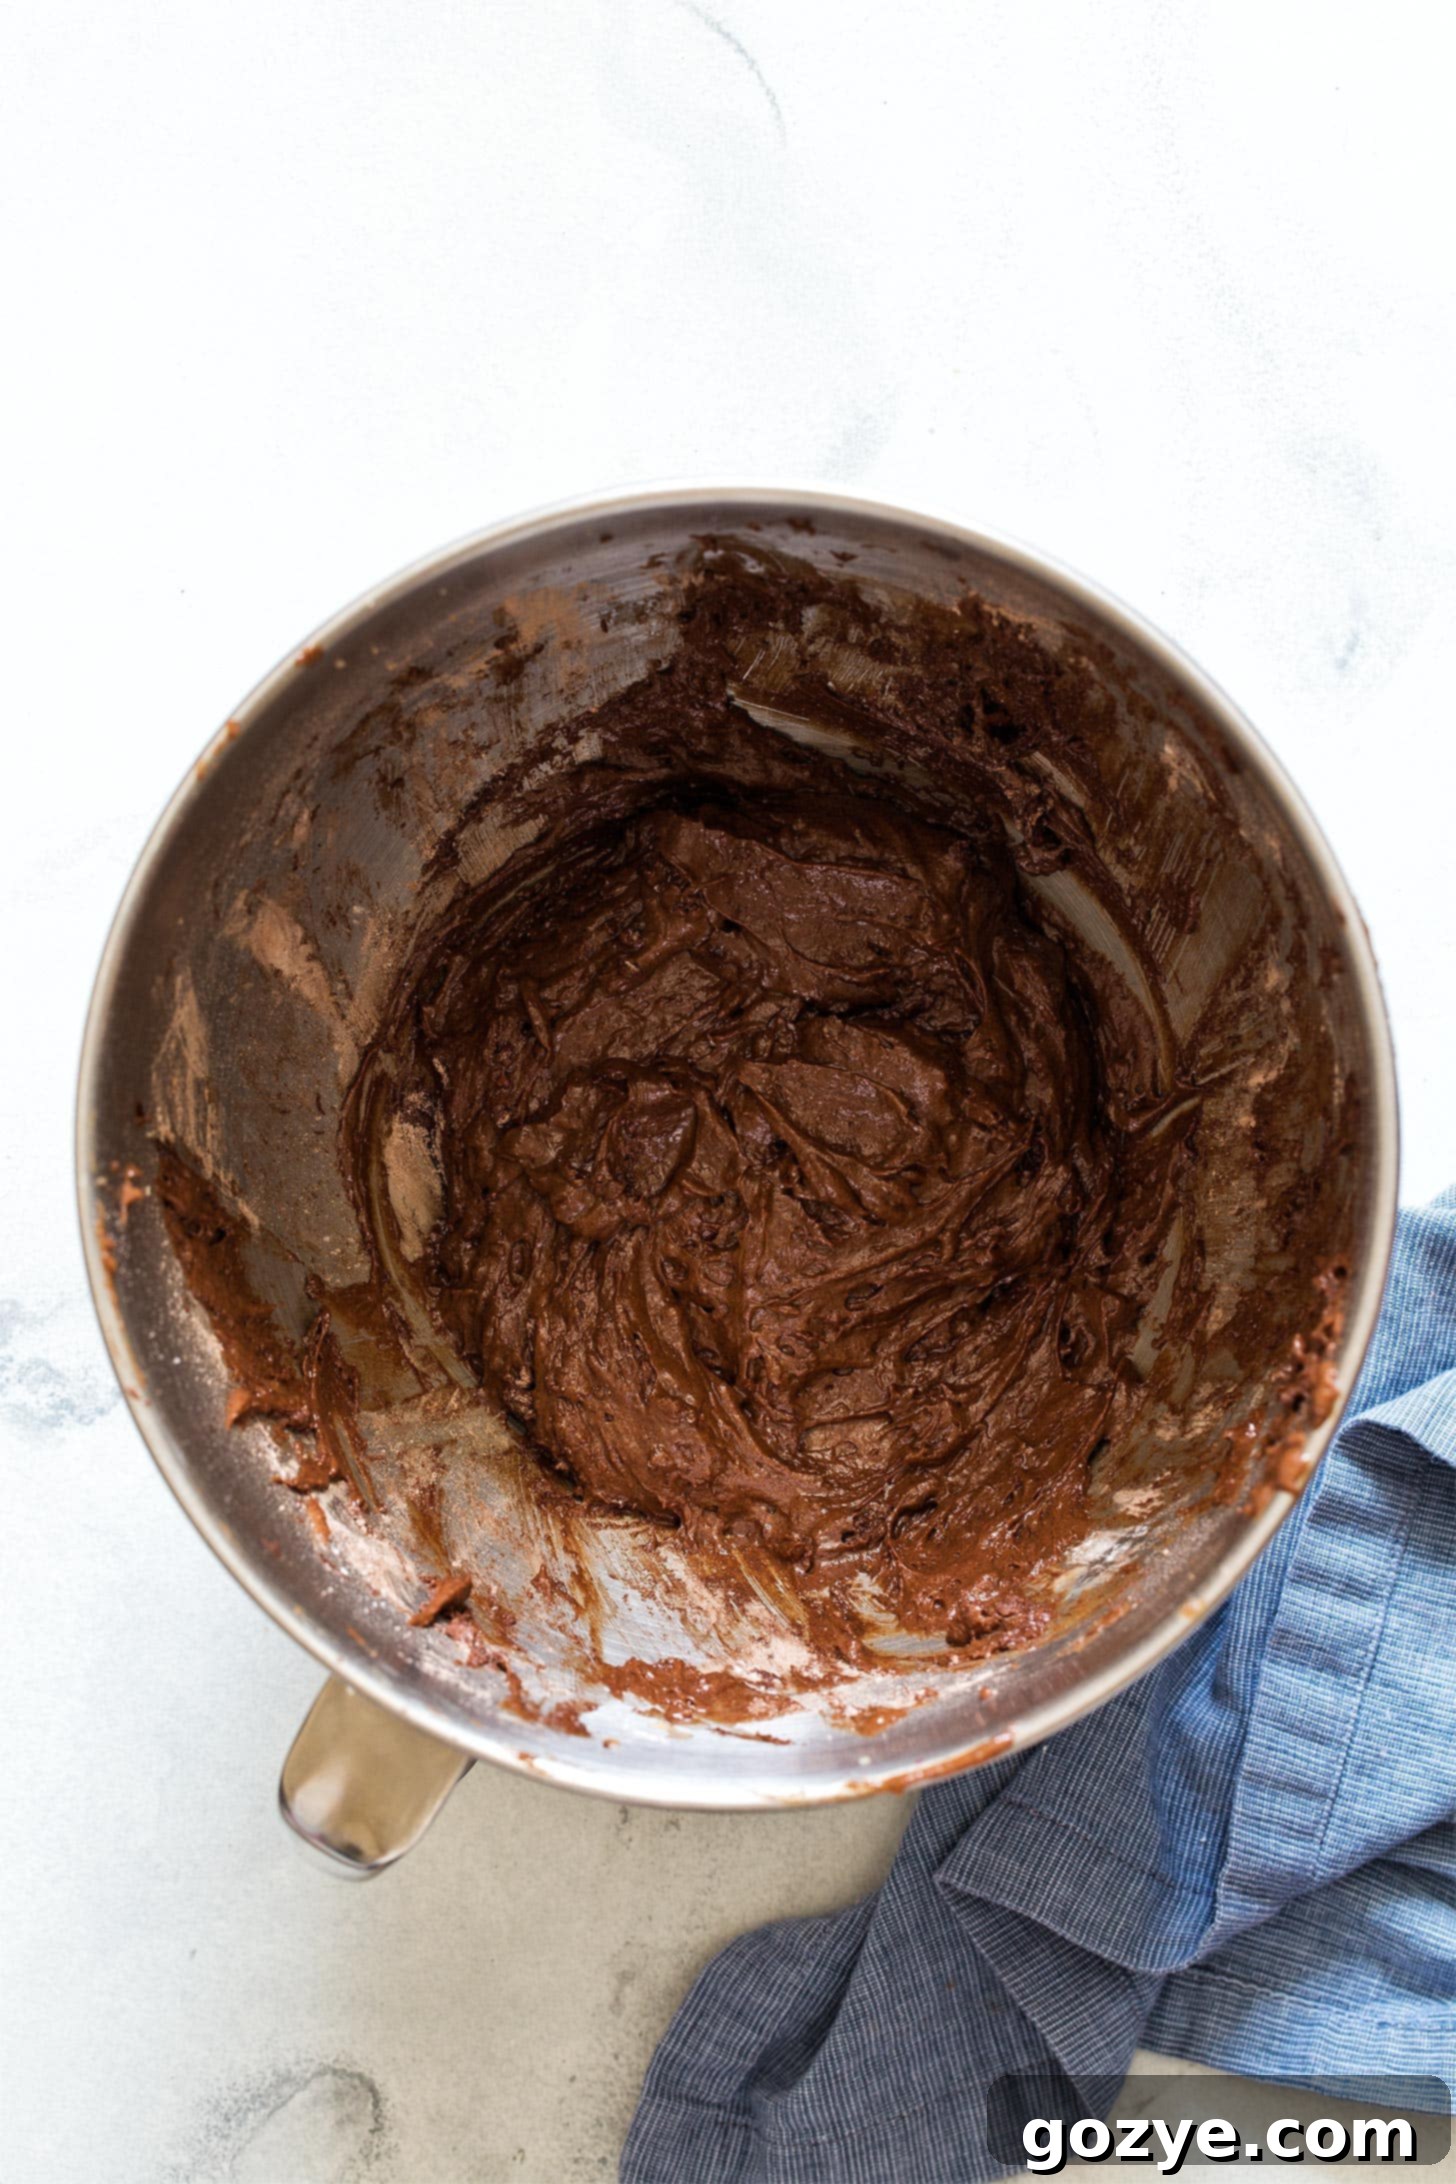
- Alternate Dry and Wet Mixtures: With your mixer on the lowest speed possible, begin adding the dry ingredients alternately with the buttermilk and hot coffee. Start by adding one-third of the flour mixture, followed by half of the liquid mixture (buttermilk and coffee combined). Repeat this, ending with the final one-third of the flour mixture. It’s crucial to avoid overmixing at this stage. As soon as the flour is about 90% incorporated, stop the mixer and finish mixing gently by hand with a rubber spatula. Overmixing can develop the gluten in the flour too much, leading to a tough and dry cake.
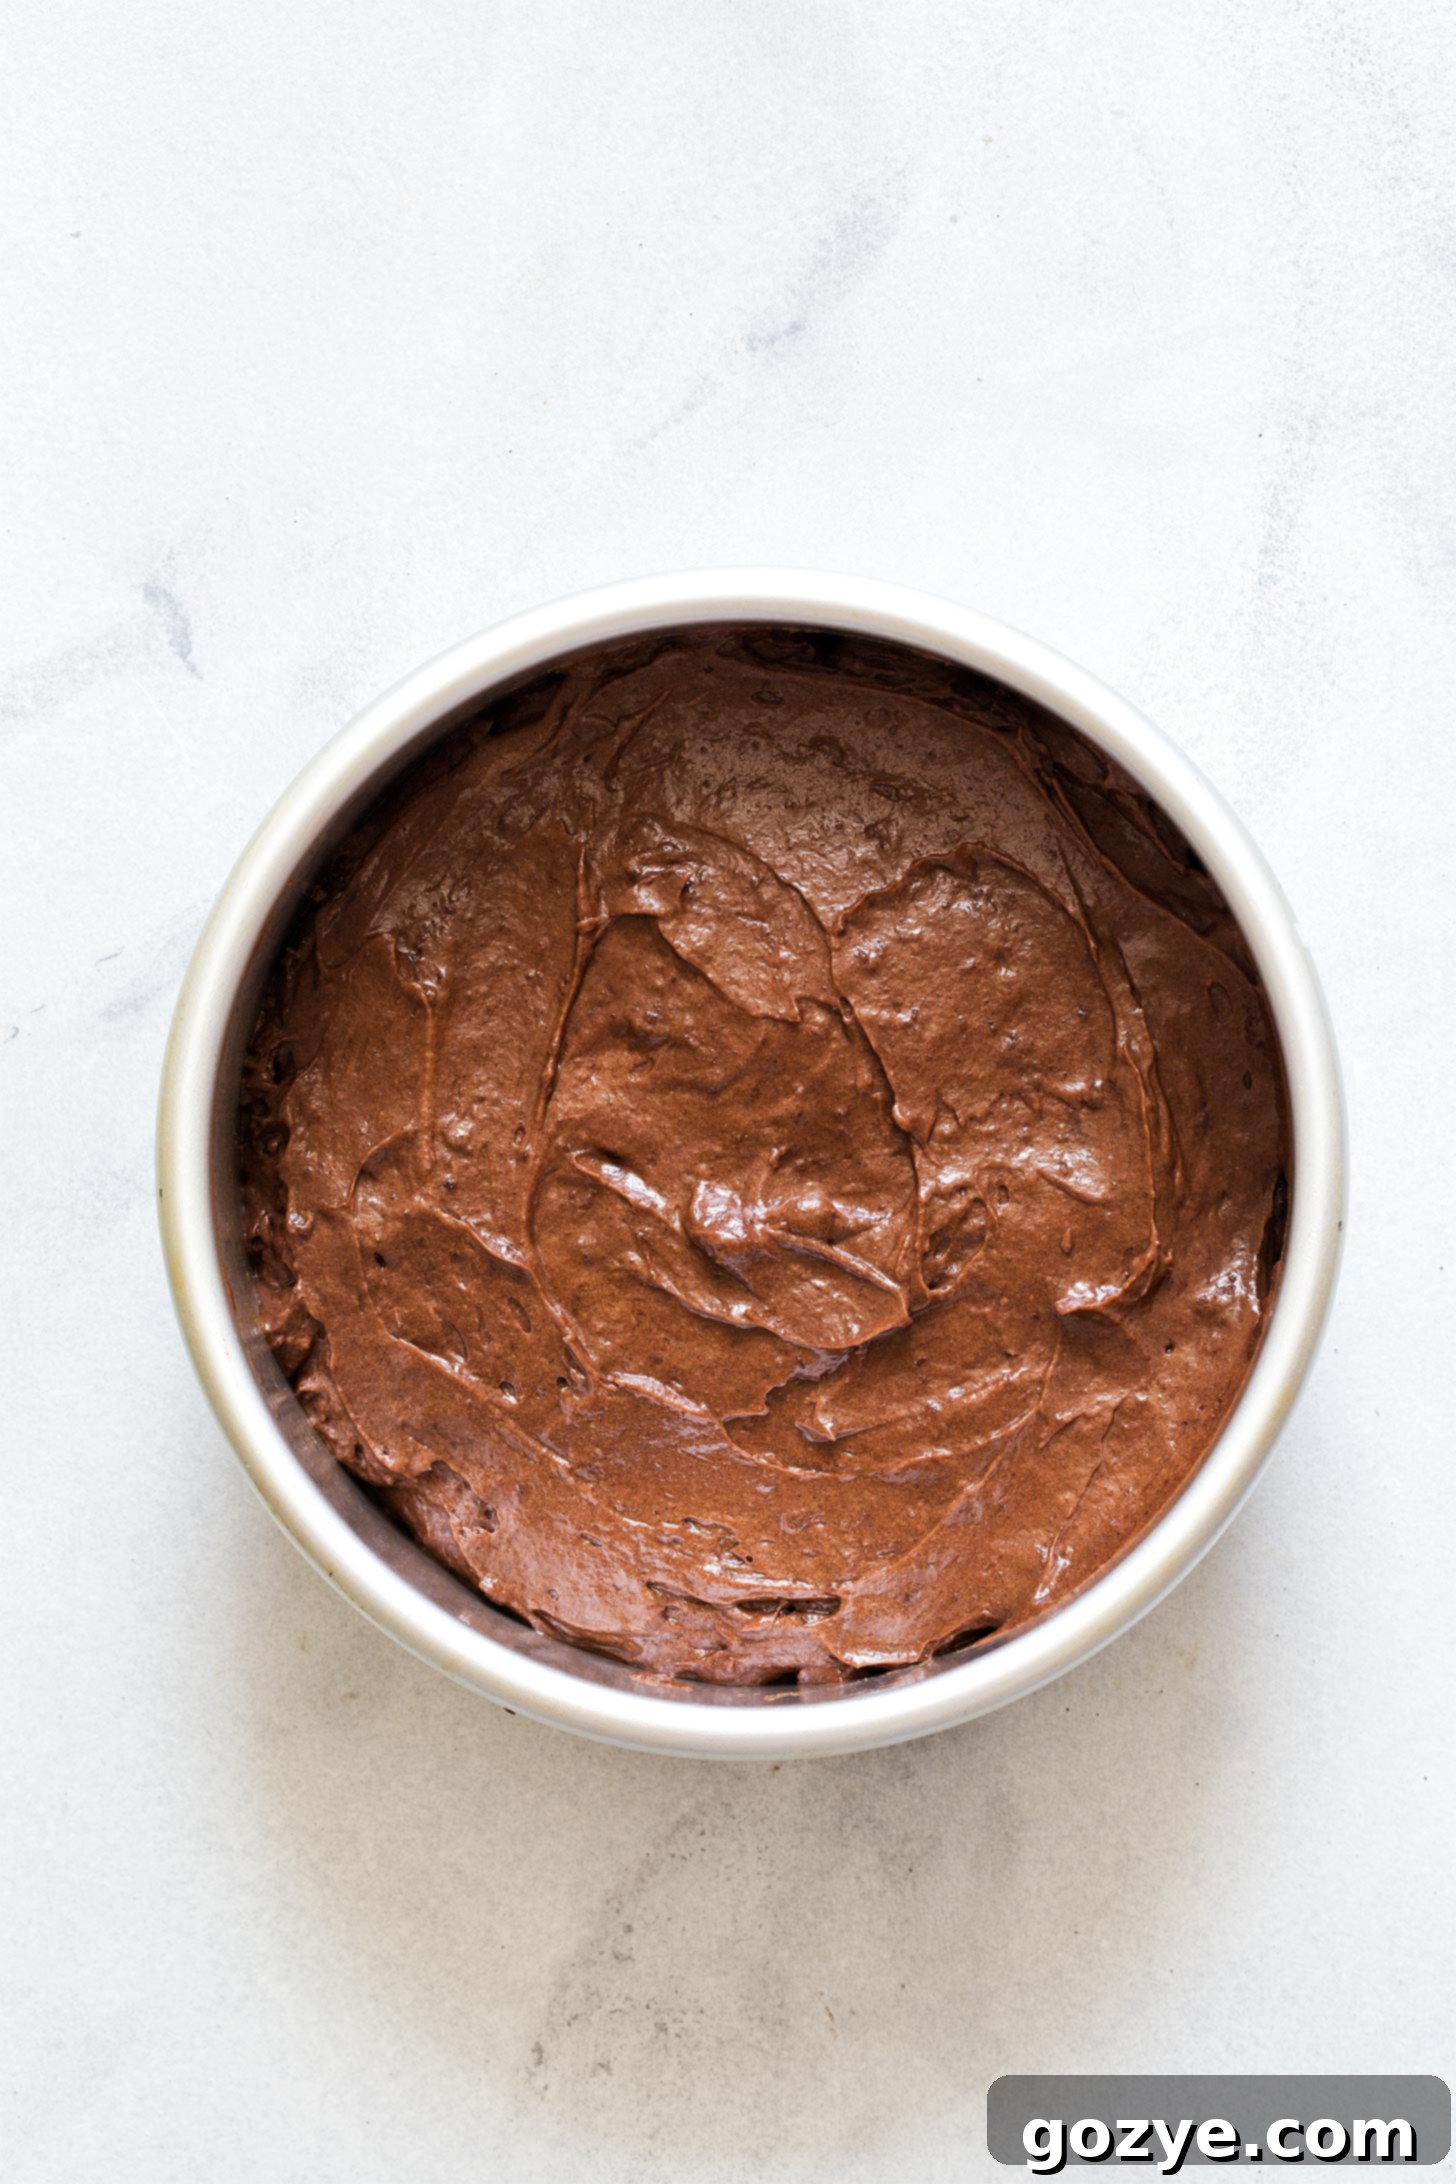
- Prepare for Baking: Pour the beautifully smooth cake batter into your prepared 6-inch cake pan, which should be lightly greased and lined with a parchment paper circle at the bottom. Distribute the batter evenly.
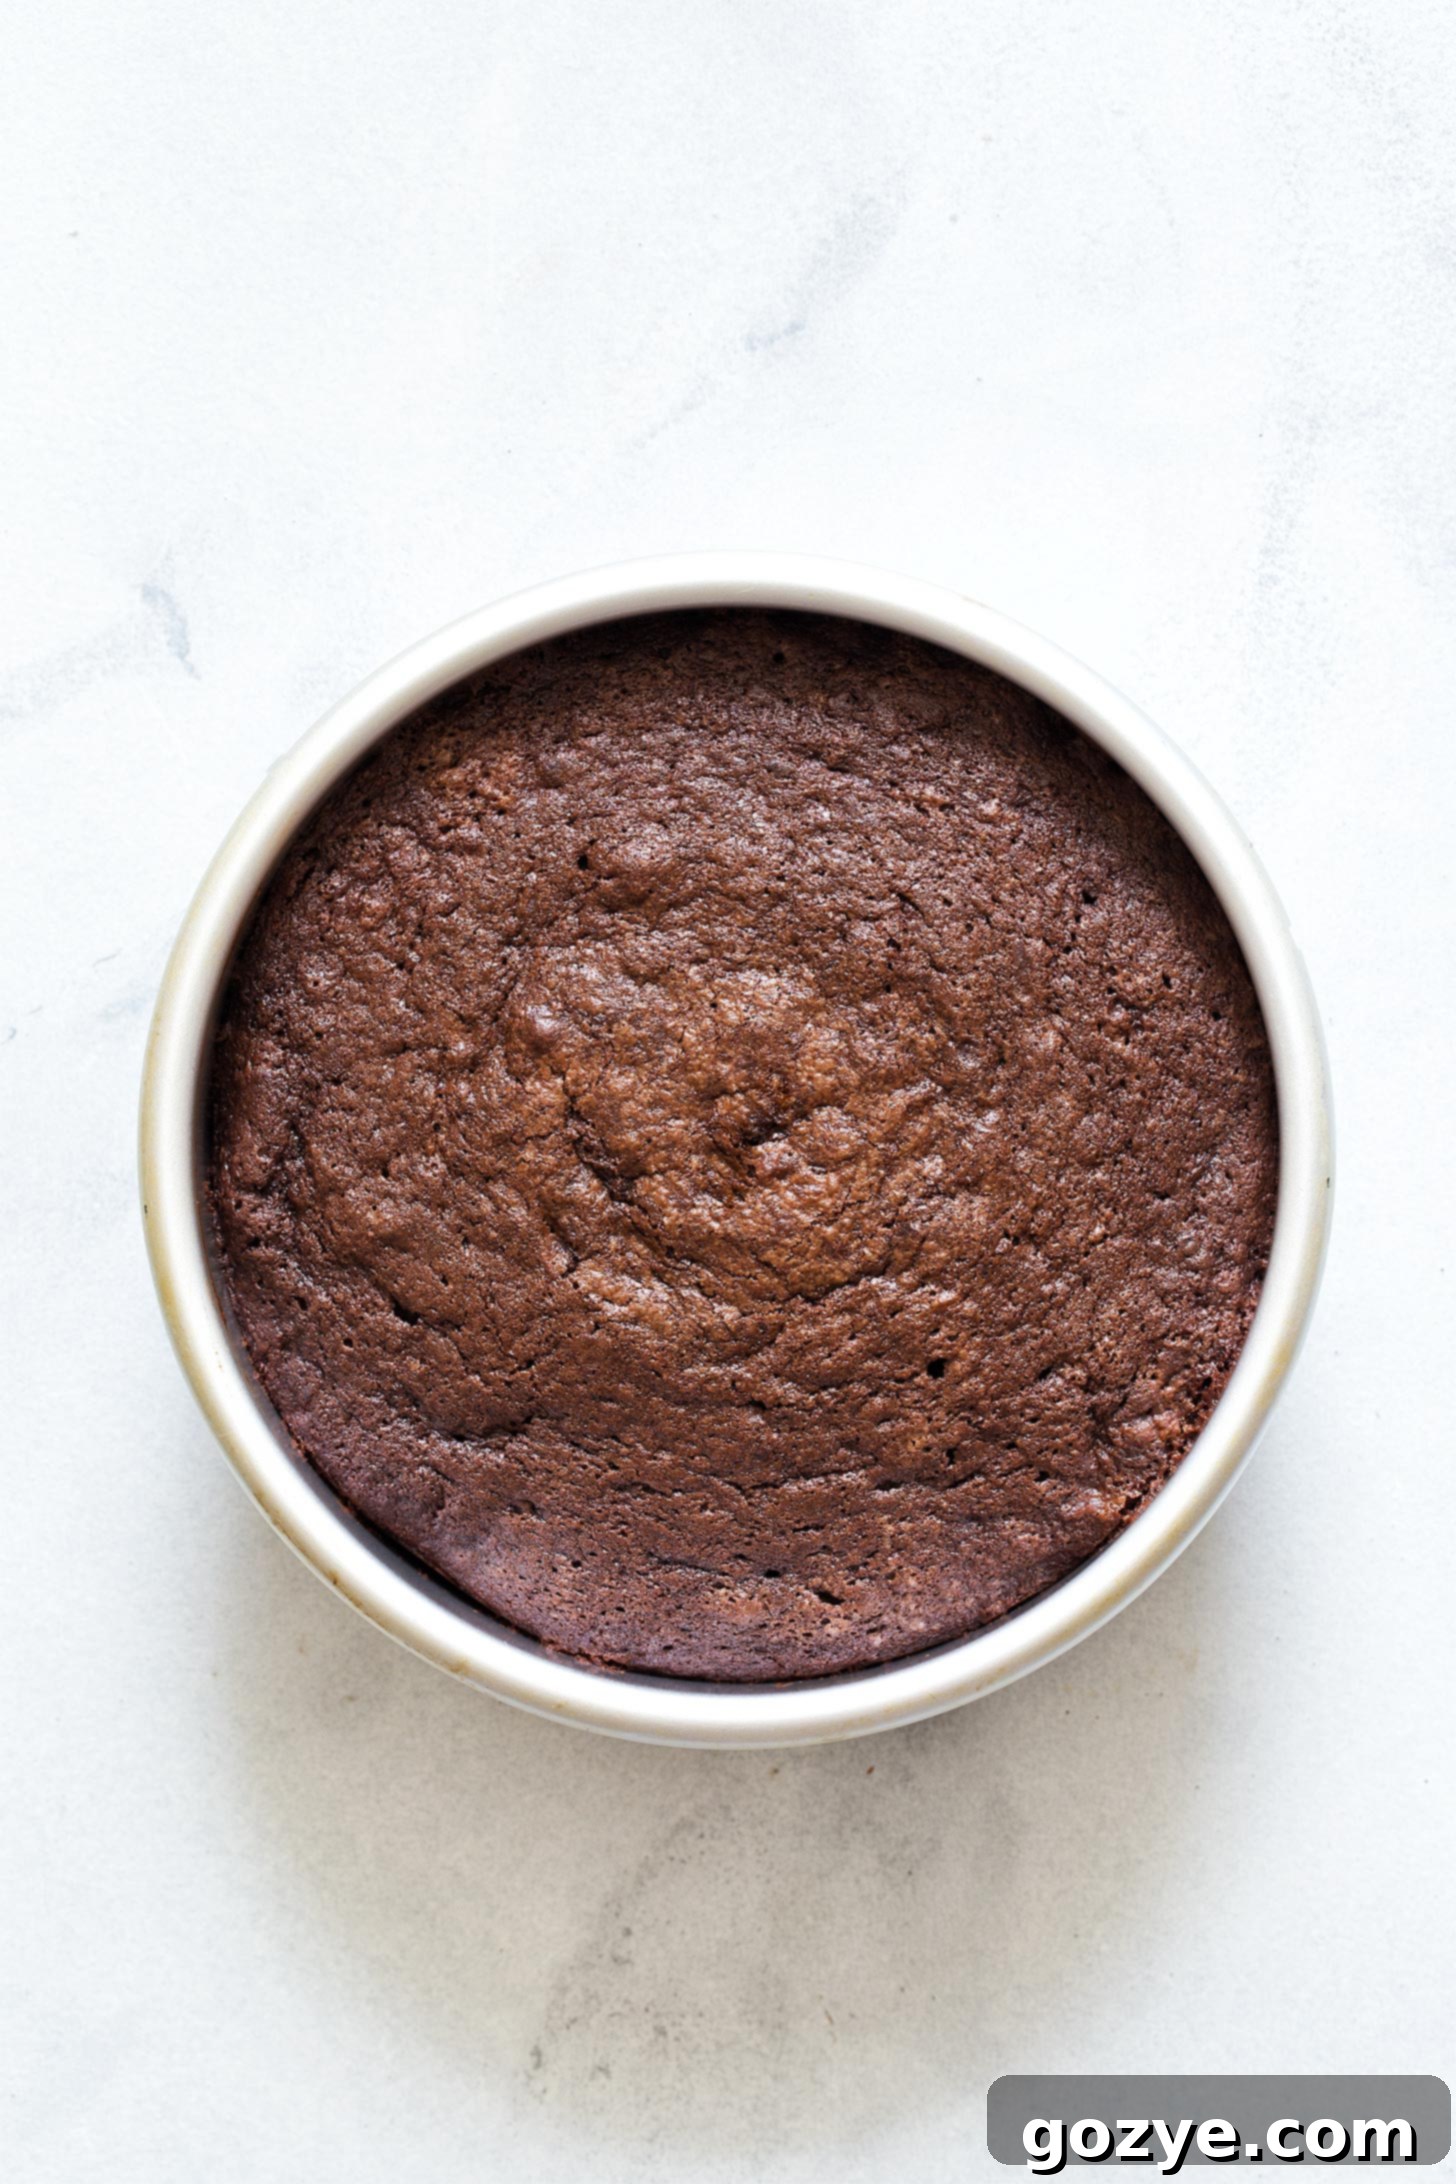
- Bake to Perfection: Bake your small chocolate cake in a preheated oven at 350°F (175°C) for approximately 25-30 minutes. Baking times can vary depending on your oven, so start checking around the 25-minute mark. The cake is done when a toothpick inserted into the center comes out with a few moist crumbs attached, but no wet batter. If the toothpick comes out completely clean, it might be slightly overbaked, but a few crumbs indicate perfect doneness.
Once baked, allow the cake to cool in the pan for about 15 minutes before running a knife carefully around the edge to loosen it. Invert the cake onto a wire cooling rack, then immediately flip it right-side-up to finish cooling completely. Decorate once fully cooled.
This small chocolate cake can be prepared ahead of time, offering wonderful convenience. Once frosted, cover the cake and store it at room temperature for up to 2 days if using a buttercream frosting. If you’ve used a cream cheese frosting or chocolate ganache, it’s best to store the covered cake in the refrigerator for up to 1 week. For the most optimal flavor and texture, allow any refrigerated cake to sit at room temperature for 15-30 minutes before serving, allowing the flavors to fully bloom.
Portioning Perfection: How Many Servings Does a 6-Inch Cake Yield?
When it comes to small cakes, serving sizes can be quite subjective, largely depending on your desired portion size or how many individuals you’re sharing it with. A 6-inch cake is inherently designed for more intimate gatherings or simply for fewer leftovers.
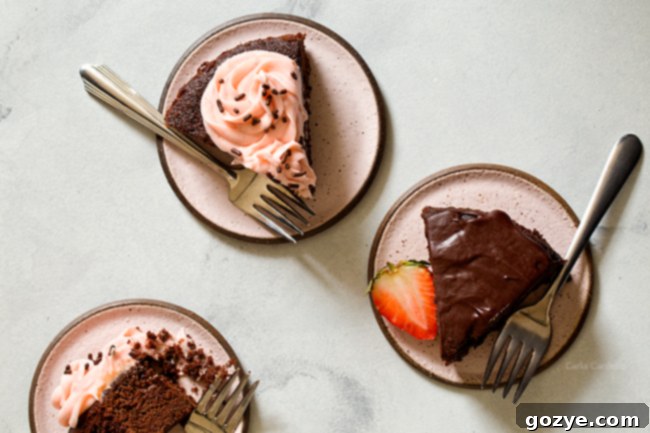
Generally, a 6-inch cake can comfortably be sliced into 4 to 6 generous slices. This makes it an ideal dessert for two to four people, allowing for seconds or a slightly larger portion if desired. For example, cutting it into four larger wedges provides a substantial serving, while six slightly smaller, but still satisfying, slices are perfect for a light dessert.
However, with careful cutting, you can even stretch your small chocolate cake to yield 8 smaller slices, making it suitable for a larger group who might prefer just a small taste. Ultimately, the number of servings for your 6-inch chocolate cake is entirely up to your preference and how you choose to slice it. It’s the perfect size for flexibility and managing portions.
Creative Flair: How To Decorate A Small Chocolate Cake
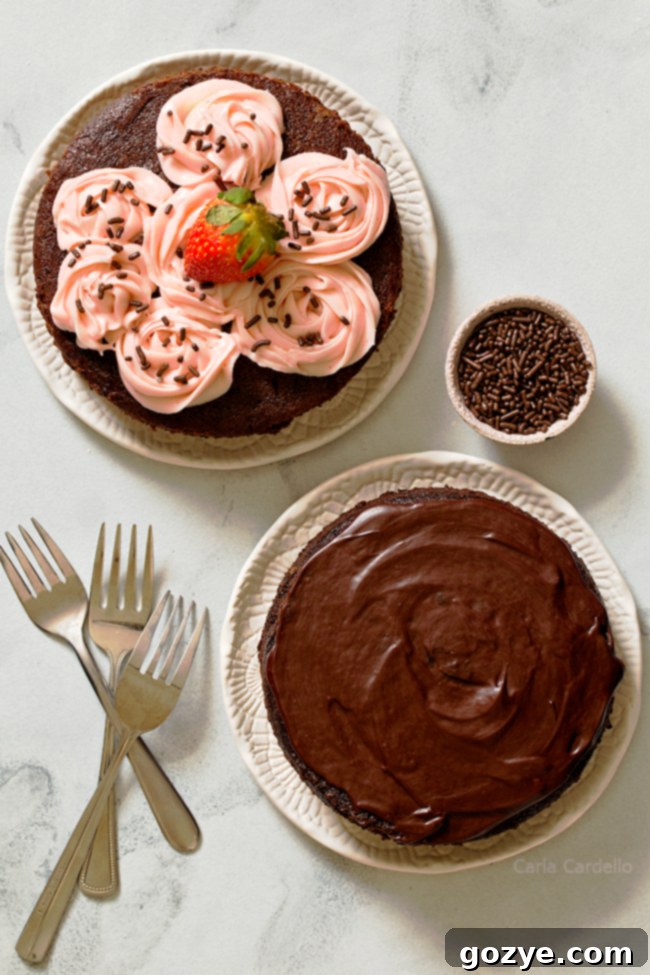
One of the most exciting aspects of baking a small chocolate cake is the freedom to get creative with its decoration. As illustrated in the accompanying photos, there are countless ways to frost and embellish your chocolate cake for two, catering to various tastes and occasions.
For a romantic touch, especially fitting for Valentine’s Day or an anniversary, consider fruit-infused frostings. A vibrant Raspberry Cream Cheese Frosting offers a tangy, sweet counterpoint to the rich chocolate, while Strawberry Buttercream provides a classic, creamy sweetness with a delicate fruit flavor. For a lighter option that’s still bursting with fresh fruit, a fluffy strawberry whipped cream is absolutely delightful.
If you’re a devout chocoholic and believe there’s no such thing as too much chocolate, embrace the double chocolate experience! Smother your cake in my indulgent chocolate frosting, a luscious chocolate cream cheese frosting, or for a lighter, airy finish, a generous dollop of chocolate whipped cream.
For those who adore the classic combination of chocolate and peanut butter, you’re in for a treat! Transform your cake into a peanut butter cup dream with my creamy peanut butter frosting, a rich peanut butter cream cheese frosting, or a light and airy dollop of peanut butter whipped cream.
And for festive occasions like St. Patrick’s Day, you can easily adapt this recipe. Simply add 1 teaspoon of peppermint extract to the cake batter for a refreshing twist, then decorate with a vibrant green mint frosting for a truly celebratory treat.
Feeling adventurous and want to explore even more flavor combinations? Be sure to check out my comprehensive list of small batch frosting recipes, where you’ll find inspiration for every craving and occasion imaginable.
Preserving Freshness: How To Freeze A Chocolate Cake
Even though a 6-inch chocolate cake yields just a few delightful slices, there are times when you might want to bake it ahead of time, perhaps for future enjoyment, or to ensure maximum freshness for a specific event. Freezing your cake is an excellent way to extend its shelf life without compromising on taste or texture.
To freeze an entire cake, whether frosted or unfrosted, the most important first step is to ensure it is completely cooled to room temperature. Freezing a warm cake can lead to condensation, which can make the cake soggy or result in ice crystals.
If your cake is already frosted, take an extra precaution: place it on a baking tray or plate lined with parchment paper or plastic wrap. Freeze it uncovered for about 1 hour, or until the frosting is firm to the touch. This crucial step prevents the plastic wrap from sticking to your beautiful frosting and potentially ruining its design when you wrap it.
Once the cake is firm (or if it’s unfrosted), carefully wrap it tightly in several layers of plastic wrap, ensuring no part of the cake is exposed to the air. This tight seal is vital for preventing freezer burn. Next, place the plastic-wrapped cake into a freezer-safe plastic bag or an airtight container. Squeeze out as much air as possible from the bag before sealing.
For best practice, always write the date on your plastic bag or container. Your chocolate cake can be safely frozen for up to 3 months, ready to be thawed and enjoyed whenever a craving strikes!
Enjoying Later: How To Thaw A Chocolate Cake
When the moment arrives to savor your delicious small chocolate cake recipe from the freezer, a proper thawing process is key to restoring its optimal flavor and texture. Avoid the temptation to thaw it too quickly or at room temperature immediately, as this can affect its quality.
The best method for thawing a frozen chocolate cake is to transfer it from the freezer to the refrigerator overnight. This slow, gradual thaw helps to maintain the cake’s moisture and prevents large ice crystals from forming, which can otherwise make the cake dry or crumbly.
Once thawed in the refrigerator, it’s highly recommended to let the cake sit at room temperature for 15-30 minutes before serving. This step is crucial because cold temperatures can mute flavors and make the cake’s texture feel dense. Allowing it to warm up slightly brings out the full depth of the chocolate and the nuances of the frosting, ensuring a much more enjoyable eating experience. You’ll find the flavors are more pronounced and the texture is perfectly soft and moist.
Small Chocolate Cake FAQ
Yes, you can easily create a buttermilk substitute. Simply use whole milk and add 1 teaspoon of white vinegar or lemon juice to it. Let it sit for 5-10 minutes until it slightly curdles. It’s crucial to use whole milk as its higher fat content is essential for achieving a moist chocolate cake. Using skim or low-fat milk will unfortunately result in a drier cake.
Absolutely. If you prefer not to use coffee, you can substitute it with warm beer or hot water instead. However, please be aware that while the cake will still be delicious, using water will result in a less intensely chocolatey flavor compared to when coffee is included, as coffee significantly enhances the chocolate notes.
Yes, this recipe can be successfully doubled to create a two-layer chocolate cake. You will need to double all the ingredients and use two separate 6-inch cake pans. The baking time should remain roughly the same for each layer, but keep an eye on your cakes, as you might need a few extra minutes depending on how your oven bakes when full.
Explore More Small Cake Recipes
If you’ve fallen in love with the convenience and charm of small-batch baking, then you’ll be thrilled to discover a world of other miniature delights! I’ve curated a comprehensive 6-Inch Cake Recipes guide, featuring every delicious flavor I’ve perfected, all perfectly portioned for two or a small gathering. Why bake a giant cake when a small one delivers all the joy with less fuss?
Some of the most popular and beloved recipes from this collection include:
- Small Vanilla Cake recipe: A classic, comforting favorite.
- Small Birthday Cake: Perfect for celebrating any occasion, big or small.
- Small German Chocolate Cake: Indulgent layers in a petite package.
- Small Yellow Cake: Sunny and sweet, a delightful treat for two.
- Small Red Velvet Cake: Rich, vibrant, and utterly irresistible.
- Small Strawberry Cake: Bursting with fresh fruit flavor.
- Small Carrot Cake recipe: Spiced, moist, and wonderfully satisfying.
Small Chocolate Cake Recipe
4-6 servings
20 minutes
30 minutes
50 minutes
This homemade Small Chocolate Cake recipe is a moist and delicious one layer 6 inch chocolate cake for two, made entirely from scratch without cake mix.
Ingredients
- 1 ounce semisweet chocolate, finely chopped
- 1/2 cup all-purpose flour (measured using the spoon and level method)
- 1/4 cup unsweetened cocoa powder
- 1/4 teaspoon baking soda
- 1/4 teaspoon espresso powder
- 1/4 teaspoon table salt
- 1/4 cup (2 ounces or 4 tablespoons) unsalted butter, softened to room temperature
- 1/4 cup granulated sugar
- 1/4 cup packed light brown sugar (ensure it’s soft and moist)
- 1 large egg, at room temperature
- 1 teaspoon vanilla extract
- 1/4 cup buttermilk, at room temperature (or substitute with 1 teaspoon vinegar added to whole milk; do not use skim or low-fat milk)
- 2 tablespoons hot coffee (or substitute with hot water or warm beer for varying chocolate intensity)
Choose Your Delicious Frosting to Decorate:
- Strawberry Cream Cheese Frosting
- Chocolate Ganache
- Small Batch Chocolate Frosting
- Explore My Full List Of Small Batch Frosting Recipes
Instructions
- Preheat your oven to 350°F (175°C). Lightly grease one 6-inch round cake pan and then line the bottom with a circle of parchment paper. This helps prevent sticking and ensures easy release.
- Melt the chopped semisweet chocolate. You can do this by adding about an inch of water to a small saucepan, bringing it to a simmer, then turning off the heat. Place a heatproof bowl over the saucepan (creating a double boiler) and add the chopped chocolate, stirring until smooth. Remove from heat and let it cool for about 10 minutes. Alternatively, place the chocolate in a microwave-safe bowl and microwave for 30 seconds. Stir, then continue microwaving in 15-second intervals, stirring after each, until the chocolate is completely melted and smooth.
- In a medium bowl, sift together the all-purpose flour and unsweetened cocoa powder. Sifting prevents lumps and aerates the mixture. Then, stir in the baking soda, espresso powder, and salt, ensuring they are well combined.
- In a large mixing bowl (using a stand mixer with a paddle attachment or a hand mixer), beat the softened butter, granulated sugar, and brown sugar together on medium-high speed until the mixture is light, fluffy, and creamy, typically about 1 to 2 minutes. This step incorporates air for a tender crumb.
- Scrape down the sides of the bowl. Beat in the room temperature egg, vanilla extract, and the cooled melted chocolate until everything is fully incorporated and the mixture is smooth. Scrape the bowl again as needed.
- Reduce the mixer speed to the lowest setting. Add the dry flour mixture alternately with the combined buttermilk and hot coffee. Begin by adding one-third of the dry ingredients, then half of the liquid. Repeat this sequence, ending with the final one-third of the dry ingredients. Mix just until the flour is about 90% incorporated. Then, turn off the mixer and finish folding the remaining dry ingredients by hand with a rubber spatula to prevent overmixing, which can lead to a tough cake.
- Transfer the finished cake batter evenly into your prepared 6-inch cake pan. Bake for 25-30 minutes, or until a wooden toothpick inserted into the center of the cake comes out with a few moist crumbs attached (not wet batter). Allow the cake to cool in the pan for approximately 15 minutes before running a thin knife around the edge to loosen it. Invert the cake onto a wire cooling rack, then immediately flip it right-side-up to cool completely.
- Once the cake is completely cool, decorate it with your frosting of choice. Cover the frosted cake and store it at room temperature for up to 2 days (if using a buttercream frosting) or in the refrigerator for up to 1 week (for buttercream, cream cheese, and ganache). For the best flavor and texture, allow any refrigerated cake to sit at room temperature for 15-30 minutes before serving.
Notes
- Adore this perfectly portioned recipe? Discover my comprehensive list of 6-Inch Cake recipes, featuring delightful flavors like vanilla, strawberry, and many more, all ideal for two!
- No 6-inch cake pan on hand? No problem! You can easily adapt this recipe to make Small Batch Chocolate Cupcakes or a larger 8-inch One Layer Chocolate Cake.
Recommended Baking Products
As an Amazon Associate and member of other affiliate programs, I earn from qualifying purchases.
- 6 Inch Cake Pan
Did you make this recipe?
Let me know what you think! Rate the recipe above, leave a comment below, and/or share a photo on Instagram using #HITKrecipes
First published: January 29, 2018. Last updated: October 26, 2023.
