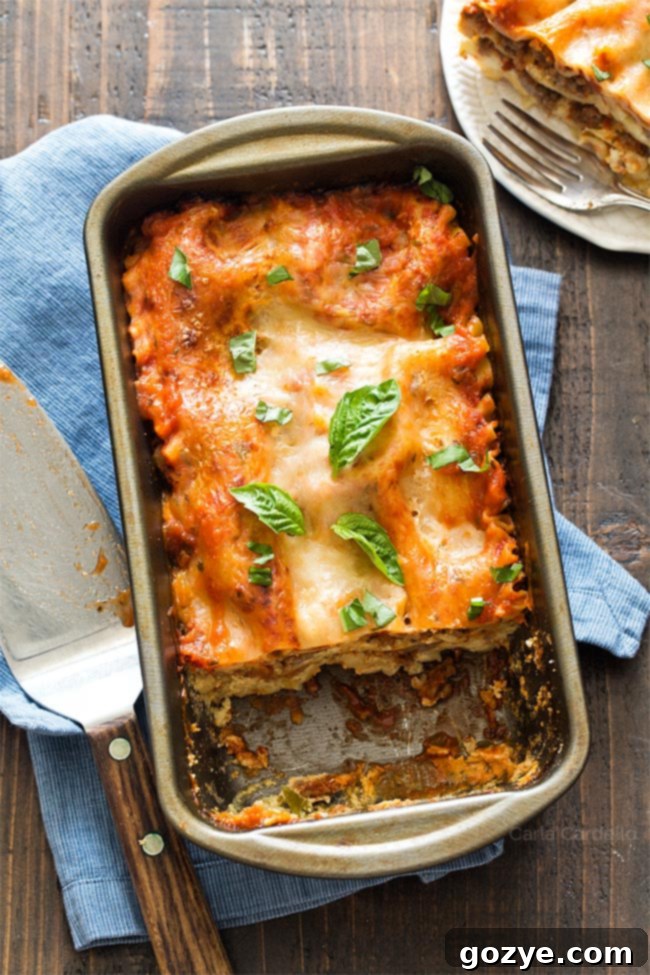
Delicious Lasagna For Two: The Perfect Small Batch Loaf Pan Recipe
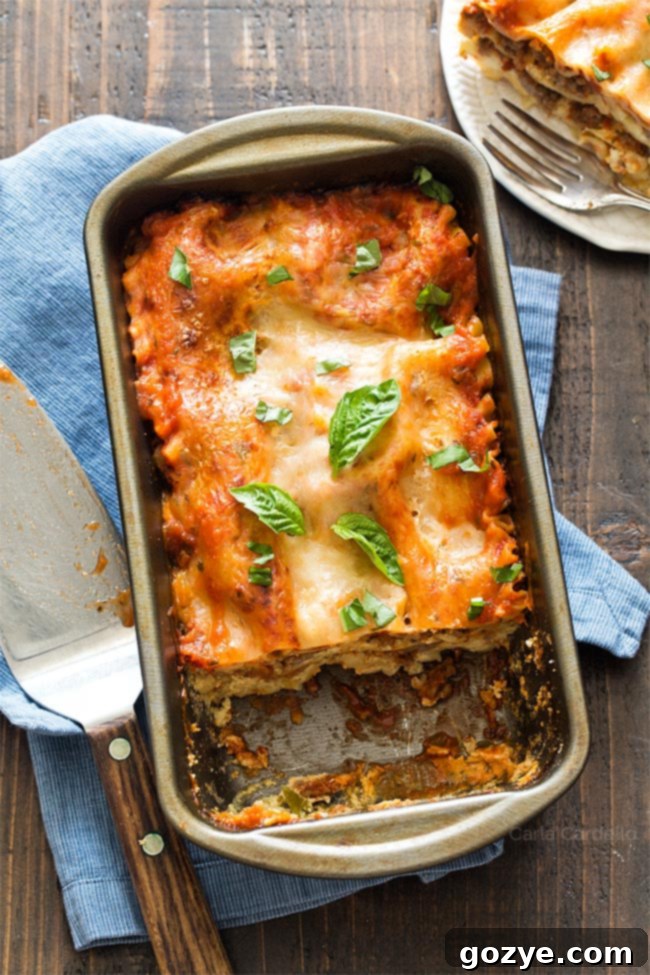
Craving the comforting layers of homemade lasagna but dreading a week of leftovers? Our Lasagna For Two recipe is your perfect solution! Baked conveniently in a loaf pan, this delightful small-batch pasta dish yields exactly four satisfying slices, making it ideal for couples, small families, or anyone who loves fresh-baked lasagna without the excess. Featuring a rich beef and creamy ricotta cheese filling, it’s a scaled-down classic that doesn’t compromise on flavor.
Back in 2015, I shared my popular Buffalo Chicken Lasagna for Two, a recipe inspired by a local cooking class where I first discovered the magic of making lasagna in a loaf pan. That smaller-scale approach was a revelation for managing portion sizes and avoiding the overwhelming leftovers often associated with traditional 13×9 lasagna pans.
For years, I’ve wanted to bring you my version of a classic beef and ricotta cheese lasagna, specially adapted for two. The only hesitation was capturing its deliciousness in photographs – a challenge I’m happy to report I’ve finally overcome! Six years later, I feel confident that these images beautifully showcase this hearty, scaled-down meal.
When I hinted at this recipe on Instagram, the excitement was palpable! It’s clear that many of you, like me, appreciate a homemade meal without the commitment of cooking for a crowd. Lasagna, while universally adored, is almost always prepared in those large, family-sized baking dishes. But for smaller households, that simply results in an abundance of food that often goes to waste or becomes a monotonous meal for days on end.
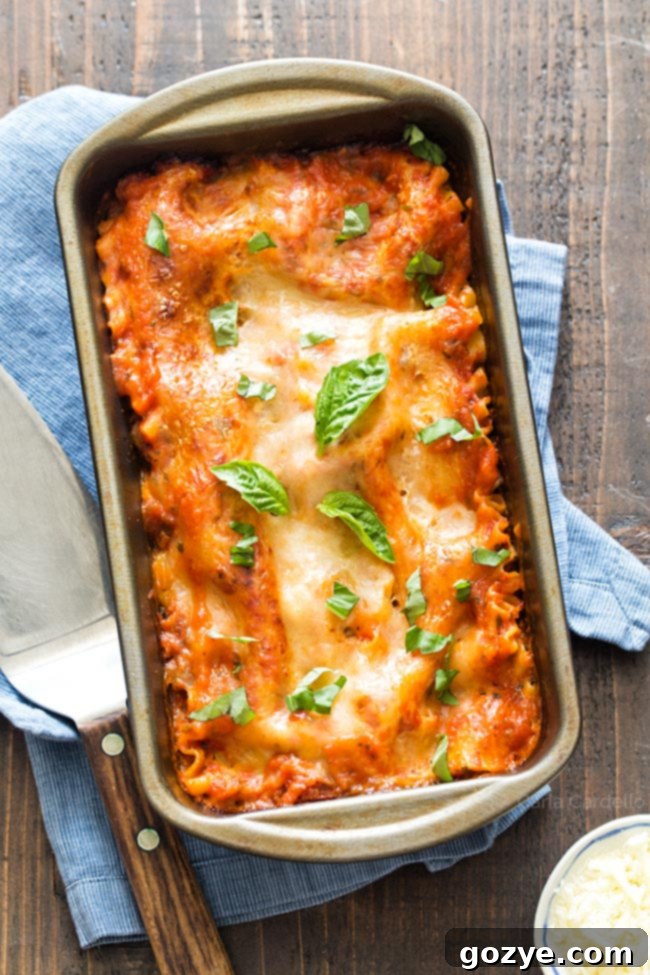
That’s precisely why I am absolutely thrilled to (finally) present my Beef Lasagna For Two recipe. It’s a truly classic beef lasagna, complete with a creamy ricotta cheese filling, perfectly portioned and baked to golden perfection in a standard bread loaf pan. It’s comforting, satisfying, and designed to minimize waste.
Despite its humble, non-fussy nature, lasagna is often chosen as a special meal. Many readers tell me it’s their go-to for an easy date night recipe, especially for romantic occasions like Valentine’s Day. There’s something inherently thoughtful about taking the time to prepare a homemade meal, and this small batch lasagna for two is the perfect way to show someone you care without spending all day in the kitchen.
If you’re pressed for time but still craving lasagna flavors, don’t miss my quick and easy alternatives: try my One-Pan Skillet Lasagna or the incredibly simple One Pot Lasagna Soup for Two.
To complete your cozy meal, serve your homemade lasagna with a refreshing side of Green Onion Salad and some warm, fluffy Small Batch Dinner Rolls. It’s a pairing that makes any evening feel special.
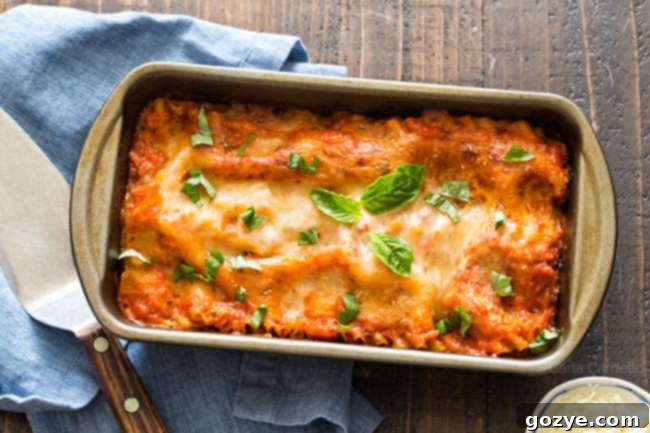
Choosing the Right Pan: What Size Loaf Pan Do I Need for Lasagna For Two?
For this small batch lasagna recipe, a standard 9×5 inch loaf pan is absolutely perfect. This size is specifically chosen because it yields exactly four generous slices of lasagna, making it ideal for two people to enjoy two slices each, or for one person to have two meals. It truly embodies the “lasagna for two” concept by providing just the right amount without overwhelming you with too many servings.
The beauty of this portion size is its flexibility. If both diners have hearty appetites and each enjoy two slices, you’ll find there are no leftovers – a dream come true for those who prefer to cook fresh every time. However, if you opt for one slice each, or if you’re cooking for yourself, you’ll have a delightful extra slice or two perfectly portioned for lunch the next day. This adaptability ensures maximum enjoyment and minimal food waste, aligning perfectly with modern cooking needs for smaller households.
No-Boil vs. Regular Lasagna Noodles: Understanding the Difference
When preparing lasagna, one of the first decisions you’ll face is which type of noodle to use: no-boil or traditional. The distinction, as the names suggest, primarily revolves around pre-cooking. No-boil noodles are specifically designed for convenience; you can layer them directly into your lasagna dish without any prior boiling. They are engineered to absorb moisture from the sauce during baking, softening and cooking through beautifully.
Traditional lasagna noodles, on the other hand, typically require you to boil them to an al dente stage before assembly. This prevents them from being too firm or undercooked in the final baked dish. While both options result in delicious lasagna, I personally favor no-boil noodles for their incredible time-saving benefits. Skipping the boiling step streamlines the preparation process significantly, allowing you to get your lasagna into the oven faster.
There’s truly no right or wrong choice here; it boils down to personal preference and how much time you have. The most important thing is simply to prepare whichever noodle type you choose properly, ensuring they are adequately hydrated and cooked through for the best texture in your finished small batch lasagna.
Mastering Lasagna For Two: A Step-by-Step Guide to Perfection
Crafting this small-batch lasagna is a rewarding process, ensuring every layer contributes to a perfect bite. Here’s how to bring your loaf pan lasagna to life:
Preparing Your Noodles (if using traditional)
If you opt for traditional lasagna noodles, your first step is to cook them. Bring a large pot of salted water to a rolling boil. Add your lasagna noodles, ensuring they have enough space to move freely. Cook them until they are al dente – that means they should be firm to the bite, but not hard. Avoid overcooking, as they will continue to cook in the oven, and you want them to maintain some structure. Drain them thoroughly and set aside.
Building the Flavorful Meat Sauce
Next, it’s time to create the heart of your lasagna: the meat sauce. In a large skillet, brown your ground meat. For this classic recipe, I use all ground beef, which provides a rich, hearty foundation. However, many enjoy a blend of ground beef and Italian sausage for added depth and spice. Feel free to use your preferred combination, ensuring you use a total of 1/2 pound of meat. As the meat browns, add your diced onion and carrot, allowing them to soften and release their sweetness. Once the meat is cooked through and no longer pink, drain any excess grease to prevent a greasy lasagna.
Stir in the minced garlic and cook for just another minute until fragrant. Then, incorporate your spaghetti sauce. To save time and effort, I often use a high-quality jarred sauce, which is perfectly acceptable and convenient. Of course, if you have a cherished homemade spaghetti sauce recipe, this is the perfect opportunity to use it! Bring the sauce to a gentle simmer, allowing the flavors to meld, then remove it from the heat, reserving some for layering.
Crafting the Creamy Ricotta Cheese Filling
While your meat sauce is simmering, prepare the luscious ricotta cheese filling. In a separate bowl, combine the full-fat ricotta cheese, an egg, shredded mozzarella cheese, grated Parmesan cheese, fresh chopped basil (or a dollop of homemade basil pesto for an extra flavor boost), and a pinch of salt. Whisk everything together until it’s smooth and well combined. While ricotta cheese is traditional and recommended for its creamy texture, if you prefer, you can substitute it with cottage cheese, just be sure to drain any excess liquid thoroughly to prevent a watery lasagna.
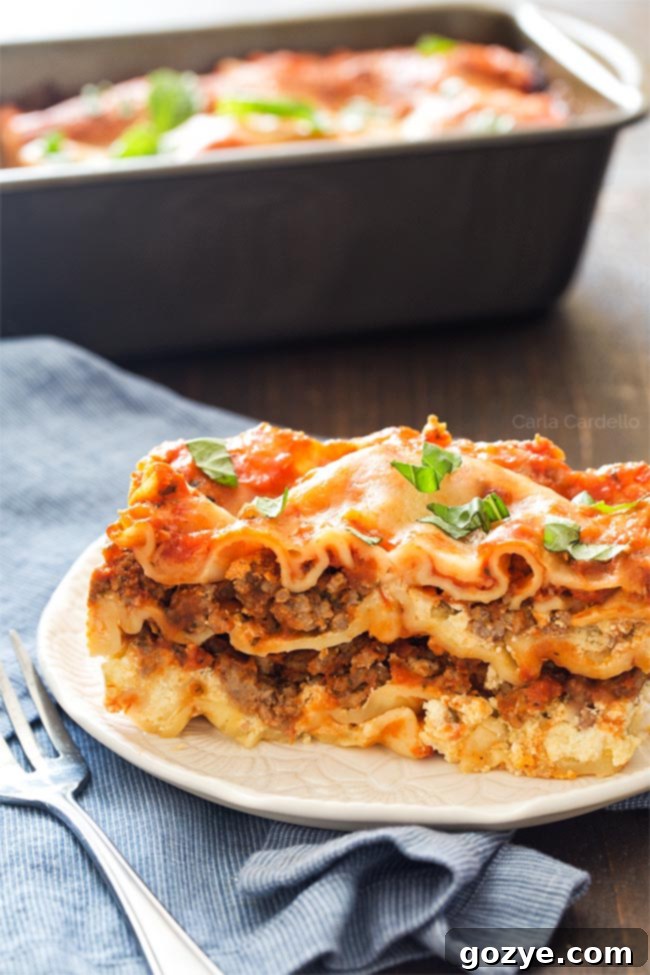
The Egg in Ricotta: A Binding Secret for Perfect Lasagna
When I first ventured into the world of homemade lasagna, I often omitted the egg from my ricotta filling, simply because I wasn’t aware of its importance. Over time, as my cooking skills evolved and I delved deeper into recipe techniques, I discovered a crucial secret: adding an egg to the ricotta cheese mixture is a game-changer.
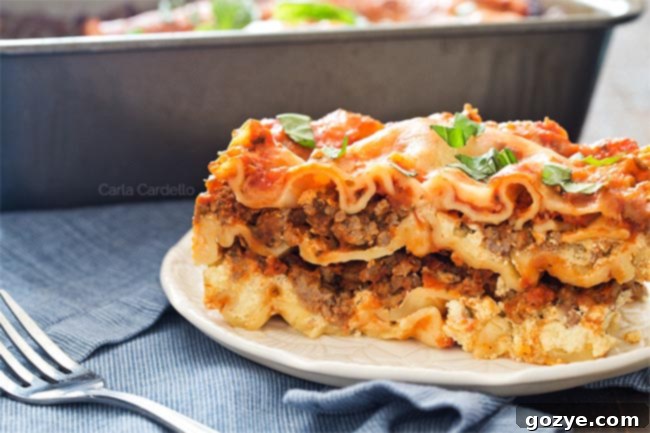
The primary role of the egg is to act as a binder. Without it, the creamy ricotta filling can become loose and ooze out from between the pasta layers when you slice into your baked lasagna. The egg helps to set the cheese, ensuring that each slice holds its structural integrity beautifully. Beyond its binding properties, the egg yolk also contributes an extra layer of richness and creaminess, enhancing the overall texture and taste of the filling.
For these reasons, I wholeheartedly recommend including an egg in your lasagna’s ricotta filling. However, if you have dietary restrictions or simply prefer an egg-free version, you can certainly leave it out. Just be mindful that the filling might be slightly softer and less cohesive when serving.
Assembling Your Lasagna For Two in a Loaf Pan: A Layering Masterclass
Once your rich meat sauce and creamy ricotta filling are ready, it’s time for the artistic part: assembling your delicious loaf pan lasagna. This scaled-down approach requires a little finesse, especially with the noodles, but the results are incredibly rewarding.
The Foundation: Preventing Sticking and Drying
Begin by spreading about 1/4 cup of your spaghetti sauce evenly across the bottom of your 9×5 inch loaf pan. This crucial first layer serves two important purposes: it acts as a non-stick barrier, preventing the noodles from adhering to the pan, and it provides essential moisture, ensuring the bottom noodles cook perfectly and don’t dry out during baking.
Mastering the Noodle Layer
Now comes the slightly tricky but manageable part: fitting the lasagna noodles. The exact length and width of lasagna noodles can vary between brands, even for no-boil varieties. The no-boil noodles I typically use are similar in dimension to traditional ones, which means they might be a touch too long for a standard loaf pan. Don’t hesitate to trim one end of the noodle with a knife to achieve a perfect fit.
Due to the narrower width of a loaf pan compared to a traditional lasagna dish, you’ll likely need to use two noodles per layer, overlapping them slightly to cover the base completely. However, some no-boil lasagna noodles are designed to be shorter and wider, which might allow you to use just one noodle per layer. Always check your specific noodle dimensions and adjust accordingly to ensure full coverage.
Building the Layers: Ricotta, Meat, and More Noodles
After placing your first layer of noodles, generously spread half of your prepared ricotta cheese filling over them. Ensure it’s an even layer. Then, top the ricotta with half of the rich meat and sauce mixture, spreading it out to the edges. It’s vital that the noodles are fully covered by the fillings and sauce; this ensures they absorb enough moisture to cook through properly and become tender during baking. Finish this layer with another 1-2 noodles, carefully placed.
Repeat this layering sequence one more time, using up the remaining ricotta cheese mixture and meat sauce. This usually means you’ll have two full layers of delicious fillings.
The Grand Finale: Top Layer and Cheese
Once you’ve completed the filling layers, crown your lasagna with the final 1-2 noodles. Cover these noodles with the remaining spaghetti sauce, ensuring it’s spread evenly to the edges. Finally, sprinkle generously with the remaining mozzarella and Parmesan cheeses. This top layer of cheese will melt into a golden, bubbly crust during baking, adding an irresistible finish. Cover your loaf pan tightly with aluminum foil and it’s ready for the oven.
Baking to Perfection: How Long Do You Cook Lasagna in a Loaf Pan?
The baking time for your small batch lasagna in a loaf pan will depend significantly on the type of lasagna noodles you’ve chosen – traditional or no-boil.
If you’re using **no-boil lasagna noodles**, which require more time to soften and cook within the sauce, you’ll bake your lasagna at 375°F (190°C). Keep the loaf pan covered with foil for the initial 30 minutes. This traps steam and moisture, allowing the noodles to absorb the sauce and become tender. After 30 minutes, remove the foil and continue baking for another 15 minutes, or until the top is beautifully browned and bubbly, and the lasagna is heated through.
For those using **traditional lasagna noodles**, which have already been par-cooked, the initial covered baking time will be shorter. Bake at 375°F (190°C) for approximately 20 minutes with the foil on. At this point, the noodles should be fully tender (you can test with a toothpick or small knife). Remove the foil and bake for an additional 10-15 minutes to achieve that desirable golden-brown, crispy cheese topping.
Regardless of the noodle type, always allow your lasagna to rest for about 10-15 minutes after removing it from the oven before slicing and serving. This resting period allows the layers to set, preventing a messy collapse and making for much cleaner, more appealing slices.
Meal Prep Made Easy: Can I Assemble Lasagna For Two and Cook Later?
Making homemade lasagna, even a small batch like our Lasagna For Two, involves several steps: preparing the meat sauce, mixing the ricotta filling, and then carefully assembling the layers before the final bake. This can be time-consuming, especially if you’re making homemade sauce from scratch.
The good news is that lasagna is an excellent candidate for advance preparation! You can assemble your lasagna entirely ahead of time, cover it tightly, and refrigerate it for up to 3 days before baking. This makes it a fantastic option for busy weekdays or when entertaining guests – simply pop it in the oven when you’re ready.
**Important Food Safety Tip**: Before refrigerating your assembled lasagna, ensure that all components (especially the meat sauce and any homemade sauce) have cooled completely to room temperature. Placing hot food directly into the refrigerator can raise the internal temperature of your fridge, potentially compromising the safety of other foods. More importantly, it prolongs the time it takes for the lasagna itself to cool down to a safe temperature range, increasing the risk of bacterial growth. This principle is similar to why you should never leave perishable foods out on the counter for more than two hours.
Freezing Lasagna: Extending the Life of Your Small Batch Meal
Whether you want to prep a meal for a future busy day or save a few leftover slices, lasagna freezes exceptionally well. Here’s how to do it effectively:
How To Freeze Lasagna Before Baking
If you’re making your Lasagna For Two specifically for freezing raw, assemble it as directed in the recipe. Just like with refrigeration, it’s crucial that any warm fillings (like the meat sauce) are fully cooled to room temperature before freezing. Freezing warm lasagna can lead to several issues: it might partially thaw other frozen items in your freezer, and it significantly increases the likelihood of ice crystal formation, which can affect the texture of the lasagna upon reheating.
Once cooled, wrap the entire loaf pan snugly with plastic wrap, pressing out as much air as possible to prevent freezer burn. Then, wrap it again securely with aluminum foil. This double layer of protection is key. Label and date your package, then freeze for up to 3 months. This is perfect for a future quick meal!
How To Freeze Lasagna After Baking (Leftovers)
Even with a small batch recipe, you might find yourself with a delicious slice or two leftover. Don’t let them go to waste! To freeze cooked lasagna, first ensure the remaining lasagna is completely cool. Then, cut it into individual serving slices. This makes future reheating much more convenient.
Wrap each individual slice tightly with plastic wrap, followed by a layer of aluminum foil. For an extra layer of protection against freezer burn, place the wrapped slices into a freezer-safe plastic bag or an airtight container. Freeze for up to 3 months. This method is fantastic for having quick, single-serving meals ready whenever a lasagna craving strikes.
Reheating Frozen Lasagna: Enjoying Your Meal Prep
Reheating frozen lasagna properly ensures it tastes just as good as when it was first made. Here’s how:
Reheating a Full Frozen Loaf Pan
To reheat an entire frozen loaf pan of lasagna, transfer it from the freezer to the refrigerator and let it thaw overnight. This slow thawing process helps maintain the texture. Once thawed, allow it to sit at room temperature for about 30 minutes before baking. Remove the plastic wrap and old foil, then cover the pan with a fresh piece of aluminum foil.
Bake the full pan at 375°F (190°C) until it’s thoroughly heated through and bubbling, which usually takes about 30-45 minutes. Then, remove the foil and continue baking for another 10-15 minutes, or until the top cheese layer is golden brown and bubbly.
Reheating Individual Frozen Slices
For individual frozen slices, you might only need a few hours to thaw them in the refrigerator, or you can even bake them from frozen (though the baking time will be longer). When ready to reheat, place the thawed or frozen slices in a small baking dish (you can even use the original loaf pan if it’s empty, or an 8×8 inch pan). Remove the plastic wrap and foil, then cover with a new piece of foil.
Bake at 375°F (190°C) until hot throughout. For thawed slices, this could be 20-30 minutes; for frozen slices, it might take closer to 40-50 minutes. Finally, remove the foil and bake for an additional 10 minutes or until the cheese on top is nicely browned and crispy.
Always ensure the internal temperature of the lasagna reaches 165°F (74°C) for food safety. With these tips, you can enjoy your delicious Lasagna For Two whenever you please, whether freshly baked or reheated from the freezer!
Lasagna For Two Recipe (Small Batch Loaf Pan)
4 slices (2 servings)
30 minutes
55 minutes
1 hour 25 minutes
This Lasagna For Two, baked perfectly in a loaf pan, is a small-batch baked pasta dish that yields 4 delicious slices. Featuring a rich beef and creamy ricotta cheese filling, it’s ideal for a cozy dinner without the leftovers.
Ingredients for Loaf Pan Lasagna
- 3-6 uncooked lasagna noodles (preferably no-boil, adjust quantity based on noodle width/length)
- 1 teaspoon vegetable oil
- 1/2 pound lean ground beef
- 1/2 cup finely diced white or yellow onion
- 1 medium carrot, finely diced
- 1 garlic clove, minced
- 2 1/4 cups your favorite quality spaghetti sauce (jarred or homemade)
- 1 cup full-fat ricotta cheese (or drained cottage cheese)
- 1 large egg, at room temperature
- 1 cup shredded mozzarella cheese, divided
- 1/4 cup + 2 tablespoons shredded Parmesan cheese, divided
- 2 tablespoons fresh chopped basil, plus extra for garnish
- 1/2 teaspoon salt (or to taste)
Step-by-Step Instructions
- Preheat your oven to 375°F (190°C). Prepare a 9×5 inch loaf pan by lightly greasing it.
- Noodle Preparation: If using no-boil lasagna noodles, no pre-cooking is needed. If using traditional noodles, bring a large pot of salted water to a boil. Add the noodles and cook until al dente (about 5-8 minutes). Do not overcook. Drain and cool thoroughly.
- Prepare Meat Sauce: In a large skillet, heat the vegetable oil over medium-high heat. Add the ground beef, diced onion, diced carrot, and a generous pinch of salt. Cook, breaking up the meat, until the beef is browned and no longer pink (5-8 minutes). Drain off any excess grease.
- Stir in the minced garlic and cook for 1 minute until fragrant. Taste and adjust seasoning if needed. Stir in 1 1/2 cups of your chosen spaghetti sauce and bring to a gentle simmer. Remove the skillet from the heat.
- Prepare Ricotta Filling: Meanwhile, in a medium bowl, whisk together the ricotta cheese, egg, 1/2 cup of the shredded mozzarella, 2 tablespoons of the shredded Parmesan, fresh basil, and 1/2 teaspoon of salt until well combined and smooth.
- Assemble Lasagna: Spread 1/4 cup of the spaghetti sauce (from the remaining sauce, not the meat sauce) thinly onto the bottom of the prepared loaf pan.
- Place 1-2 lasagna noodles over the sauce to cover the bottom of the pan. Depending on your noodle brand, you may need to trim the ends or overlap two noodles slightly to fit the loaf pan’s dimensions.
- Evenly spread half of the ricotta cheese mixture on top of the noodles. Then, spoon half of the meat sauce mixture over the ricotta. Top with another layer of 1-2 noodles.
- Repeat the layering once more: spread the remaining ricotta mixture, then the remaining meat sauce, and finally, top with the last 1-2 noodles.
- Cover the top noodle layer with the remaining 1/2 cup of plain spaghetti sauce. Sprinkle evenly with the remaining 1/2 cup mozzarella cheese and 1/4 cup Parmesan cheeses.
- Bake: Cover the loaf pan tightly with aluminum foil.
- If using **traditional noodles**, bake for 20 minutes, or until the noodles are tender (test with a toothpick).
- If using **no-boil noodles**, bake for 30 minutes.
- Remove the foil and bake for an additional 15 minutes (or 10-15 minutes for traditional noodles) or until the top is golden brown and bubbly.
- Let the lasagna rest for about 15 minutes before carefully cutting and serving. Garnish with fresh basil, if desired, for an extra touch of flavor and color.
Recommended Products for Small Batch Lasagna
As an Amazon Associate and member of other affiliate programs, I earn from qualifying purchases.
- 9×5 Loaf Pan
Did you make this Lasagna for Two?
I’d love to hear how it turned out! Please rate the recipe above, leave a comment below sharing your experience, and/or share a photo of your delicious loaf pan lasagna on Instagram using the hashtag #HITKrecipes. Your feedback helps me create more recipes you’ll love!
