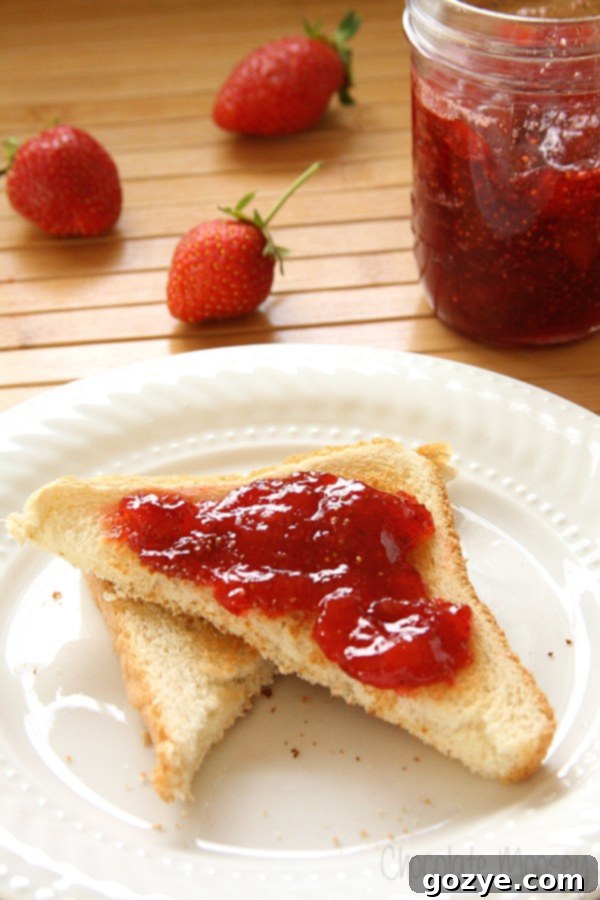
Homemade Small Batch Strawberry Jam (No Pectin): Easy 3-Ingredient Recipe for Beginners
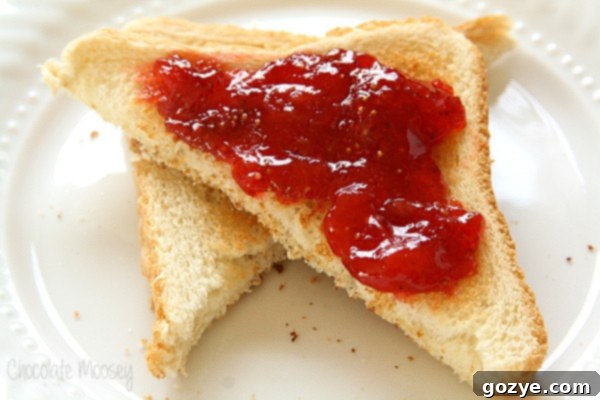
Welcome to the wonderful world of jam making! If you’re new to preserving fruits, this 3-ingredient homemade Small Batch Strawberry Jam without pectin is the absolute perfect starting point. Designed specifically for beginners, this recipe yields just one delightful 6-ounce jar, making the process incredibly simple and unintimidating. Imagine spreading this luscious, bright red jam on your morning toast, stirring it into creamy yogurt, or swirling it through a decadent cheesecake. It’s pure berry bliss, and it’s easier to achieve than you might think!
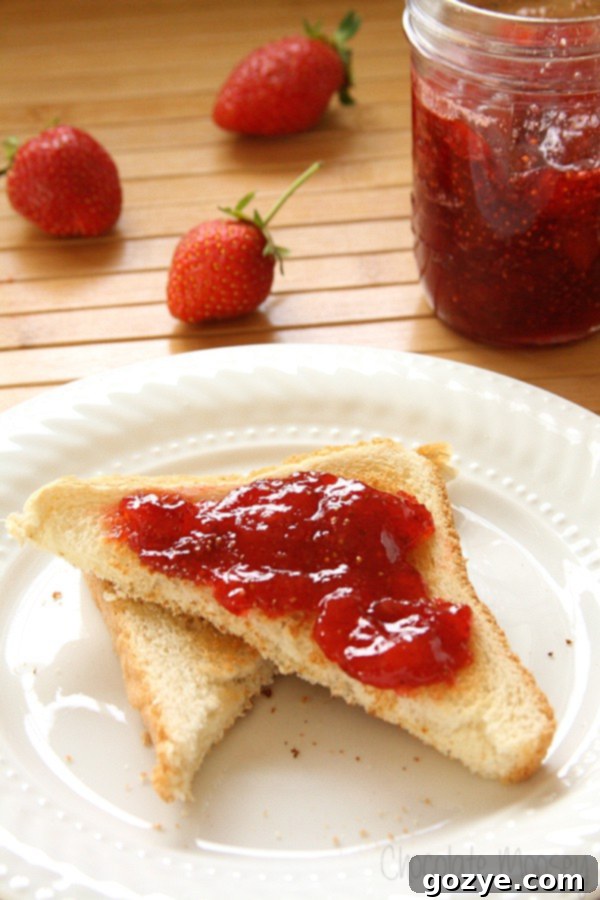
For many, especially in regions like Pennsylvania, summer signals one glorious thing – the peak of strawberry season! There’s nothing quite like heading to a local farm, basket in hand, and picking your own fresh, sun-ripened strawberries. It’s a tradition that brings immense joy and a bounty of beautiful berries, often amounting to five pounds or more. And what better way to celebrate this seasonal harvest than by transforming those juicy treasures into a delectable homemade jam?
Every year, I look forward to using my freshly picked strawberries in a variety of beloved strawberry recipes, and at the top of that list is always this incredible Small Batch Strawberry Jam. I’ve been perfecting this easy, no pectin strawberry jam for several years, and now I’m thrilled to share its simplicity and deliciousness with you.
This particular strawberry jam without pectin recipe is truly ideal for those embarking on their first jam-making or canning adventure. The process is straightforward and manageable, ensuring you won’t feel overwhelmed with countless jars to sterilize, fill, and store. All it takes is cooking three simple ingredients in a skillet for approximately 10 minutes. Plus, I’ll even reveal a fantastic (and literally cool!) trick that helps you know precisely when your homemade strawberry jam has reached its perfect set.
Many traditional no pectin strawberry jam recipes tend to produce a large quantity of jars. However, if you live in a smaller household, like mine, you might wonder what to do with all that jam – where to store it, and who to give it all away to? This is precisely why my small batch strawberry jam recipe is a game-changer. It’s designed to yield just one modest 6-ounce jar. That’s it! This perfect amount is enough to grace your breakfast table all week long, or to be incorporated into other delightful creations such as my Strawberry Swirl Cheesecake or Strawberry Cream Cheese Frosting.
Before we dive deeper, I want to clarify an important point: while I will discuss the process of canning this jam, it is absolutely not mandatory. You can simply store your homemade small batch strawberry jam in the refrigerator for up to two weeks, enjoying its fresh taste without any extra steps. The canning instructions are provided for those who wish to preserve a jar or two to savor later, perhaps during the colder winter months when the memory of summer’s fresh produce feels like a distant dream.
Whether you choose to enjoy your strawberry jam without pectin immediately while berries are at their peak ripeness, or you save it for a taste of summer in the depths of winter, you are only three ingredients away from experiencing pure, unadulterated berry bliss. Let’s get started on this incredibly rewarding culinary journey!
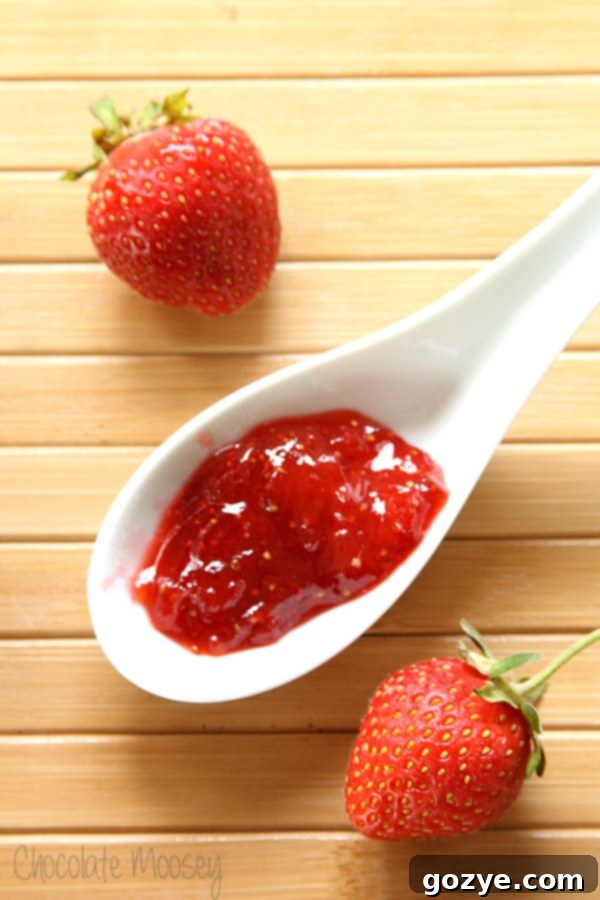
Essential Ingredients for Your Strawberry Jam (No Pectin)
Creating your exquisite no pectin strawberry jam requires a minimal, yet powerful, trio of ingredients. Each plays a vital role in achieving that perfect balance of flavor, texture, and preservation:
- Strawberries: Naturally, these are the undisputed stars of our jam! For the best flavor and natural pectin content, aim for fresh, ripe strawberries. A mix of fully ripe and a few slightly underripe berries can be particularly beneficial for setting the jam.
- Sugar: Beyond its role as a sweetener, sugar is absolutely crucial in jam making as a powerful preservative. As the strawberries cook, they release their natural water content. The sugar then bonds with this water, creating an environment that inhibits the growth of undesirable microorganisms, ensuring your jam stays fresh and safe. It also contributes significantly to the jam’s texture and overall body.
- Lemon Juice: This acidic ingredient is a true unsung hero in pectin-free jams. Lemon juice not only aids significantly in the gelling process by activating the natural pectin present in the strawberries but also acts as a vital flavor balancer. Its bright acidity cuts through the sweetness, enhancing the natural fruit flavors and preventing the jam from tasting overly cloying.
Understanding Pectin: Why You Can Skip It Here
As you delve into the world of jam and jelly making, you’ll frequently encounter an ingredient called pectin. Pectin is essentially a naturally occurring carbohydrate (a soluble fiber) found in varying amounts in fruits. In commercial or many traditional jam recipes, it’s often added as a thickening agent to help jams and jellies achieve their desired set and firm texture after cooling.
You can typically purchase powdered or liquid pectin in the canning section of most grocery stores. While it’s a useful ingredient, it’s often specifically bought for jam making, meaning it might sit unused for long periods if you only make jam occasionally. I, for one, prefer not to buy ingredients I’d only use a few times a year if I can avoid it.
The excellent news for us is that strawberries contain natural pectin! While not as high in pectin as some other fruits like apples or citrus, strawberries have enough, especially when they are slightly underripe and show a hint of green around their stems. These slightly less ripe berries have a higher concentration of pectin, which is invaluable for a no-pectin recipe.
For the best possible set and texture in your small batch jam, try to include a few not-quite-ripe berries – about 2-3 larger ones should be perfect. If you don’t have any underripe berries on hand, don’t worry! You can still successfully cook your jam until it reaches a thickened consistency. It might result in a slightly softer set, but it will undoubtedly still be wonderfully delicious and perfectly spreadable for your toast, pastries, or whatever culinary creation you choose.
Why is Lemon Juice So Important in Strawberry Jam?
When it comes to preserving foods like jam, there’s a fascinating bit of science at play, primarily focused on preventing the growth of harmful bacteria and ensuring a safe, stable product. This is why strict adherence to ingredient proportions, especially for recipes intended for canning, is so important.
Even if your strawberries are incredibly sweet, the sugar content in this recipe is non-negotiable for proper thickening and, more importantly, for its role as a preservative. Sugar works by binding with the water released from the cooking strawberries, thereby reducing the “free water” available for microorganisms to thrive. This creates an inhospitable environment for bacterial growth, extending the jam’s shelf life.
The acid from the lemon juice is equally critical. It not only assists significantly with the gelling process by helping to activate the natural pectin in the strawberries but also plays a crucial role in balancing the overall flavor profile. Its bright, tangy notes cut through the richness and sweetness of the berries and sugar, ensuring the jam isn’t overly saccharine and truly allows the vibrant strawberry flavor to shine through.
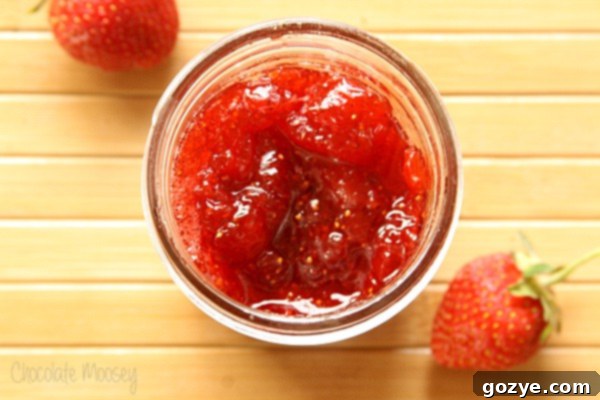
Step-by-Step: How To Make Strawberry Jam Without Pectin
Making this small batch strawberry jam is surprisingly simple and comes together quickly. Follow these steps for a perfect result:
- Prepare for Testing: Before you even start cooking, grab a small, ceramic plate and place it in your freezer. This chilled plate is essential for the “frozen plate test,” a brilliant method we’ll use later to determine if your jam has set properly (more on this clever trick shortly!).
- Combine Ingredients: In a large 12-inch skillet, combine your prepared strawberries, granulated sugar, and fresh lemon juice. Using a wide skillet is key here, as it provides a larger surface area for evaporation, helping the jam to thicken more efficiently and giving you ample room to stir without splashing.
- Cook to a Boil: Place the skillet over medium-high heat. Bring the mixture to a rolling boil, stirring frequently to prevent sticking and ensure the sugar dissolves evenly. A “rolling boil” means the bubbles are constant and don’t stop when you stir.
- Thicken the Jam: Once it reaches a rolling boil, continue to cook the mixture, stirring often, for about 8-10 minutes. During this time, the mixture will visibly thicken as the water evaporates and the natural pectin and sugar work their magic. Keep a close eye on it, as the consistency can change rapidly.
Mastering the “Frozen Plate Test” to Know When Your Jam Is Done
One of the trickiest aspects of jam making, especially for beginners or when making jam without added pectin, is knowing exactly when it’s achieved the perfect consistency. You can’t truly tell until it’s completely cooled, and by then, it’s often too late to adjust if it’s too runny. This is where our “frozen plate technique” comes in handy – it’s a brilliant, straightforward method that guarantees success.
Because the plate is frozen, it instantly cools down a small sample of your hot jam, allowing you to quickly gauge its final thickness and decide if it needs more cooking time. Here’s how to execute it perfectly:
- Retrieve Your Plate: When your jam appears thick enough in the skillet (after the initial 8-10 minutes of boiling), retrieve the small plate you placed in the freezer earlier.
- Sample the Jam: Carefully spoon a very small amount of the hot jam onto the center of the cold plate. Let it sit for about 30 seconds to allow it to cool down rapidly.
- Test for Set: Now, gently tilt the plate. Observe how the jam moves.
- If the jam slides too quickly or runs like syrup: It needs more time. Return the skillet to the heat and cook for an additional 1-2 minutes, then repeat the frozen plate test.
- If it slides slowly, forms wrinkles, or has a slightly gelled consistency: Congratulations, your jam is done! It has reached its ideal set.
- If it doesn’t move at all or is extremely stiff: You may have slightly overcooked it. While still edible, it might be thicker than desired. This is why checking frequently is important.
When your jam needs to cook longer, always proceed with caution. Even just one minute too many can be the difference between perfectly set jam and an overdone, overly stiff result. It’s always better to check the consistency frequently, perhaps every minute or two, rather than risk overcooking. Patience and observation are key to achieving that perfect spreadable texture!
Optional: How To Can Strawberry Jam Without Pectin for Longer Storage
For many, the idea of canning can seem a bit daunting, conjuring images of complex equipment and strict rules. I remember my first time learning how to can jam, and it felt like stepping into a science lab! Concerns about cross-contamination, jars not sealing properly, and the potential for food-borne illnesses are legitimate. However, please don’t let these worries deter you! The principles of canning are not so different from ensuring food safety in everyday cooking, like preventing cross-contamination between raw meat and cooked foods or clean surfaces.
While there’s plenty of specialized canning equipment available for those who process large quantities, you truly don’t need to invest in an extensive setup for a single jar. For this small batch recipe, a large pot of boiling water and a pair of kitchen tongs (or a basic canning jar lifter, if you have one) are often all you need. Since I don’t can very often, I can’t justify buying dedicated, bulky equipment – nor do I have the storage space for it!
The most critical aspect of canning is sterilization and proper sealing. You must sterilize anything that will come into contact with the inside of your canning jar and its contents, including the jar itself, the lid, tongs, and any funnel you use. This step is crucial for eliminating bacteria and creating a vacuum seal that preserves the jam safely.
If, at any point during the canning process, you feel uncertain or doubt that your jar has sealed correctly, it’s always best to err on the side of caution. Simply refrigerate your finished jam instead of storing it at room temperature. Safety always comes first!
Do I Really Have to Can My Small Batch Strawberry Jam?
Absolutely not! Since this particular small batch strawberry jam recipe makes only one convenient 6-ounce jar, canning is genuinely an optional step. It’s only necessary if you intend to store the jam for an extended period, perhaps for several months, or if you want to give it as a gift without the recipient needing to refrigerate it immediately.
If you have no desire to delve into the canning process, simply prepare the jam as directed. Once it’s cooked and cooled slightly, transfer it to a clean, heat-proof container (this could be a regular glass jar, a plastic container, or even the canning jar itself, just without going through the boiling water bath). Allow it to cool completely to room temperature before placing it in the refrigerator.
Once opened, or if stored only in the refrigerator without canning, your homemade strawberry jam (no pectin) will maintain its freshness and quality for approximately two weeks. After this period, you’ll need to use your best judgment. Always check for any signs of spoilage, such as mold, off-smell, or unusual discoloration. If anything seems “off,” it’s always safest to discard it.
Tips for Sourcing Canning Jars (and Lids!)
If you do decide to explore canning, even for a single jar, you might be tempted to rush out and buy brand new jars. However, I have a fantastic money-saving tip: first, check your local flea markets, antique shops, and thrift stores! You can often find perfectly good canning jars for a fraction of the retail price, sometimes as low as 25 cents to a dollar each. It’s a sustainable and budget-friendly approach.
Glass canning jars themselves are designed to be reused indefinitely, as long as they remain free of cracks, chips, or damage. Inspect them carefully before use. However, the lids are a different story. The flat metal lids with sealing compound are typically designed for single-use to ensure a proper, airtight seal. Therefore, if you purchase used jars, I highly recommend discarding all the old lids and buying new ones. The metal bands (rings) that hold the lids in place can be reused, but the flat sealing lids are crucial for food safety in canning.
Beyond Toast: Creative Ways to Enjoy Your Strawberry Jam Without Pectin
While the most obvious and incredibly satisfying way to enjoy your homemade strawberry jam without pectin is slathered generously on warm toast with a dollop of butter, this versatile preserve offers so much more! Don’t limit yourself – unleash your culinary creativity with these delightful serving suggestions:
- Dessert Swirls: Elevate your desserts by swirling it into Small Batch Cheesecake Bars or folding it into Strawberry Cheesecake Ice Cream for bursts of fruity flavor.
- Savory Pairings: For an unexpected twist, serve it as a topping for savory dishes like Cranberry Baked Brie – the sweetness of the jam beautifully complements the rich cheese.
- Baked Goods Fillings: Use it as a sweet and tangy filling for homemade pastries such as Strawberry Turnovers or as the vibrant center for light and flaky Puff Pastry Danish.
- Layer Cakes & Shortcakes: Layer it generously in a classic Chocolate Strawberry Shortcake for an extra dimension of fruitiness.
- Mini Cheesecakes & Parfaits: Go patriotic with a red, white, and blue theme by layering it with No Bake Mini Cheesecakes or creating stunning Red White And Blue Cheesecake Parfaits.
- Creative Cookies: Get inspired by Peanut Butter and Jelly Cookies by The Food Charlatan, using your homemade strawberry jam for an extra special touch.
- Yogurt & Oatmeal Topping: A simple dollop stirred into plain yogurt or hot oatmeal transforms a basic breakfast into a gourmet experience.
- Cocktail Mixer: A teaspoon or two can add a fantastic fruity depth to cocktails or mocktails.
Explore More Small Batch Jam Recipes!
Once you’ve mastered this delightful strawberry jam, you might find yourself eager to transform other seasonal fruits into delicious preserves. Harness the bounty of summer with these other easy small batch jam recipes, all crafted without added pectin:
- Peach Jam without pectin: Sweet, fragrant, and bursting with summery peach flavor.
- Raspberry Jam without pectin: A vibrant, tangy, and deeply flavored classic.
- Raspberry Jalapeno Jam: For those who love a sweet and spicy kick!
- Sour Cherry Jam: A wonderfully tart and rich preserve perfect for pies and pastries.
- Blueberry Jam without pectin: Earthy, sweet, and incredibly versatile.

Small Batch Strawberry Jam Without Pectin
6 ounces
15 minutes
15 minutes
30 minutes
New to making jam? This 3 ingredient homemade Small Batch Strawberry Jam without pectin is the perfect recipe for beginners because it only makes one 6-ounce jar.
Ingredients
- 2 cups sliced fresh strawberries
- 3/4 cup granulated sugar
- 1 tablespoon lemon juice
Instructions
- Place a small dish in the freezer to use for testing the jam.
- In a large 12 inch skillet, add strawberries, sugar, and lemon juice. Bring to a rolling boil, stirring often. Once boiling, cook until it thickens, about 10 minutes.
- When it seems thick enough, take your plate out of the freezer. Put a small spoonful of the jam onto the plate and let sit for 30 seconds. Tilt it. If it slides too fast, keep cooking in 1-2 minute increments. If it moves slow, it is done.
- Transfer to a heat-proof container. Cool to room temperature. If not canning, use within 2 weeks. Once opened, store in the refrigerator.
Canning Instructions (Optional)
- Place a clean 6-8 ounce glass mason jar and lid pieces into a large pot of boiling water deep enough for the jar to be completely submerged in water. Once the water is boiling, leave the jar in there until ready to use.
- Remove the jar and lids from water and drain out all of the water from the jar. Keep the water boiling.
- Transfer the finished jam to the jar. Wipe excess jam off the rim so it will seal properly. Add the lid. You may want to use an oven mitt so you can hold the jar still.
- Place sealed jar back into the boiling water and boil for 15 minutes. Make sure it is submerged in the water. Remove from the water and let dry on a heat-resistant surface for 18-24 hours.
- Once cool, press down on the lid. If it stays down, it is sealed. If it pops back up, put in the refrigerator and use within two weeks.
Notes
- Enjoyed this recipe? Check out my recipes for blueberry jam, raspberry jam, raspberry jalapeno jam, peach jam, and sour cherry jam.
- Use your strawberry jam in Strawberry Swirl Cheesecake, Strawberry Cream Cheese Frosting, and Strawberry Cheesecake Bars.
Recommended Products
As an Amazon Associate and member of other affiliate programs, I earn from qualifying purchases.
- Mason Jar
Did you make this recipe?
Let me know what you think! Rate the recipe above, leave a comment below, and/or share a photo on Instagram using #HITKrecipes
Originally published June 5, 2012
