Master Your WordPress Blog: Create an Automatic, SEO-Friendly Recipe Index (No Coding Needed!)
As an active member of the vibrant blogging community, I frequently encounter a recurring question in various Facebook and Google Plus groups: “How do you create a recipe index that automatically updates itself?” This common query highlights a significant pain point for many bloggers. Rather than repeatedly providing the same answer, it’s much more efficient to compile a comprehensive guide in one place, complete with detailed screenshots, to help everyone. This article is specifically designed for those running self-hosted WordPress sites. Achieving an automatically updating recipe archive requires the use of a specialized plugin, a functionality not typically available on platforms like Blogger or WordPress.com.
While we’re focusing on recipe indexes, it’s important to note that the plugin discussed here isn’t exclusive to food blogs. It’s incredibly versatile and can automatically categorize any type of content you publish. Whether you’re writing about photography techniques, creating detailed travel guides, or even sharing tips on how to pamper your feline friend, this plugin can help you organize your content into dynamic, self-updating lists.
And for those who aren’t bloggers at all, don’t worry! There will be a delicious chocolate and peanut butter dessert recipe waiting for you tomorrow, so make sure to check back!
Why an Automatic Recipe Index is Essential for Your WordPress Blog
Creating an automated recipe index is a solution I’ve personally sought for years. In the past, there was no readily available, easy solution or a dedicated plugin widely advertised for this specific purpose. The struggle was real: manually updating an index is incredibly time-consuming and often leads to outdated lists. Thankfully, the plugin I eventually discovered, called the WP Category Post List plugin, changed everything. This method involves no complex template modifications or direct PHP editing. Instead, you’ll simply paste a customizable line of code onto a brand new page (not a post) in your WordPress dashboard. The beauty of this code is its simplicity; it’s very easy to adjust, especially when you follow the clear chart provided on the plugin’s official website.
Before we dive into the “how-to,” let’s truly understand “why” you need a robust, automated recipe archive. Imagine a new visitor landing on your blog. They might only see what’s currently featured on your homepage. If they like what they see and want to explore more of your delicious recipes, where do they go? A well-organized recipe archive becomes their gateway. They can easily navigate to the index, pick a category that interests them, and browse through your culinary creations effortlessly.
Consider another scenario: a reader is actively seeking inspiration. Perhaps they need a quick dinner idea for tonight, or their child needs cupcakes for a school event tomorrow. If your blog is one of their favorites, they’ll turn to your recipe archive first. A comprehensive, easy-to-navigate index allows them to quickly find exactly what they’re looking for. Let’s be honest, many blogs’ built-in search functions aren’t always the most efficient or user-friendly. An index bypasses these limitations, offering a direct path to content.
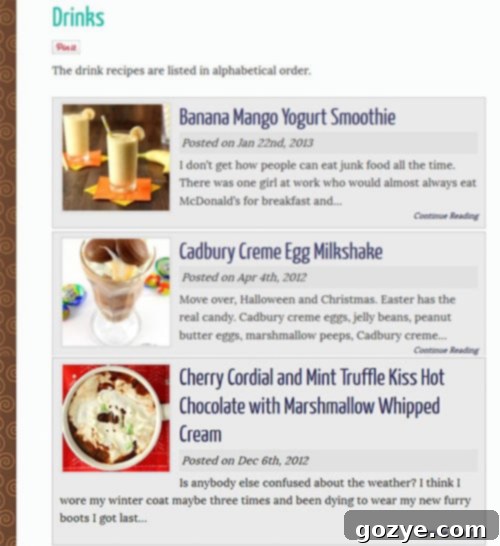
By default, WordPress allows you to organize posts by category, but typically, these lists display recipes by publication date, not by title. If you have hundreds of posts, this means a reader would have to click through numerous pages, making it incredibly cumbersome to find a specific recipe. A fantastic cookie recipe might be buried on page five, and most users will give up long before reaching it. By contrast, categorizing posts alphabetically by title on a single, dedicated page allows visitors to scroll through all the recipes within a category in just a few minutes, drastically improving their experience and encouraging them to stay on your site longer. This improved user experience also contributes positively to your blog’s SEO, as search engines favor sites that are easy to navigate and keep users engaged.
If you’re still reading, chances are you already appreciate the value of an index, but you might be attempting to maintain it manually. The inherent problem with manual updates is that they’re easily forgotten or deprioritized due to time constraints, leading to an outdated and unhelpful resource. I know myself well enough to realize that after just a couple of new posts, my manual index would fall behind. This is precisely why finding an automatic plugin was so critical for me. The search was initially frustrating; I knew exactly what I wanted but couldn’t find a straightforward solution. I downloaded plugin after plugin and experimented with countless HTML codes. Finally, the WP Category Post List plugin emerged as the perfect match for my needs, requiring just the right manipulation to achieve the desired result.
Are you ready to create an easy, automated, and SEO-friendly recipe index for your blog? Excellent, let’s get started!
Step-by-Step Guide to Building Your Automatic Recipe Index
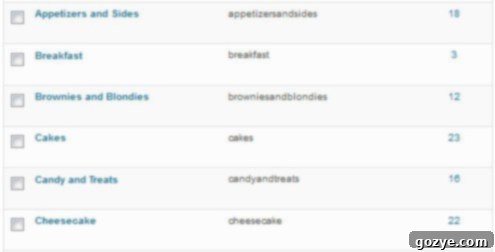
1. Strategically Map Out Your Recipe Index Categories
Before you even touch a plugin, you need a clear vision for how your content will be organized. Think about the logical breakdown of your categories. Will you create a highly granular structure, like mine, with specific categories such as “Cookies,” “Cheesecakes,” and “Yeast Breads”? Or do you prefer broader categories like “Main Dishes,” “Desserts,” and “Drinks”? If you opt for “Main Dishes,” will you group all of them together, or will you further segment them by type, such as “Chicken Recipes,” “Beef Dishes,” “Seafood,” and “Vegetarian Mains”? This planning stage is crucial because every post you publish needs to be assigned to the appropriate category (or categories). Remember, WordPress allows you the flexibility to assign a single post to more than one category, which can be incredibly useful for recipes that fit multiple themes (e.g., a “Lemon Blueberry Muffin” could be in both “Muffins” and “Lemon Desserts”). A well-thought-out category structure not only improves user experience but also enhances your blog’s search engine optimization by providing clear topical signals to search engines.
2. Download and Install the WP Category Post List Plugin
The next step is to acquire and activate the plugin. Navigate to your WordPress dashboard, go to “Plugins” -> “Add New.” In the search bar, type “WP Category Post List plugin.” Once found, click “Install Now” and then “Activate Plugin.” After activation, you might want to briefly check the plugin’s general settings under “Settings” -> “WP Category Posts List” (or similar) to ensure everything looks correct, though for most basic uses, the default settings are perfectly fine. This plugin will do the heavy lifting of dynamically listing your posts.
3. Create a New WordPress Page for Your Index

In your WordPress dashboard, go to “Pages” -> “Add New.” It’s crucial that you create a *page*, not a *post*, for your index. Pages are static content designed for information that doesn’t change frequently, making them ideal for an index. Give your new page a clear, descriptive title related to the specific category it will display, for example, “Cheesecake Recipes” or “Main Dishes.” You will create a separate page for each major category you wish to list in your index.
4. Understanding and Customizing the Shortcode
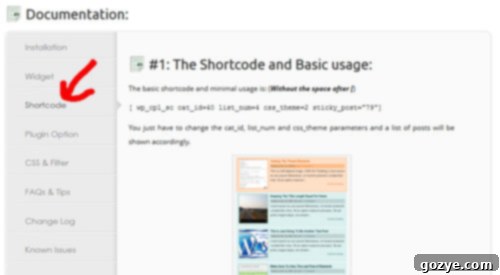
Now, head over to the developer’s official website. In the menu column, click on “Shortcode.” You’ll find the core code that powers this plugin. Each number and parameter within the shortcode represents a specific function. There’s a helpful chart on their site that breaks down what each part of the code means.
The default shortcode you might see is something like this:
Please note: For demonstration purposes, I’ve added an extra space between `[` and `wp_cpl_sc` so you can see the code written out clearly. When you copy and paste this into your WordPress page, you *must* delete that extra space. The shortcode needs to be `[wp_cpl_sc …]` with no space after the opening bracket.
[ wp_cpl_sc cat_id=40 list_num=4 css_theme=2 sticky_post="79"]
Let’s break down the components of this default code:
wp_cpl_sc: This is the abbreviated name of the plugin and the core command. Do not modify this part.cat_id=40: This attribute specifies the category identity number. It tells the plugin which specific category’s posts should be displayed on this page. Every category in WordPress has a unique ID number.list_num=4: This controls the maximum number of posts from the chosen category that will be displayed in the list. For a comprehensive index, you’ll likely want to adjust this.css_theme=2: This determines the visual appearance of your list. The plugin typically offers a few predefined themes (e.g., 0, 1, 2, 3, 4). You can experiment with these to find one that best matches your blog’s aesthetic.sticky_post="79": This optional attribute allows you to pin specific posts to the very top of the list, regardless of the sorting order. Each post also has a unique ID number. If you don’t need to sticky any posts, you can simply omit this attribute.
While the default code is a good starting point, most bloggers will want to customize it to better suit their needs. On the developer’s “Shortcode” page, if you scroll down, you’ll find a comprehensive table listing various available attributes. I highly recommend reading through these to understand the full capabilities of the plugin. After reviewing the options, I crafted my own customized shortcode:
[ wp_cpl_sc cat_id=63 css_theme=0 list_num=99 sort_using=4 show_author=false show_comments=false]
Let’s dissect my customized shortcode and understand the reasoning behind each choice:
wp_cpl_sc: As before, this is the plugin’s core command and should not be altered.cat_id=63: This specifies the category ID. In my example, ’63’ corresponds to my “Cheesecake” category. This is the crucial part that links your page to a specific category.css_theme=0: I chose ‘0’ because it represents the “Light Theme,” which best integrates with my blog’s design and offers a clean, minimalistic look.list_num=99: My goal is to display *all* posts within a given category on a single page, ensuring visitors don’t have to click through multiple pages. Since the exact number of posts in each category might vary and grow over time, I selected a sufficiently high number, ’99’, to guarantee all current and future posts would be listed without needing constant updates to this number. You could even use a higher number like ‘999’ if you anticipate hundreds of posts.sort_using=4: This attribute dictates the order in which the posts are listed. I chose ‘4’ to sort posts in alphabetical order by title, which makes it incredibly easy for users to quickly scan and find a specific recipe. Other sorting options might include sorting by date, author, or comment count.show_author=false: Since I am the sole author of my blog, displaying my name next to each recipe felt redundant and unnecessary, so I set this to ‘false’ to keep the list clean.show_comments=false: Similarly, showing the number of comments for each post wasn’t essential for my recipe index, as the primary goal is to find recipes, not to gauge post popularity from this specific page. Setting this to ‘false’ further streamlines the list’s appearance.
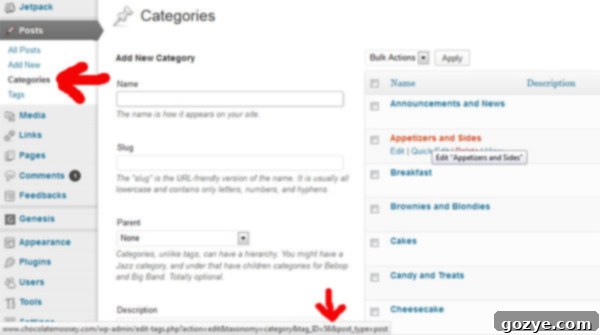
To determine a specific category’s unique ID number, navigate to your WordPress dashboard and go to “Posts” -> “Categories.” Hover your mouse over the desired category name. At the bottom of your browser window, you should see the URL appear. Towards the end of this URL, you’ll find a series of parameters, one of which will be `tag_ID=` followed by a number. This number is your category’s unique ID. Make a note of it for each category you plan to include in your index.
5. Implement the Shortcode and Publish Your Page

Return to the new page you created in WordPress (under “Pages”). In the main content editor, simply copy and paste your customized shortcode. You have the flexibility to add any introductory or explanatory text before or after the shortcode if you wish, providing context to your readers. Once you’re satisfied, click “Publish.” Your first dynamic category page is now live!
6. Crafting Your Navigation to the Index Pages

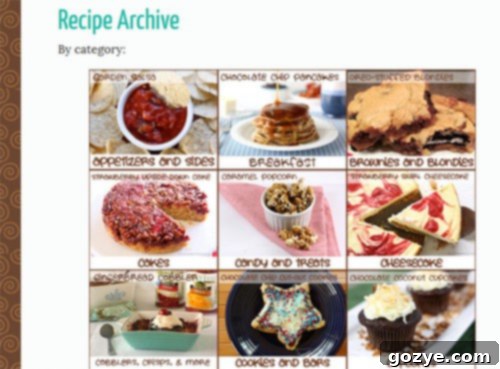
Your new category page is created, but it’s not truly useful until your readers can easily find it. You need a clear way to navigate to these index pages. For blogs with many categories, like mine, creating a central “portal page” is an excellent solution. This is simply a main page that acts as a hub, directing visitors to all your individual category index pages. To set this up, I created another new page (again, a *page*, not a *post*) and configured it to appear prominently in my main navigation bar, often labeled “Recipes” or “Index.”
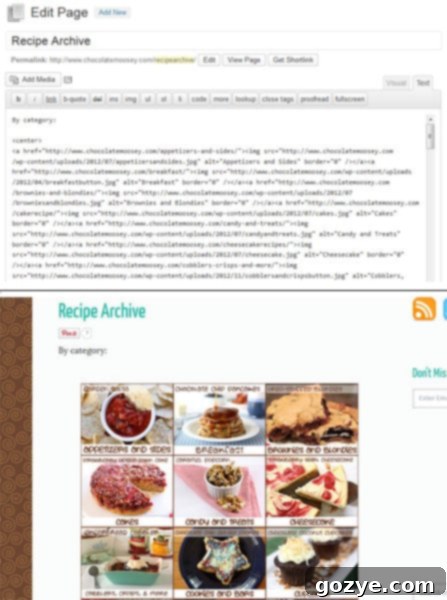
Editing your navigation bar largely depends on your specific WordPress theme. Most themes offer a “Menus” option under the “Appearance” tab in your dashboard, where you can easily drag and drop pages, posts, or custom links to build your menu structure. On my portal page, I used HTML to insert visually appealing image-based buttons that I designed in Photoshop to attract attention. Each button is then linked to its corresponding recipe category page (e.g., a “Cheesecake” button linking to my “Cheesecake Recipes” index page). Alternatively, you can simply use clean text links if you prefer. The goal is to make your index highly accessible and intuitive for your visitors.
7. Repeat for a Comprehensive, Scalable Index
Now, simply repeat steps 3 through 6 for every category you want to include in your automatic index. Create a new page for each category, customize the shortcode with the correct `cat_id`, and then link it from your main navigation or portal page. The beauty of this system is its scalability. It doesn’t have to be limited to recipes; you can apply the same method to organize any category of content on your blog. For instance, I’ve implemented the same structure for my photography category, giving it its own dedicated navigation tab and a clean, automatically updating list of posts.
Troubleshooting & Best Practices for Your Index
**Update (04/23/13): Thumbnails Not Showing?** A common issue some users encounter is that post thumbnails might not appear in their index lists. If this happens to you, the most likely culprit is that your posts are missing a “Featured Image.” This plugin, like many others, pulls the thumbnail directly from the featured image you assign to each individual post. Make sure every post you want to appear with a thumbnail in your index has a Featured Image selected in the WordPress editor.
**Maintain Your Categories:** For an effective index, ensure your categories are consistently applied and well-defined. Avoid creating too many similar categories, which can confuse both users and search engines.
**Regular Plugin Updates:** Always keep your `WP Category Post List` plugin updated to its latest version. This ensures compatibility with the newest WordPress versions, security patches, and access to any new features or bug fixes.
**Consider SEO for Page Titles:** When creating your individual category pages, use SEO-friendly titles. For example, instead of just “Cheesecake,” use “Delicious Cheesecake Recipes” or “Best Easy Cheesecake Recipes.” This helps search engines understand the content of your page and can improve visibility.
Enjoy your new, effortlessly updating, and user-friendly index! Your readers will thank you for making it so easy to explore your valuable content.
