Easy Small Batch Chocolate-Dipped Peanut Butter Rice Krispie Treats: Your Go-To No-Bake Holiday Dessert
Looking for a delightful, easy, and customizable treat that requires absolutely no baking? These Small Batch Peanut Butter Rice Krispie Treats, lovingly crafted in a loaf pan and then generously dipped in rich chocolate, are your answer. Whether you’re decorating them with festive coconut flakes, crunchy chopped nuts, or vibrant sprinkles for the holidays, or simply enjoying them as a quick indulgence, this no-bake dessert promises to be a crowd-pleaser.
The holiday season often brings with it a flurry of activity, from gift shopping to party planning. Amidst the hustle and bustle, one tradition I cherish deeply is making homemade treats. It’s not just about saving money, though that’s certainly a perk; it’s about sharing something made with care and love. Just the other weekend, while stocking up at the grocery store – and yes, spending a bit more than usual, as November often dictates – the cashier observed my overflowing cart. “You’re a baker, aren’t you?” she remarked, eyeing the marshmallows, chocolate, coconut, peanut butter, and molasses nestled amongst my “normal people groceries.”
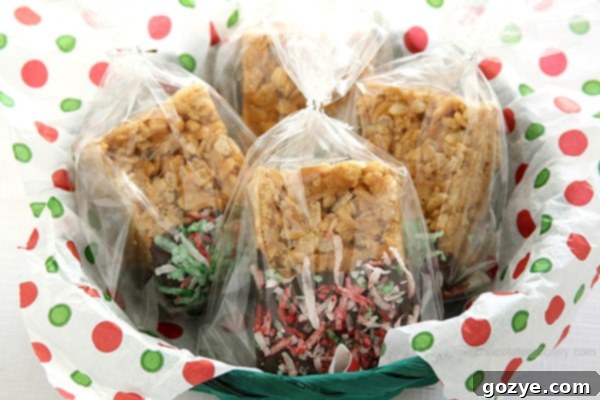
Indeed, I am. And during the holidays, my kitchen transforms into a joyful factory of goodies. Gifting homemade treats from the heart is a tradition that brings me immense joy. It simplifies my gift list and brings a personal touch that store-bought items often lack. That’s why I’m thrilled to share this recipe for Chocolate Dipped Small Batch Peanut Butter Rice Krispie Treats – a perfect blend of nutty, crunchy, and sweet, designed to make your holiday gifting (or personal snacking) a breeze.
While these easy rice krispie treats are ideal for festive occasions and thoughtful gifts, don’t feel obligated to save them only for special events! This recipe yields an excellent small-batch dessert that you can whip up any time you crave a quick, satisfying treat. They’re particularly fantastic during the summer when you want a delicious dessert without turning on the oven. You might even feel generous enough to share them with a loved one!
Why Choose Small Batch Peanut Butter Rice Krispie Treats?
In a world often obsessed with baking for a crowd, there’s a unique charm in small batch recipes. Making a smaller quantity of these delightful Peanut Butter Rice Krispie Treats means less waste, fewer ingredients to buy, and the perfect portion for a small family, a couple, or even just for yourself. This recipe, specifically designed for a loaf pan, ensures you get eight perfectly sized squares, satisfying your craving without leaving you with an overwhelming abundance of leftovers. It’s the ideal way to enjoy a fresh, homemade treat without the commitment of a large-scale baking project. Plus, the convenience of a loaf pan makes for easy pressing and cutting, leading to consistently perfect treats every time.
It’s no secret that I’m a huge fan of classic rice krispie treats. They’re incredibly simple to make, practically with your eyes closed (well, maybe just squinting a little to see what you’re doing). You don’t need much brainpower, which is precisely why they’re such a beloved no-bake dessert. While I’ve experimented with variations like peanut butter rice crispy treat truffles in the past, I realized the undeniable appeal of the classic peanut butter square. The addition of creamy peanut butter transforms the humble rice krispie treat into something extraordinary, adding a rich, nutty depth that complements the sweet marshmallow base perfectly.
How to Make Delicious Peanut Butter Rice Krispie Treats
Creating these delightful treats is a straightforward process, but a few tips can elevate them from good to absolutely fantastic. Follow these steps for the perfect small-batch peanut butter rice krispie treats:
- Prepare Your Pan: First, line a 9×5-inch loaf pan with parchment paper, leaving an overhang on the sides. This simple step is crucial for easy removal and cleanup later.
- Melt Butter and Peanut Butter: In a large pot or a Dutch oven (which I highly recommend for its size, allowing ample stirring room even for a small batch), combine the butter and smooth peanut butter. If you’re using unsalted butter, a tiny pinch of salt (about 1/8 teaspoon) can enhance the flavors beautifully. Melt these two ingredients together over low heat, stirring occasionally until smooth and fully combined. Using low heat is key here to prevent burning the butter and ensure a gentle melt.
- Add Marshmallows: Once the peanut butter and butter mixture is melted, add the marshmallows. Continue stirring constantly with a wooden spoon over low heat. Patience is a virtue here; resist the urge to crank up the heat. You want the marshmallows to melt slowly and evenly until they are completely smooth and gooey. Overcooking them at high heat can lead to hard, brittle treats later.
- Incorporate Cereal: As soon as the marshmallows are fully melted and incorporated, turn off the heat. Immediately add the crispy rice cereal to the pot. Stir gently but thoroughly with your wooden spoon, ensuring every piece of cereal is coated with the warm, gooey peanut butter marshmallow mixture. Be careful not to crush the cereal during this process; we want to preserve that delightful crunch!
- Press into Pan: Quickly transfer the mixture into the prepared loaf pan. To press it down into an even, single layer without sticking to your hands, place another piece of parchment paper on top and use your hands or a flat bottomed glass to gently but firmly press it down. This prevents stickiness and ensures an even density.
- Cool and Serve: Let the treats cool completely until firm, which usually takes about an hour at room temperature. Once firm, use the parchment paper overhang to lift the entire block out of the pan. You can then cut them into squares and serve them as is. However, if you’re aiming for those irresistible chocolate peanut butter rice krispie treats, especially for holiday decorating, you’re ready for the next delicious steps!
How to Make Chocolate Dipped Rice Krispie Treats
Dipping your peanut butter rice krispie treats in chocolate adds an extra layer of decadence and makes them visually stunning, especially for gifts. Here’s how to achieve that perfect chocolate coating:
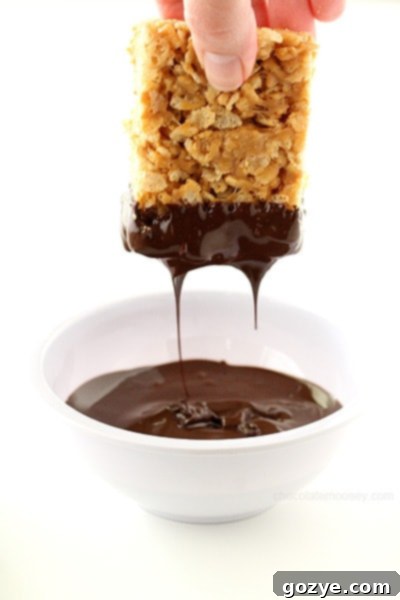
- Choose the Right Bowl: Before you even think about melting chocolate, select the appropriate bowl for dipping. You want a bowl that is deep and narrow. Why? A shallow bowl won’t allow you to dip the treats far enough for a good coating, and a wide bowl will require significantly more chocolate than the recipe calls for, as the chocolate will spread too thinly. A tall, narrow mug or a small, deep bowl is ideal for minimizing the amount of chocolate needed while ensuring full coverage. If you don’t have a good dipping bowl, don’t despair! You can use a spoon to pour the melted chocolate over each treat or create an elegant chocolate drizzle instead.
- Melt the Chocolate: Add the chopped semisweet chocolate to your chosen microwave-safe bowl. Microwave for 30 seconds, then remove and stir thoroughly. The chocolate may not look melted, but stirring helps distribute the heat. Continue to microwave in 15-second increments, stirring well after each interval, until the chocolate is fully melted and smooth. Be careful not to overheat the chocolate, as this can cause it to seize and become clumpy. If your chosen dipping bowl isn’t microwave-safe, melt the chocolate in a separate microwave-safe bowl or over a double boiler, then carefully transfer it to your dipping bowl.
- Dip the Treats: Once the chocolate is perfectly melted, take one peanut butter rice krispie treat and dip about half or two-thirds of it into the chocolate. Allow any excess chocolate to drip off by gently tapping the treat against the rim of the bowl.
- Set the Chocolate: Immediately place the dipped treat onto a parchment-lined cookie sheet. The chocolate will begin to set as it cools. For quicker setting, especially if you’re adding decorations, you can briefly place the cookie sheet in the refrigerator for about 10-15 minutes.
How to Decorate Your Peanut Butter Rice Krispie Treats
Decorating is where you can truly personalize these treats, making them perfect for any occasion, especially Christmas gifting. The key is to add decorations while the chocolate is still wet, so they adhere properly. Here are some ideas:
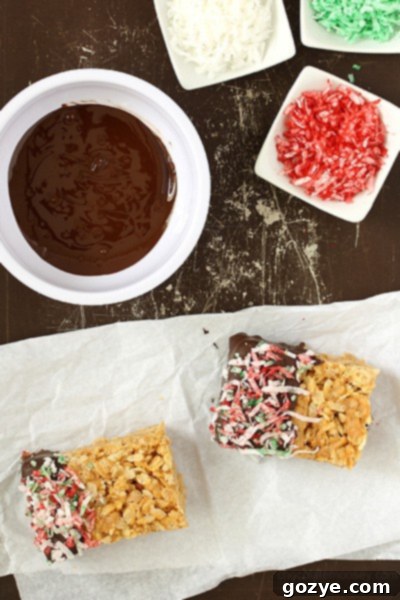
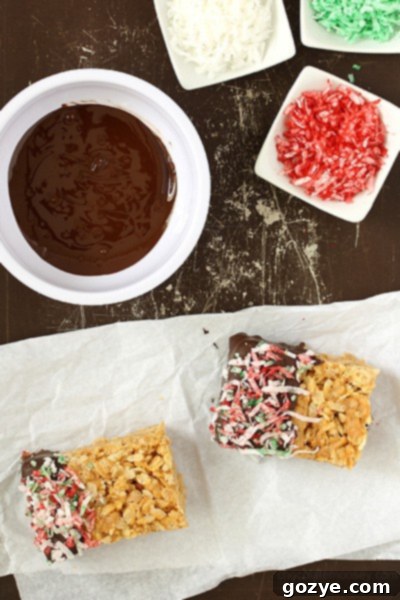
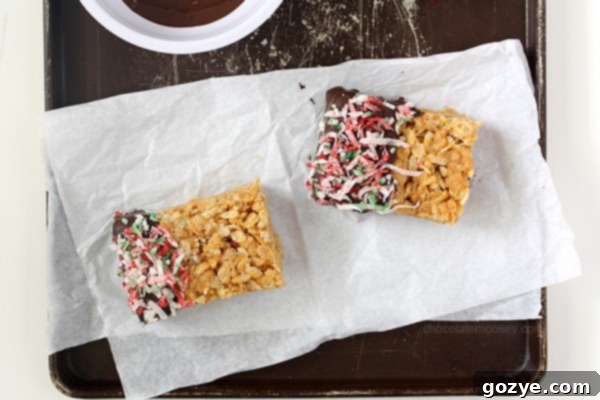
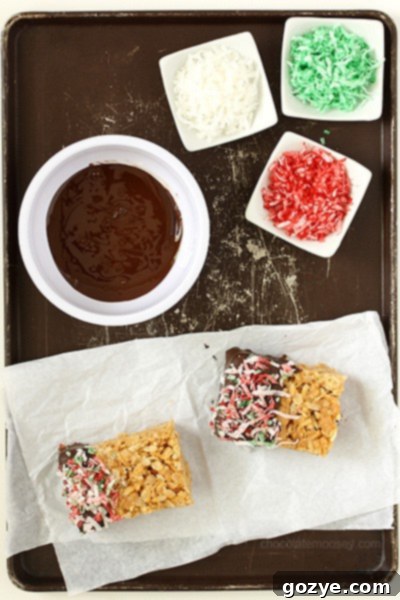
- Festive Coconut Flakes: For Christmas, I love using shredded coconut flakes, dyed red and green with a few drops of food coloring. Simply divide the coconut into small bowls, add a drop or two of food coloring to each, and mix until evenly colored. Sprinkle these vibrant flakes over the wet chocolate for an instant holiday look.
- Classic Sprinkles: If your recipients aren’t fans of coconut, colorful sprinkles are always a hit. Choose holiday-themed sprinkles (stars, snowflakes, red and green mixes) for a festive touch, or opt for rainbow sprinkles for an everyday celebration.
- Chopped Nuts: For an extra layer of nutty flavor and crunch, sprinkle finely chopped peanuts, walnuts, or pecans over the chocolate. This is an excellent choice for peanut butter lovers!
- Chocolate Drizzle: If you didn’t dip the treats, or want an extra touch, melt a different color of chocolate (white chocolate works great!) and drizzle it over the set chocolate with a fork or a piping bag.
- Crushed Candy Canes: For a truly festive holiday treat, crush some candy canes and sprinkle the pieces over the wet chocolate. The peppermint will add a delightful seasonal twist.
Remember, the most important part of decorating is knowing your recipient. Personalizing your homemade gift shows an extra layer of thought and care.
Tips for Perfect Rice Krispie Treats Every Time
How to Keep Rice Krispie Treats from Sticking to Your Hands
There’s no doubt about it – freshly made rice krispie treats are incredibly sticky, and often quite hot, from the melted marshmallows. While some people recommend greasing your hands with butter or cooking spray, I find this method messy and still struggle with the heat. The absolute best way to keep rice krispie treats from sticking to your hands when pressing them into the pan is by using a piece of parchment paper. Simply place a sheet of parchment paper directly on top of the mixture in the pan, and then use your hands to press down. Not only will the treats not stick to the parchment, but you also won’t burn your hands, making for a win-win situation and a much more pleasant experience.
How Long Do Rice Krispie Treats Last?
When stored properly in an airtight container at room temperature, your delicious peanut butter rice krispie treats will stay fresh and soft for up to 1 week. For optimal freshness, you can also wrap individual treats tightly in plastic wrap before placing them in the container.
How Do You Keep Rice Krispie Treats from Getting Hard?
There’s nothing more disappointing than biting into a rice krispie treat that has gone rock hard. Thankfully, there are a few simple tricks to ensure your treats remain perfectly soft and chewy:
- Use Fresh Marshmallows: This is perhaps the most crucial tip. Fresh marshmallows are soft, pliable, and melt into a wonderfully gooey consistency, which is essential for binding your cereal treats together into a tender, chewy square. Old, stale marshmallows, on the other hand, are often dry and firm, and they simply don’t melt as well, leading to a much harder final product. Always reach for a fresh bag of marshmallows for the best results.
- Melt on Low and Slow Heat: It can be tempting to blast the heat to speed up the melting process, especially when you’re in a hurry. However, high heat is the enemy of soft rice krispie treats. Overcooking marshmallows at high temperatures can cause the sugar to crystallize and become brittle, resulting in treats that are hard and difficult to chew. Keep the heat on low, stir patiently, and resist the temptation to rush the process. Your teeth (and taste buds) will thank you for the extra few minutes.
- Don’t Over-Compress: When you’re pressing the mixture into the pan, be firm but gentle. Over-compressing the treats can compact the cereal too much, squeezing out air and making them dense and hard. Use the parchment paper trick and apply even, moderate pressure rather than force. You want them to stick together, not to be a brick.
More Rice Krispie Treat Recipes to Explore
If you’re as much of a rice krispie treat enthusiast as I am, you’ll love these other variations:
- Classic Small Batch Rice Krispie Treats
- Irresistible Caramel Rice Krispie Treats
- Decadent Chocolate Twix Rice Krispie Treats
- Fun Peanut Butter Rice Krispie Ice Cream Cupcakes
- Scrumptious S’mores Rice Krispie Treat Bark
Small Batch Peanut Butter Rice Krispie Treats
8 squares
10 minutes
1 hour
1 hour 10 minutes
Small Batch Peanut Butter Rice Krispie Treats made in a loaf pan then dipped in chocolate make an easy no bake dessert.
Ingredients
- 1/2 cup smooth peanut butter
- 1 tablespoon butter (add 1/8 teaspoon salt if unsalted)
- 5 ounces marshmallows (roughly 3 cups mini marshmallows or 4 cups regular marshmallows)
- 3 cups crispy rice cereal
Chocolate Dipped (Optional)
- 4 ounces semisweet chocolate, chopped
- 1/2 cup shredded coconut, sprinkles, or chopped nuts
- Red and green food coloring (optional)
Instructions
- Line a 9×5 loaf pan with parchment paper, allowing some overhang on the sides for easy lifting.
- In a Dutch oven or large pot over low heat, melt together the peanut butter and butter (add the salt if using unsalted butter). Stir until smooth and fully combined.
- Once melted, add the marshmallows and stir constantly with a wooden spoon until they are completely melted and smooth. Be sure to keep the heat low to prevent overcooking.
- Turn off the heat and immediately stir in the crispy rice cereal until every piece is evenly coated with the marshmallow mixture.
- Transfer the mixture to the prepared loaf pan. Using another piece of parchment paper, gently but firmly pat the mixture down into a single, even layer. Cool completely before cutting into squares, about 1 hour at room temperature. Store in an airtight container for up to 1 week to maintain freshness.
- If dipping in chocolate: Line a cookie sheet with parchment paper. In a narrow, microwave-safe bowl (deep enough for dipping), add the chopped semisweet chocolate. Microwave for 30 seconds, then stir well. Continue microwaving in 15-second increments, stirring after each, until the chocolate is fully melted and smooth.
- If using food coloring for the coconut: Divide the shredded coconut into three small bowls. Leave one bowl plain. To the second bowl, add a few drops of red food coloring and stir to mix thoroughly. In the third bowl, add a few drops of green food coloring and stir to mix.
- Dip one rice krispie treat into the melted chocolate, coating about half to two-thirds of the treat. Let any excess chocolate drip off. Place the dipped treat onto the parchment-lined cookie sheet. Immediately sprinkle with your choice of plain or colored coconut, sprinkles, or chopped nuts. Repeat this process until all treats are dipped and decorated. Allow the chocolate to harden completely at room temperature or in the refrigerator for about 10-15 minutes before storing.
Recommended Products
As an Amazon Associate and member of other affiliate programs, I earn from qualifying purchases.
- 9×5 Loaf Pan
- Dutch Oven
Did you make this recipe?
Let me know what you think! Rate the recipe above, leave a comment below, and/or share a photo on Instagram using #HITKrecipes
With these tips and the detailed recipe, you’re ready to create the most delicious and perfectly chewy Small Batch Chocolate-Dipped Peanut Butter Rice Krispie Treats. They are incredibly versatile, easy to make, and always a hit. Whether you’re preparing them for a holiday gift exchange, a casual gathering, or just a sweet craving, these no-bake wonders are sure to bring joy. Happy treating!
