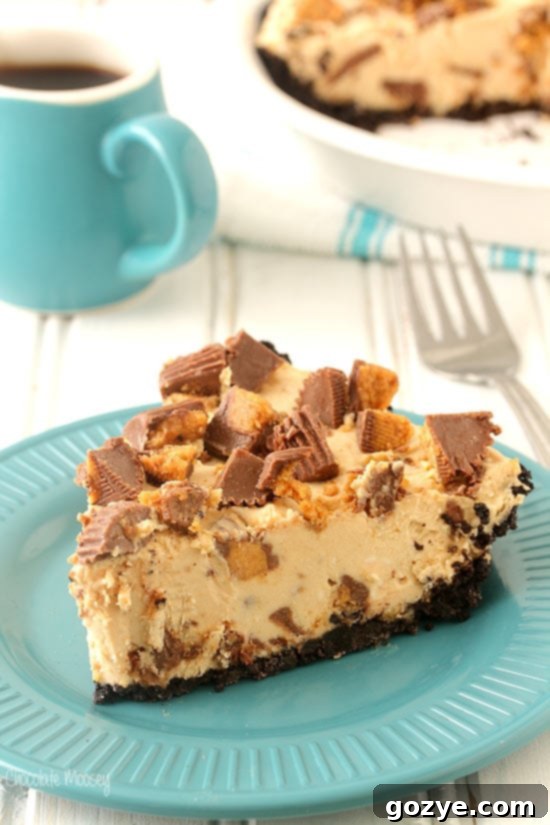
Indulge in the Ultimate No-Bake Peanut Butter Pie with Oreo Crust & Peanut Butter Cups
Forget the oven, embrace the bliss! This isn’t just any dessert; it’s a rich, creamy, and utterly irresistible No-Bake Peanut Butter Pie that will steal the show at any gathering. Imagine a decadent chocolate Oreo cookie crust, a velvety smooth peanut butter filling, and generous chunks of your favorite peanut butter cups – all without ever turning on your oven. Perfect for hot summer days, busy holidays, or simply when you crave an easy yet impressive treat that caters to every peanut butter lover’s dream. What truly sets this recipe apart is its commitment to homemade goodness, ditching the store-bought whipped topping for a superior, from-scratch experience.
The Beloved “Birthday Pie”: A Celebration in Every Slice
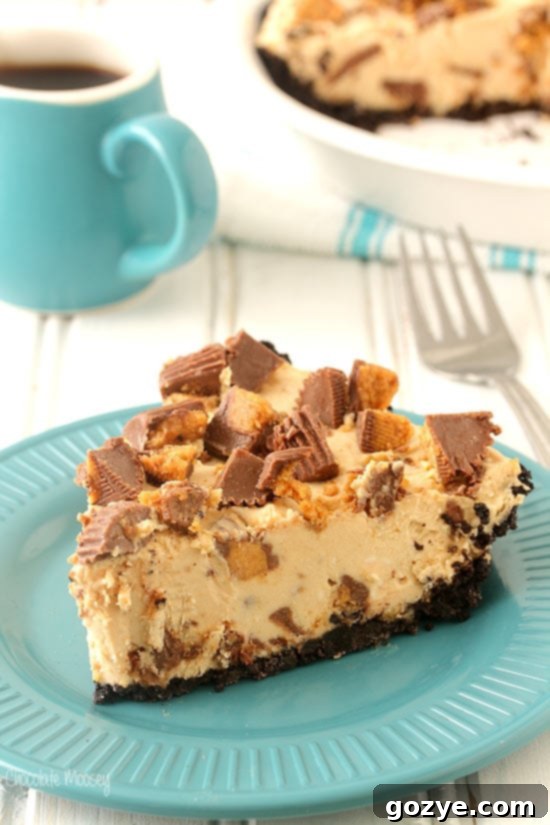
While traditional birthdays often bring to mind towering cakes adorned with frosting and candles, there’s a growing appreciation for desserts that offer a different kind of celebration. This particular No-Bake Peanut Butter Pie has earned the affectionate nickname “The Birthday Pie” in my circle, having graced countless celebrations, from office parties at my previous job to numerous family gatherings for my brother. It’s a testament to its universal appeal – a dessert so profoundly satisfying, it makes people question why they ever settled for just cake!
Its luxurious texture is reminiscent of a delicate cheesecake, offering a creamy indulgence that’s hard to resist. If you’ve enjoyed my No Bake Blueberry Cheesecake Pie, you’ll find a familiar comfort in its consistency, but with the beloved nutty twist of peanut butter taking center stage. The combination of a crunchy chocolate crust and a smooth, rich filling creates an exquisite contrast that keeps you coming back for more.
Why This No-Bake Peanut Butter Pie Stands Out: Homemade Goodness
What truly elevates this Peanut Butter Pie above many similar recipes is its dedication to using fresh, homemade ingredients. A lot of no-bake desserts lean on convenience, often calling for pre-made crusts and store-bought whipped toppings like Cool Whip. While there’s a time and place for such shortcuts, there’s an undeniable magic and superior flavor that comes from making components from scratch. Instead of a processed whipped topping, we elevate this pie with freshly made, fluffy whipped cream, carefully folded into a rich cream cheese base. This not only enhances the flavor profile significantly but also contributes to a superior, more refined texture that tastes incredibly gourmet.
If you’re anything like me, you find immense joy in crafting homemade desserts. The extra effort put into making your own whipped cream adds a special touch and a depth of flavor that simply cannot be replicated. Plus, knowing exactly what goes into your dessert makes it even more enjoyable. This pie is a celebration of that homemade philosophy, delivering a dessert that feels both deeply satisfying and lovingly prepared.
The Perfect Any-Time Dessert: Easy, Breezy, Delicious
Of course, you don’t need a special occasion or a birthday candle to justify whipping up this delightful no-bake dessert. Its effortless preparation makes it an ideal choice for impromptu gatherings, weekend treats, or as a cooling indulgence during those sweltering summer months when the last thing you want is to heat your kitchen with a hot oven. The minimal prep time and the convenience of not baking mean you can have a show-stopping dessert ready with less stress and more enjoyment.
One spoonful of this creamy, dreamy Peanut Butter No Bake Pie, and you might just find yourself declaring it your new favorite dessert, eclipsing even the most classic birthday cakes. It’s truly a year-round pleasure, but its no-bake nature makes it particularly appealing during warmer weather, offering a refreshing escape from the heat while satisfying your sweetest cravings. It’s a versatile crowd-pleaser that promises smiles with every slice.
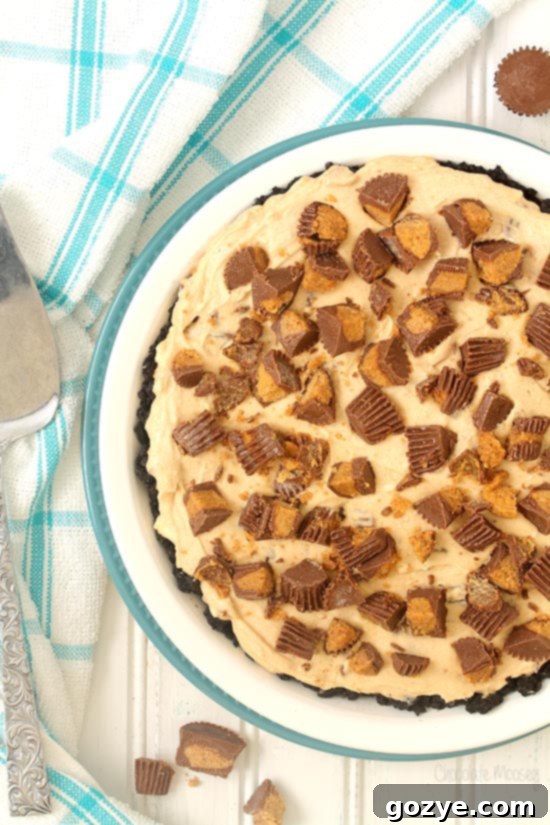
Key Ingredients For Your Irresistible No Bake Peanut Butter Pie
To craft this extraordinary Peanut Butter Pie (no bake), you’ll need a selection of simple yet high-quality ingredients. Each component plays a crucial role in building the incredible layers of flavor and texture:
- Oreo cookie crumbs: The foundation of this exquisite pie is a rich, dark chocolate Oreo cookie crust. I personally adore the classic chocolate-peanut butter combination, which is why Oreos are my top choice. Remember to crush the entire cookie, filling and all, for the best texture and flavor. However, if you prefer a different base, feel free to experiment with graham cracker crumbs for a more traditional pie crust, or Nutter Butter cookies for an extra layer of peanut butter intensity.
- Butter: Melted unsalted butter acts as the binding agent for our crust, ensuring it holds together perfectly when chilled and provides that satisfying crumble with every bite. It’s the key to a stable and delicious base.
- Heavy whipping cream: This is where our pie truly shines! While many no-bake recipes call for pre-made whipped topping (like Cool Whip), we opt for homemade whipped cream. Beating cold heavy cream until it forms stiff peaks creates a light, airy, and incredibly fresh component that lifts the richness of the peanut butter filling, resulting in an unparalleled texture and taste. It’s a small step that makes a huge difference in the final product.
- Cream cheese: For that signature creamy, almost cheesecake-like texture, full-fat cream cheese is essential. Ensure it’s softened to room temperature – this is crucial for a smooth, lump-free filling. Avoid low-fat or fat-free varieties, as they contain more water and can lead to a watery, less stable pie filling. A block of cream cheese, not the whipped or tub variety, is what you need for optimal results.
- Powdered sugar: Finely sifted powdered sugar not only sweetens our decadent filling but also plays a vital role in its consistency, helping to thicken it to the perfect creamy texture. Sifting ensures no lumps and a silky smooth finish.
- Peanut butter: Stick to standard processed peanut butter (like Jif or Skippy) for this recipe. Natural peanut butter, with its tendency for oil separation, can result in a greasier or less stable filling. The smooth, creamy consistency of processed peanut butter is key to achieving that perfectly luxurious texture in our pie.
- Vanilla: A touch of vanilla extract doesn’t just add its own wonderful aroma; it surprisingly amplifies the rich, nutty flavor of the peanut butter, making it taste even more ‘peanut buttery’ – much like a pinch of salt enhances sweetness in other dishes.
- Peanut butter cups: Chopped peanut butter cups are folded directly into the filling, providing delightful pockets of texture and an intensified burst of chocolate and peanut butter flavor. They also serve as a fantastic garnish, making the pie visually appealing and undeniably tempting. Don’t skimp on these for maximum indulgence!
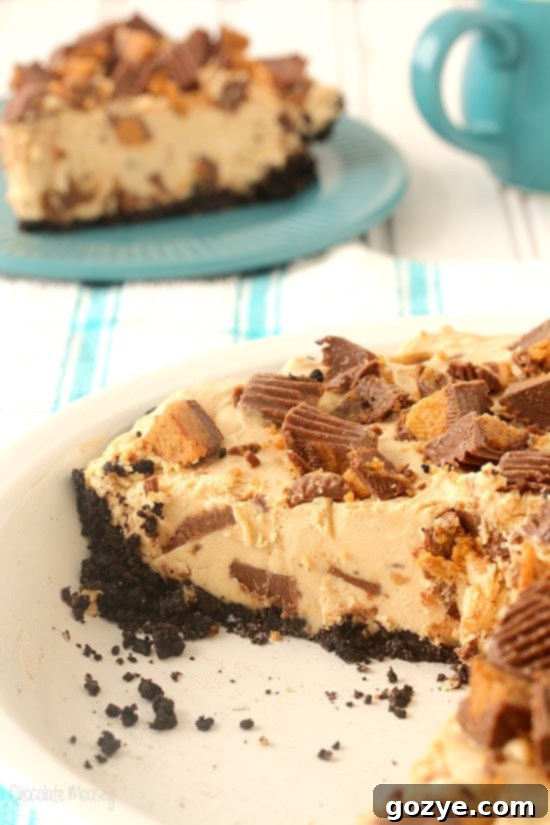
How To Make This Dreamy No Bake Peanut Butter Pie: Step-by-Step Guide
Creating your luscious Peanut Butter No Bake Pie is a straightforward process, promising delicious results with minimal effort. Follow these steps for pie perfection:
- Prepare the Oreo Crust: The journey to this delectable dessert begins with the crust. In a large bowl, combine your finely crushed Oreo cookie crumbs (remember, keep the filling in!) and the melted butter. Mix thoroughly until the crumbs are evenly moistened and resemble wet sand. Then, press this mixture firmly into a 9-inch pie plate. Use the bottom of a glass or your knuckles to create an even, compact layer across the bottom and slightly up the sides. This firm press is crucial for a stable crust that won’t crumble when sliced. Pop it into the refrigerator to chill while you prepare the filling – this step helps set the butter and ensures a perfectly firm base.
- Whip the Heavy Cream: Next, tackle the homemade whipped cream. Pour cold heavy cream into a large mixing bowl (a stand mixer with a whisk attachment or a hand mixer works best). Beat the cream on high speed. Watch it closely; it will first get foamy, then soft peaks will form, and finally, stiff peaks will emerge. Stiff peaks mean that when you lift the beater, the cream will stand up firmly without collapsing. This usually takes about 2-3 minutes. Carefully transfer this airy whipped cream to a separate bowl and keep it in the refrigerator – it needs to stay cold until you’re ready to fold it in.
- Create the Peanut Butter Filling: In the same mixing bowl (no need to wash it, as long as you’ve scraped out most of the whipped cream), combine the softened cream cheese, sifted powdered sugar, smooth processed peanut butter, and vanilla extract. Beat these ingredients together on medium-high speed until the mixture is perfectly smooth and creamy, with no lumps of cream cheese remaining – this usually takes another 2-3 minutes. Don’t rush this step! Scrape down the sides of the bowl once or twice to ensure everything is thoroughly incorporated for a silky texture.
- Fold and Assemble: Now for the magical combination: gently fold the cold whipped cream into the peanut butter mixture. The key here is to be delicate, preserving the airiness of the whipped cream. Use a spatula to scoop from the bottom and fold over, turning the bowl as you go, until no white streaks of whipped cream are visible. Overmixing will deflate the cream, so stop as soon as it’s just combined. Next, gently fold in about half of your chopped peanut butter cups, distributing them evenly throughout the filling. Spoon the luscious filling into your chilled cookie crust, spreading it evenly with a spatula. Top with the remaining peanut butter cups, lightly pressing them into the filling for a beautiful finish that hints at the deliciousness within.
- Chill to Perfection: The final, crucial step is chilling: refrigerate your pie for at least 4 hours, or ideally, overnight. This allows the pie to firm up completely, making it easy to slice and serve. Resist the urge to cut into it sooner! An overnight chill will yield the best, most sliceable results and allows the flavors to meld beautifully. You can even pop it in the freezer for about an hour if you’re in a hurry to firm it up.
Expert Tips for the Best No-Bake Peanut Butter Pie
To ensure your No-Bake Peanut Butter Pie turns out perfectly every time, keep these expert tips in mind. These small details can make a big difference in the texture, flavor, and overall success of your dessert:
- Cream Cheese Temperature is Key: Always use room temperature, full-fat cream cheese. If it’s too cold, it will be lumpy and won’t blend smoothly into the filling, no matter how long you beat it. Take it out of the fridge at least 30 minutes to an hour before you plan to start your pie. This ensures a velvety smooth filling.
- Whip Cream Cold: Ensure your heavy whipping cream is very cold before beating. A cold bowl (chilled in the freezer for 10-15 minutes) and a cold whisk attachment can also aid in achieving stiff peaks more quickly and efficiently. This makes for light and airy whipped cream that holds its structure.
- Sift Your Powdered Sugar: Don’t skip sifting the powdered sugar! This simple step prevents any small lumps from forming in your otherwise silky-smooth peanut butter filling, contributing to that luxurious mouthfeel.
- Fold Gently: When incorporating the whipped cream into the peanut butter mixture, use a gentle folding technique. Overmixing will deflate the air you’ve painstakingly whipped into the cream, resulting in a denser, less airy pie. The goal is to combine just until no white streaks remain.
- Chill Time is Non-Negotiable: The minimum 4-hour chilling time is absolutely essential for the pie to set properly. Resist the urge to cut into it sooner! An overnight chill will yield the best, most sliceable results, allowing all the components to firm up and meld beautifully. You can even pop it in the freezer for about an hour if you’re in a hurry to firm it up quickly.
- Consider Your Peanut Butter: As mentioned in the ingredients, processed creamy peanut butter is recommended over natural peanut butter due to its consistent texture and oil stability. Natural peanut butter can sometimes separate or make the filling too oily, affecting the final consistency.
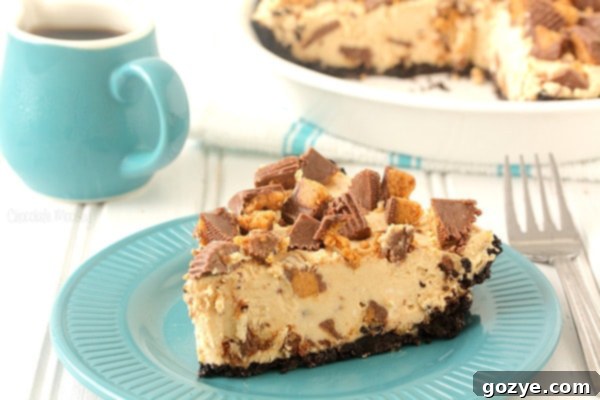
How To Freeze Your No Bake Peanut Butter Pie for Later Enjoyment
Life can get hectic, and sometimes preparing desserts in advance is a true lifesaver. Fortunately, this magnificent Peanut Butter Pie without Cool Whip is incredibly freezer-friendly, allowing you to enjoy a slice of heaven whenever the craving strikes, or to simply get ahead of your party preparations. This recipe, specifically designed without Cool Whip, holds up beautifully in the freezer thanks to its stable homemade whipped cream and cream cheese base, ensuring excellent texture upon thawing.
To freeze your pie for optimal freshness and presentation, first place the uncovered pie in the freezer for about 1 hour. This initial chill will firm up the filling significantly, preventing plastic wrap from sticking to the surface and potentially messing up your beautiful peanut butter cup topping. Once the pie is firm to the touch, tightly wrap it first in plastic wrap, ensuring a good, airtight seal around the entire pie. Then, cover it securely with a layer of aluminum foil. This double layer of protection helps prevent freezer burn and keeps unwanted freezer odors out, preserving the pie’s delicious flavor.
Your No Bake Peanut Butter Pie can be stored in the freezer for up to 3 months without compromising its delightful flavor or texture. When you’re ready to serve this frozen delight, simply remove it from the freezer and unwrap it. Let it sit at room temperature for 20-30 minutes, or until the filling is soft enough to easily cut through with a knife. For a firmer, almost ice cream-like slice, you can serve it slightly colder, which is especially refreshing on a hot day. This makes it a fantastic make-ahead option for holidays or unexpected guests!
More No Bake Dessert Recipes to Love
Loved this peanut butter pie (no bake) recipe? If you’re a fan of easy, oven-free treats, you’ll definitely want to explore these other fantastic no bake dessert recipes. They’re perfect for any season and are sure to satisfy your sweet tooth without heating up your kitchen:
- No Bake Chocolate Pie
- No Bake Strawberry Cream Pie
- No Bake Mint Chocolate Chip Pie
- No Bake Gingerbread Pie
- No Bake Blueberry Cheesecake
- No Bake Caramel Apple Cheesecake
- No Bake Pumpkin Cheesecake Bars
No Bake Peanut Butter Pie
8-10 servings
30 minutes
4 hours
4 hours 30 minutes
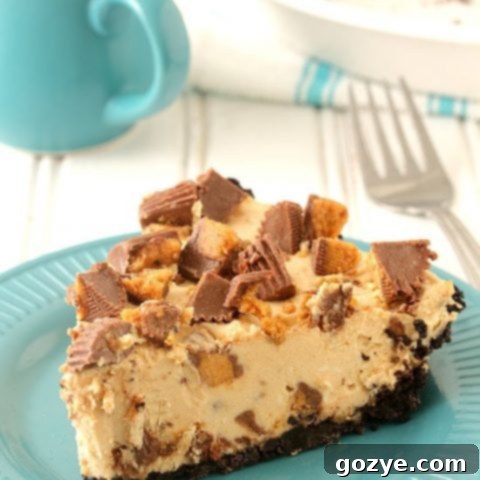
If you love peanut butter, then you’re going to love this No Bake Peanut Butter Pie with peanut butter cups in an Oreo cookie crust. Pie recipe made without Cool Whip!
Ingredients
- 2 cups chocolate sandwich cookie crumbs, such as Oreo (keep filling in cookies when crushing)*
- 1/4 cup (2 ounces or 4 tablespoons) unsalted butter, melted
- 1/2 cup heavy whipping cream, cold
- 8 ounces (1 block or 8 tablespoons) full-fat cream cheese, room temperature and not cold to the touch (do not sub fat free)
- 3/4 cup powdered sugar, sifted
- 1/2 cup smooth processed peanut butter (not natural)
- 1 teaspoon vanilla extract
- 2 cups chopped peanut butter cups
Instructions
- In a large bowl, mix together the cookie crumbs and butter. Pat into a 9-inch pie plate. Refrigerate while you work on the filling.
- In a large mixing bowl (with whisk attachment if using stand mixer), beat the heavy cream on high speed until it thickens and stiff peaks form, roughly 2-3 minutes (when you pull the beaters up, peaks will form and not fall over). Transfer to another bowl and keep cold in the refrigerator.
- In the same mixing bowl (no need to clean bowl – switch to paddle if using stand mixer), beat together the cream cheese, sugar, peanut butter, and vanilla until smooth and creamy, about 2-3 minutes.
- Scrape down the bowl then fold the whipped cream into the peanut butter mixture until no white streaks remain then fold in 1 cup peanut butter cups.
- Spread into the chilled cookie crust and top with the remaining 1 cup peanut butter cups, gently pressing down so they stick to the filling. Refrigerate at least 4 hours or overnight until firm (you can speed up this process in the freezer).
Notes
- *If you use another kind of crumb that doesn’t have a filling (such as graham crackers), you may need to add an extra 2 tablespoons butter.
- Enjoyed this recipe? Check out my No Bake Chocolate Pie, No Bake Chocolate Strawberry Pie, No Bake Blueberry Cheesecake Pie, and No Bake Gingerbread Pie.
Recommended Products
As an Amazon Associate and member of other affiliate programs, I earn from qualifying purchases.
- 9 Inch Pie Plate
Did you make this recipe?
Let me know what you think! Rate the recipe above, leave a comment below, and/or share a photo on Instagram using #HITKrecipes
Source: Adapted from Food Network
Originally published May 15, 2015
