Easy Small Batch Mini Cheesecakes: Your Perfect Muffin Pan Recipe Guide
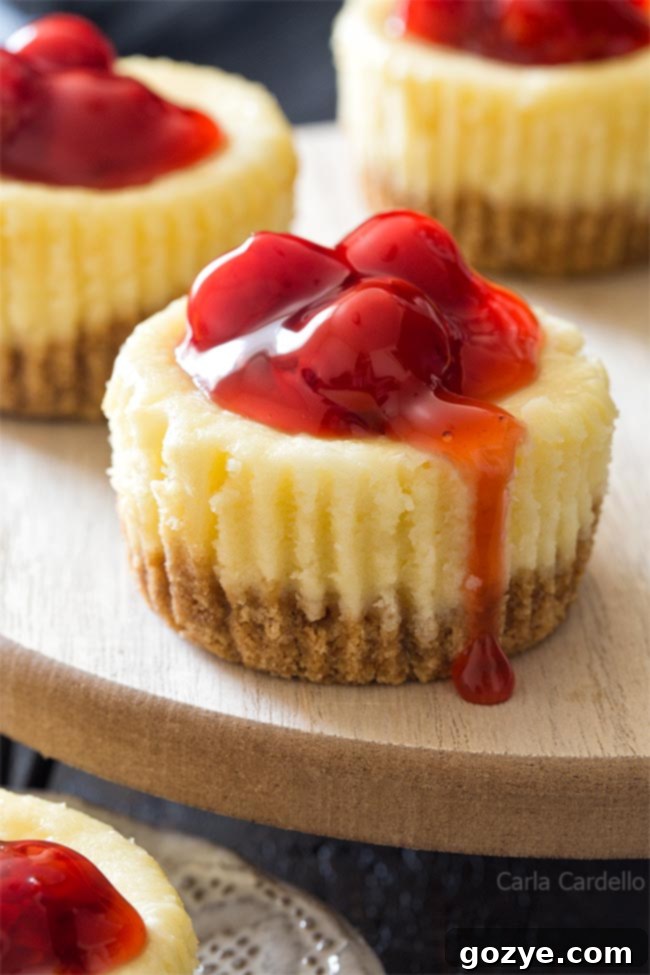
There’s something irresistibly charming about mini cheesecakes. These individual delights offer all the rich, creamy goodness of a classic cheesecake but in a perfectly portioned, easy-to-handle size. Ideal for intimate gatherings, a dessert for two, or simply a sweet treat when a full-sized cheesecake feels like too much, our small batch mini cheesecakes are designed for convenience and incredible flavor. Baked in a standard muffin pan with a delightful graham cracker crust, they’re surprisingly simple to make, even for novice bakers.
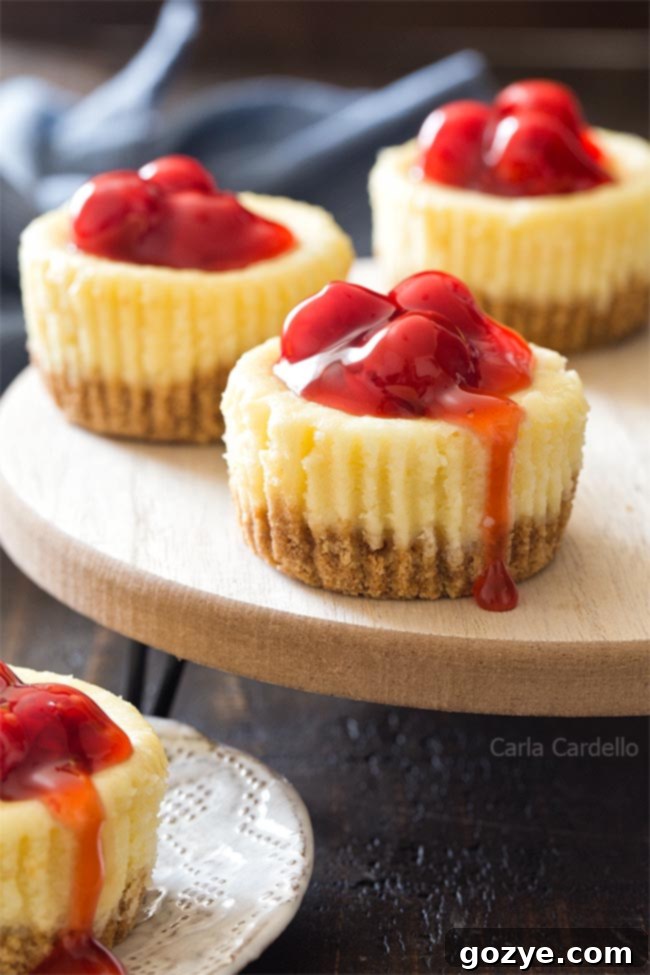
For too long, the humble plain mini cheesecake has flown under the radar in my baking repertoire. While I’ve experimented with exciting flavors like mini chocolate cheesecakes, seasonal mini pumpkin cheesecakes, and even festive mini gingerbread cheesecakes, the essential, versatile plain version has been conspicuously absent – until now.
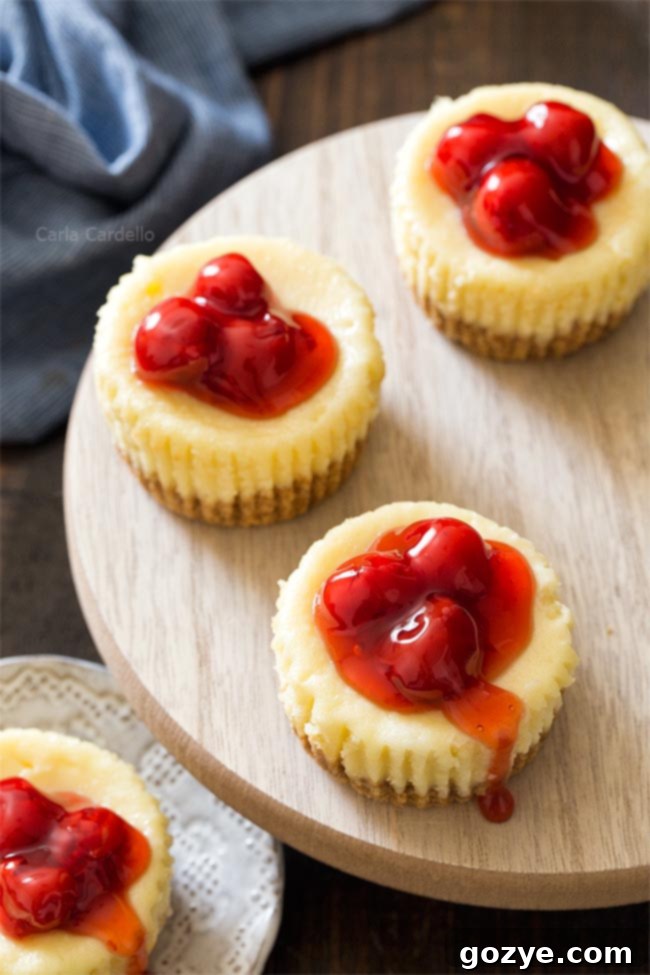
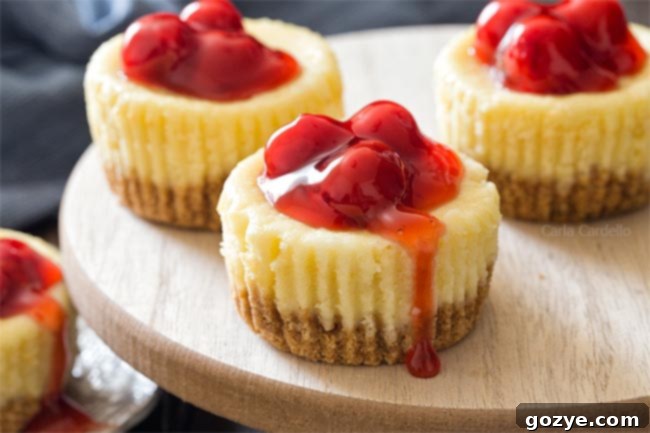
These aren’t just any mini cheesecakes; they are your traditional, perfectly plain cheesecakes, complete with a buttery graham cracker crust, baked to perfection in a convenient muffin pan. The beauty of a plain cheesecake lies in its versatility. Think of it as a blank canvas, eagerly awaiting your creative touch. Whether you envision a luscious layer of cherry pie filling, a dollop of freshly whipped cream, a decadent chocolate ganache drizzle, or a vibrant homemade blueberry jam without pectin, the possibilities for customization are truly limitless.
This particular recipe yields a small batch of five individual mini cheesecakes. After rigorous testing, I found that five was the magic number for a consistent and delightful result from a single small batch. While aiming for six proved a challenge, consider this recipe a perfect opportunity to enjoy four perfectly crafted cheesecakes, with one extra designated solely for a delicious taste test – because who can resist a quality control sample?
If you’re eager to explore more delightful mini cheesecake flavors, be sure to check out my comprehensive guide to Easy Mini Cheesecake Recipes, where I’ve gathered all my favorites in one convenient place. And for those days when baking feels like too much effort, my No Bake Mini Cheesecakes offer a quick and refreshing alternative that satisfies your craving without turning on the oven.
Choosing the Right Pan for Your Mini Cheesecakes
When it comes to baking cheesecake, the choice of pan is crucial, especially for easy removal. Traditional, full-sized cheesecakes are often baked in springform pans, which feature removable sides that prevent the delicate dessert from tearing or sticking. These pans are fantastic for larger, more elaborate cheesecakes.
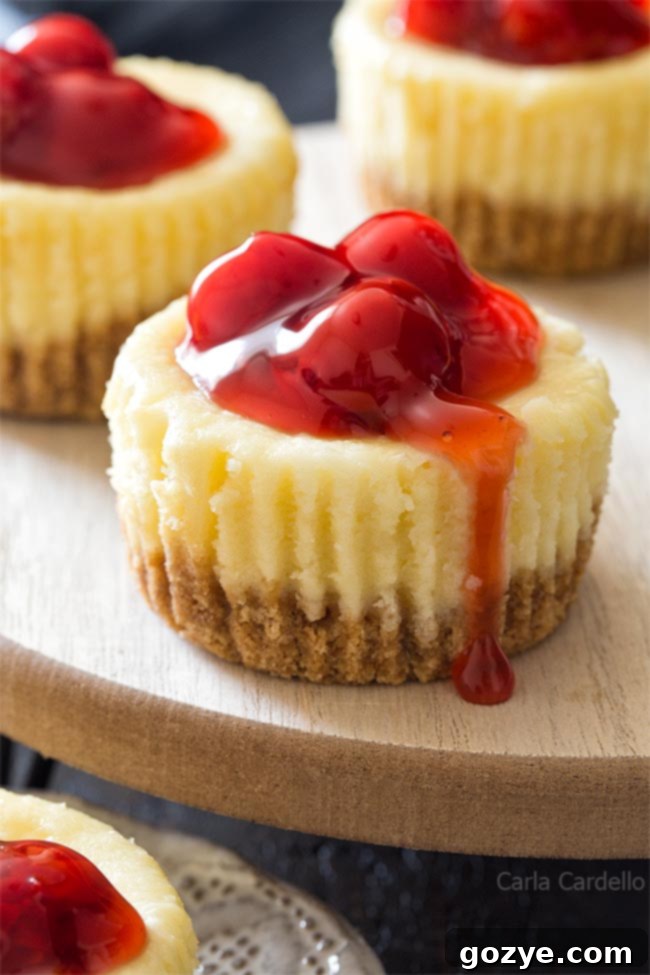
However, for these delightful individual mini cheesecakes, a standard muffin tin (an Amazon affiliate link) is your best friend. Muffin tins are incredibly common in most kitchens, making this recipe accessible to nearly everyone without the need for specialized equipment. While dedicated mini cheesecake pans with removable bottoms do exist, investing in a single-use pan isn’t always practical for many home bakers. I’ve specifically developed and tested this recipe for the everyday muffin tin, ensuring reliable results with minimal fuss.
While I haven’t specifically tested this recipe in those specialized mini cheesecake pans, I anticipate it would still yield excellent results, though the exact quantity might vary slightly depending on the size of the individual cavities. If you happen to have a springform pan on hand and are looking for other cheesecake options, explore my recipes for a more modest 6-inch cheesecake, a slightly larger 7-inch cheesecake, or the classic crowd-pleasing 9-inch cheesecake.
Alternatively, for a different twist on cheesecake, consider my loaf pan cheesecake, which offers a unique rectangular presentation, or even try your hand at unique cheesecake in a jar creations, perfect for gifting or picnics.
Effortless Removal: Getting Your Mini Cheesecakes Out of the Muffin Tin
Since we’re not using a springform pan with its convenient removable sides, a little care is needed to gently extract your delicate mini cheesecakes from the muffin tin. The key to stress-free removal lies in preparation and patience.
The Magic of Paper Liners
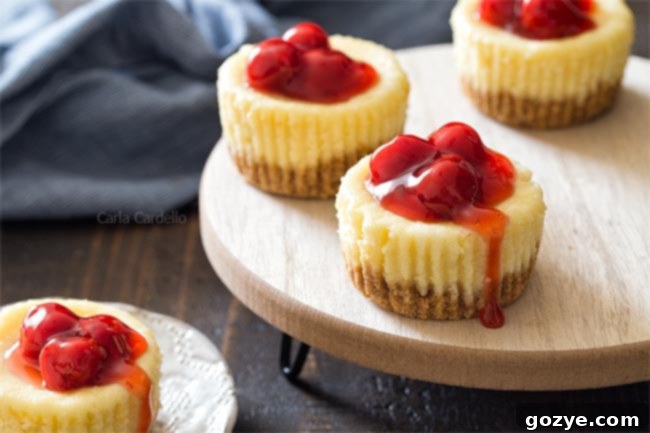
I highly recommend using paper cupcake liners. These simple liners act as a perfect barrier, preventing the cheesecakes from sticking to the pan and making them incredibly easy to lift out. Once baked and completely cooled, you can easily grasp the edges of the liner and lift each cheesecake free, ensuring a pristine presentation. The decision to remove the liners before serving or to let your guests peel their own is entirely up to you – both methods work perfectly fine and ensure clean hands for eating!
No Liners? No Problem! Tips for a Liner-Free Finish
Forgot to stock up on paper liners, or simply prefer a liner-free, seamless look for your mini cheesecakes? You can still achieve beautiful results with a bit of extra attention. The crucial step here is to thoroughly grease your muffin tin with cooking spray or butter. Ensure every cavity is lightly but completely coated to prevent any sticking. After baking and cooling, use a thin offset spatula or a small, sharp knife to gently loosen the edges of each cheesecake. Carefully pry them up from the bottom. If they’re proving particularly stubborn, try refrigerating the entire pan for an additional hour or two. The cold will firm up the cheesecakes even more, making them easier to pop out cleanly and without damage.
Essential Ingredients for Your Small Batch Mini Cheesecakes
Crafting these delightful mini cheesecakes requires just a handful of straightforward ingredients, each playing a vital role in creating that signature creamy texture and balanced flavor profile that makes cheesecake so beloved.
- Graham Cracker Crumbs: The foundation of any classic cheesecake is its crust. We stick to tradition here, using finely crushed graham cracker crumbs for their subtly sweet and buttery flavor that perfectly complements the creamy filling. For the best consistency, I recommend using a food processor to crush whole graham crackers into a fine, uniform crumb. While graham crackers are traditional, feel free to get creative with other cookies like Oreos, shortbread, or even ginger snaps for a different flavor profile.
- Melted Butter: This essential ingredient binds the graham cracker crumbs together, forming a sturdy and flavorful crust that won’t crumble apart when you take a bite. Make sure it’s fully melted so it can evenly coat all the crumbs.
- Full-Fat Cream Cheese: This is the undeniable star of your cheesecake! For the creamiest, most luxurious texture and rich flavor, always opt for full-fat cream cheese. Low-fat and fat-free versions contain more water, which can lead to a watery, grainy, or less stable cheesecake after baking. It’s also absolutely crucial for your cream cheese to be at true room temperature. Cold cream cheese will result in a lumpy batter that no amount of beating can fully smooth out, affecting the final texture.
- Granulated Sugar: A touch of granulated sugar balances the tangy notes of the cream cheese, adding just the right amount of sweetness to the filling without making it overly rich or cloying.
- Large Egg: The egg acts as a crucial binding agent, providing structure and helping the cheesecake set beautifully as it bakes. As with most baking recipes, a large egg is the standard size to ensure proper balance in the recipe. Ensure it’s also at room temperature to incorporate smoothly into the batter without curdling the cream cheese.
- Vanilla Extract: A splash of good quality vanilla extract enhances all the other flavors, adding a warm, aromatic depth and complexity that is essential to a classic cheesecake profile.
Choosing the Right Cream Cheese: A Baker’s Secret for Smoothness
When it comes to baking cheesecake, not all cream cheese brands are created equal. For an impeccably smooth cheesecake, free from any tiny lumps, you’ll want to choose a brand that does not list xanthan gum or guar gum in its ingredients. These are stabilizers that help cream cheese maintain its shape, but they can make it difficult to achieve a perfectly smooth batter, regardless of how much you beat it. These tiny bits of stabilizer become particularly noticeable in cheesecakes with contrasting colors, like pumpkin or chocolate, where they might appear as small white flecks.
However, if you discover your refrigerator stash contains cream cheese with these stabilizers, don’t despair! Your cheesecake will still taste absolutely delicious. It simply might have a slightly less uniform appearance, with very tiny white specks. The most important factor, regardless of brand, remains bringing your cream cheese to true room temperature before mixing.
How to Master Small Batch Mini Cheesecakes: A Step-by-Step Guide
Creating these delightful mini cheesecakes is a straightforward process when you follow a few key steps with attention to detail. Let’s break down the journey from simple ingredients to a decadent, perfectly portioned dessert.
1. Prepare Your Crust: The Foundation of Flavor
Begin by combining your finely crushed graham cracker crumbs with the melted butter in a small bowl. Mix thoroughly until the crumbs are evenly moistened and have a clumpy, wet sand-like texture. Next, spoon roughly 2 tablespoons of this mixture into the bottom of each paper liner in your muffin pan. Use the back of a spoon or your fingertips to firmly press the crumbs down, creating a compact and even crust layer. This firm pressing is essential for a crust that holds together well and forms a solid base for your cheesecake.
Bake the crust for approximately 5-8 minutes, or until it appears set, slightly golden, and no longer looks wet. This crucial pre-baking step helps to crisp up the crust, deepen its flavor, and prevents it from becoming soggy once the creamy filling is added. Allow the crusts to cool completely while you prepare the cheesecake filling – cooling prevents the crust from steaming the bottom of the filling.
2. Craft the Creamy Filling: The Heart of Your Cheesecake
While your crusts are cooling, it’s time to whip up the luscious cheesecake filling. In a large mixing bowl, combine the room temperature full-fat cream cheese and granulated sugar. Using an electric mixer on medium-high speed, beat these two ingredients together until the mixture is beautifully smooth, light, and fluffy, typically taking about 2-3 minutes. Remember to pause and scrape down the sides and bottom of the bowl periodically to ensure all ingredients are thoroughly incorporated and prevent any lumps from forming.
Next, beat in the room temperature egg. Mix just until it’s fully combined and the batter is smooth, usually about 1 minute. Be cautious not to overbeat the batter once the egg is added, as incorporating too much air can lead to cracks or a sunken center in your finished cheesecakes. Finally, stir in the vanilla extract for that lovely aromatic finish that rounds out the flavor.
3. Bake to Perfection: The Final Transformation
Once your crusts are cool and your filling is smooth and ready, carefully divide the cheesecake batter evenly among the prepared paper liners, filling each one nearly to the top. Transfer the muffin pan to a preheated oven and bake at 325°F (160°C) for 22-25 minutes. Baking at a slightly lower temperature helps prevent cracks and ensures a creamy texture.
How to Tell When Your Mini Cheesecakes Are Done
Knowing exactly when to pull your mini cheesecakes from the oven is key to their perfect texture and preventing over or under-baking. Look for these crucial signs:
- Set Edges: The edges of the cheesecakes should appear firm and slightly puffed. They should not look wet or liquid.
- Slightly Jiggling Center: The very center of each cheesecake should still have a slight jiggle when you gently shake the pan. It shouldn’t be liquid or wet-looking, but a subtle wobble indicates a creamy interior that will set further upon cooling. Think of it like a firm Jell-O.
- Internal Temperature: For the most precise measurement, use an instant-read thermometer. Insert it into the center of one of the cheesecakes; the internal temperature should reach 150°F (65°C).
Don’t be alarmed if your cheesecakes puff up a bit during baking; this is normal due to the air incorporated. They will gently deflate and flatten as they cool, achieving that characteristic smooth cheesecake surface. Allow them to cool completely at room temperature before chilling.
Do Mini Cheesecakes Require a Water Bath?
One of the many advantages of baking mini cheesecakes is that they generally do not require a water bath. Water baths are typically used for larger cheesecakes to ensure even, gentle baking and prevent cracking by creating a humid environment that slows down the cooking process. However, due to their small size, mini cheesecakes bake quickly and evenly without the need for this extra step, simplifying the process considerably and saving you time and effort.
Crust Varieties: Beyond Graham Crackers
While a classic graham cracker crust is traditional and wonderfully delicious, it’s by no means your only option. Feel free to customize your mini cheesecakes with different crusts to match your taste, theme, or occasion:
- Oreo Cookie Crust: For a rich, chocolatey twist, use finely crushed Oreo cookies (cream and all). If opting for Oreos, you might reduce the amount of melted butter slightly, as the cream filling in Oreos contributes to binding the crumbs.
- Shortbread or Digestive Biscuit Crust: These options provide a buttery, less sweet base that pairs beautifully with many fruit and creamy toppings, offering a sophisticated alternative.
- Ginger Snap Crust: Perfect for a festive or spicier flavor profile, especially around the holidays, complementing pumpkin or apple toppings wonderfully.
- Nilla Wafer Crust: A vanilla-flavored cookie crust provides a milder, sweeter base that lets the cheesecake filling truly shine.
Endless Topping Possibilities for Your Cheesecake Canvas
As mentioned earlier, a plain mini cheesecake is a culinary blank canvas, ready to be adorned with a myriad of delectable toppings. This incredible versatility is one of its greatest strengths, allowing you to tailor each dessert to your personal preference or the season. Here are some inspiring ideas to elevate your cheesecakes and truly make them your own:
- Classic Fruit Fillings:
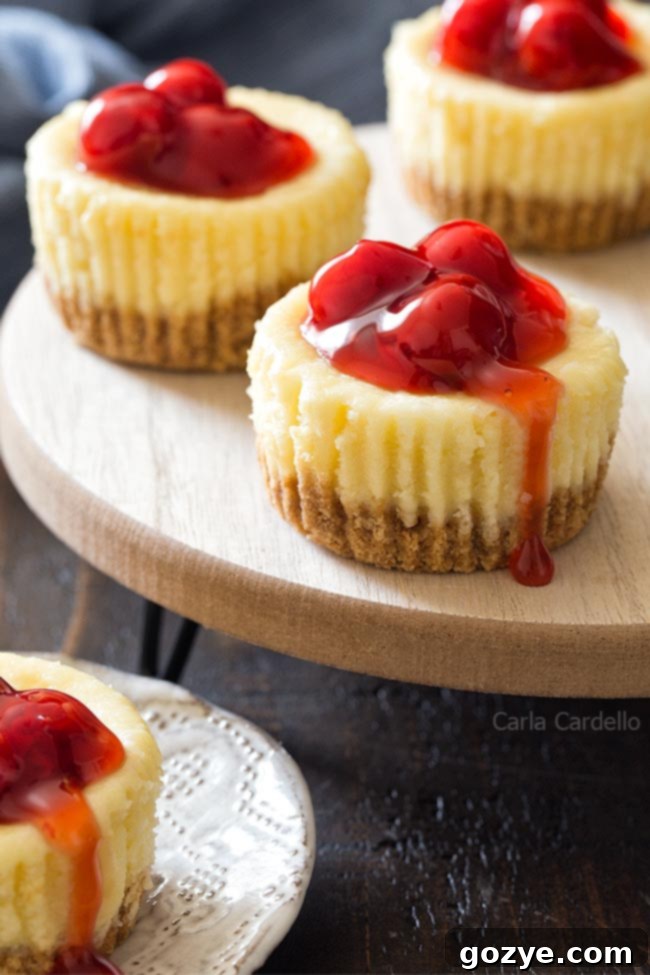
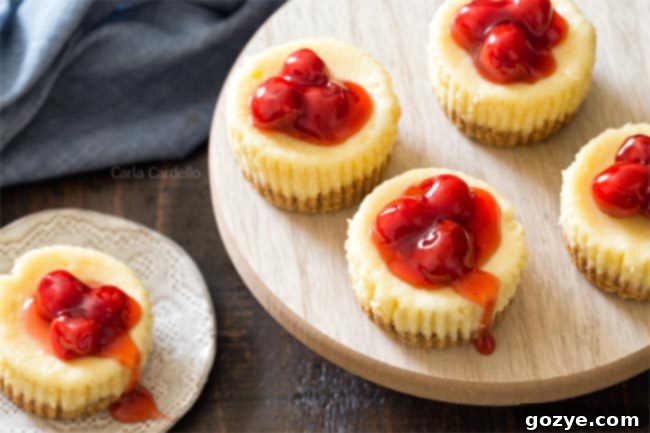
- Cherry Pie Filling: My personal choice for these photos, especially when fresh fruit isn’t in season. Its vibrant color and sweet-tart flavor are a timeless pairing. You can opt for a high-quality canned filling or make your own homemade cherry pie filling for an extra special, fresh-tasting touch.
- Other Fruit Pie Fillings: Explore vibrant alternatives like strawberry pie filling, blueberry pie filling, peach pie filling, or a warm, spiced apple pie filling for seasonal variations that are always a hit.
- Fresh Fruit & Elegant Sauces:
- Fresh Berries: A simple scattering of fresh raspberries, blueberries, or sliced strawberries adds a burst of freshness, natural sweetness, and a pop of beautiful color.
- Homemade Fruit Sauces: Drizzle with a homemade strawberry sauce, a bright raspberry coulis, or a tangy lemon or lime sauce for a refreshing finish.
- Fruit Curds: Swirl in creamy strawberry curd for a miniature version of my strawberry swirl cheesecake, or experiment with passion fruit or key lime curd for an exotic twist.
- Creamy & Decadent Toppings:
- Whipped Cream: A cloud of light and airy homemade whipped cream is a classic and always welcome addition. You can also flavor it with vanilla, almond, or a hint of citrus zest for extra depth.
- Chocolate Ganache: A rich, glossy chocolate ganache takes these mini cheesecakes to an indulgent, luxurious level. A dark chocolate ganache provides a beautiful contrast to the sweet cream cheese.
- Caramel Sauce: A luscious drizzle of homemade or store-bought salted caramel sauce adds a sweet and salty complexity that’s hard to resist.
- Crunchy Nuts & Other Add-ins:
- Toasted Nuts: Sprinkle with chopped pecans, walnuts, or almonds for added texture and a delightful nutty flavor. Toasting them beforehand enhances their aroma and crunch.
- Chocolate Shavings or Sprinkles: For a simple yet effective decorative touch, especially for birthdays or celebratory occasions.
- Cookie Crumbles: Beyond the crust, a sprinkle of extra crushed cookies (like Oreos or shortbread) on top can add extra texture and reinforce the crust’s flavor.
- Edible Flowers or Mint Leaves: For an elegant and fresh presentation.
And if you find yourself with extra cherry pie filling, don’t let it go to waste! I’ve compiled a fantastic list of 10+ Cherry Pie Filling Desserts to inspire your next creation, ensuring no deliciousness is left behind.
Storage and Freezing Tips for Your Mini Cheesecakes
Proper storage ensures your delicious mini cheesecakes remain fresh and enjoyable for longer. With this small batch recipe, they might disappear quickly, but it’s always good to know your options for keeping them at their best!
Refrigeration for Optimal Freshness
Once completely baked and cooled, store your mini cheesecakes in an airtight container in the refrigerator. This protects them from absorbing other odors and maintains their creamy texture. They will maintain their quality and flavor for up to 5-7 days. It’s best to add any delicate fresh fruit toppings, whipped cream, or drizzles just before serving for optimal freshness and appearance.
Freezing for Later Enjoyment: Your Make-Ahead Solution
Yes, mini cheesecakes are excellent candidates for freezing, especially before you add any delicate garnishes. This allows you to prepare them in advance and enjoy them whenever a craving strikes, or for impromptu guests.
- Initial Freeze (Flash Freeze): First, place the undecorated, completely cooled mini cheesecakes in a single layer on a baking sheet or plate. Ensure they are not touching. Freeze them until they are firm, which usually takes about 1 hour. This crucial step, known as “flash freezing,” prevents them from sticking to plastic wrap or to each other when stored in bulk.
- Individual Wrapping: Once firm, individually wrap each cheesecake tightly in plastic wrap. Make sure there are no air gaps to prevent freezer burn. You can then add an additional layer of aluminum foil for extra protection.
- Final Storage: Place the individually wrapped cheesecakes into a large freezer-safe bag or an airtight container. Label with the date. They can be frozen for up to 1-2 months for best quality.
- Thawing: When you’re ready to enjoy them, simply transfer the frozen cheesecakes (still wrapped) to the refrigerator and let them thaw overnight. Once thawed, garnish as desired before serving for a perfectly fresh-ttasting dessert.
Troubleshooting Common Mini Cheesecake Issues
Even experienced bakers sometimes encounter hiccups. Don’t worry, many common mini cheesecake problems have straightforward explanations and solutions. Here are the most frequent issues and how to address them:
Why Do Mini Cheesecakes Sink in the Middle?
If your mini cheesecakes develop a sunken center after cooling, there are typically two main culprits:
- Underbaking: The most common reason is that the middle was simply not baked long enough to fully set. An underbaked center lacks the structural integrity to support the top as it cools, leading to a collapse. This is why it’s crucial to ensure you’re looking for those key doneness indicators mentioned earlier: set edges, a slightly jiggling center (not wet), and an internal temperature of 150°F (65°C).
- Overbeating the Batter (Especially After Adding Eggs): Incorporating too much air into the batter, particularly after the egg has been added, can cause the cheesecake to puff up excessively in the oven. While it looks impressive during baking, as the cheesecake cools, this trapped air escapes, leading to a dramatic deflation and a sunken appearance. To avoid this, beat only until just combined after adding the egg.
How to Keep Mini Cheesecakes from Sinking
To avoid a sunken center and ensure beautifully level mini cheesecakes, focus on these critical steps:
- Bake Thoroughly: Always ensure your cheesecakes are fully baked to an internal temperature of 150°F (65°C) with firm, set edges and a minimal, gentle wobble in the center.
- Do Not Overbeat: Once the egg is incorporated into the cream cheese mixture, mix the batter as little as possible – just enough for it to be smooth and homogeneous. Stop the mixer as soon as the egg is fully combined.
- Gradual Cooling: Allow cheesecakes to cool completely at room temperature, undisturbed, for at least an hour before covering and refrigerating. Sudden or drastic temperature changes can sometimes contribute to sinking or cracking.
Why Is My Cheesecake Batter Lumpy?
A lumpy cheesecake batter is almost always due to cold ingredients, specifically cold cream cheese and/or cold eggs. When these ingredients are cold, they don’t blend smoothly with the sugar and other components, resulting in small, unincorporated pieces that create a grainy or lumpy texture.
The Ultimate Solution: Room Temperature Ingredients!
Make sure your full-fat cream cheese and eggs sit out on the counter until they are no longer cold to the touch. This can take anywhere from 1 to 2 hours, depending on your kitchen’s ambient temperature (it might be quicker in summer, longer in winter).
- For Cream Cheese: If you’re short on time, you can carefully microwave unwrapped blocks of cream cheese in 5-10 second increments until they are just softened and pliable, but not melted. Be very careful not to overheat it, as melted cream cheese can ruin the texture and consistency of your cheesecake.
- For Eggs: Place the egg (still in its shell) in a bowl of warm (not hot) water for about 15 minutes, or until it reaches room temperature.
What to Do if Your Cheesecake Batter Is Already Lumpy
Unfortunately, once lumps have formed due to cold ingredients, simply beating the batter more will not smooth them out; the lumps will persist through baking and affect the final texture. However, you have a couple of last-resort options to salvage your batter:
- Blender Method: You can try carefully pulsing the lumpy batter in a blender or food processor for short bursts. While this can help smooth out lumps effectively, be aware that it might incorporate too much air, potentially leading to cracks in the baked cheesecake. But remember, any minor cracks can always be artfully covered with a delicious topping!
- Straining Method: For a truly smooth finish without the risk of over-aerating, you can press the batter through a fine-mesh strainer. This method is effective but may result in a small loss of batter as some lumps might be too large to pass through, and it requires a bit of patience.
Own an air fryer? Check out my recipe for Air Fryer Cheesecake for another innovative way to enjoy this classic dessert with modern convenience!
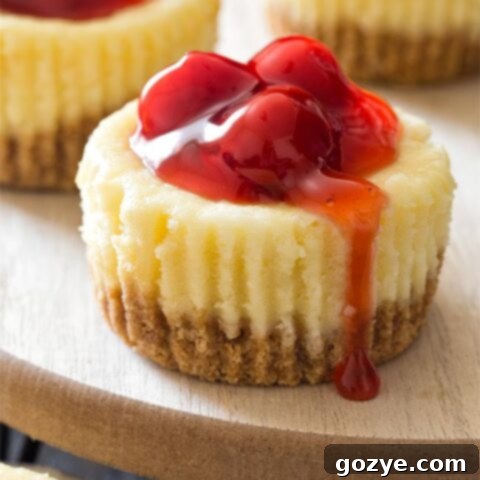
Mini Cheesecakes (Small Batch)
5
20 minutes
30 minutes
4 hours
4 hours 50 minutes
Small Batch Mini Cheesecakes with a graham cracker crust are easy individual cheesecakes baked in a muffin pan. Serve with cherry pie filling as a dessert for two.
Ingredients
- 1/2 cup graham cracker crumbs
- 2 tablespoons unsalted butter, melted
- 8 ounces (1 block or 8 tablespoons) full-fat cream cheese, room temperature and not cold to the touch (do not sub fat free)
- 1/2 cup granulated sugar
- 1 egg, room temperature and not cold to the touch
- 1/2 teaspoon vanilla extract
- Cherry pie filling or whipped cream, for garnish
Instructions
- Preheat oven to 325F. Line a muffin pan with 5 paper liners. If not using paper liners, grease with cooking spray.
- In a small bowl, mix together the graham cracker crumbs and melted butter until moistened and clumpy.
- Press roughly 2 tablespoons crumbs into the bottom of each paper liner. Bake 5-8 minutes or until set and no longer looks wet. Cool while you make the filling.
- In a large mixing bowl on high speed, beat together the cream cheese and sugar until light and fluffy, about 2-3 minutes. Scrape down the bowl as needed.
- Beat in the egg for 1 minute or until smooth (do not overbeat). Beat in the vanilla.
- Divide the filling among the paper liners. They should be filled to the top. Bake 22-25 minutes or until tops and edges are firm, the center slightly jiggles when moved, and internal temperature is 150F.
- Cool for 1 hour at room temperature then cover and refrigerate at least 4 hours or overnight before garnishing
and serving.Store leftovers in an airtight container in the refrigerator for up to 5-7 days.
Notes
Looking for more recipes like this? Check out my full list of Easy Mini Cheesecake Recipes.
Want to bake this recipe in a different pan? Check out my 6 inch cheesecake recipe and 9 inch cheesecake recipe.
Recommended Products
As an Amazon Associate and member of other affiliate programs, I earn from qualifying purchases.
- Cupcake Pan
- Paper Liners
Did you make this recipe?
Let me know what you think! Rate the recipe above, leave a comment below, and/or share a photo on Instagram using #HITKrecipes
