Small Batch Gingerbread Cookies with Eggless Royal Icing: Your Essential Holiday Baking Guide
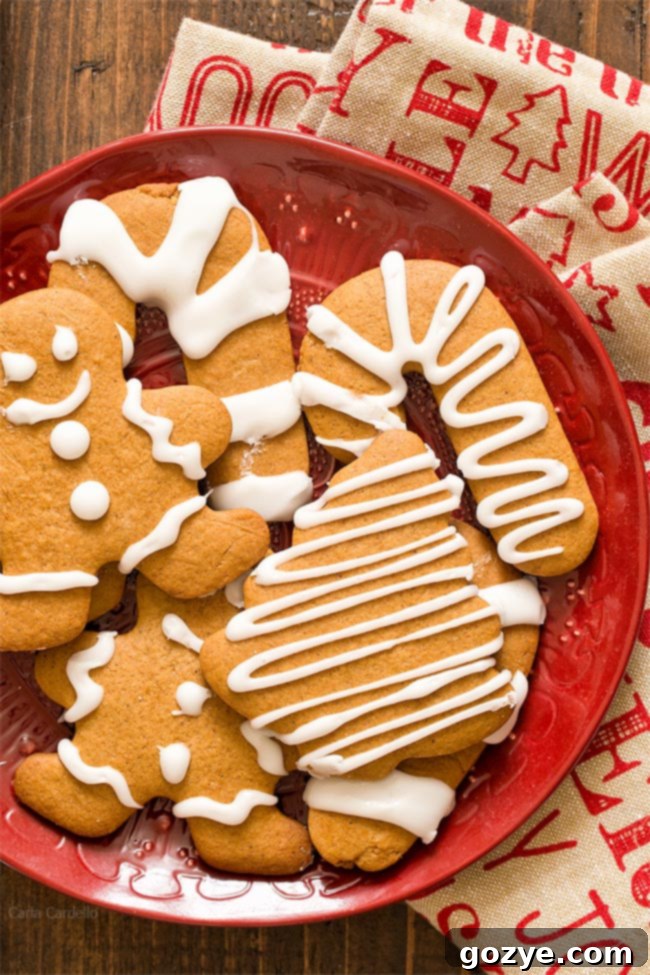
Get ready to embrace the festive spirit with these delightful Small Batch Gingerbread Cookies, crafted without shortening and beautifully adorned with a simple, eggless royal icing! Dive into our comprehensive guide for expert tips and tricks, ensuring a stress-free cookie-making experience this holiday season.

Happy December, fellow bakers! The holiday season is truly upon us. My tree is twinkling (despite the cat’s best efforts to redecorate), Christmas music is on a delightful non-stop loop, and I’m practically a professional snow-shoveler these days (ah, winter wonderland!).
With most of my Christmas shopping hopefully wrapped up, my mind turns to one of the most cherished holiday traditions: baking an abundance of festive cookies. And when it comes to classic Christmas treats, gingerbread reigns supreme.
Once Thanksgiving feasts are a fond memory, it’s officially gingerbread everything season! Gingerbread is not just a flavor; it’s synonymous with the warmth, spice, and joy of Christmas. And these Small Batch Gingerbread Cookies are poised to become your new holiday tradition.
Gingerbread cookies can sometimes be a gamble, but this recipe is designed to be your steadfast go-to. They offer that delightful “snap” of a classic gingerbread, yet they remain perfectly chewy in the center, ensuring you won’t risk a tooth while enjoying them. This balance of crispness and chewiness is what sets them apart.
We’ve crafted this dough using all butter, a choice that not only enhances the flavor profile significantly but also acknowledges that not everyone keeps shortening readily available. The rich, creamy taste of real butter simply can’t be beaten, contributing to a superior texture and a more authentic, comforting gingerbread experience. These are the gingerbread cookies your holiday dreams are made of!
Feeling inspired to start baking yet? Let’s get those cookie cutters ready!
And if you’re planning a full assortment of gingerbread delights for your Christmas cookie tray this year, make sure to check out my comprehensive guide on How To Make The Best Christmas Cookie Tray for more inspiration and tips.
Perhaps gingerbread isn’t your absolute favorite, or you’re looking for another festive cut-out cookie option? Then you’ll love my Red Velvet Sugar Cookies with Eggless Royal Icing. They’re just as fun to decorate and add a beautiful pop of color to any holiday spread.

Determining an exact yield for cut-out cookies can be tricky, as it largely depends on the size of your cookie cutters. For this small batch recipe, I typically yield around 9 regular-sized gingerbread cookies, plus a couple of adorable tiny ones (which, regrettably, didn’t make it into the photo shoot – they were too delicious!).
It’s important to remember that different cookie sizes will also require slightly different baking times. Smaller cookies, like those cute little stars or mini gingerbread men, are usually perfectly baked in about 8 minutes. Larger, more substantial cookies might need closer to 10 minutes to achieve that ideal balance of crisp edges and a chewy center.
To ensure all your cookies are baked to perfection, begin checking your smaller cookies around the 8-minute mark. Gently remove any that appear done – their edges will be firm and slightly golden – while allowing the larger ones to continue baking for a couple more minutes until they reach the same stage. This staggered approach helps prevent over-baking and ensures a consistent quality across your entire batch of festive gingerbread treats.
How to Roll Out Cookie Dough Without Stress or Sticking
If you’ve ever baked cut-out cookies, you know the immense frustration of dough sticking stubbornly to your rolling pin, countertop, or cookie cutters. It can turn an enjoyable baking session into a tear-inducing ordeal! But fear not, because the secret to stress-free rolling lies primarily in managing the dough’s temperature.
The most crucial tip to prevent your gingerbread cookie dough from sticking is to ensure it remains consistently cold. Warm dough is a sticky dough. Here’s a brilliant trick: roll out your dough *before* chilling it, doing so between two sheets of plastic wrap.
Here’s why this method is a game-changer:
First, easier rolling: It’s significantly simpler to roll out room temperature dough than cold, stiff dough. Attempting to roll cold dough requires considerable effort and often results in cracks or uneven thickness. This pre-rolling step allows you to achieve an even 1/4 inch thickness with ease.
Second, minimal handling: By pre-rolling, you minimize the amount of time you spend directly handling the dough. The more you work with the dough, the more warmth your hands transfer to it, causing it to become sticky. This method gets you to the cutting stage faster, which is key!
Third, ready-to-cut convenience: Once your pre-rolled dough is thoroughly chilled, it’s ready to be cut directly from the fridge. No waiting for it to soften slightly, no wrestling with cold, unyielding dough. You’ll simply peel back the plastic, cut your festive shapes, and slide them onto your baking sheet with unprecedented ease.
Since we’re working with a small batch of cookie dough, I have an extra ingenious tip for you. After pre-rolling your dough between plastic wrap, you can easily slide the entire flattened sheet of dough (still between the plastic) onto a dinner plate before refrigerating. This makes it incredibly easy to manage. Then, when it’s time to cut, you can even cut the cookies out directly on the plate!
This ingenious plate method offers an extra layer of protection: if your dough starts to warm up even slightly while you’re cutting, you can simply slide the entire plate back into the fridge for a quick re-chill. This saves you from the common predicament of having warm, sticky dough clinging to your counter with no easy way to transfer it back to the fridge without damage. Embrace these simple tricks for a truly enjoyable gingerbread baking experience!

How to Keep Gingerbread Cookies from Spreading in the Oven
Have you ever spent precious time meticulously cutting out beautifully intricate gingerbread shapes, only to pull them from the oven transformed into unrecognizable, blob-like discs? This disheartening phenomenon, often called “cookie spread,” occurs when your cookies expand too much during baking, completely losing their distinctive, festive forms.
The ultimate secret to keeping your gingerbread cookies perfectly shaped and preventing unwanted spreading in the oven ties back to our recurring theme: keeping the dough cold! Cold dough is stable dough. When cold dough hits the hot oven, the butter and other fats take longer to melt, allowing the cookie structure to set before excessive spreading can occur.
To implement this, I highly recommend a crucial step: once you’ve cut out your gingerbread shapes and arranged them on your baking sheet, pop the entire tray into your freezer. Let them chill for at least 15-20 minutes while your oven preheats to the required temperature. This intense chill solidifies the butter in the dough, acting as a structural scaffold that resists spreading.
By the time your oven is perfectly preheated and ready to go, your gingerbread cookie cut-outs will be thoroughly chilled and firm. This optimal temperature ensures that they will hold their shape beautifully as they bake, resulting in crisp, defined edges and the perfect chewy texture you desire. Say goodbye to cookie blobs and hello to perfectly shaped gingerbread men, stars, and snowflakes!
How to Make Royal Icing Without Eggs (Eggless Royal Icing)
Traditional royal icing recipes typically call for egg whites or meringue powder to achieve their signature hard, glossy finish. However, many home bakers prefer to avoid raw egg whites for safety reasons or simply don’t want to purchase an ingredient like meringue powder that they might only use a couple of times a year. That’s precisely why I opt for a fantastic small batch eggless royal icing recipe!
My eggless royal icing is incredibly simple to make, requiring just powdered sugar, milk, and a touch of corn syrup. This trio creates a beautiful, pipeable icing that hardens wonderfully.
The corn syrup plays a dual role here: it adds a lovely, subtle shine to your finished cookies, making them look professionally decorated, and it also contributes to a smoother, more fluid consistency, which is ideal for precise piping. However, if corn syrup isn’t easily available to you, or if you don’t wish to buy an entire bottle for a small amount, rest assured you can confidently leave it out without compromising the integrity of the icing too much.
When you’re mixing, aim for an icing that is quite thick – surprisingly thick, in fact. You’ll be tempted to add more milk to thin it out, but resist that urge! If the icing is too runny, it will spread out uncontrollably when you try to pipe intricate details, turning your carefully crafted dots and squiggles into messy puddles. Think of it as painting with watercolor versus thick acrylic; we want acrylic consistency here for control.
Should you accidentally add too much liquid, don’t despair! Simply add about 1 tablespoon of powdered sugar at a time, mixing well after each addition, until the icing returns to that desired thick, pipeable consistency. This quick fix will save your decorating efforts!
While this eggless royal icing does harden beautifully, it can be a bit fragile. Therefore, I advise against stacking your decorated gingerbread cookies, especially for transport or long-term storage. Stacking could easily cause the delicate icing designs to get squashed or smudged. Instead, store them in a single layer to preserve their artistic perfection.
How to Store Gingerbread Cookies for Maximum Freshness
Proper storage is key to enjoying your homemade gingerbread cookies for as long as possible. Baked gingerbread cookies, especially when decorated with royal icing, have a good shelf life, typically lasting 1-2 weeks when stored correctly.
The best way to store them is in an airtight container. This prevents them from drying out and helps maintain their perfect balance of crispness and chewiness. Place the container on your kitchen counter or in a cool, dry pantry – there’s no need to refrigerate them.
As mentioned earlier, due to the somewhat fragile nature of royal icing, it’s highly recommended to store your decorated cookies in a single layer within the airtight container. If you must stack them, place a piece of parchment paper or wax paper between each layer to protect the delicate icing designs from smudging or sticking. This little extra step ensures your festive creations look as good as they taste for days to come!
More Irresistible Gingerbread Recipes to Explore
If you’re as much of a gingerbread enthusiast as we are, you’ll love these other festive variations. Perfect for expanding your holiday baking repertoire!
- Gingerbread Chocolate Chip Cookies: A delightful fusion of classic spices and melty chocolate.
- Gingerbread Cookie Bars: All the gingerbread flavor in an easy, shareable bar format.
- Gingerbread Blondies: Chewy, spiced, and utterly delicious.
- Gingerbread Cake: A moist and flavorful centerpiece for your holiday table.
- Chocolate Gingerbread Cupcakes: The perfect pairing of rich chocolate and warm ginger spice.
- Gingerbread Cheesecake: A decadent and creamy dessert with a festive twist.
- Mini Gingerbread Cheesecakes: Bite-sized portions of creamy, spiced perfection.
- Gingerbread Pie: An easy, no-bake option for a quick festive treat.
- Christmas Popcorn with a delightful gingerbread coating: A perfect crunchy snack for holiday movie nights.

Small Batch Gingerbread Cookies with Eggless Royal Icing
9-12 cookies (depending on cutter size)
30 minutes
8-10 minutes
1 hour
1 hour 40 minutes
Embrace the joy of holiday baking with these perfect small batch gingerbread cookies. Made with rich butter and spiced to perfection, they feature a delightful snap and chewy center. Finish them with a simple, shiny eggless royal icing for a truly festive and delicious treat!
Ingredients
- 1 cup + 2 tablespoons all-purpose flour
- 1/4 teaspoon baking soda
- 1/4 teaspoon ground cinnamon
- 1/4 teaspoon ground nutmeg
- 1/4 teaspoon ground ginger
- 1/4 teaspoon ground cloves
- 1/8 teaspoon salt
- 1/4 cup (2 ounces or 4 tablespoons) unsalted butter, softened
- 2 tablespoons brown sugar
- 1 egg yolk
- 2 tablespoons molasses
- 1/2 teaspoon vanilla extract
For the Eggless Royal Icing
- 1 cup powdered sugar, sifted
- 1 tablespoon milk (dairy or non-dairy)
- 1 tablespoon corn syrup (optional, for shine and smoothness)
- 1/8 teaspoon vanilla extract
Instructions
- In a large bowl, thoroughly whisk together the all-purpose flour, baking soda, ground cinnamon, ground nutmeg, ground ginger, ground cloves, and salt. Set aside.
- In a separate, larger mixing bowl, using an electric mixer, beat together the softened unsalted butter and brown sugar until the mixture is light, fluffy, and creamy, which should take about 1-2 minutes.
- Add the egg yolk, molasses, and vanilla extract to the butter mixture. Continue beating until well combined. Don’t be concerned if the mixture appears slightly curdled at this stage; just keep mixing.
- Gradually add the dry flour mixture to the wet ingredients, beating on low speed until a cohesive dough forms. Mix just until combined; avoid overmixing.
- Gather the dough into a ball and flatten it slightly. Place it between two sheets of plastic wrap. Using a rolling pin, roll out the dough evenly until it is approximately 1/4 inch thick. Transfer the wrapped dough to a flat surface (like a dinner plate or baking sheet) and refrigerate for at least 1 hour, or until thoroughly cold and firm.
- Once the dough is cold, preheat your oven to 350°F (175°C). Lightly flour your cookie cutters. Carefully remove the top layer of plastic wrap from the chilled dough. Cut out desired shapes with your floured cookie cutters and transfer them gently to an ungreased cookie tray. Re-roll any dough scraps between the plastic wrap and cut more cookies until all the dough is used. If the dough becomes too sticky or warm, return it to the fridge for a quick re-chill.
- To prevent spreading, place the cookie tray with the cut-out cookies into the freezer for at least 15 minutes while the oven finishes preheating. This crucial step helps the cookies maintain their shape.
- Bake the gingerbread cookies for 8-10 minutes, depending on their size. Smaller cookies will be done around 8 minutes, while larger ones may need up to 10 minutes. The edges should be firm and lightly golden. Let the cookies cool on the baking sheet for 5 minutes before carefully transferring them to a wire rack to cool completely.
- For the Eggless Royal Icing: In a medium mixing bowl, beat together the sifted powdered sugar, milk, corn syrup (if using), and vanilla extract until the mixture is smooth and thick. The consistency should be quite thick and pipeable, not runny. If it’s too thin, add powdered sugar 1 tablespoon at a time until the desired thickness is achieved. If too thick, add milk 1/4 teaspoon at a time.
- Transfer the prepared royal icing to a plastic sandwich bag or a piping bag fitted with a small round tip. Snip off a tiny corner of the sandwich bag. Pipe your desired designs onto the completely cooled gingerbread cookies. Allow the icing to harden fully (this can take several hours at room temperature) before serving or storing. Store cooled and decorated cookies in a single layer in an airtight container at room temperature for up to 1 week.
Did you make this recipe?
I’d love to see your festive creations! Rate the recipe above, leave a comment below sharing your experience, and/or share a photo on Instagram using the hashtag #HITKrecipes. Your feedback makes my day!
