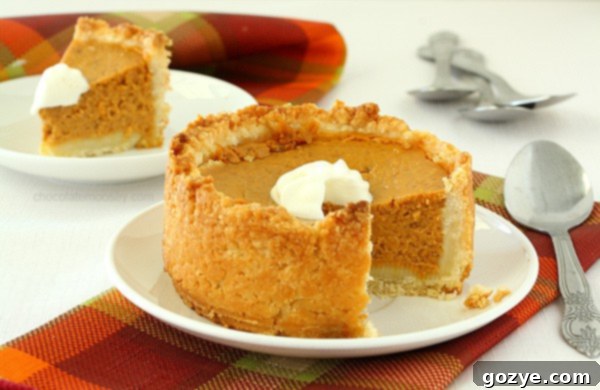
Perfect Mini Deep Dish Pumpkin Pies for Two: No Evaporated Milk, Cream Cheese Crust
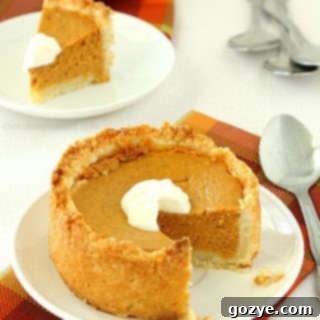
Imagine a Thanksgiving feast where you can enjoy all the delicious main courses and sides, yet still have plenty of room for a perfectly sized, warm slice of pumpkin pie. This dream becomes a reality with our Mini Pumpkin Pie Recipe for Two. These deep-dish delights are baked in adorable 4-inch springform pans, featuring a uniquely tangy and flaky cream cheese pie crust, and best of all, they’re made without evaporated milk. This recipe is designed for those who appreciate homemade goodness but want to avoid the usual holiday excess.
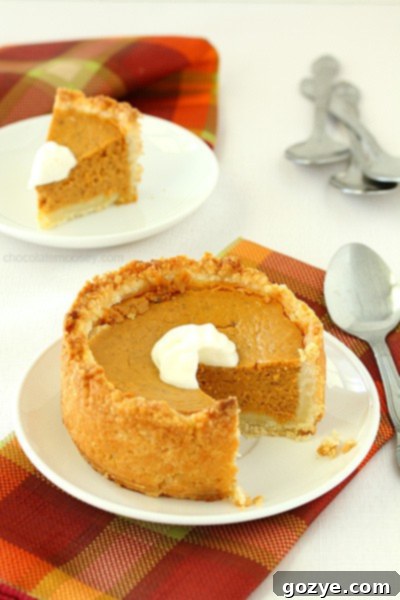
For many, Thanksgiving conjures images of grand family gatherings, massive twenty-pound turkeys, ten different side dishes, and a dessert table laden with at least three kinds of pie. However, not every household fits this traditional mold. For smaller families, or those hosting an intimate Thanksgiving Dinner For Two, the idea of baking an entire 9-inch pie can feel overwhelming and lead to unnecessary waste. By the time you reach dessert, often there’s barely enough room for a single slice.
This is precisely why we adore this Mini Pumpkin Pie recipe. It yields two perfect, individual deep-dish pumpkin pies, each crafted in a 4-inch springform pan with a delectable homemade cream cheese pie crust. It’s the ideal solution for ensuring everyone gets a taste of their favorite holiday dessert without the leftovers or the pressure of consuming a huge amount.
Don’t have mini springform pans readily available? No problem! You can explore my alternative Small Pumpkin Pie recipe, which is designed for a 6-inch pie plate, offering another fantastic option for small-batch baking.
Why Opt for Mini Pumpkin Pies?
The inspiration behind these mini pies stems from my popular mini lemon meringue pies. The concept is simple yet brilliant: smaller portions mean you can truly savor the taste of Thanksgiving without feeling overly full or guilty about the calories (unless, of course, you decide to eat both pies!).
There are numerous compelling reasons to embrace mini pies:
- Perfect Portion Control: Ideal for smaller households or when you want to offer individual desserts.
- Reduced Waste: Avoids the problem of a large pie sitting in the fridge for days, especially if only a few family members enjoy pumpkin.
- Variety on the Dessert Table: Mini pies allow you to serve a wider array of desserts, such as both pumpkin and pecan pies, giving guests more choices.
- No Evaporated Milk Needed: One of the biggest advantages is avoiding the need to open a full can of evaporated milk, only to use a small amount and have the rest go to waste. We’ll show you a simple, effective substitute.
- Less Stress: Baking smaller pies can feel less daunting than a large one, making holiday baking more enjoyable.
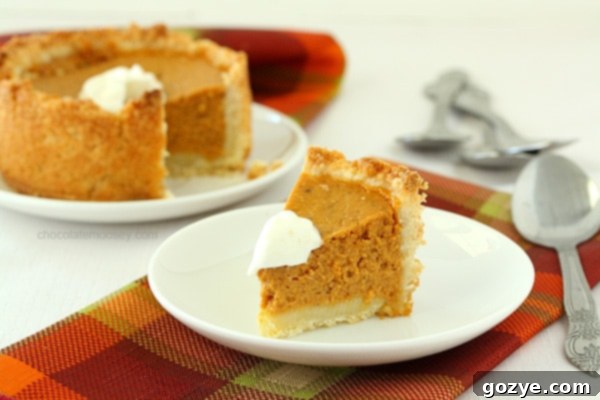
How To Make The Best Mini Pumpkin Pies
Crafting these delightful mini pumpkin pies involves two primary components: the flaky pie crust and the creamy pumpkin filling. The beauty of this recipe is that many elements can be prepared in advance, significantly reducing stress on Thanksgiving Day or any special occasion. This particular pumpkin pie recipe draws inspiration from the timeless Libby’s Famous Pumpkin Pie recipe, a classic that has earned my dad’s unwavering endorsement. We’ve expertly scaled down the filling to perfectly fit two mini pies and paired it with our signature cream cheese pie crust for an extra layer of flavor and tenderness.
Crafting the Cream Cheese Pie Crust for Your Mini Pumpkin Pies
The pie crust for these mini pumpkin pies is a variation of my popular Small Pie Crust recipe, but with a special twist: cream cheese replaces shortening. This substitution not only contributes to an incredibly tender and rich crust but also imparts a delightful, subtle tang that perfectly complements the sweet pumpkin filling.
The secret to a truly flaky pie crust lies in keeping your butter and cream cheese intensely cold. This critical step ensures that the fat remains in distinct pieces within the dough, rather than blending in completely as it would for cookies or cake. When these cold chunks of fat encounter the heat of the oven, they rapidly melt and release steam. This steam then creates delicate, airy pockets throughout the dough, resulting in that coveted, melt-in-your-mouth flaky texture we all desire in a perfect pie.
Easy Pie Dough Preparation
For maximum ease and efficiency, preparing pie dough in a food processor is highly recommended. This method allows you to cut in the cold butter and cream cheese in mere minutes, forming a cohesive dough with minimal effort. Simply add your dry ingredients along with the cold, cubed fats, and pulse until the mixture resembles coarse crumbs.
However, if a food processor isn’t available, don’t despair! You can achieve excellent results manually. Combine your dry ingredients in a large bowl, then use a sturdy pastry cutter to meticulously cut the cold butter and cream cheese into the flour mixture. Work quickly to prevent the fats from warming up, continuing until the mixture resembles small, pea-sized pieces.
Rolling Out Your Pie Dough Like a Pro
Once your pie dough is made, it’s absolutely crucial that it is thoroughly chilled before you attempt to roll it out. Warm dough becomes notoriously sticky and difficult to manage, clinging to your work surface and rolling pin no matter how much flour you use. A well-chilled dough is much more pliable and cooperative.
Working with one portion of the dough at a time, gently roll it into an approximately 6-inch circle. This size provides ample dough to neatly line both the bottom and up the sides of your 4-inch mini springform pan. Don’t be overly concerned if the dough tears slightly during this process. Pie dough is incredibly forgiving! Any small rips or holes can be easily patched together directly within the pan, blending seamlessly as it bakes. Just use your fingers to press the torn pieces back into place.
The Essential Step: How to Blind Bake Pie Crust
Blind baking the pie crust for pumpkin pie is a non-negotiable step if you want to avoid a common pitfall: a soggy crust bottom. This technique involves partially baking the crust on its own before the filling is added, which allows it to firm up and create a barrier against the moisture of the custard filling.
If you were to pour the liquid pumpkin pie filling directly into an unbaked crust, the bottom crust would never fully crisp up, regardless of how long you bake the entire pie. The result would be an unappetizingly soft and wet bottom layer, detracting from the overall texture of your delicious dessert.
During blind baking, pie crusts have a natural tendency to puff up and shrink. To counteract this, you’ll need to line each crust with a piece of greased foil (greasing prevents it from sticking to the dough) and fill it with pie weights or dried beans. These weights provide gentle pressure, keeping the crust securely in place and preventing it from bubbling up or collapsing during the initial bake. I personally find dried lentils work wonderfully as pie weights, but dried beans are an equally effective and common alternative.
For the final 5 minutes of the blind baking process, carefully remove the foil and pie weights. This direct exposure to the oven’s heat ensures that the bottom of the crust truly dries out and becomes golden brown, creating a perfectly firm and ready base for your pumpkin filling.
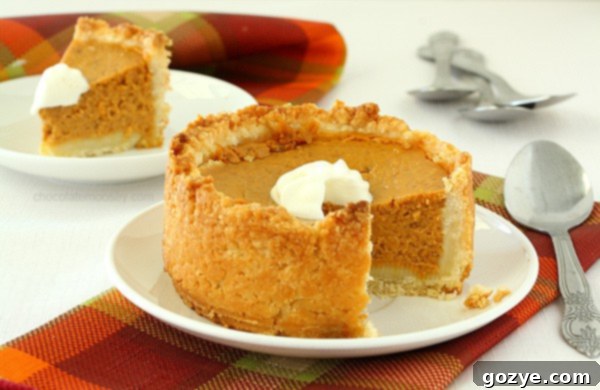
Crafting the Irresistible Pumpkin Pie Filling
Making the pumpkin pie filling is surprisingly straightforward. The process is as simple as combining all the ingredients in a bowl, whisking them until smooth and well-incorporated, then pouring the mixture into your perfectly blind-baked pie crusts.
Traditionally, pumpkin pie filling recipes often call for evaporated milk. However, I’ve found it frustrating to open a full can of evaporated milk only to use a small portion, especially when baking small batches. The rest often goes to waste or languishes in the refrigerator.
Fortunately, there’s an excellent and equally delicious substitute! You can achieve the same rich, creamy consistency by using a combination of heavy cream and whole milk. This blend ensures that the filling has a sufficient amount of milk fat, which is crucial for achieving that signature velvety texture and preventing the filling from becoming watery. This simple swap means you can enjoy homemade pumpkin pie without the fuss of specialty canned milks.
For those who need or prefer to bake without eggs, I also have a fantastic Eggless Pumpkin Pie recipe that delivers all the classic flavors without compromise.
Common Questions & Troubleshooting for Pumpkin Pie
Why does my pumpkin pie crack in the middle?
Pumpkin pie, at its heart, is a custard pie, thanks to its egg-based filling. Like many custards, it has a tendency to crack if it’s baked for too long or at too high a temperature. The most common culprit is simply overbaking. Many home bakers struggle to determine when the pie is truly done, leading them to leave it in the oven for too long “just in case.”
The key to a perfectly baked, crack-free pumpkin pie is to look for a specific indicator of doneness. Much like a cheesecake, a pumpkin pie is ready when the edges are set and firm to the touch, but the very center still has a slight, delicate jiggle when gently nudged. It should never be completely liquid, but a subtle wobble is perfectly normal and indicates a creamy, perfectly cooked custard. If it jiggles too much, it needs a little more time; if it’s completely firm, it’s likely overbaked.
Should your pumpkin pie unfortunately develop a crack, don’t fret! It’s an easy fix. A generous dollop of homemade whipped cream is the perfect camouflage, transforming any imperfection into an attractive topping.
Should you refrigerate pumpkin pie?
Yes, homemade pumpkin pie must be refrigerated. Due to its egg and dairy content, pumpkin pie can safely sit out at room temperature for a maximum of 2 hours. Beyond this timeframe, it should be promptly transferred to the refrigerator to prevent the growth of harmful bacteria. Always store leftover pie, covered, in the fridge.
Can you freeze pumpkin pie?
Absolutely! Pumpkin pie freezes exceptionally well, which is a huge advantage, especially when you’re managing a busy holiday dinner with a myriad of tasks on your to-do list. Freezing pies ahead of time can be a real time-saver.
To freeze pumpkin pie effectively, ensure the pie is completely cooled to room temperature first. Then, wrap it securely in several layers of plastic wrap, followed by a layer of aluminum foil, to protect it from freezer burn.
When you’re ready to enjoy your frozen pumpkin pie, the thawing process is crucial. Transfer the wrapped pie from the freezer to the refrigerator approximately 12 hours before you plan to serve it. This slow, gradual thawing in the refrigerator is essential. If you attempt to thaw the pie at room temperature, the filling is likely to “weep” or release moisture, which will inevitably lead to a soggy and unappealing crust. A slow thaw ensures the filling retains its creamy texture and the crust remains firm and delicious.
What To Do With Leftover Canned Pumpkin
Making pumpkin pie for two means you often won’t use an entire can of pumpkin puree. Don’t let that leftover pumpkin go to waste! Here are more fantastic recipes that utilize leftover canned pumpkin, ensuring every last bit is enjoyed:
- Soft Pumpkin Sugar Cookies
- Cheddar Pumpkin Mashed Potatoes
- Single Serving Pumpkin Chocolate Chip Cookie
- Pumpkin Pie Cupcakes
- Small Pumpkin Cake
- Mini Pumpkin Cheesecakes
Mini Pumpkin Pies For Two
2-4 servings
30 minutes
1 hour
4 hours
5 hours 30 minutes
Making homemade Mini Pumpkin Pies For Two without evaporated milk in a cream cheese pie crust means having room for pie on Thanksgiving.
Ingredients
- 1/2 cup all purpose flour
- 1 tablespoon granulated sugar
- 1/4 teaspoon salt
- 2 tablespoons cold unsalted butter, cut into 2 pieces
- 2 ounces cold full-fat cream cheese, cut into 2 pieces
- 1 tablespoon water
Pie Filling
- 1 egg, room temperature
- 1/2 cup canned pumpkin puree
- 1/4 cup granulated sugar
- 1/2 teaspoon ground cinnamon
- 1/4 teaspoon ground nutmeg
- 1/4 teaspoon ground ginger
- 1/4 teaspoon ground cloves
- 1/4 teaspoon salt
- 1/2 teaspoon vanilla extract
- 3 tablespoons whole milk, room temperature
- 3 tablespoons heavy cream, room temperature
- Small Batch Homemade Whipped Cream, for serving
Instructions
- In the bowl of a food processor, add the flour, sugar, butter, and cream cheese. Pulse until the mixture looks like large pebbles. Alternately, add everything to a large bowl and cut in the fat using a pastry blender.
- Add the water and pulse until a dough forms. Divide the dough into two even pieces and flatten each piece into an evenly round disk. Wrap in plastic wrap and refrigerate at least 1 hour or until cold.
- Preheat oven to 400F. Place two 4-inch springform pans onto a baking sheet.
- Working with one disk at a time, roll the dough into a 6 inch circle. Press the dough into the bottom and up the sides of the pan (if the dough tears, patch into pieces). Repeat with the remaining disk. If the oven is still preheating, keep both pans cold in the refrigerator until ready to bake.
- Line each pie crust with greased foil, covering the bottom and sides. Fill with pie weights or dried beans. Bake for 10 minutes.
- Remove the foil and weights then bake another 5 minutes or until the bottoms are golden brown and no longer looks uncooked.
- Turn the oven down to 350F. Let the crusts cool while you make the filling.
- In a large bowl, whisk together the egg, pumpkin, sugar, cinnamon, nutmeg, ginger, cloves, salt, and vanilla. Whisk in the milk and heavy cream.
- Divide the filling evenly between the two crusts. Bake 45-50 minutes or until the filling is set (the center may jiggle slightly but shouldn’t be wet).
- Cool for at least 2 hours then cover and refrigerate for at least 1 hour before serving with whipped cream.
Notes
- Don’t have mini springform pans? Check out my Small Pumpkin Pie made in a 6 inch pie plate or Eggless Pumpkin Pie made in ramekins.
- Baking for the holidays? Check out my Thanksgiving For Two and Christmas For Two menus for recipe pairings.
- Got extra pumpkin? Check out my other pumpkin recipes.
Recommended Products
As an Amazon Associate and member of other affiliate programs, I earn from qualifying purchases.
- 4-Inch Pans
Did you make this recipe?
Let me know what you think! Rate the recipe above, leave a comment below, and/or share a photo on Instagram using #HITKrecipes
Source: Adapted from Very Best Baking
Whether you’re celebrating a quiet Thanksgiving, hosting a romantic dinner for two, or simply craving a perfectly portioned pumpkin dessert, these Mini Deep Dish Pumpkin Pies are sure to impress. With a delicate cream cheese crust and a rich, evaporated milk-free filling, they offer all the classic flavors with a modern twist. Give this recipe a try and elevate your dessert game!
