Homemade Funfetti Ice Cream Sundae Cupcakes: The Ultimate No-Melt Party Dessert
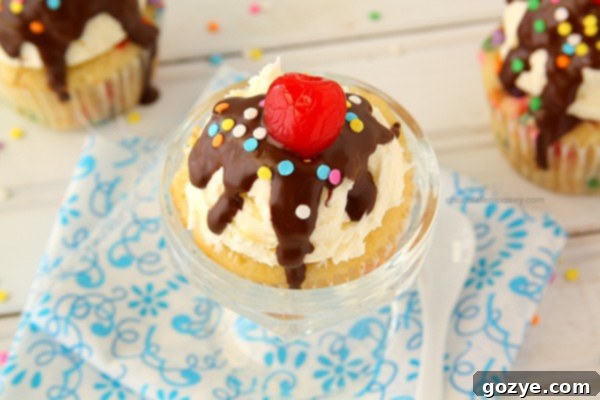
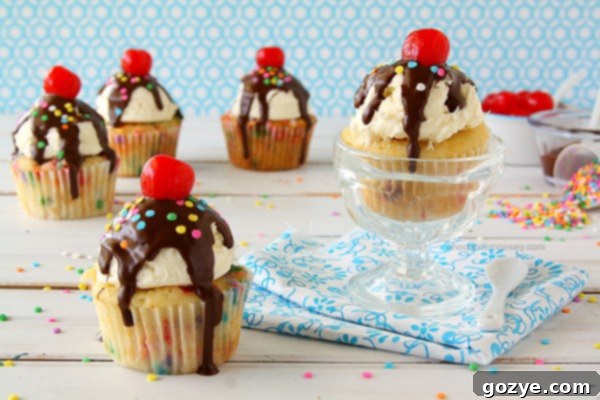
What better way to celebrate the joyful spirit of summer, birthdays, or any special occasion than with a dessert that brings a smile to everyone’s face? Presenting our delightful Funfetti Ice Cream Sundae Cupcakes – a visually stunning treat that perfectly captures the whimsical charm of a classic ice cream sundae, yet offers the convenience and stability of a cupcake. These aren’t just any cupcakes; they’re a clever illusion, designed to bring all the fun without any of the melt!
Don’t let their picture-perfect presentation fool you. While these cupcakes look exactly like adorable miniature ice cream sundaes, there’s a delicious secret: no actual ice cream is involved. This innovative approach means you can serve a stunning dessert that holds up beautifully at any gathering, from backyard BBQs to indoor celebrations, without worrying about drips or puddles.
The Magic Behind the Sundae Illusion: Frosting, Fudge, and Flair
Crafting the “Ice Cream” Scoop with Vanilla Frosting
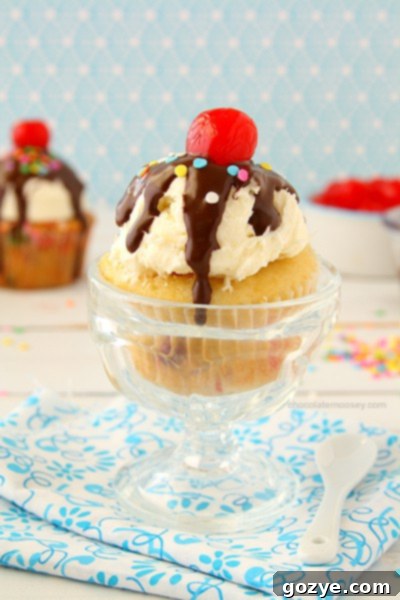
The key to these cupcakes’ convincing appearance lies in their topping. That luscious swirl isn’t a scoop of melting vanilla ice cream; it’s a generous dollop of rich, fluffy vanilla frosting. The trick? I simply used an ice cream scoop to perfectly shape the frosting on top of each cupcake. This method creates an incredibly realistic effect, making your guests do a double-take! I’ve employed this delightful technique before with my Root Beer Float Cupcakes, proving its versatility and charm.
Creating the Irresistible Magic Shell “Fudge” Sauce
No sundae is complete without a decadent fudge topping, and these cupcakes are no exception. To achieve the iconic hardening “magic shell” effect, I simply melted some semisweet chocolate chips with a touch of vegetable oil. This simple mixture, when poured over the cool frosting, quickly sets into a satisfyingly crisp shell, mimicking the classic ice cream parlor experience. The slight snap as you bite into the chocolate adds another layer of texture and fun to every bite.
The Cherry on Top (and the Sprinkle Sparkle)
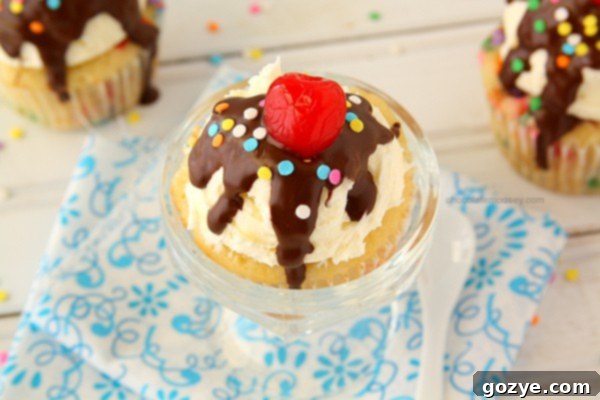
To finish the sundae illusion, a bright maraschino cherry is essential. For whatever reason, I couldn’t find maraschino cherries with stems on my last grocery trip, so I opted for stemless ones. While the stem adds a certain flair, the vibrant red pop of color is what truly completes the look. And let’s not forget the sprinkles! A generous scattering of rainbow jimmies or confetti sprinkles over the hardening chocolate adds that extra touch of funfetti magic and makes these cupcakes truly irresistible.
The Allure of Funfetti: A Timeless Favorite
From Boxed Mixes to Homemade Perfection
Funfetti has always held a special place in my heart – and, I imagine, in the hearts of many. I grew up with the convenience of boxed Funfetti mixes, a staple at countless birthday parties and celebrations. However, as soon as I was old enough to confidently bake on my own, I embarked on a mission to create my own small birthday cake and cupcakes from scratch. There’s an undeniable satisfaction in knowing every ingredient that goes into your dessert, and the resulting flavor and texture are simply unmatched.
The Art and Science of Sprinkles
At its core, a Funfetti cake is essentially a classic butter cake infused with colorful sprinkles. But here’s a crucial detail that can make or break your Funfetti experience: the type of sprinkles you use truly matters. If you opt for nonpareils (those tiny, round, bead-like sprinkles), you might encounter a common baking woe: they tend to bleed their color into the batter, turning your beautiful, vibrant cake into a slightly muddy, colorful mess. To avoid this, it’s best to use rainbow jimmies or flat confetti sprinkles, just like I did for this recipe. These types of sprinkles are more stable and less prone to dissolving into the batter. If you do find yourself with only nonpareils, incorporate them carefully by gently folding them into the batter just before baking, and whatever you do, avoid overmixing!
Achieving the Perfect Funfetti Base
The foundation of these “sundae” cupcakes is a moist and tender Funfetti cake. The recipe calls for standard pantry ingredients like all-purpose flour, baking powder, baking soda, salt, sugar, melted butter, eggs, vanilla, sour cream, and milk. Each plays a vital role: the butter provides richness, sour cream adds moisture and a slight tang, and the leavening agents ensure a light, airy crumb. Following the mixing instructions carefully, alternating between dry and wet ingredients, helps develop the cake’s structure without overworking the gluten, which can lead to a tough cupcake. The final gentle fold of sprinkles ensures they are evenly distributed, ready to bring cheer to every slice.
Creative Serving Ideas and Party Perfection
Baking in Cones: A Whimsical Party Trick
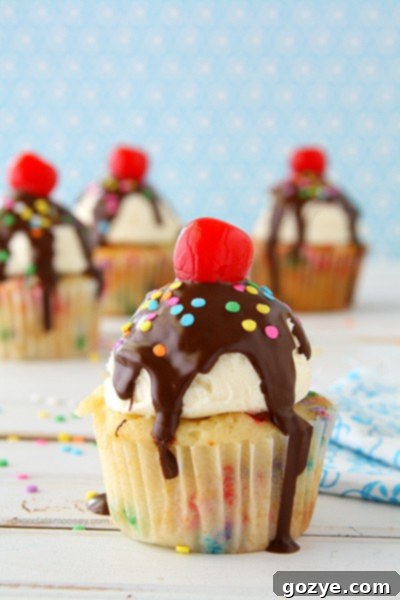
When my coworker first laid eyes on these Funfetti Ice Cream Sundae Cupcakes, she immediately noted how fantastic they would be baked directly into ice cream cones. What a brilliant idea! While I can’t give you an exact count of how many cones this specific recipe would yield without testing, it’s a fantastic concept for adding an extra layer of fun and novelty to your dessert presentation. Imagine these colorful cupcakes, baked right inside a crunchy cone, topped with that “ice cream” frosting and magic shell. You’d undoubtedly be the star of any child’s (or adult’s!) party. To try this, simply line a muffin tin with foil to stabilize the cones, fill them with batter, and bake as directed. It’s an easy way to eliminate the need for cupcake liners and adds to the ice cream theme.
The Ultimate DIY Sundae Bar
Want to take the interactive fun even further? You could easily transform these cupcakes into a DIY “Ice Cream Sundae Bar.” Prepare a batch of the Funfetti cupcakes, frost them with the vanilla “ice cream” swirl, and then set out an array of toppings for guests to customize their own. Think beyond just sprinkles and cherries! Offer bowls of mini chocolate chips, chopped nuts, different colored jimmies, gummy candies, caramel sauce, and even whipped cream. This allows everyone to get creative and design their perfect cupcake sundae, making your party truly memorable.
Why Choose No-Melt Sundaes?
The advantages of these “faux” ice cream sundaes are numerous. Firstly, they eliminate the mess and stress associated with serving real ice cream, especially at outdoor events or larger gatherings. No melting, no sticky drips, and no need for constant refrigeration. Secondly, they offer a unique and unexpected twist on traditional cupcakes, instantly elevating them to a conversation-starter. Finally, the ability to customize with various toppings ensures there’s something for everyone, catering to different tastes and preferences.
Funfetti Ice Cream Sundae Cupcakes
1 dozen
Whip up these adorable Funfetti Ice Cream Sundae Cupcakes that look just like the real deal but won’t melt! Perfect for parties and a delightful treat.
Ingredients
For the Cupcakes:
- 1 2/3 cups all purpose flour
- 1/2 teaspoon baking powder
- 1/4 teaspoon baking soda
- 1/2 teaspoon salt
- 1 cup granulated sugar
- 1/2 cup (1 stick) unsalted butter, melted
- 1 egg
- 1 teaspoon vanilla extract
- 1/4 cup sour cream
- 3/4 cup milk
- 1/2 cup rainbow sprinkles (jimmies or confetti recommended)
For the Vanilla Frosting:
- 3 cups powdered sugar, sifted
- 1 cup (2 sticks) unsalted butter, softened
- Pinch of salt
- 1 teaspoon vanilla extract
For the Chocolate Magic Shell:
- 1/2 cup semisweet chocolate chips
- 1 tablespoon vegetable oil
For Garnish:
- Extra rainbow sprinkles
- Maraschino cherries
Instructions
Making the Funfetti Cupcakes:
- Preheat your oven to 350°F (175°C). Line a standard 12-cup cupcake pan with paper liners.
- In a medium bowl, whisk together the all-purpose flour, baking powder, baking soda, and salt. Set aside.
- In a large mixing bowl, using either a stand mixer with a paddle attachment or a whisk, beat together the granulated sugar and melted butter until well combined and smooth. Beat in the egg, then the vanilla extract and sour cream until fully incorporated.
- Gradually add the dry ingredients to the wet ingredients, alternating with the milk. Start by adding about 1/3 of the flour mixture, then 1/2 of the milk. Add another 1/3 of the flour mixture, then the remaining milk, and finally the remaining flour mixture. Mix until just combined. Be careful not to overmix. Gently fold in the rainbow sprinkles.
- Divide the batter evenly among the 12 prepared cupcake liners, filling each about two-thirds full. Bake for 20-25 minutes, or until a toothpick inserted into the center of a cupcake comes out clean. Let the cupcakes cool in the pan for a few minutes before transferring them to a wire rack to cool completely.
Preparing the Vanilla Frosting:
- While the cupcakes are cooling, prepare the frosting. In a large mixing bowl, using a stand mixer with a paddle attachment or a hand mixer, beat together the sifted powdered sugar, softened unsalted butter, and a pinch of salt until smooth and creamy, about 2-3 minutes. Add the vanilla extract and continue to beat for another 2-3 minutes until the frosting is light and fluffy. Once the cupcakes are completely cool, use an ice cream scoop to place a generous scoop (or pipe with a large round tip) of frosting on top of each cupcake, creating an “ice cream” effect.
Making and Applying the Chocolate Magic Shell:
- In a small, microwave-safe bowl, melt the semisweet chocolate chips in 30-second intervals, stirring after each, until smooth. Stir in the vegetable oil until fully incorporated and the mixture is glossy. Immediately pour a spoonful of the melted chocolate over the top of each frosted cupcake. The chocolate will begin to harden as it touches the cool frosting.
- Quickly top with extra sprinkles and place a maraschino cherry on top of the hardening chocolate.
- Refrigerate the cupcakes for at least 15-20 minutes, or until the chocolate magic shell is firm. Store the finished Funfetti Ice Cream Sundae Cupcakes in an airtight container for up to one week. Keep refrigerated, especially if the chocolate shell softens in warmer temperatures, and let them come to room temperature briefly before serving for best texture.
Did you make this recipe?
Let me know what you think! Rate the recipe above, leave a comment below, and/or share a photo on Instagram using #HITKrecipes
Source: Adapted from 125 Best Cupcake Recipes
Explore More Delicious Dessert Ideas
If you loved creating and tasting my Funfetti Ice Cream Sundae Cupcakes, you’re in for a treat with these other delightful recipes that bring unique twists to classic desserts:
- Sundae Cookies: Another fantastic “no-melt” dessert that captures the essence of an ice cream sundae in a convenient cookie form. Perfect for cookie lovers and party platters!
- Homemade Chocolate Peanut Butter Magic Shell: Elevate your ice cream or cupcake game with this incredible homemade magic shell. The peanut butter adds a rich, nutty flavor that’s utterly addictive.
- Funfetti Cheesecake: For those who can’t get enough of Funfetti’s festive charm, this cheesecake combines creamy, tangy goodness with colorful sprinkles for a show-stopping dessert.
These Funfetti Ice Cream Sundae Cupcakes are more than just a dessert; they’re an experience. They embody creativity, nostalgia, and pure joy, making them the perfect centerpiece for any celebration. So gather your ingredients, unleash your inner baker, and get ready to impress with these utterly charming and delicious treats!
