The Ultimate Guide to Homemade Vanilla Bean Ice Cream: Creamy, Aromatic & Unforgettable
Prepare to embark on a culinary journey that will forever change your perception of vanilla ice cream. This recipe isn’t just about making dessert; it’s about crafting an experience – a truly amazing, intensely flavorful, yet surprisingly simple homemade vanilla ice cream starring real vanilla beans. Forget bland and boring; this is the pure essence of vanilla, resulting in a rich, creamy, and utterly delightful treat. This recipe yields approximately 1 pint, a perfect small batch for two, but can easily be doubled to make a full quart for sharing (or for keeping all to yourself!).
My childhood memories of ice cream often involved intense softball games, long summer afternoons spent in the outfield, chasing fly balls and celebrating singles (and the occasional double!). After our dusty victories or valiant efforts, the team’s collective plea to our coach was almost always for ice cream. Sometimes, he’d relent, and we’d pile into cars heading for the bright pink building on the hill – a landmark you truly couldn’t miss.
Back then, chocolate was my unwavering choice. I remember vanilla ice cream being so… tasteless, so uninspired, so utterly boring. Little did I know, the mass-produced vanilla I encountered was a pale imitation of what real vanilla ice cream truly tastes like. It wasn’t until my early blogging days that I had my first true encounter with Vanilla Bean Ice Cream, and the memory of that moment is still vivid.
I was absolutely astonished by how incredibly GOOD it tasted. The depth of flavor, the aromatic notes, and those beautiful specks of vanilla bean almost convinced me to crown it my new favorite (though nothing will ever quite unseat my beloved German chocolate cake ice cream!). This transformative experience taught me a valuable lesson: if you think vanilla ice cream is dull, then you absolutely NEED to try the real deal – vanilla bean ice cream.
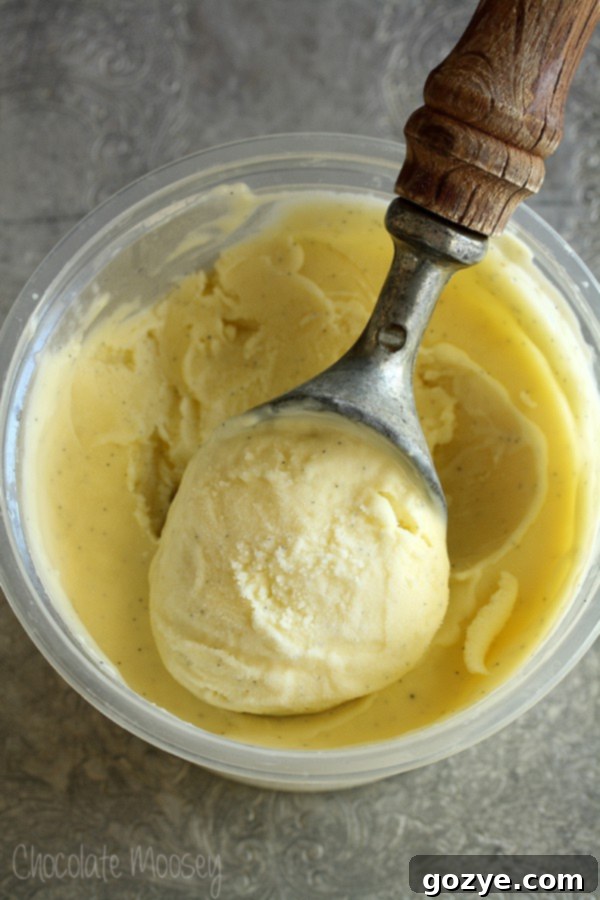
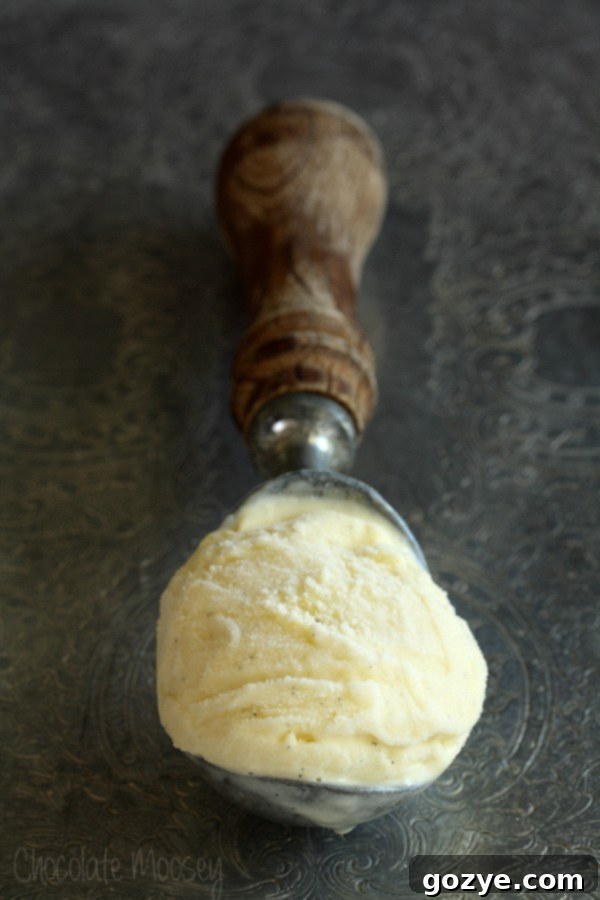
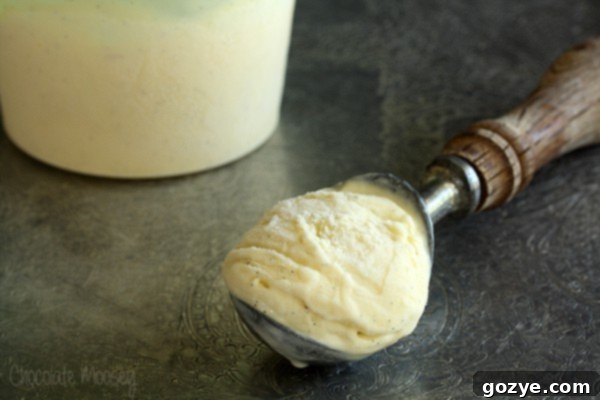
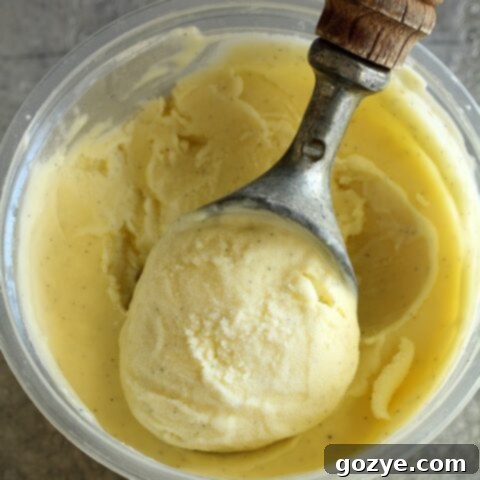
One of the most striking differences you’ll notice with authentic homemade vanilla bean ice cream is its color. It’s not stark white like many store-bought varieties. Instead, it boasts a beautiful, light brown hue. Think about it: what color is a vanilla bean itself? Brown. When you infuse that rich brown essence into a white cream base, you naturally get a lovely, subtle light brown. This distinctive color is a tell-tale sign that you’re enjoying genuinely homemade vanilla bean ice cream, bursting with natural flavor.
This exquisite ice cream is incredibly versatile. It’s the perfect companion for a warm dessert like mini apple pie, a comforting small apple pie, or a rustic apple crisp for two. For a truly decadent treat, try pouring thick hot chocolate over a generous scoop to create an irresistible hot chocolate float.
Choosing the Right Ice Cream Maker
While some no-churn recipes exist, using an ice cream machine significantly simplifies the process and generally yields a superior, smoother texture. For making this luscious vanilla bean ice cream, an ice cream maker is highly recommended. I personally use this versatile red 1.5 quart ice cream maker.
Although you can find smaller models, I appreciate the flexibility of a larger capacity machine. You never know when you might need to scale up your recipe to make a full quart for a special occasion like a peanut butter ice cream cake or to serve at a family gathering. A good ice cream maker ensures your mixture is properly churned, incorporating just the right amount of air for that light, creamy consistency, and preventing the formation of large, icy crystals that can ruin the texture of homemade ice cream.
Enjoying this vanilla bean ice cream recipe? Don’t stop here! Explore my other delicious Small Batch Ice Cream Recipes for more delightful frozen treats you can easily make at home.
Key Ingredients for Unforgettable Vanilla Bean Ice Cream
Crafting the perfect vanilla bean ice cream requires a thoughtful selection of ingredients, each playing a crucial role in achieving that rich flavor and incredibly creamy texture. Here’s a breakdown of what you’ll need:
- Heavy whipping cream: This is your secret weapon for a truly luxurious ice cream. Fat is absolutely essential for creating the smooth, velvety texture we all crave. Beyond texture, fat also acts as a carrier for flavor, allowing the delicate notes of vanilla bean to shine through brilliantly. It also helps the ice cream freeze with minimal, fine ice crystals, preventing an icy consistency. Do not substitute!
- Whole milk: While heavy cream is vital, using it exclusively would result in an overly rich and heavy ice cream. Whole milk balances this richness, providing a lighter body while maintaining creaminess. It’s crucial to use whole milk; low-fat or skim milk will lead to an icier, less satisfying product.
- Granulated sugar: More than just a sweetener, sugar is fundamental to the ice cream’s final texture. It lowers the freezing point of the mixture, which is why your homemade ice cream remains delightfully semi-soft and easily scoopable, rather than rock-hard and icy straight from the freezer.
- Salt: A pinch of salt is a flavor enhancer. It doesn’t make the ice cream salty, but rather brightens and deepens the other flavors, ensuring your ice cream is never bland.
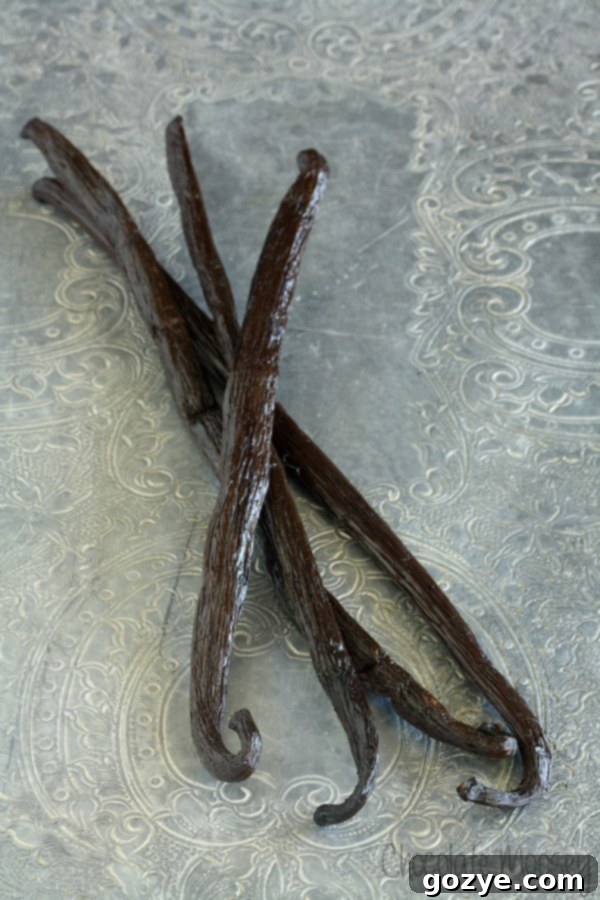
- Vanilla bean: The undisputed star of this recipe! The real vanilla bean pods and their tiny, aromatic seeds deliver a complex, profound vanilla flavor that extract alone cannot replicate. I typically use Madagascar vanilla beans, known for their classic, rich, and creamy profile. However, you could also experiment with Mexican vanilla (bold, smoky, and spicy) or Tahitian vanilla (floral, fruity, and sweet) for different nuances.
- Egg yolks: Egg yolks are what transform your ice cream base into a luscious, silky custard. They act as an emulsifier and thickener, contributing significantly to the smooth, rich mouthfeel of the finished ice cream. Don’t worry about leftover egg whites; check out my guide on what to do with egg whites.
- Vanilla extract: Even with a whole vanilla bean, a touch of vanilla extract (pure, not imitation) adds another layer of vanilla complexity, enhancing and rounding out the overall flavor profile. It acts as a booster for the natural vanilla essence.
What To Do With Your Used Vanilla Bean Pods
One of the wonderful benefits of using real vanilla beans is their reusability, even after you’ve scraped out the seeds and infused their flavor into your cream. Don’t discard those precious pods!
After you’ve finished steeping, lightly rinse any remaining cream off the bean, pat it completely dry, and then store it in a small container of granulated sugar. Over time, the sugar will absorb the remaining vanilla aroma, creating your very own homemade vanilla sugar – perfect for baking or sweetening coffee. Alternatively, you can use the dried pods to make your own homemade vanilla extract, which makes for thoughtful and unique homemade Christmas gifts!
How To Make Perfectly Creamy Vanilla Bean Ice Cream
Making this incredible vanilla bean ice cream is a rewarding process. Follow these steps carefully to achieve the best possible results:
- Infuse the Vanilla: In a medium saucepan, gently warm up half of the heavy cream, all the milk, sugar, and salt. Once warm, scrape the tiny, fragrant seeds from your vanilla bean into the mixture, and add the split bean pod as well. Remove from heat, cover, and let it steep for a full 30 minutes. This crucial step allows the vanilla flavor to deeply infuse into the cream, creating an aromatic base.
- Temper the Egg Yolks: While the cream mixture is steeping, whisk the egg yolks in a separate small bowl until they are lightly beaten and pale yellow. Once the steeping time is up, gradually whisk about half a cup of the warm milk mixture into the egg yolks. This “tempering” step slowly raises the temperature of the yolks, preventing them from scrambling when added to the hot liquid.
- Create the Custard: Pour the tempered egg yolk mixture back into the saucepan with the remaining warm milk. Place the saucepan back over medium-low heat. Cook, whisking constantly and gently, until the mixture thickens enough to coat the back of a spoon (it should reach about 175-180°F or 80-82°C). Do not boil, and keep whisking to prevent the eggs from curdling. Immediately remove from heat once thickened.
- Cool Down Quickly: Prepare an ice bath: fill a larger bowl with ice and a little water. Strain the hot custard through a fine-mesh sieve into a clean bowl that fits into your ice bath. This step removes the vanilla bean pod and any potential small bits of curdled egg. Whisk in the remaining half cup of heavy cream and the vanilla extract. Place the bowl into the ice bath and continue whisking occasionally until the mixture cools to room temperature.
- Chill Thoroughly & Churn: Once the mixture is at room temperature, remove it from the ice bath, cover it, and refrigerate for at least 4 hours, or ideally, overnight. The colder your base is, the better it will churn. When thoroughly chilled, churn the mixture in your ice cream maker according to the manufacturer’s instructions. Transfer the freshly churned (and soft) ice cream to an airtight container and freeze for at least 4 hours, or overnight, until firm and perfectly scoopable. Homemade ice cream, when stored properly in an airtight container, will retain its best quality for up to two weeks.
Why Is Homemade Vanilla Bean Ice Cream Brown, Not White?
It’s a common misconception that vanilla ice cream should be pure white. When you buy commercial vanilla ice cream, it often has that stark white appearance. However, when you make homemade vanilla bean ice cream, you’ll notice it naturally takes on a beautiful, light brown tint. This distinctive color comes primarily from the vanilla bean itself. Vanilla beans are brown, and when their tiny seeds and entire pod are steeped and infused into your cream mixture, they impart their natural color. While a small amount of vanilla extract in a large volume of white liquid might not noticeably change the color, the intense infusion of a whole vanilla bean absolutely will, giving your ice cream the authentic, artisanal look you see in the photos.
Delicious Pairings: What To Serve With Vanilla Bean Ice Cream
The pure, rich flavor of homemade vanilla bean ice cream makes it a perfect complement to a wide array of desserts. Elevate your sweet creations by serving a scoop alongside:
- Decadent Mini Lava Cakes
- Warm Peach Cobbler For Two
- Sweet and flaky Mini Peach Pies
- Fudgy Brownies For Two (especially with hot fudge!)
- A cozy Chocolate Peanut Butter Mug Cake
- Tart and sweet Mini Cherry Pies
You can also transform your scoop into an incredible ice cream sundae by drizzling it with:
- Fresh and fruity Strawberry Sauce
- Rich and gooey Homemade Hot Fudge Sauce
- Nutty and sweet Nutella Sauce
- Velvety smooth Homemade Caramel Sauce
Vanilla Bean Ice Cream FAQ
Vanilla bean ice cream is crafted using actual vanilla bean pods and their seeds, which are steeped into the cream base. This process imparts a profoundly complex, rich, and often visible specks of vanilla. Regular vanilla ice cream, on the other hand, is primarily flavored with vanilla extract. While good, it typically lacks the depth, nuance, and visual appeal of its bean-infused counterpart, resulting in a less intense vanilla flavor.
For the best quality and value, I highly recommend sourcing vanilla beans online rather than from typical grocery stores. Online retailers often offer fresher products at more competitive prices. You can easily purchase high-quality vanilla beans online from Amazon (affiliate link) or from specialty spice shops.
To prepare a vanilla bean, place it on a clean cutting board. Use a sharp paring knife to carefully split the bean lengthwise down the center, without cutting all the way through to the other side. Then, using the blunt back edge of your knife, scrape along the inside of each half of the pod to extract all the tiny, potent seeds. Both the scraped seeds and the empty pod should be added to your milk and cream mixture for steeping to maximize flavor extraction.
While this recipe is designed for an ice cream maker for optimal creaminess, you can attempt a no-churn version. To do so, fold in 1 cup of cold heavy cream (whipped to soft peaks) into the thoroughly chilled custard base before freezing. Freeze in an airtight container, stirring vigorously every 30-45 minutes for the first 3-4 hours to break up ice crystals. The texture won’t be as smooth or airy as machine-churned, but it will still be delicious!
When stored properly in a sealed, airtight container in the coldest part of your freezer, homemade vanilla bean ice cream will maintain its best quality for up to two weeks. After that, it may start to develop more ice crystals and lose some of its fresh flavor and creamy texture.
More Not-Boring Vanilla Recipes
If vanilla has truly captured your heart and you’re eager to explore its incredible versatility beyond ice cream, check out these other wonderfully flavorful vanilla recipes that are anything but boring:
- Delightful Small Batch Vanilla Cupcakes
- A classic and comforting Small Vanilla Cake Recipe
- Rich and smooth Vanilla Bean Fudge
- Refreshing and creamy Vanilla Bean Popsicles
- Sweet and soft Baked Vanilla Doughnuts
Vanilla Bean Ice Cream
1 pint (can be doubled)
45 minutes
15 minutes
4 hours
5 hours
This Vanilla Bean Ice Cream recipe delivers an amazingly flavorful, creamy, and simple homemade vanilla ice cream, featuring real vanilla beans for an unparalleled taste and aroma. It makes 1 pint but can easily be doubled.
Ingredients
- 1 cup heavy whipping cream (do not substitute)
- 1/2 cup whole milk (do not substitute low fat or skim milk)
- 1/3 cup granulated sugar
- 1/8 teaspoon table salt
- 1 vanilla bean, split in half lengthwise (Madagascar recommended)
- 3 egg yolks, room temperature
- 1/4 teaspoon pure vanilla extract
Instructions
- In a large saucepan, gently warm up 1/2 cup heavy cream, the whole milk, sugar, and salt over medium-low heat. Scrape the fragrant seeds from the vanilla bean into the milk mixture and add the split bean pod as well. Remove from the heat, cover, and let the mixture steep for 30 minutes to infuse the vanilla flavor.
- While the cream mixture is steeping, whisk the egg yolks in a small bowl until they are lightly beaten. After steeping, gradually whisk about half a cup of the warm milk mixture into the beaten yolks to temper them, then pour the tempered egg mixture back into the saucepan with the remaining milk mixture.
- Return the saucepan to medium-low heat. Cook, whisking frequently and gently, until the mixture thickens enough to coat the back of a spoon (approximately 175-180°F or 80-82°C). Do not allow it to boil. Immediately remove from the heat once thickened to prevent curdling.
- Pour the hot custard through a fine-mesh strainer into a large clean bowl that is set in an ice bath. Whisk in the remaining 1/2 cup heavy cream and the vanilla extract. Continue to whisk occasionally in the ice bath until the mixture cools completely to room temperature.
- Once cooled, remove the bowl from the ice bath, cover it, and refrigerate for at least 1 hour, or preferably overnight, until thoroughly cold. This chilling step is vital for the best churned texture.
- Churn the thoroughly chilled base in your ice cream maker according to the manufacturer’s instructions, typically for 20-30 minutes, until it reaches a soft-serve consistency. Transfer the freshly churned ice cream to an airtight container and freeze for at least 4 hours, or overnight, until it is firm and scoopable. Homemade ice cream stored in an airtight container will last up to 2 weeks when frozen properly.
Notes
- Since this recipe uses all egg yolks, be sure to check out my post on what to do with your leftover egg whites – don’t let them go to waste!
- Craving more homemade frozen treats? Explore my full list of small batch ice cream recipes for additional inspiration.
- For the most intense vanilla flavor and classic specks, always use a high-quality vanilla bean. Madagascar is a great all-around choice.
- Ensure your ice cream maker bowl is thoroughly frozen for at least 24 hours before churning for optimal results.
Recommended Products
As an Amazon Associate and member of other affiliate programs, I earn from qualifying purchases.
- Ice Cream Maker
Did you make this recipe?
Let me know what you think! Rate the recipe above, leave a comment below, and/or share a photo on Instagram using #HITKrecipes
Source: Slightly adapted from The Perfect Scoop by David Lebovitz.
First published June 16, 2014, and regularly updated to ensure the best possible recipe and user experience.
