Mastering the Perfect 4-Inch Cheesecake: Your Ultimate Guide to Mini Indulgence
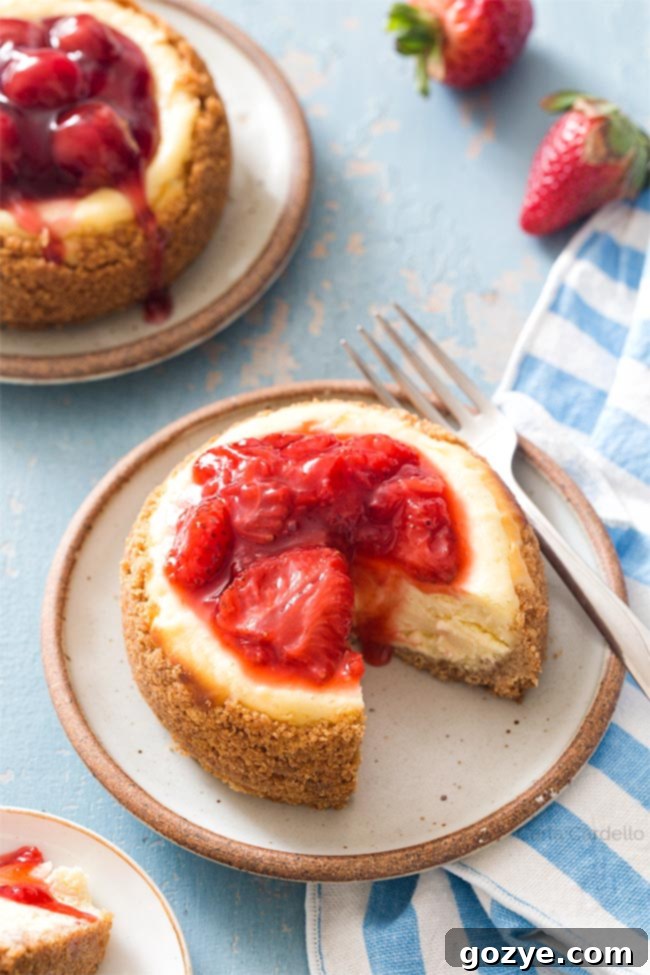
Craving a decadent cheesecake but don’t want a huge dessert taking over your fridge? This 4-Inch Cheesecake recipe is your ideal solution! Designed specifically for two, it yields two perfectly portioned mini cheesecakes, baked beautifully in springform pans. Imagine topping them with luscious cherry pie filling, vibrant strawberry sauce, or any of your favorite garnishes. Get ready to impress with these adorable, yet incredibly satisfying, individual treats.
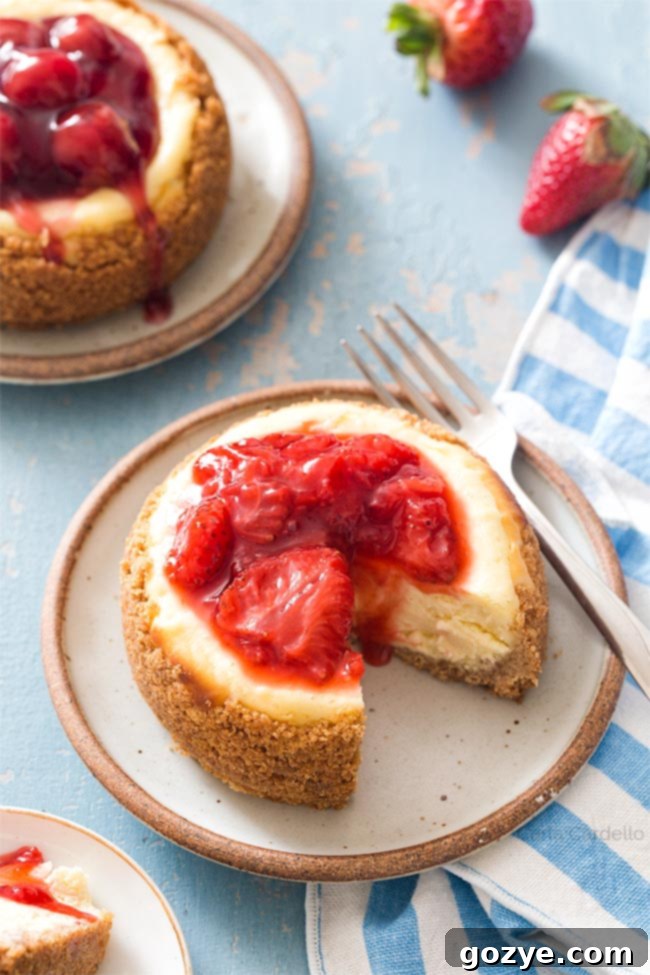
With special occasions like Valentine’s Day often inspiring desires for intimate, shareable desserts, I’m thrilled to share this ultimate small-batch dessert: our 4-inch cheesecake recipe. It’s the perfect way to create a memorable sweet moment without the overwhelming scale of a full-sized cheesecake.
This recipe focuses on crafting two delightful mini 4-inch cheesecakes, each featuring a classic graham cracker crust. These charming treats offer a blank canvas for your favorite toppings, from a rich strawberry sauce to a sweet cherry pie filling.
I’ve personally cherished my 4-inch springform pans for years, dating back to my college days. While my heart-shaped pans from that era have long since retired, these trusty rounds remain a staple for delightful small-scale baking. Many of you have specifically requested a mini springform cheesecake recipe, and I’m excited to deliver just that!
When developing this recipe, I initially considered making just one cheesecake. However, I realized that would leave you with leftover cream cheese and an egg white – an inconvenience many home bakers wish to avoid. After consulting with our wonderful community on Facebook, the overwhelming preference was for two mini cheesecakes. This approach ensures you use up all your ingredients efficiently, eliminating waste and providing two perfect desserts.
But don’t worry, if your heart truly desires only one 4-inch cheesecake, I’ve included clear instructions for halving the recipe to achieve that. Alternatively, you can enjoy one immediately and freeze the second for a delightful treat later!
Choosing the Right Equipment: What Pan Do I Need for a 4-Inch Cheesecake?
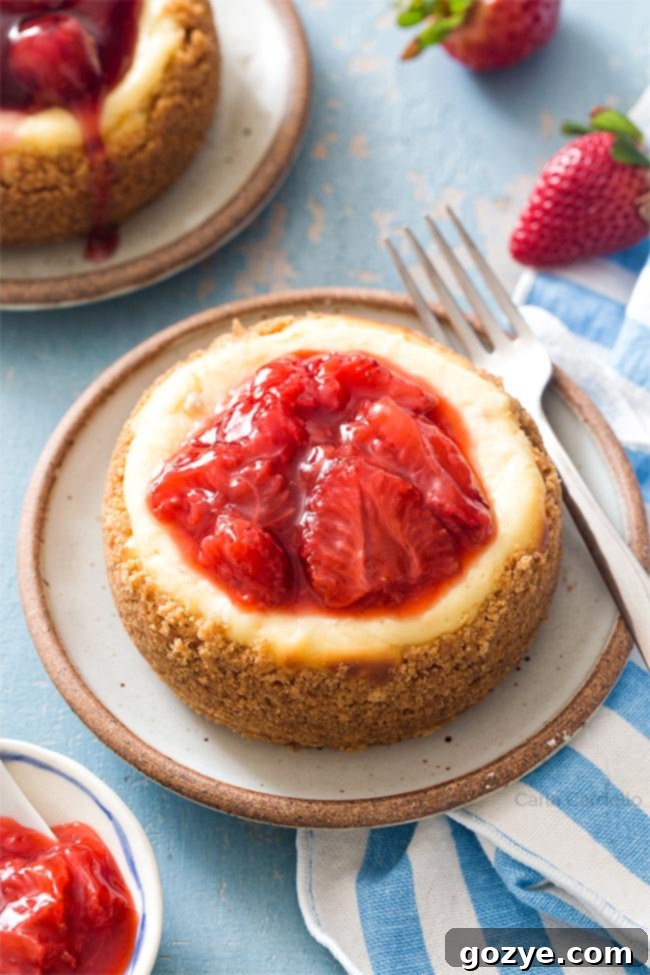
For these adorable mini cheesecakes, a 4-inch springform pan is absolutely essential. The delicate nature of cheesecake makes it impossible to invert from a regular cake pan without damage. A springform pan, with its removable sides, allows for effortless release, preserving the pristine shape of your dessert.
Typically, you can find a set of three 4-inch springform pans, which is incredibly convenient since this recipe makes two mini cheesecakes. Having an extra allows for future baking adventures or even making a third if you scale up slightly.
No 4-Inch Pan? No Problem! Alternative Baking Vessels
If you don’t own a 4-inch springform pan, don’t let that stop you from enjoying a delicious small-batch cheesecake! There are several creative alternatives:
- Jars: You can bake individual cheesecakes directly in small canning jars, much like my popular cheesecake in a jar recipe. This method is great for grab-and-go portions.
- Ramekins: For an elegant presentation, bake your cheesecake for two in ramekins. While they don’t have removable sides, serving directly in the ramekin is a charming option, as seen with my chocolate and plain cheesecake for two.
- Muffin Pans: For even smaller, bite-sized treats, use a muffin pan to create mini cheesecakes or even no-bake mini cheesecakes.
- Loaf Pan: If you prefer a bar-style dessert, a loaf pan works wonderfully for small batch cheesecake bars, offering a different texture and easy slicing.
For those with slightly larger pans, check out my 7-inch cheesecake recipe if you have a 7-inch springform pan available.
How Many Does a 4-Inch Cheesecake Feed? The Perfect Portion
A 4-inch cheesecake is indeed quite petite, making it ideal for managing portions. Each mini cheesecake can comfortably serve one to two people, depending on appetites and how generous you feel! Personally, I consider it a perfect single serving for a satisfying individual indulgence. However, given typical American dessert portions, it could officially be stretched to two servings. The beauty of these mini cheesecakes is that they offer delightful control over serving sizes, preventing overindulgence and ensuring everyone gets a fresh, perfect slice.
Crafting Your 4-Inch Cheesecake from Scratch: A Simple Guide
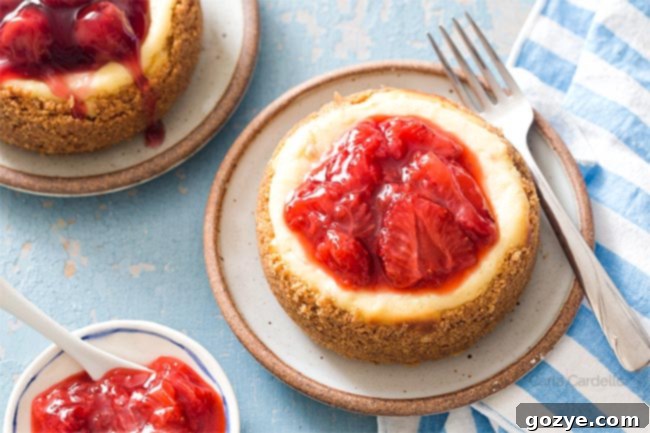
Baking a delicious cheesecake from scratch is simpler than you might think, especially with these mini versions! The key lies in a few high-quality, easy-to-find ingredients and careful preparation. Let’s delve into the components:
Key Ingredients for a Flawless Mini Cheesecake:
- Graham Cracker Crumbs: The cornerstone of a classic cheesecake crust. For the freshest taste and best texture, I recommend crushing whole graham crackers yourself using a food processor. This ensures a fine, even crumb.
- Unsalted Butter: Melted butter is crucial for binding the graham cracker crumbs together, forming a sturdy and flavorful crust. Using unsalted butter allows you to control the overall saltiness of the dessert.
- Full-Fat Cream Cheese: This is non-negotiable for authentic, rich cheesecake flavor and texture. Full-fat cream cheese provides the necessary body and creaminess. Low-fat or fat-free versions contain more water, which can lead to a watery, less stable, and less flavorful cheesecake after baking. Ensure it’s at room temperature for a lump-free batter!
- Granulated Sugar: Adds the perfect touch of sweetness to balance the tangy richness of the cream cheese, creating a harmonious flavor profile.
- Large Eggs: Eggs act as a binder and provide structure to the cheesecake, giving it that characteristic smooth, creamy custard-like texture. Always use large eggs for consistent baking results, and ensure they are at room temperature.
- Vanilla Extract: A splash of vanilla extract elevates the overall flavor, adding a warm, aromatic note that complements the cream cheese beautifully. Use pure vanilla extract for the best taste.
Step-by-Step Preparation:
The process is straightforward and rewarding:
- Prepare the Crust: Begin by combining your graham cracker crumbs with the melted butter. Press this mixture firmly into the bottom and slightly up the sides of your 4-inch springform pans. A firm press ensures the crust holds together beautifully.
- Create the Creamy Filling: In a separate bowl, beat the softened cream cheese and granulated sugar together until the mixture is incredibly smooth and light. Remember to scrape down the sides of the bowl frequently to ensure everything is evenly incorporated.
- Incorporate the Egg and Vanilla: Gently beat in the egg. The key here is not to overbeat the batter once the egg is added, as this can incorporate too much air, leading to cracks later. Finally, stir in the vanilla extract for that essential flavor boost.
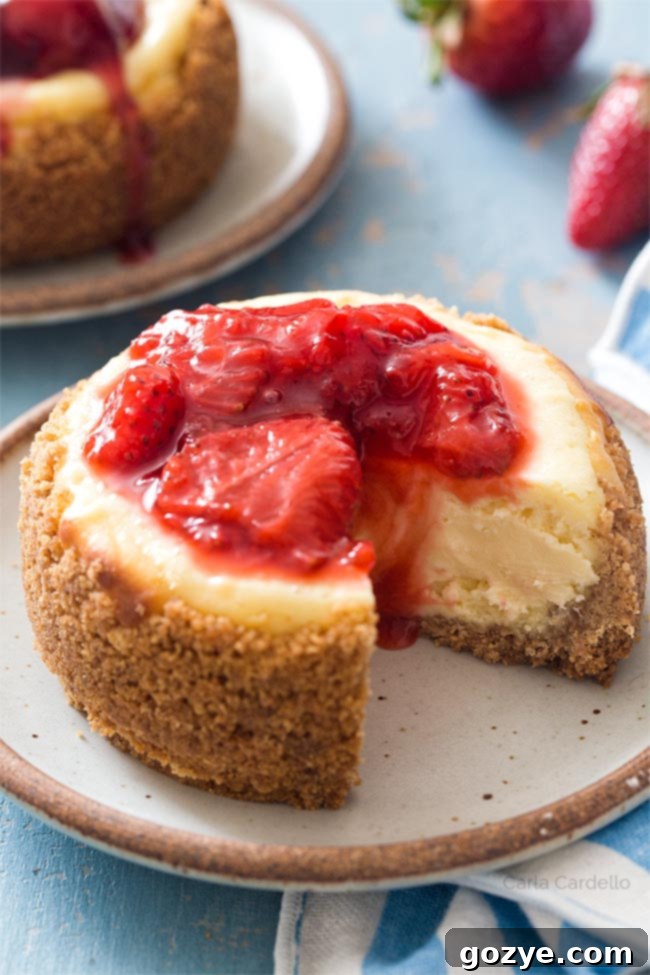
- Bake to Perfection: Carefully transfer your smooth cheesecake batter into the prepared graham cracker crusts. Bake at 350°F (175°C) for approximately 25-28 minutes. You’ll know it’s done when the edges are set and lightly browned, and the internal temperature reaches 150°F (65°C). The very center may still have a slight jiggle – this is perfectly normal for a perfectly baked cheesecake!
The Water Bath Question: Is it Necessary for Mini Cheesecakes?
One of the most common questions when baking cheesecake is whether a water bath is required. For these specific 4-inch cheesecakes, the answer is no, you do not need a water bath. This is one of the many benefits of baking smaller desserts!
A water bath (bain-marie) is traditionally used for larger cheesecakes to create a moist, even heat environment in the oven. This helps the center cook at the same rate as the edges and top, preventing the top from burning or cracking before the interior is fully set. The steam also contributes to a creamier texture and helps prevent cracking by minimizing drastic temperature changes.
However, because 4-inch cheesecakes are so small, their size allows for excellent heat distribution. The middle and top will bake evenly without the need for the added humidity and temperature regulation of a water bath. This simplifies the baking process considerably, making these mini cheesecakes even more appealing for home bakers.
Knowing When Your Cheesecake is Done Baking: The Jiggle Test and Beyond
Determining the perfect doneness of a cheesecake can be a bit tricky, as it’s a delicate custard that behaves differently from a regular cake. Overbaking is a common pitfall that can lead to dry texture and cracks, so knowing the signs is key.
Key Indicators of a Perfectly Baked Cheesecake:
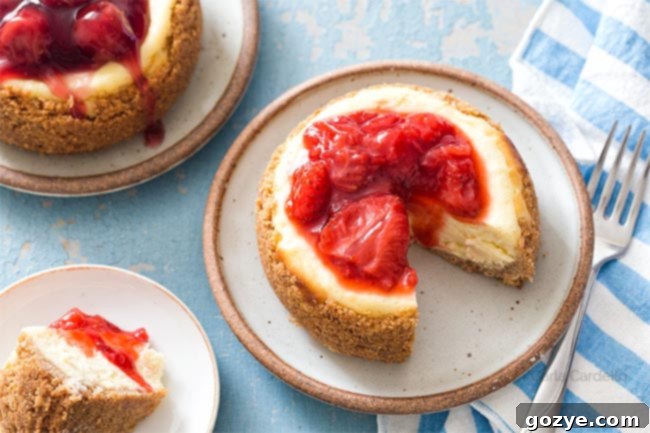
- The Gentle Jiggle: After baking, the edges of your cheesecake should appear firm and slightly golden brown. When you gently nudge the pan, only the direct center (about a 1-inch circle) should still have a slight, delicate jiggle, much like a set custard. If the entire cheesecake jiggles like liquid, it needs more time. If there’s no jiggle at all, it’s likely overbaked.
- Internal Temperature: For absolute precision, a digital thermometer is your best friend. The internal temperature of a perfectly baked cheesecake should reach 150°F (65°C). Insert the thermometer into the center of the cheesecake. While this will leave a small hole (or two, if you’re checking multiple spots), these can be easily covered and disguised with your chosen garnish like cherry pie filling or whipped cream. It’s far better to have a tiny hole than an underbaked, soupy cheesecake!
Making Cheesecake for One: Halving the Recipe
While this recipe is designed to yield two mini cheesecakes, it’s absolutely possible to scale it down further if you truly only want one. The main challenge in small-batch baking, especially when halving recipes, often comes down to the egg.
To successfully make a single 4-inch cheesecake, simply halve all the ingredients. For the egg, instead of using half an egg white and half an egg yolk, which can be messy and imprecise, I recommend using just one egg yolk for the half-egg requirement. The yolk provides most of the binding and richness needed for the cheesecake’s structure without adding excessive liquid that a full egg white would bring in a smaller batch.
Storage and Freshness: How Long is Cheesecake Good For?
Proper storage is crucial for maintaining the freshness and safety of your delicious cheesecake. Because cheesecake is a dairy-based dessert made with perishable ingredients like cream cheese and eggs, it requires refrigeration.
Once cooled completely, your baked cheesecake can be stored in an airtight container in the refrigerator for up to 5-7 days. With these mini cheesecakes, they are often enjoyed quickly, so leftovers might not even be an issue!
Can You Leave Cheesecake Out Overnight?
No, cheesecake should not be left out overnight. While it’s perfectly fine, and even recommended, to let your cheesecake cool at room temperature for a couple of hours after baking to allow it to set gradually, it must be refrigerated once fully cooled. The cream cheese and egg content makes it susceptible to bacterial growth at room temperature, which can lead to spoilage. Always transfer it to the refrigerator for overnight chilling and long-term storage.
Elevate Your Mini Cheesecake: Creative Decoration Ideas
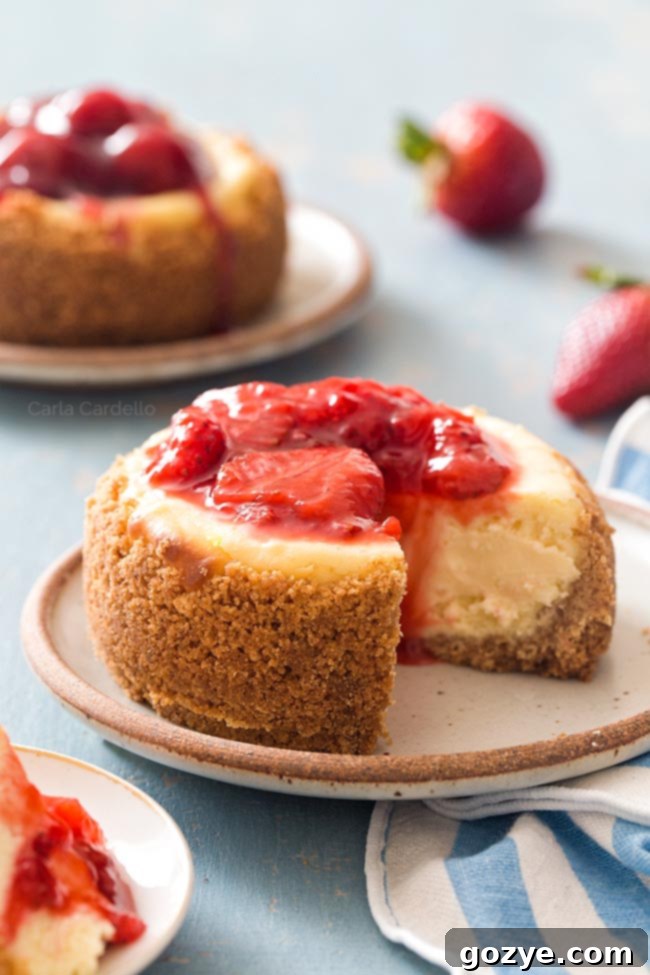
A plain cheesecake is like a beautiful blank canvas, offering endless possibilities for creative decoration. The small size of these 4-inch cheesecakes makes them even more fun to adorn!
My Favorite Topping Ideas:
- Classic Fruit Sauces: My top two go-to garnishes are always homemade strawberry sauce and rich cherry pie filling. If it’s not cherry season, canned cherry pie filling works perfectly, but if you have fresh cherries, definitely try making homemade cherry pie filling for an extra special touch.
- Diverse Fruit Fillings: Don’t limit yourself to just cherries or strawberries! Experiment with other delightful fruit toppings like strawberry pie filling, luscious blueberry pie filling, sweet peach pie filling, or comforting apple pie filling.
- Fruit Curds & Swirls: For a zesty and creamy twist, swirl in a vibrant strawberry curd. This is a fantastic way to create a smaller, individual version of my popular strawberry swirl cheesecake.
- Whipped Cream Creations: A dollop of light and airy homemade whipped cream is always a welcome addition. For an elevated flavor, try honey whipped cream.
Additional Garnish Inspirations:
- Fresh Berries: A simple scattering of fresh raspberries, blueberries, or sliced strawberries adds color, freshness, and a natural sweetness.
- Chocolate Shavings or Drizzle: For chocolate lovers, a sprinkle of dark chocolate shavings or a elegant chocolate drizzle is a perfect complement.
- Caramel or Butterscotch Sauce: A rich caramel or butterscotch sauce can add a delightful depth of flavor.
- Lemon or Orange Zest: A little citrus zest can brighten up the entire dessert with a refreshing aroma.
- Toasted Nuts: Finely chopped toasted pecans, walnuts, or almonds can add a lovely crunch.
- Edible Flowers: For a truly elegant and impressive presentation, consider adding a few edible flowers.
Troubleshooting Common Cheesecake Problems: Why Did My Cheesecake Crack?
Few things are as disheartening in baking as spending time and effort on a cheesecake, only to have it emerge from the oven with unsightly cracks. While frustrating, cracks are often preventable once you understand their common causes:
- Overbeating the Batter: We all strive for a perfectly smooth cheesecake, but excessive beating, especially after adding eggs, incorporates too much air into the batter. This air causes the cheesecake to puff up higher than it should during baking. As it cools, the cheesecake rapidly deflates, and this drastic contraction leads to cracks.
Solution: Beat the cream cheese and sugar until just smooth. Once you add the egg and vanilla, beat only until everything is combined and just smooth. Avoid over-mixing. - Overbaking the Cheesecake: While you want to ensure your cheesecake is fully cooked, overbaking dries out the delicate custard, particularly the top layer. A dry, stiff surface is prone to cracking as the cheesecake cools and contracts.
Solution: Rely on the internal temperature (150°F / 65°C) using a digital thermometer for accuracy. Trust the “gentle jiggle” test for the center and remove it promptly when done. - Cheesecake Sticking to the Pan: As cheesecake cools, it naturally shrinks and deflates. If the edges of the cheesecake are stuck to the sides of the springform pan, they won’t be able to contract smoothly with the rest of the cake. This tension can cause tears and cracks around the perimeter or even across the top.
Solution: Immediately after removing the cheesecake from the oven (while it’s still hot and pliable), carefully run a thin, sharp knife or offset spatula around the edge of the pan to ensure it’s completely loosened. - Opening the Oven Door Too Frequently: While it’s okay to peek towards the end of baking to check for doneness, opening the oven door too early or too often allows heat to escape rapidly. This sudden drop in temperature can shock the delicate cheesecake, causing it to cool too quickly and crack.
Solution: Resist the urge to constantly open the oven door. Only check for doneness towards the very end of the recommended baking time, and do so quickly.
Addressing Lumps: Why is My Cheesecake Lumpy?
A lumpy cheesecake batter is another common frustration that can impact the final texture of your dessert. The primary culprits are usually related to ingredient temperature and sometimes the cream cheese itself.
Common Causes of Lumpy Batter:
- Cold Cream Cheese and Eggs: This is the most frequent reason for lumps. Cold cream cheese is stiff and won’t cream smoothly with sugar, resulting in stubborn lumps. Similarly, cold eggs don’t emulsify as well into the batter.
Solution: Always ensure your cream cheese and eggs are at room temperature. Let them sit out for at least 2 hours, or until they are no longer cold to the touch. The exact time will vary depending on your kitchen’s ambient temperature. - Quick Warming Tips:
- Cream Cheese: If you’re short on time, remove the cream cheese from its foil wrapper (never microwave with foil!) and microwave it in 5-10 second increments, gently pressing it between each burst until it’s softened but not melted.
- Eggs: Place eggs in a bowl of warm (not hot) water for about 15 minutes to bring them to room temperature quickly.
- Brand of Cream Cheese: Believe it or not, some brands of cream cheese contain more stabilizers than others. Brands with fewer stabilizers tend to be naturally smoother and creamier, making it easier to achieve a lump-free batter. If you consistently struggle, consider trying a different brand.
What to Do If Your Cheesecake Batter is Already Lumpy:
Unfortunately, once lumps have formed, simply beating the batter more will often incorporate too much air (leading to cracks) and won’t necessarily smooth out the lumps. And no, lumps won’t magically melt away during baking.
- Using a Blender: You *can* try processing the lumpy batter in a blender or food processor to smooth it out. However, be mindful that this method can also incorporate a significant amount of air, potentially increasing the risk of cracks during baking. If cracks occur, remember they can be elegantly covered with a delicious garnish!
- Straining the Batter: Another option is to carefully push the batter through a fine-mesh strainer. This will effectively remove the lumps, yielding a smooth batter. Be aware that you might lose a small amount of batter in the process, but the trade-off is a much smoother final cheesecake.
Can You Freeze Cheesecake? Extend the Enjoyment!
Absolutely, you can freeze cheesecake! This is a fantastic advantage, whether you’re planning to enjoy one now and save the second for later, or if you’re a busy baker who likes to prepare desserts ahead of time.
Best Practices for Freezing Your 4-Inch Cheesecake:
For optimal results, it’s always best to freeze a plain cheesecake without any garnishes. Add your toppings fresh before serving after thawing.
- Ensure Complete Cooling: This is critical. Cheesecake takes a significant amount of time to cool completely. Do not attempt to freeze it before it has reached room temperature, and ideally, after it has had some initial refrigeration to fully set.
- Initial Freeze (Unwrapped): Once the cheesecake is thoroughly cooled, remove it completely from the springform pan (including the bottom plate). Place the bare cheesecake on a baking tray or plate and freeze it uncovered for about 1 hour, or until it is firm to the touch. This prevents the wrapping from sticking to the delicate surface.
- Wrap Securely: Once firm, carefully wrap the cheesecake first in a layer of plastic wrap, ensuring it’s airtight to prevent freezer burn.
- Add a Second Protective Layer: For extra protection, either wrap the plastic-wrapped cheesecake in a layer of aluminum foil or place it inside a freezer-proof plastic bag.
- Label and Store: Don’t forget to write the date on your wrapped cheesecake. It can be safely frozen for up to 1 month for best quality.
How to Thaw Your Frozen Cheesecake
When you’re ready to indulge in your previously frozen cheesecake, proper thawing is key to restoring its delightful texture and flavor:
Simply transfer the frozen cheesecake (still wrapped) from the freezer to the refrigerator and let it thaw slowly overnight. This gradual thawing prevents condensation and helps maintain its creamy consistency. Once thawed, unwrap, garnish as desired, and serve! It will taste just as fresh and delicious as when it was first baked.
Explore More Small Batch Cheesecake Recipes
If you’ve fallen in love with the convenience and charm of small batch baking, you’ll be delighted to discover more of my cheesecake recipes for two, perfect for any occasion:
- Decadent 4-Inch Chocolate Cheesecakes
- Joyful Mini Funfetti Cheesecakes (4 Inch)
- Classic 6-Inch Cheesecake Recipe
- Rich Chocolate Cheesecake with Oreo Crust
- Luxurious Red Velvet Oreo Cheesecake
- Creamy Peanut Butter Cheesecake
- Quick Air Fryer Cheesecake
- Versatile Loaf Pan Cheesecake Bars
Easy 4-Inch Cheesecake Recipe (Mini Cheesecakes for Two)
2 mini cheesecakes
20 minutes
25 minutes
5 hours
5 hours 45 minutes
Looking for the perfect dessert for two? This incredibly easy 4-Inch Cheesecake recipe creates two delightful mini cheesecakes with a buttery graham cracker crust, baked to perfection in springform pans. Ideal for romantic dinners, small celebrations, or simply satisfying a sweet craving without leftovers. Enjoy with your favorite toppings!
Ingredients
For the Graham Cracker Crust:
- 1 cup (about 7-8 full sheets) graham cracker crumbs (finely crushed)
- 1/4 cup (4 tablespoons or 2 ounces) unsalted butter, melted
For the Cheesecake Filling:
- 8 ounces (1 block) full-fat cream cheese, softened to room temperature (crucial for smooth batter, do not use low-fat or fat-free)
- 1/3 cup granulated sugar
- 1 large egg, at room temperature
- 1 teaspoon pure vanilla extract
Optional Garnish Ideas:
- Homemade Strawberry Sauce
- Homemade Cherry Pie Filling (or quality canned)
- Fresh Whipped Cream
- Fresh berries, chocolate shavings, lemon zest, caramel drizzle
Instructions
- Preheat Oven & Prep Pans: Preheat your oven to 350°F (175°C). Lightly grease two 4-inch springform pans. While a water bath isn’t needed for mini cheesecakes, you can wrap the outside of the pans with foil for easier handling if desired, but it’s not strictly necessary for baking results.
- Make the Crust: In a medium bowl, combine the graham cracker crumbs and melted butter. Mix until the crumbs are evenly moistened. Divide the mixture evenly between the two prepared springform pans. Press the crumbs firmly and evenly into the bottom and slightly up the sides of each pan using the back of a spoon or your fingers.
- Prepare the Filling: In a large mixing bowl (or the bowl of a stand mixer), beat the softened cream cheese and granulated sugar together on medium speed for 2-3 minutes, until the mixture is light, fluffy, and completely smooth. Stop and scrape down the sides of the bowl with a rubber spatula as needed to ensure no lumps remain.
- Add Egg & Vanilla: Reduce the mixer speed to low. Beat in the room temperature egg just until it’s fully incorporated and the batter is smooth, about 1 minute. Be careful not to overbeat, as this can introduce too much air, leading to cracks. Stir in the vanilla extract.
- Bake the Cheesecakes: Divide the cheesecake batter evenly between the two prepared crusts in the springform pans. Place the pans on a baking sheet for easier transfer to and from the oven. Bake for 25-28 minutes, or until the edges are set and lightly browned, and the center still has a slight, delicate jiggle when gently nudged. The internal temperature should register 150°F (65°C) when checked with a digital thermometer.
- Cool & Loosen: Remove the cheesecakes from the oven. Immediately and carefully run a thin knife around the inside edge of each pan to loosen the cheesecake from the sides. This crucial step helps prevent cracking as the cheesecake cools and contracts. Let them cool completely at room temperature for at least 1 hour.
- Chill Thoroughly: Once cooled, cover the cheesecakes loosely with plastic wrap (or place in an airtight container) and refrigerate for at least 4 hours, or preferably overnight, to allow them to fully set and firm up. Once thoroughly chilled, carefully remove the springform sides. Garnish and serve as desired. Store any leftovers in an airtight container in the refrigerator for up to 5-7 days.
Notes
- For a Single Cheesecake: To make only one 4-inch cheesecake, simply halve all the ingredients. For the egg, use 1 large egg yolk instead of trying to halve a whole egg precisely.
- Ingredient Temperature is Key: Ensure your cream cheese and egg are at true room temperature (not cold to the touch) for the smoothest batter and to prevent lumps.
- Preventing Cracks: Avoid overbeating the batter, don’t overbake, and loosen the edges with a knife immediately after baking.
- Freezing Instructions: To freeze, ensure cheesecake is 100% cooled and chilled. Remove from pan. Freeze uncovered for 1 hour until firm, then wrap tightly in plastic wrap and then foil. Freeze for up to 1 month. Thaw overnight in the refrigerator before serving.
- Explore More: Enjoy this recipe? Discover my other delightful Cheesecake Recipes For Two, including mini cheesecakes (muffin pan), 6-inch cheesecake, and 7-inch cheesecake.
Recommended Baking Essentials
As an Amazon Associate and member of other affiliate programs, I earn from qualifying purchases.
- 4-Inch Springform Pan (Set of 3)
Did you make this recipe?
We’d love to hear from you! Rate the recipe above, leave a comment below with your experience, and/or share a photo of your delicious creation on Instagram using #HITKrecipes
Final Thoughts on Baking Your Mini Cheesecake Masterpiece
Baking these 4-inch cheesecakes is more than just following a recipe; it’s an invitation to create a delightful, perfectly portioned dessert that’s both elegant and incredibly satisfying. Whether you’re celebrating a special moment, enjoying a quiet evening, or simply treating yourself, these mini cheesecakes offer all the rich flavor and creamy texture of a classic cheesecake without the commitment of a large one.
With the detailed guidance on ingredients, baking techniques, troubleshooting common issues, and creative garnish ideas, you’re now equipped to bake a flawless, crack-free mini cheesecake. Don’t be afraid to experiment with toppings and make these desserts truly your own. Happy baking!
