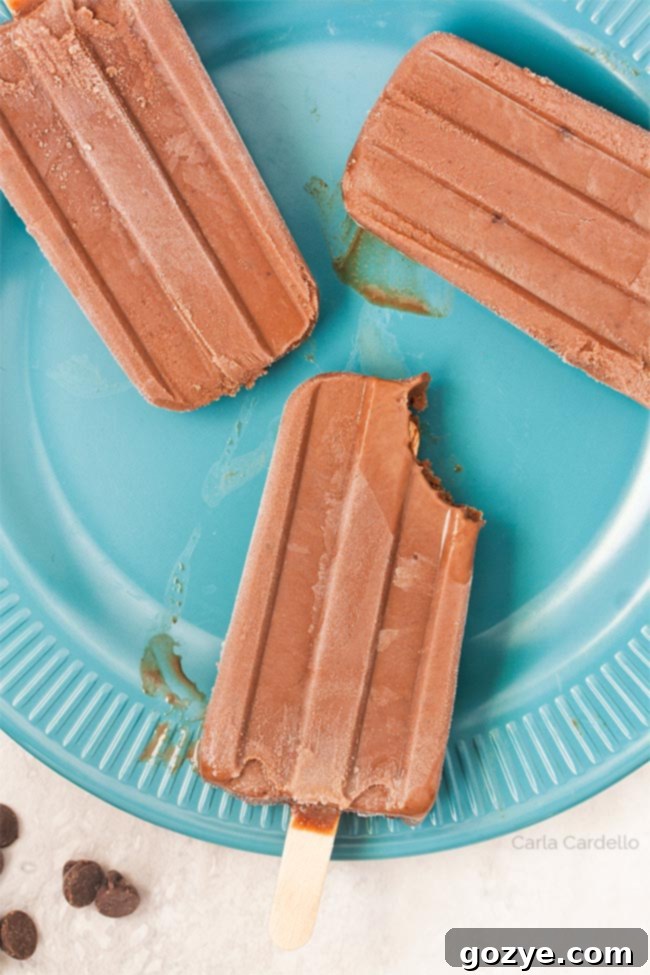
Indulge in Homemade Fudgesicles: Your Easy Guide to Creamy, Rich, No-Pudding-Mix Frozen Chocolate Treats
There’s a special kind of nostalgia that comes with biting into a Fudgesicle, that quintessential taste of summer. Whether snatched from an ice cream truck on a scorching afternoon or pulled straight from the home freezer, these decadent chocolate pops have been a beloved frozen treat for generations. And what if we told you that making your own rich, creamy, and intensely chocolatey Fudgesicles at home is not only incredibly easy but also incredibly rewarding? Forget about store-bought versions; this homemade recipe, crafted without a single box of pudding mix, promises a superior taste and texture that will make you wonder why you ever bought them.
Our small-batch recipe is designed to yield four perfect, gluten-free Fudgesicles, making it ideal for a quick indulgence or a small family treat. The process is delightfully straightforward: a simple melt-and-mix on the stovetop, followed by a period of patient freezing. No complex steps, no fancy equipment required beyond a basic saucepan and your chosen popsicle molds. Prepare to unleash your inner chocolatier and create a batch of frozen delights that will bring pure joy to any warm day. Get ready to bid farewell to the uncertainty of the ice cream truck schedule and say hello to an endless supply of homemade chocolate bliss.
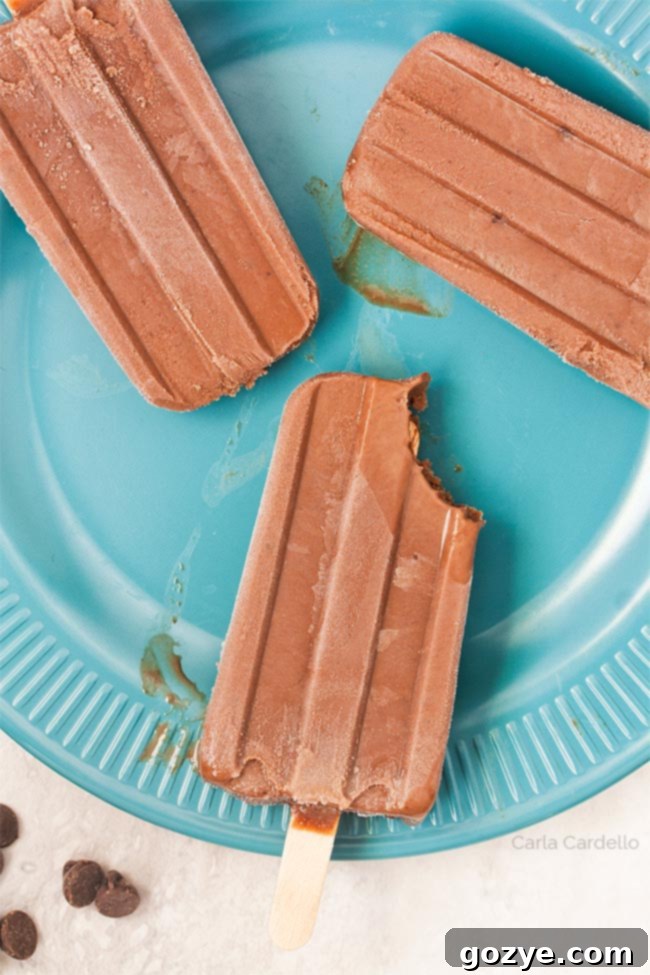
What Exactly Are Fudgesicles? A Deep Dive into this Classic Frozen Treat
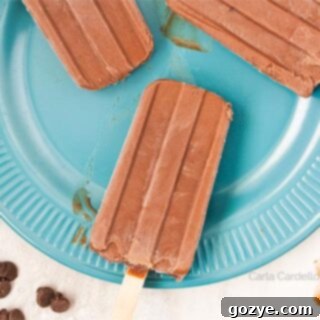
For those unfamiliar with the pure delight that is a Fudgesicle, imagine a luscious, intensely chocolatey frozen pudding on a stick. It’s not quite ice cream, nor is it a watery fruit pop. Instead, it occupies a unique space in the frozen dessert world, characterized by its smooth, dense, and deeply satisfying fudge-like consistency. The “fudge” in its name perfectly describes the rich, decadent chocolate flavor that defines this iconic treat. Each bite offers a cool, creamy burst of chocolate that melts slowly, leaving behind a lingering cocoa essence.
The texture is a key differentiator. Unlike some icy pops, a well-made Fudgesicle is remarkably smooth and creamy, almost like a solidified chocolate mousse. This creamy texture is achieved through a careful balance of ingredients, often including milk, sugar, and various forms of chocolate and cocoa, with a thickening agent like cornstarch (in our recipe) or pudding mix (which we cleverly avoid for a purer taste and gluten-free option). It’s this unique combination that makes Fudgesicles so addictive and a go-to choice for chocolate lovers seeking a refreshing cool-down.
While chocolate is the star here, the world of frozen pops is vast and varied. If you’re a fan of creamy, non-chocolate options, you might enjoy exploring my Vanilla Popsicles, which offer a rich and creamy experience reminiscent of frozen vanilla pudding. And for those who believe chocolate is even better with a nutty twist, my Chocolate Peanut Butter Fudgesicles take the classic to a whole new level of indulgence.
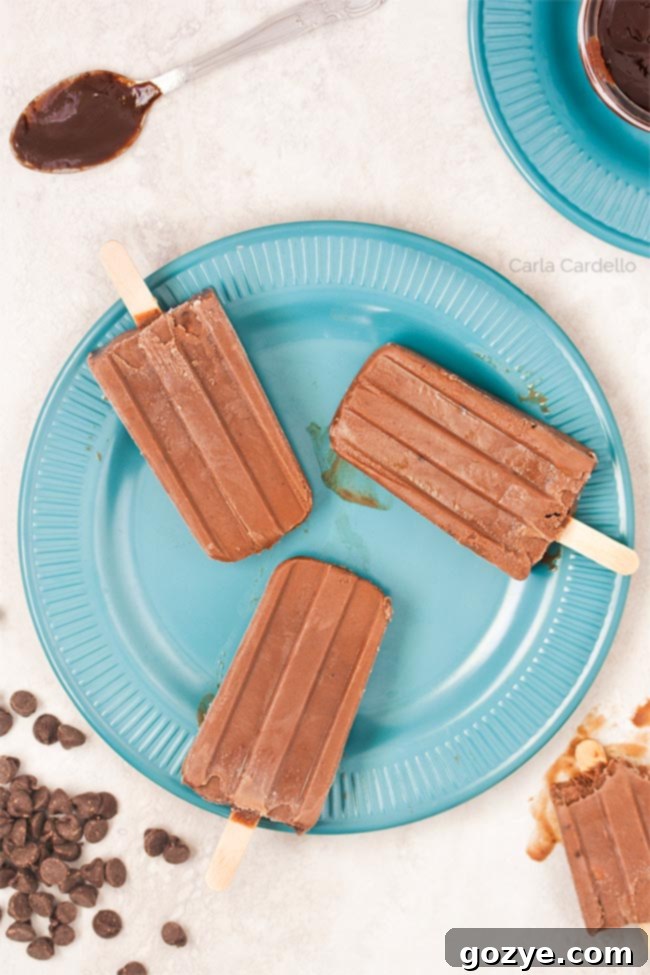
The Essential Ingredients for Perfect Homemade Fudgesicles
Crafting these delectable Fudgesicles requires a handful of common pantry staples. The beauty of this recipe lies in its simplicity and the quality of its core components. Here’s a breakdown of what you’ll need and why each ingredient plays a crucial role in achieving that signature creamy, rich flavor:
- Milk: This is the foundation of our Fudgesicle’s creamy texture. Whole milk is recommended for its higher fat content, which contributes to a richer mouthfeel. It also acts as the liquid base that binds all the chocolate elements together, ensuring a smooth, pourable mixture for your popsicle molds.
- Granulated Sugar: Beyond just sweetening, sugar contributes to the overall texture by lowering the freezing point of the mixture, which helps prevent an overly icy Fudgesicle and promotes a smoother, creamier bite.
- Unsweetened Cocoa Powder: This is where the deep, intense chocolate flavor truly comes from. Using a high-quality baking cocoa is paramount, as its flavor will shine through prominently. Dutch-processed cocoa powder, for example, is less acidic and provides a darker color and milder chocolate flavor, often preferred for its smoothness in fudges. Sifting the cocoa powder before adding it helps prevent lumps and ensures an ultra-smooth mixture.
- Cornstarch: Our secret weapon for achieving that thick, pudding-like consistency without relying on pre-made pudding mixes. Cornstarch acts as a thickening agent, giving the Fudgesicles their characteristic dense and creamy texture. It’s crucial for the structural integrity and delightful mouthfeel.
- Salt: A small pinch of salt works wonders in enhancing and balancing the sweetness and deepening the chocolate flavor. It’s a flavor enhancer that makes the chocolate taste even more vibrant and complex. Kosher salt is often preferred for its clean taste.
- Semisweet Chocolate: For an extra layer of chocolate richness and a luxurious finish, chopped semisweet chocolate is incorporated. Again, the quality of your chocolate here makes a significant difference. Choose a good baking bar or high-quality chocolate chips. If you prefer a more intense, less sweet chocolate experience, dark chocolate can be used instead.
- Vanilla Extract: Much like salt, vanilla extract doesn’t just add its own flavor; it amplifies and rounds out the chocolate notes, adding depth and complexity to the overall taste profile. Use pure vanilla extract for the best results.
Beyond the ingredients, you’ll also need some essential equipment:
- Popsicle Molds and Sticks: While a good popsicle mold with its classic shape certainly adds to the experience, don’t fret if you don’t have one. You can get standard molds and popsicle sticks from Amazon or your local craft store.
- Alternative Molds: As a clever workaround, small 3-ounce paper or plastic cups (like Dixie cups) make excellent makeshift molds. Once frozen, you can simply cut away the cup for easy unmolding, as demonstrated in my Peach Yogurt Popsicles recipe.
Step-by-Step Guide: How to Make Homemade Fudgesicles
Making these glorious Fudgesicles is a surprisingly simple process that yields incredible results. Follow these steps carefully for perfect, creamy frozen treats every time:
- Combine Dry and Wet Ingredients: Begin by adding the milk, granulated sugar, unsweetened cocoa powder, cornstarch, and salt to a large, heavy-bottomed saucepan. Whisk these ingredients vigorously and continuously. The goal is to fully dissolve the dry ingredients into the milk, preventing any lumps and ensuring a perfectly smooth base for your Fudgesicles.
- Heat and Thicken the Mixture: Place the saucepan over medium heat. Continue whisking often to prevent scorching and ensure even heating. Heat the mixture until it becomes hot and bubbly around the edges, but do not allow it to come to a full boil. Boiling can cause the milk to curdle or scorch, affecting the final texture and taste. The mixture should thicken noticeably as the cornstarch activates.
- Incorporate Chocolate: Once the mixture is hot and slightly thickened, remove the saucepan from the heat. Add your chopped semisweet chocolate to the hot liquid. Stir continuously until the chocolate is completely melted and fully incorporated, creating a rich, glossy chocolate base. Return the saucepan to low heat for another 1-2 minutes, stirring constantly, until the chocolate mixture achieves a thick, pudding-like consistency from the cornstarch. It should be substantial but still pourable.
- Add Vanilla and Cool: Remove the saucepan from the heat completely. Stir in the vanilla extract. At this stage, your mixture should closely resemble a silky, warm chocolate pudding. It will be thick enough to cling to a spoon but still liquid enough to easily pour into your chosen molds.
- Pour and Freeze: Carefully transfer the chocolate pudding mixture into your popsicle molds. If you’re using standard molds, this recipe typically yields about 4 Fudgesicles. If your molds are smaller, you might get a few more. Insert your popsicle sticks into the center of each mold.
- Chill Until Solid: This is the most challenging part – the waiting! Transfer the filled molds to the freezer and allow them to freeze until completely firm. This usually takes roughly 4-6 hours, but for best results and maximum firmness, especially for easy unmolding, it’s often best to let them chill overnight.
By following these steps, you’ll be well on your way to enjoying homemade Fudgesicles that are far superior to anything you can buy in a box!
Expert Tips for Unmolding Homemade Fudgesicles
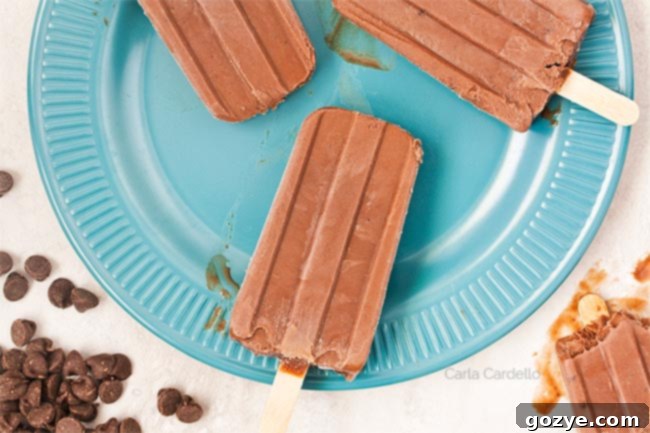
The moment of truth – unmolding your perfectly frozen Fudgesicles! While it might seem straightforward, a little technique goes a long way in preventing broken pops or a sticky mess. As you can see in some of the photos, impatience can lead to quick melting! While a little chocolate on your face is part of the fun, proper unmolding helps maintain their shape and integrity.
The correct way to release your homemade Fudgesicles from their molds is to apply a bit of gentle warmth:
- Individual Molds: For single molds, briefly run each mold under lukewarm (not hot!) water. Aim for about a minute. The warmth will slightly loosen the outer layer of the Fudgesicle from the mold. Be very careful to prevent any water from getting inside the mold and onto the Fudgesicle itself, as this can create ice crystals.
- Gentle Release: After the minute under running water, gently pull the Fudgesicle stick upwards. It should slide out smoothly. If there’s resistance, don’t force it; simply run it under water for a few more seconds and try again. Forcing it can cause the stick to pull out or the Fudgesicle to break.
- Batch Unmolding: If you’re unmolding several pops at once, a more efficient method is to fill a large, deep container or sink with lukewarm water. Submerge the entire popsicle mold (ensuring the tops and sticks remain out of the water) into the water for about 30-60 seconds. This allows for even warming around all the molds simultaneously. Remove the mold from the water and gently pull out the Fudgesicles.
- Paper Cup Method: If you opted for paper cups as molds, the process is even simpler. Just tear or cut away the paper cup, and your Fudgesicle is free!
Once unmolded, if you’re not planning to eat them immediately, it’s a good idea to place them back in the freezer for about 10-15 minutes to firm up again, especially if they’ve softened slightly during the unmolding process. This ensures they maintain their shape and don’t melt too quickly when you finally enjoy them.
Storing Your Homemade Fudgesicles for Lasting Enjoyment
You’ve put in the effort to make these delightful Fudgesicles, so proper storage is key to enjoying them at their best for as long as possible. There are two main methods, depending on how quickly you plan to devour your batch:
Short-Term Storage (Within a Week)
For Fudgesicles you plan to eat within a week, you can use a simpler method:
- Single Layer: Once unmolded, arrange the Fudgesicles in a single layer on a piece of wax paper or parchment paper.
- Freezer-Safe Container: Carefully transfer the Fudgesicles (still on the paper) into an airtight, freezer-safe container. This prevents them from sticking together and minimizes freezer burn.
- Enjoy: Store in the freezer and enjoy within 5-7 days for optimal taste and texture.
Long-Term Storage (Up to a Month)
If you’ve made a larger batch or want to keep your Fudgesicles fresh for a longer period, individual wrapping is the best approach to prevent freezer burn and maintain their creamy consistency:
- Initial Freeze: After unmolding, ensure the Fudgesicles are completely refrozen and solid. This usually takes about 10-15 minutes back in the freezer after the unmolding process.
- Individual Wrapping: Wrap each Fudgesicle tightly in plastic wrap. Make sure there are no air pockets, as air is the enemy of frozen treats, leading to freezer burn and flavor degradation.
- Secondary Container: Place the individually wrapped Fudgesicles into a freezer-safe bag (like a large Ziploc bag) or an airtight freezer container.
- Maximize Freshness: Stored this way, your homemade Fudgesicles will retain their quality for up to a month. Beyond that, while still safe to eat, their texture and flavor might start to diminish.
No matter the storage method, always ensure your Fudgesicles are kept in an airtight environment to preserve their deliciousness!
More Irresistible Popsicle Recipes
If you’re now hooked on making your own frozen treats, here are some other fantastic popsicle recipes to try:
- Orange Creamsicles: A tangy, creamy, and nostalgic delight.
- Watermelon Popsicles: Refreshing and naturally sweet for a taste of summer.
- Root Beer Ice Cream Bars: A fizzy, creamy twist on a classic soda shop favorite.
- Strawberry Popsicles: Bursting with fresh fruit flavor, simple and delicious.
- Blueberry Yogurt Popsicles: Healthy, creamy, and packed with antioxidant-rich blueberries.
- Pineapple Popsicles: Tropical and zesty, a perfect vacation for your taste buds.
- Coconut Popsicles: Exotic and creamy, a taste of the tropics.
Homemade Fudgesicles: Creamy & Easy (No Pudding Mix)
4 servings
15 minutes
15 minutes
30 minutes
Craft your own decadent Fudgesicles from scratch with this easy, small-batch recipe! No pudding mix is needed for these creamy, rich, and naturally gluten-free frozen chocolate treats, perfect for satisfying your sweet tooth on any warm day.
Ingredients
- 1 cup whole milk, room temperature
- 1/3 cup granulated sugar
- 2 tablespoons unsweetened cocoa powder, sifted
- 1 tablespoon cornstarch
- 1/8 teaspoon salt (preferably kosher)
- 1 ounce semisweet chocolate, chopped
- 1/2 teaspoon vanilla extract
Instructions
- In a large saucepan, whisk together the milk, sugar, cornstarch, cocoa, and salt until smooth and no lumps remain. Heat over medium heat until hot and bubbly around the edges, but do not boil. Whisk frequently.
- Remove from heat and add the chopped chocolate. Stir until completely melted and smooth. Return to low heat and cook for another 1-2 minutes, stirring constantly, until the mixture thickens to a pudding-like consistency.
- Remove the saucepan from the heat again, then stir in the vanilla extract until fully combined.
- Carefully transfer the warm, thickened chocolate mixture into your popsicle molds. It should be thick like pudding but still easily pourable. Insert popsicle sticks into each mold. Freeze until thoroughly firm, which will take at least 4 hours, but ideally overnight for best results.
Notes
- For an easier unmolding process, run the molds under lukewarm water for about a minute before gently pulling out the Fudgesicles.
- If you don’t have popsicle molds, small 3-ounce paper cups with craft sticks make excellent alternatives.
- Enjoyed this recipe? You might also love our Vanilla Popsicles for a non-chocolate creamy treat, or indulge in the nutty goodness of Chocolate Peanut Butter Fudgesicles.
Recommended Products
As an Amazon Associate and member of other affiliate programs, I earn from qualifying purchases.
- Popsicle Mold
- Popsicle Sticks
Did you make this recipe?
Let me know what you think! Rate the recipe above, leave a comment below, and/or share a photo on Instagram using #HITKrecipes
Source: Adapted from Smitten Kitchen
Originally published June 10, 2014, and updated with enhanced details and tips for a superior homemade experience.
