Ultimate Buckeye Ice Cream Cake: The Chocolate Peanut Butter Dream Dessert
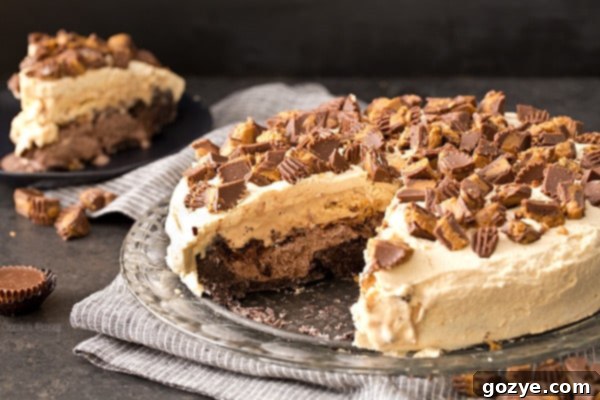
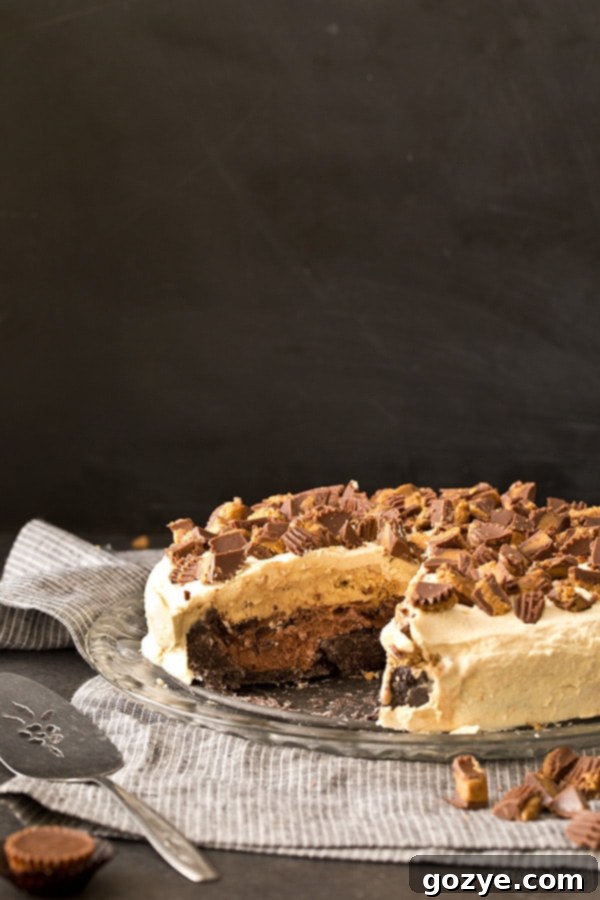
What’s better than a simple birthday cake? A show-stopping, homemade Buckeye Ice Cream Cake, a truly epic Chocolate Peanut Butter Ice Cream Cake that will be the star of any celebration. Imagine a robust chocolate cookie crust, generously layered with rich chocolate ice cream, followed by a delightful, crunchy peanut butter fudge mixture, and topped with creamy peanut butter ice cream. Each exquisite layer is then perfectly enveloped in a cloud of homemade peanut butter whipped cream, creating a symphony of flavors and textures that is simply irresistible.
Every year brings a reason to celebrate, and for many, that means cake. While my actual birthday might be May 15th, who says we can’t extend the celebration to a whole week, month, or even the entire year? Whether it’s a milestone or just another turn around the sun, a birthday calls for something special, and for me, that always means making my own birthday cake. It’s not just a tradition; it’s an opportunity to create something truly spectacular that I know I’ll love. If someone else bakes or buys me a cake, well, that simply means I get to enjoy two birthday cakes that year, and I’m certainly not complaining!
The Undeniable Allure of Ice Cream Cake
If I had to crown one dessert as the ultimate birthday cake, it would unequivocally be an ice cream cake. I still fondly remember a particular year at a previous job when my thoughtful coworkers, unsure of my preferred flavor, surprised me with an ice cream cake. It wasn’t just any ice cream cake; it was the good kind from Dairy Queen – a far cry from the often-tasteless varieties found in grocery store freezers. That experience solidified my love for the frozen confection, but it also highlighted a common limitation: store-bought ice cream cakes offer a limited selection of flavors. You’re confined to what’s available, which rarely includes anything as extraordinary and decadent as this Buckeye Ice Cream Cake recipe, with its incredible chocolate and peanut butter layers.
The Magic of Buckeye: Chocolate and Peanut Butter Perfection
The inspiration for this magnificent creation came from my hugely popular buckeye layer cake. The classic combination of rich chocolate and creamy peanut butter is universally beloved, evoking memories of the iconic Buckeye candy from Ohio. It’s a flavor pairing that’s robust, comforting, and intensely satisfying. Given the immense success of the layer cake, it was only natural to translate that beloved theme into an ice cream cake, elevating it to an entirely new level of frozen dessert bliss. This isn’t just a dessert; it’s an experience.
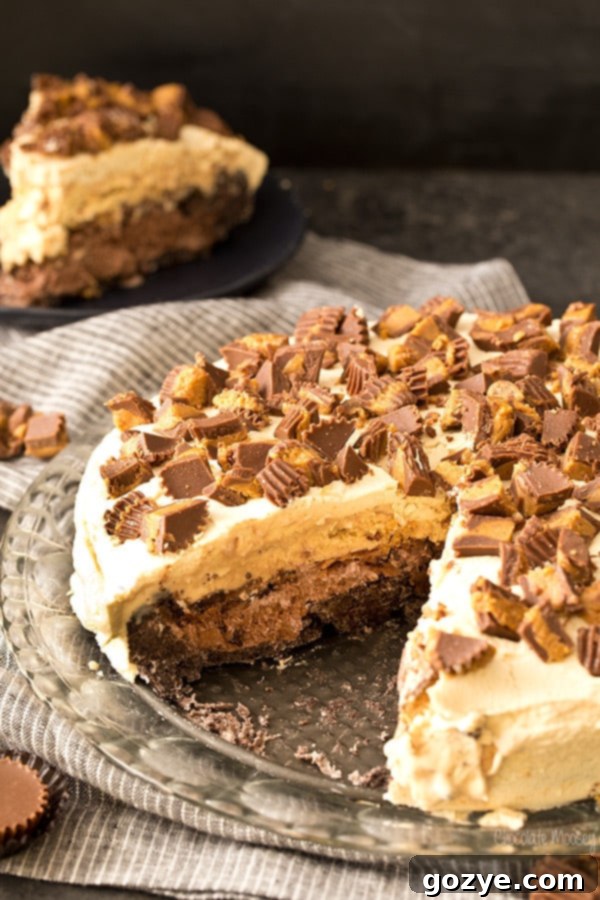
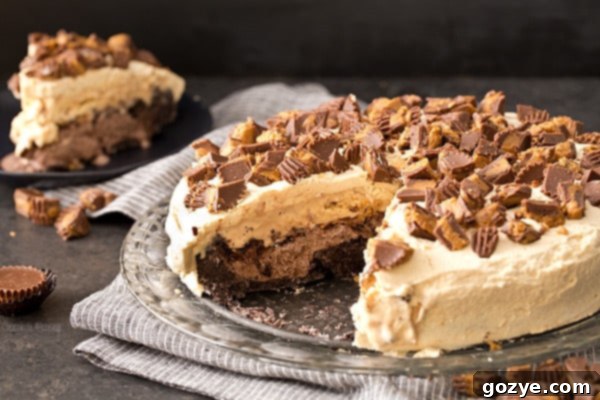
This Buckeye Ice Cream Cake is a masterpiece of layers: a sturdy chocolate cookie crust forms the base, followed by a generous layer of smooth chocolate ice cream. Next comes a delightful, crunchy peanut butter fudge layer, reminiscent of those fantastic Dairy Queen cakes but with an added homemade touch of chopped peanut butter cups and cookies for extra texture. This is then crowned with a creamy layer of pure peanut butter ice cream, all artfully covered with a luscious, homemade peanut butter whipped cream. Every spoonful is an explosion of chocolate and peanut butter harmony, making it the perfect way to truly celebrate any special occasion.
Homemade vs. Store-Bought Ice Cream: Making Your Choice
One of the first decisions you’ll face when embarking on this delicious journey is whether to make your own ice cream or buy it. The beauty of this recipe is its flexibility; it can be made either way, depending on your time and preference. While the idea of homemade ice cream can seem daunting, it offers unparalleled control over flavor and texture. For example, I have a fantastic recipe for peanut butter ice cream that’s incredibly simple – just throw everything in a blender and freeze. For the chocolate layer, my German chocolate cake ice cream (minus the frosting component) works perfectly.
The Case for Homemade Ice Cream
Opting for homemade ice cream allows you to achieve a truly bespoke flavor profile. You can adjust the sweetness, the intensity of the chocolate, or the creaminess of the peanut butter. If you decide to go this route, remember to double both my homemade recipes, as you’ll need at least 1.5 quarts (approximately 6 cups) of each flavor of ice cream to build these generous layers. Homemade ice cream often has a fresher, more vibrant taste, and the satisfaction of crafting every component of your cake from scratch is immensely rewarding.
Smart Choices for Store-Bought Ice Cream
However, acknowledging that it was my birthday, I decided to give myself a break and opt for store-bought ice cream for this particular cake. This choice, while convenient, presented its own challenges. Finding a pure, unadulterated peanut butter ice cream in stores can be surprisingly tough. I frequently encountered “chocolate peanut butter” ice cream or, even worse, vanilla ice cream with a mere peanut butter swirl. While I have nothing against vanilla, when I crave the rich, nutty flavor of peanut butter ice cream, a swirl just doesn’t cut it. It took some dedicated searching before I finally located the perfect pure peanut butter ice cream. If you find yourself in a similar predicament, don’t be afraid to enhance a good quality vanilla ice cream with some melted peanut butter stirred in, or simply accept the delicious challenge of making your own.
The Art of Assembly: Patience is Your Secret Ingredient
When it comes to assembling an ice cream cake, the true secret ingredient isn’t found on any shopping list; it’s patience. You’ll discover that a significant portion of your time will be spent waiting rather than actively assembling or indulging in the cake. This waiting period is crucial for ensuring each layer sets properly, preventing any messy meltdowns, and guaranteeing beautiful, distinct layers in your final masterpiece.
Mastering the Chill Times
Each individual layer of this Buckeye Ice Cream Cake requires at least 30 minutes of chill time in the freezer before you can confidently move on to the next step. This allows the ice cream to firm up just enough to support the subsequent layers without becoming a soupy mess. When preparing to scoop and spread your ice cream, it’s best to let it sit at room temperature for about 5-10 minutes. This softens it to the perfect consistency – soft enough to spread evenly with an offset spatula without melting too quickly, yet still cold enough to maintain its structure. If you’re using homemade ice cream, which often starts out softer, you might need to extend this waiting period slightly to achieve the ideal spreading texture.
Tips for Smooth Spreading
Using an offset spatula is highly recommended for achieving smooth, even layers. Work quickly and confidently, spreading the ice cream from the center outwards. Don’t worry if it’s not absolutely perfect; the beauty of an ice cream cake is its rustic charm. The springform pan is your best friend here, as its removable sides make the layering and final removal incredibly easy. Just remember to run a knife around the edge before releasing the sides to ensure a clean finish.
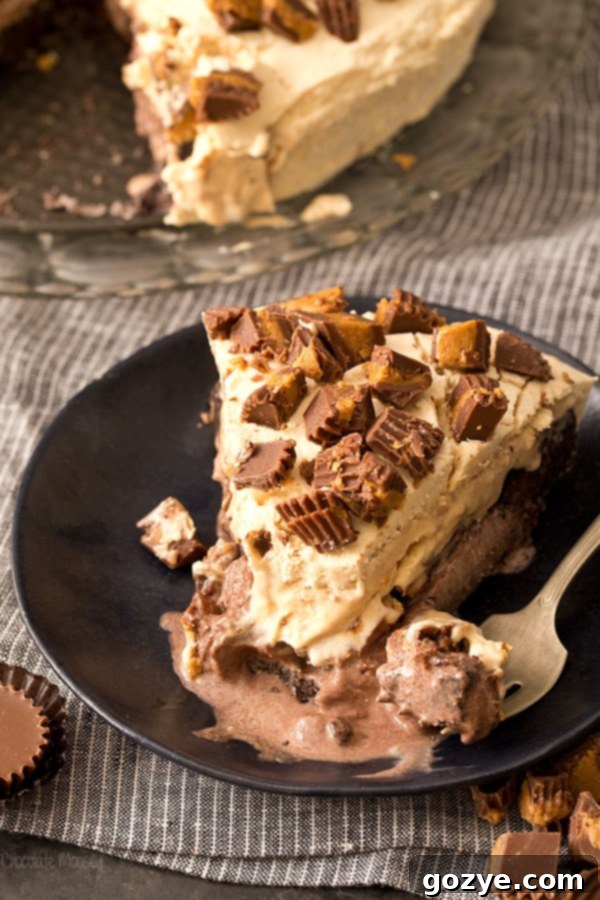
How To Cut An Ice Cream Cake Like a Pro
Cutting an ice cream cake can be notoriously tricky, often resulting in a frustrating, melted mess. However, with a simple trick, serving your beautiful Buckeye Ice Cream Cake can be a breeze. Prior to serving, allow the cake to thaw slightly. This can be done by placing it in the refrigerator for about 30 minutes or, for a quicker thaw, on the counter for 15 minutes. The key tool is a long, serrated knife. Before each cut, warm the knife by running it under hot water, then quickly wipe off any excess moisture. This warm, clean blade will glide through the frozen layers with ease, ensuring perfect, neat slices every time. Repeat this warming and wiping process between each cut for the best results.
Serving and Storing Your Masterpiece
While this Buckeye Ice Cream Cake recipe is certainly not a “small batch,” its generous size means it freezes exceptionally well. This is fantastic news because it means you won’t have to worry about throwing away any uneaten portions. Instead, you’ll have a delightful and dangerously tempting treat waiting for you in your freezer, ready to be enjoyed whenever a craving strikes! The rich flavors and creamy textures hold up beautifully in the freezer, making it an ideal make-ahead dessert for parties or simply to savor over several days.
Proper Storage for Lasting Enjoyment
To ensure your ice cream cake remains in pristine condition, proper storage is crucial. The best method is to store it in an airtight cake container. If you don’t have one readily available, simply place the cake back into its springform pan (after removing the sides) and cover it thoroughly with several layers of plastic wrap, ensuring no air can get in. This tight seal will protect the cake from freezer burn and preserve its delicious flavor and texture for up to two weeks. Before serving subsequent slices, you might want to allow it to thaw for a few minutes again, as outlined in our cutting tips, for optimal enjoyment.
Customization and Variations
One of the joys of homemade desserts is the ability to customize them to your liking. While the classic Buckeye combination is divine, don’t hesitate to experiment! You could try a different cookie for the crust, such as Oreo or even graham crackers for a different base flavor. For the fudge layer, consider adding different mix-ins like mini chocolate chips, pretzels for extra saltiness, or even different types of candy bars. You could also swirl some caramel into the fudge layer for a caramel-buckeye twist. The peanut butter whipped cream can also be flavored with a touch of cocoa powder for a chocolate peanut butter topping. This recipe is a fantastic canvas for your culinary creativity.
Why This Buckeye Ice Cream Cake Will Be Your New Favorite
This Buckeye Ice Cream Cake is more than just a dessert; it’s a celebration in itself. From its rich chocolate cookie crust to its layers of decadent chocolate and peanut butter ice cream, punctuated by a crunchy peanut butter fudge, and finally crowned with fluffy homemade peanut butter whipped cream, every element is designed to delight. It’s a dessert that caters to every craving, offering sweetness, saltiness, creaminess, and crunch in perfect harmony. Whether it’s for a birthday, a holiday gathering, or just a special treat, this Chocolate Peanut Butter Ice Cream Cake is guaranteed to impress and leave everyone asking for the recipe. It’s an investment of time and love that truly pays off in unforgettable deliciousness.
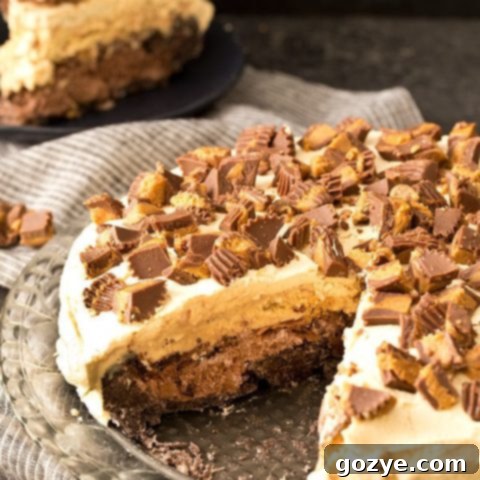
Buckeye Ice Cream Cake (Chocolate Peanut Butter Ice Cream Cake)
10-12 servings
This incredible Buckeye Ice Cream Cake recipe features a decadent chocolate cookie crust, creamy layers of chocolate ice cream, a crunchy peanut butter fudge center, and rich peanut butter ice cream, all generously topped with a homemade peanut butter whipped cream. It’s the ultimate chocolate peanut butter dessert!
Ingredients for Buckeye Ice Cream Cake
- 2 1/2 cups chocolate sandwich cookie crumbs
- 6 tablespoons butter, melted
- 1 1/2 quarts (6 cups) chocolate ice cream
- 1/2 cup hot fudge sauce (homemade or quality store bought)
- 1 cup chopped chocolate sandwich cookies
- 1 cup chopped peanut butter cups
- 1 1/2 quarts (6 cups) peanut butter ice cream
For the Luscious Peanut Butter Whipped Cream
- 1 cup heavy whipping cream
- 1/4 cup powdered sugar
- 1/4 cup smooth peanut butter
- 2 teaspoons vanilla extract
- 1 1/2 cups chopped peanut butter cups (for topping)
Step-by-Step Instructions to Make Buckeye Ice Cream Cake
- Prepare the Chocolate Cookie Crust: In a large bowl, thoroughly mix together the chocolate sandwich cookie crumbs and the melted butter until well combined. Press this mixture firmly into the bottom and about 2 inches up the side of an 8.5-inch or 9-inch springform pan. Place the pan in the freezer for at least 30 minutes to allow the crust to set.
- Add the Chocolate Ice Cream Layer: Remove the pan from the freezer. Allow the chocolate ice cream to sit at room temperature for 5-10 minutes until slightly softened (but not melted) for easier spreading. Scoop the softened chocolate ice cream evenly into the prepared crust, then spread it smoothly with an offset spatula. Return the pan to the freezer for another 30 minutes to firm up.
- Create the Crunchy Peanut Butter Fudge Layer: If your hot fudge sauce is solid, gently heat it in the microwave for 5-10 seconds, or until it reaches a pourable liquid consistency. In a separate large bowl, mix the warmed hot fudge sauce with the chopped chocolate sandwich cookies and chopped peanut butter cups. Retrieve the pan from the freezer and evenly spread this crunchy hot fudge mixture over the set chocolate ice cream layer. Freeze for an additional 30 minutes.
- Layer with Peanut Butter Ice Cream: Take the pan out of the freezer. Let the peanut butter ice cream soften at room temperature for 5-10 minutes, similar to the chocolate ice cream. Scoop this softened peanut butter ice cream on top of the fudge layer, spreading it evenly with an offset spatula. Place the cake back into the freezer for its final 30-minute freeze before the topping.
- Prepare the Homemade Peanut Butter Whipped Cream: While the cake chills, make the whipped cream. In a large mixing bowl (a stand mixer with a whisk attachment is ideal), beat the heavy whipping cream on high speed until it begins to thicken and soft peaks form (when you lift the beaters, the peaks will form but gently fall over). Gradually add the powdered sugar, smooth peanut butter, and vanilla extract. Continue beating on high speed until stiff peaks form (the peaks will stand firm and not fall over).
- Assemble and Garnish: Remove the chilled cake from the freezer. Carefully run a thin knife around the inside edge of the springform pan to loosen it, then gently release and remove the side of the pan. Evenly cover the entire cake with the homemade peanut butter whipped cream, then generously top with the remaining chopped peanut butter cups for a decorative and delicious finish. Freeze the decorated cake for at least 30 minutes to set the whipped cream. Once firm, cover the cake securely, either with a cake container or several layers of plastic wrap, and keep frozen until you’re ready to serve this amazing Buckeye Ice Cream Cake.
Did you make this recipe?
Let me know what you think! Rate the recipe above, leave a comment below, and/or share a photo on Instagram using #HITKrecipes
