Bake the Perfect Mini Apple Pies for Two in Ramekins: An Easy Homemade Recipe
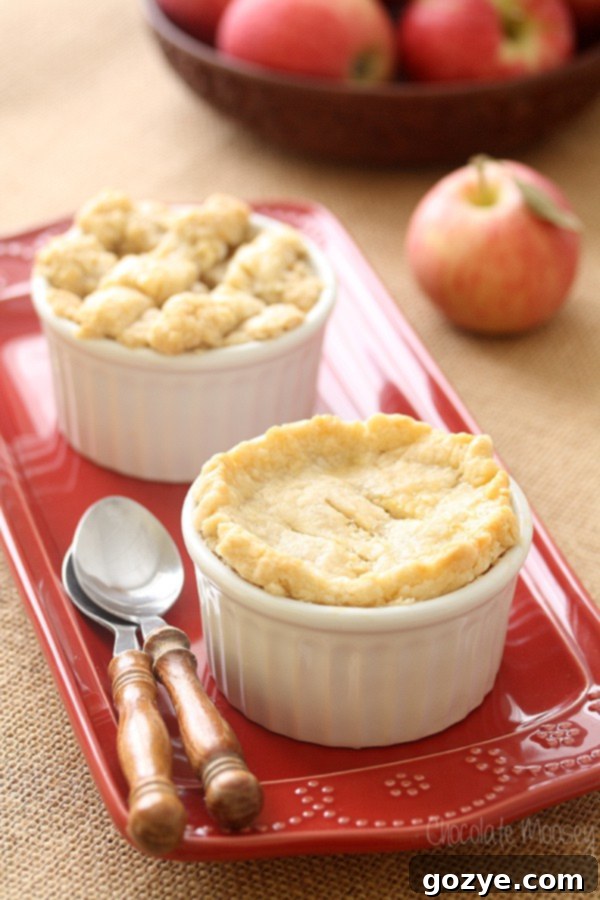
Craving an easy apple pie recipe but want to avoid the commitment of a large pie and potential leftovers? These delightful Mini Apple Pies are individual apple pies perfectly portioned for two, baked conveniently in ramekins. Crafted with a homemade flaky pie crust and a luscious apple pie filling, this recipe eliminates the need for any special 6-inch pie pan, making dessert for two simpler and more satisfying than ever.
As autumn leaves begin to change and a crispness fills the air, it’s a sure sign that apple season has arrived in Pennsylvania. This cherished time of year means our kitchens are filled with the sweet, comforting aromas of freshly baked apple treats. Expect to see an abundance of mouth-watering apple recipes gracing tables throughout September and October, celebrating the harvest.
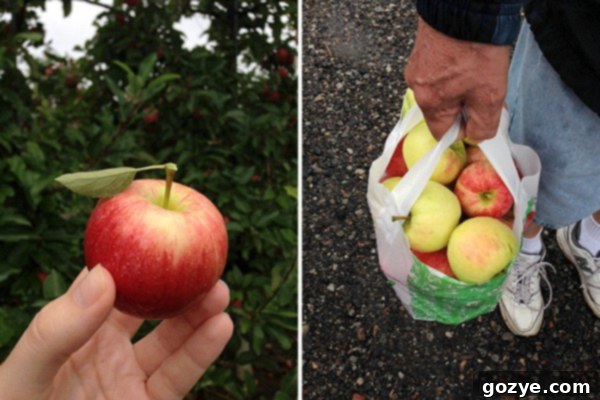
For my father and me, the apple season always officially kicks off with a delightful tradition: a trip to our favorite apple farm situated just south of Pittsburgh. There, we spend the day picking crisp, ripe apples, gathering inspiration for the season’s baking adventures. With a passion for baking with apples (you might recall my popular apple crisp for two), I often find myself with a growing list of recipe ideas, carried over from the previous year. Right at the very top of that list this year were these irresistible Mini Apple Pies.
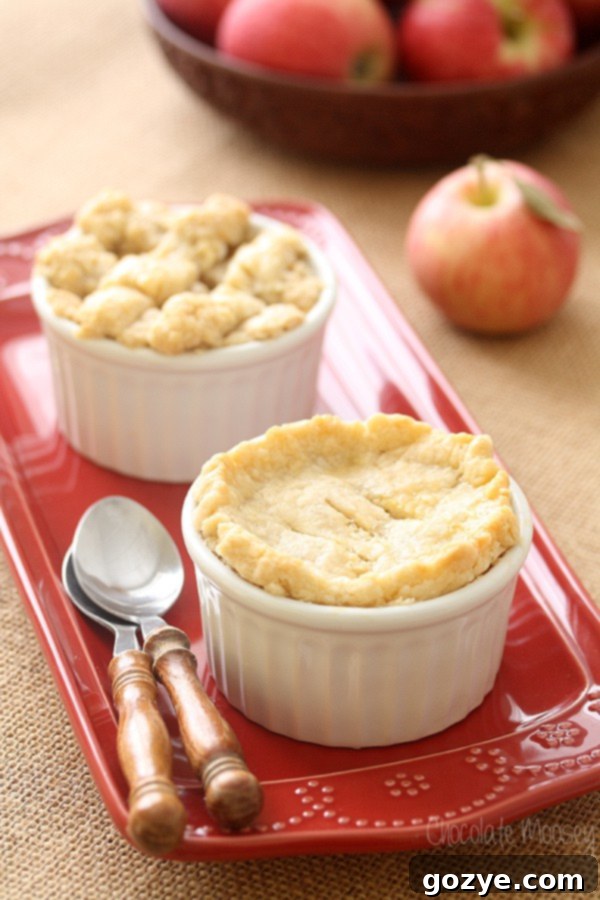
These aren’t just any apple pies; they’re two beautifully crafted individual apple pies, each baked in its own ramekin. The concept is simple yet brilliant: it’s like baking a single-serve apple pie, ensuring that each person gets their very own, perfectly portioned dessert. No sharing, no cutting awkwardly, just pure, personal apple pie bliss.
Of course, the beauty of these mini pies is also in their flexibility. You can indulge in both yourself – perhaps one warm from the oven and the other saved for a delightful treat later. The baker’s choice is truly yours!
Beyond everyday enjoyment, these mini apple pies are also an excellent choice for special occasions. They make a fantastic, personal dessert option for your intimate Thanksgiving Dinner For Two, especially if you prefer a classic apple dessert over the traditional pumpkin pie. They offer a touch of elegance and thoughtful presentation that elevates any meal.
Just like their larger, traditional counterparts, these charming ramekin apple pies are double-crusted. This means a rich, buttery crust forms the base and sides, perfectly cradling the sweet apple filling, while another layer creates a golden, often decorative, top. I could have simplified the recipe by skipping the bottom crust, but then, it just wouldn’t be a true, authentic apple pie for two. The double crust is essential for that quintessential apple pie experience.
And naturally, every apple pie, regardless of its size, absolutely demands a homemade apple pie filling! Crafting the filling from scratch ensures the freshest flavors and allows for precise control over sweetness and spice. I’ll guide you through the process of scaling down a classic apple pie filling recipe to create precisely enough for these two delectable mini apple pies, ensuring no leftovers unless you intentionally make extra for other delightful purposes.

Essential Ingredients for Your Mini Apple Pies
To embark on your journey of crafting these individual apple pies, you’ll need a carefully selected array of ingredients for both the rich, flaky crust and the sweet, aromatic apple filling. Here’s what to gather:
For the Perfect Homemade Pie Crust:
- All-Purpose Flour: This foundational ingredient provides the necessary structure for a tender, yet sturdy crust. Its gluten content helps bind the dough and prevents it from becoming too sticky. When measuring flour, always spoon it gently into your measuring cup and then level it off with a straight edge or knife. Avoid scooping directly from the bag, as this can compact the flour, leading to too much flour and a dry, tough crust.
- Granulated Sugar: A small amount of sugar in the crust contributes a subtle sweetness that complements the filling beautifully, and also aids in browning for that appealing golden finish.
- Salt: Often underestimated, salt is a crucial flavor enhancer in baking. It balances the sweetness of the sugar and makes the butter’s richness truly shine, especially when using unsalted butter.
- Cold Unsalted Butter: This is where much of the flavor and the desired “melt-in-your-mouth” quality of the crust originates. Keeping the butter cold is paramount; as it bakes, the cold butter melts and releases steam, creating pockets that result in a wonderfully flaky texture. Using unsalted butter allows you to control the exact amount of salt in your recipe.
- Cold Shortening: While butter provides incredible flavor, shortening excels at creating an incredibly tender and exceptionally flaky crust. Combining both butter and shortening gives you the best of both worlds: superior flavor from butter and unparalleled tenderness and flakiness from shortening. Fortunately, you can now easily find shortening in convenient stick form, making it simple to cut into precise tablespoon measurements, just like butter. I often keep a stick of shortening in the freezer, ensuring it’s extra cold and firm whenever I’m ready to bake.
- Cold Water: The final key to a flaky crust. Cold water hydrates the flour to form the dough and, crucially, contributes to steam production during baking. This steam separates the layers of dough, creating those desirable flaky strata. Exercise caution not to add too much water; an overly wet dough can become tough and puff excessively from too much steam, rather than developing distinct layers.
For the Luscious Apple Pie Filling:
- Granulated Sugar: Even naturally sweet apples require additional sugar to achieve that classic apple pie flavor and to create the rich, syrupy consistency of the filling. The amount can be adjusted slightly based on the sweetness of your apples and personal preference.
- Water: This liquid component is essential for dissolving the sugar and cornstarch, forming the foundational syrup of the filling. For an even deeper and more complex apple flavor, consider substituting apple cider or apple juice for the water.
- Cornstarch: A vital thickening agent, cornstarch ensures your apple pie filling achieves a wonderfully thick and slightly glossy texture without being gummy. It cooks clear, allowing the vibrant apple color to show through.
- Ground Spices (Cinnamon, Nutmeg, and Clove): It simply isn’t apple pie without this aromatic trio! I affectionately refer to these three as the “holy trinity of baking spices.” Ground cinnamon provides warmth and sweetness, nutmeg adds a subtle, earthy aroma, and clove introduces a hint of pungent sweetness, all harmonizing perfectly with apples.
- Fresh Lemon Juice: A touch of lemon juice is crucial for balancing the sweetness of the sugar and apples, adding a bright, zesty counterpoint. It also helps prevent the apples from browning too quickly during preparation.
- Vanilla Extract: A dash of vanilla extract might seem minor, but it’s a powerful flavor enhancer. It deepens the overall apple flavor, adding a layer of sophisticated sweetness and warmth to the filling.
- Baking Apples: The star of the show! You’ll want to select specific baking varieties that hold their shape well during cooking (more detailed recommendations are provided below). Always remember to peel and core your apples before chopping them for the filling.
Feeling adventurous or not in the mood for apple? This recipe is incredibly versatile! You can easily substitute the apple filling with other delightful fruit fillings. Consider trying a vibrant strawberry pie filling, a juicy blueberry pie filling, a sweet peach pie filling, or a rich cherry pie filling to create your own unique mini fruit pies.
Choosing the Best Apples for Your Mini Apple Pies
One of the most frequent questions I receive when it comes to baking apple desserts is, “Which type of apples are truly best for apple pie?” The choice of apple can significantly impact the final texture and flavor of your pie, so it’s an excellent question to consider.
During my most recent apple-picking adventure at the farm, I selected two fantastic varieties: Ginger Gold and Gala. Both of these apples are highly recommended for apple pie filling because of a crucial characteristic: they steadfastly hold their shape and texture even after extended baking times. Unlike some varieties that can turn into a mushy applesauce, Ginger Gold and Gala maintain a pleasant bite, ensuring your pie filling has substance and character.
Beyond these two, several other apple varieties are excellent candidates for baking. Look for Jonathans, Jonagolds, Golden Delicious, Cortland, and McIntosh. Each offers a slightly different flavor profile – from tart to subtly sweet – and a good balance of firmness that stands up to the heat of the oven. Many experienced bakers even prefer to use a combination of two or three different apple varieties in their pies. This blend allows for a more complex flavor, incorporating both sweet and tart notes, and often results in a more interesting textural experience within the filling.
While you can generally get away with most apple varieties when baking, there’s one particular apple I strongly advise against using for pie: the Red Delicious. Despite its appealing name, Red Delicious apples have a soft, mealy texture that simply doesn’t hold up to baking. They tend to disintegrate and become unpleasantly mushy, detracting from the overall quality of your pie. Save those Red Delicious apples for simple snacking; for baking, always opt for varieties known for their firmness and ability to retain structure.

Crafting Your Perfect Mini Apple Pies: A Step-by-Step Guide
Now, let’s get to the delightful process of making your very own apple pies for two! The journey begins with the homemade pie dough, which requires an essential chilling period to achieve its perfect texture. Plan to make your dough at least an hour before you intend to assemble the pies.
While pie crust can certainly be made by hand using a pastry blender or your fingertips, I find the food processor to be the most efficient and quickest method. It expertly cuts the cold butter and shortening into the flour in mere seconds, minimizing the warmth transferred from your hands, which is key for a flaky crust. For a more visual, step-by-step guide to achieving the perfect small pie crust, you can refer to my dedicated Small Pie Crust post.
While your freshly made dough is chilling in the refrigerator, firming up and allowing the gluten to relax, it’s the perfect time to prepare your apple pie filling. I’ve carefully scaled down my original homemade apple pie filling recipe specifically for these mini pies, ensuring you’ll have just the right amount without excess. However, if you’re ever in the mood to make a full batch of filling (perhaps for future baking), rest assured that any leftovers can be wonderfully utilized in one of these delicious recipes using apple pie filling.
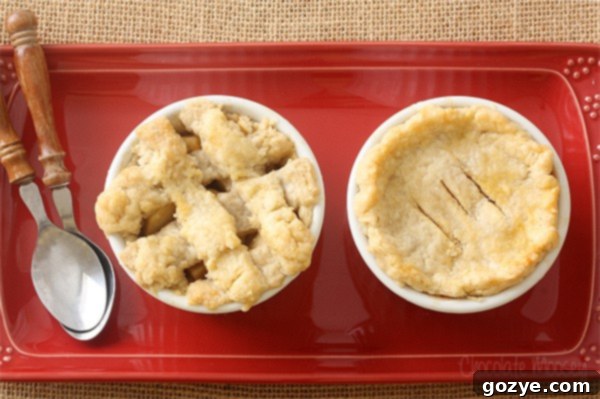
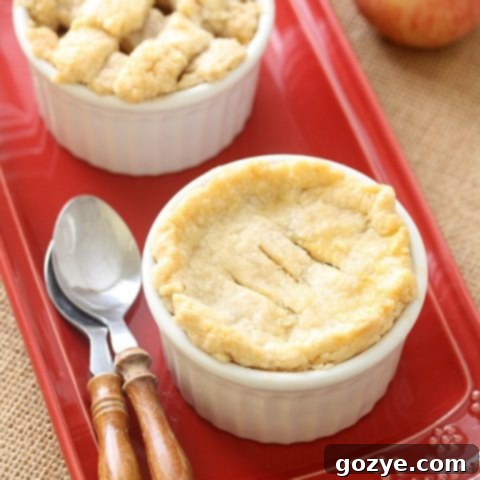
Once your pie dough is thoroughly chilled and ready to work with, retrieve it from the refrigerator. You’ll use half of the prepared dough to line two standard 6-ounce ramekins, forming the bottom and side crusts. The remaining half of the dough is reserved for the top crust. Here, you have a creative choice: you can opt for a simple, elegant full top crust, or you can elevate your pies with some impressive lattice work. Creating a lattice top not only looks stunning but also allows steam to escape beautifully, preventing a soggy top. For more inspiring ideas and detailed instructions on various decorative pie crust looks, Martha Stewart offers a fantastic and handy tutorial: Making Decorative Piecrusts.
No ramekins on hand? No problem! You can easily adapt this recipe to make my delicious Small Apple Pie, which is perfectly designed to bake in a 6-inch pie plate, offering a similar delightful experience.
Baking and Serving Your Individual Apple Pies
How Long to Bake Mini Apple Pies?
The moment of truth arrives when your ramekin apple pies are baking, filling your kitchen with an irresistible aroma. These individual pies typically require a baking time of about 35-40 minutes in a preheated oven set to 350°F (175°C). You’ll know your mini apple pies are perfectly done when their tops achieve a beautiful, enticing golden-brown color. The crust should look crisp and cooked through, with no raw, pale spots remaining. This golden hue is a clear indication of a perfectly baked, flaky crust that promises a delightful crunch with every bite.
Once baked, allow your pies to cool slightly before serving. This brief cooling period helps the filling set properly, preventing it from being too runny when you cut into it, and also allows the flavors to meld beautifully.
Storage Tips for Your Mini Apple Pies:
While these delicious mini apple pies are usually devoured quickly, you might occasionally find yourself with a slice or two left over (though it’s a rare occurrence!). At room temperature, well-wrapped apple pie will typically last for up to two days. However, if you need to extend their freshness and prolong their deliciousness, refrigerating the pies can add an extra day or two to their shelf life. Simply cover them loosely with plastic wrap or aluminum foil and store them in the refrigerator.
For reheating, a quick warm-up in a low oven (around 300°F/150°C) for 10-15 minutes will bring back that fresh-baked warmth and crispness to the crust, making them taste as good as new. You can also briefly microwave them if you’re in a hurry, though this might soften the crust slightly.
The Perfect Companions: What to Serve With Mini Apple Pies
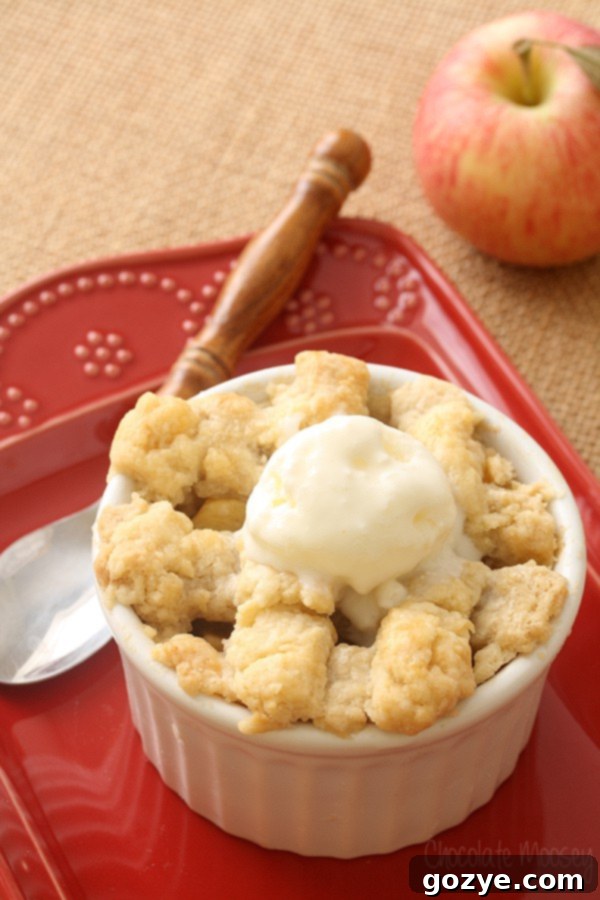
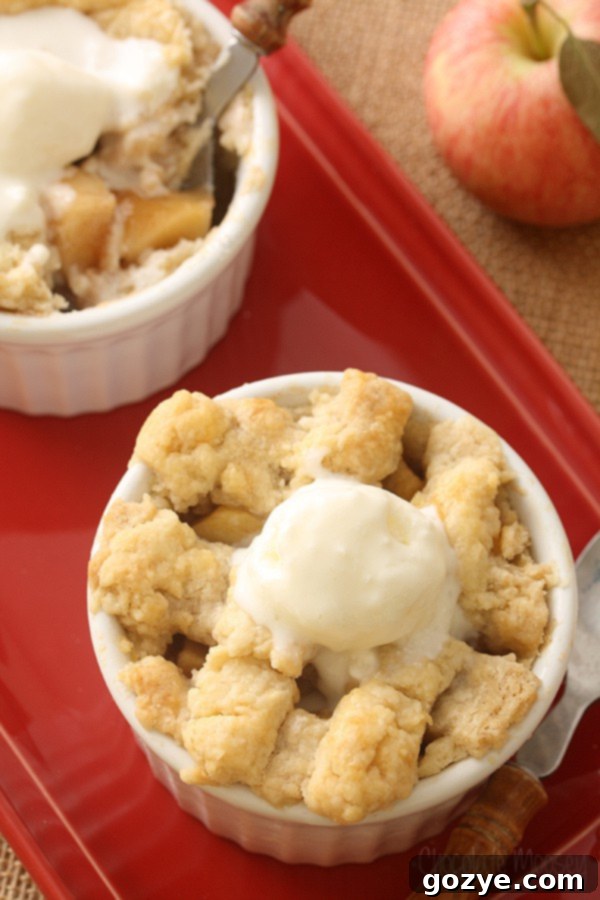
What is a warm, comforting apple pie without its ideal companion? For many, the ultimate pairing for any apple pie is a generous scoop of ice cream melting delicately over the warm, spiced apples. It’s a classic combination that perfectly marries hot and cold, creamy and crispy, sweet and tart. I personally adore topping my mini apple pies with rich buttermilk ice cream, which offers a delightful tangy counterpoint to the sweet apples.
However, the beauty of this dessert lies in its versatility. You are more than welcome to choose your favorite ice cream flavor. A classic vanilla bean ice cream is always a superb choice, with its pure, creamy notes enhancing the apple’s natural sweetness. For an extra layer of seasonal flavor, consider a scoop of apple cider ice cream, which truly amplifies the apple essence. The possibilities are truly endless, so feel free to experiment with caramel, cinnamon, or even a simple plain cream ice cream.
If ice cream isn’t your preference, or you’re looking for an alternative, these individual pies are equally wonderful topped with a dollop of homemade whipped cream. The light, airy sweetness of whipped cream provides a luxurious contrast to the dense, flavorful pie filling, making for an equally satisfying dessert experience. A sprinkle of cinnamon or a drizzle of caramel sauce over the whipped cream can add another layer of indulgence.
For an even more decadent treat, consider serving your mini apple pies with a sprinkle of toasted nuts like pecans or walnuts, or a light dusting of powdered sugar for a simple yet elegant finish. Whatever you choose, these mini apple pies are sure to be a showstopper and a comforting end to any meal.
Recommended Baking Tools and Equipment (Affiliate Links)
To ensure your mini apple pie baking experience is as smooth and enjoyable as possible, here are some essential tools and equipment that you might find incredibly useful. These are items I often rely on in my own kitchen:
More Delightful Ramekin Dessert Recipes
If you’ve thoroughly enjoyed crafting and savoring these individual apple pies, you’re in for a treat! Ramekins are incredibly versatile for creating charming, single-serving, or two-person desserts. Here are even more fantastic ramekin dessert recipes you can explore and make, perfect for any occasion:
- Mini Cherry Pies: Sweet, tangy, and bursting with cherry flavor.
- Mini Strawberry Pies: A vibrant, fresh take on a classic.
- Mini Peach Pies: Juicy peaches nestled in a flaky crust, pure summer bliss.
- Eggless Pumpkin Pie: A creamy, spiced pumpkin pie, perfect for those with dietary restrictions.
- Brownies For Two: Rich, fudgy brownies designed for a perfectly indulgent experience.
- Cheesecake For Two: Creamy, dreamy cheesecake, available in both classic and chocolate variations.
- Peach Cobbler For Two: Warm, bubbly peach cobbler with a delightful biscuit topping.
- Single Serve Chocolate Chip Cookie: A giant, warm, gooey cookie, just for you!
For a comprehensive list of all the delectable possibilities, be sure to check out my full collection of Ramekin Dessert Recipes. You’re sure to find your next favorite sweet treat!
Mini Apple Pies
2 mini pies
15 minutes
40 minutes
1 hour
1 hour 55 minutes
Craving an easy apple pie recipe but don’t want leftovers? These Mini Apple Pies are individual apple pies for two baked in ramekins with a homemade pie crust and apple pie filling. No special 6 inch pie pan needed!
Ingredients
Pie Crust
- 1 cup all purpose flour
- 2 tablespoons granulated sugar
- 1/2 teaspoon salt
- 3 tablespoons cold shortening, cut into 3 pieces
- 3 tablespoons cold unsalted butter, cut into 3 pieces
- 2 tablespoons cold water
Apple Pie Filling
- 1/4 cup water
- 1 teaspoon lemon juice
- 1/4 cup granulated sugar
- 1 tablespoon cornstarch
- 1/2 teaspoon ground cinnamon
- 1/4 teaspoon ground nutmeg
- 1/8 teaspoon ground clove
- 1/4 teaspoon vanilla extract
- 1 1/2 cups chopped, peeled baking apples (such as Gala, Golden Delicious, or Jonagold)
Instructions
- In the bowl of a food processor, add the flour, sugar, and salt. Add the cold butter and shortening and pulse until butter and shortening are cut into the flour, looking like large pebbles. Add the water and pulse until a dough forms. Alternatively, you can do this by hand with a pastry blender.
- Divide the dough into four even pieces and flatten each piece into an evenly round disk. Wrap in plastic wrap and refrigerate at least 1 hour or until cold.
- For the apple filling: In a large saucepan, combine the water, juice, sugar, cinnamon, nutmeg, clove, and cornstarch. Stir over medium heat until thickened and bubbly. Stir in vanilla and apples then cook for 5 minutes or until the apples start to soften (don’t fully cook them), constantly stirring. Remove from the heat and let cool.
- Preheat oven to 350F. Have two six-ounce ramekins* and a cookie sheet ready.
- Take one pie crust piece out of the refrigerator. On a lightly floured surface, roll it into a circle slightly bigger than your ramekin. Line the bottom and sides of the ramekin with the crust, patching it together if necessary. Fill the crust with half of the pie filling.
- Take another pie crust piece and roll into a circle just big enough to cover the top. Place it on top and seal the edges. Cut a few slits in the top to let steam escape. If making the lattice crust, cut the dough in strips and lay the pieces on top in a criss-cross pattern.
- Repeat these steps with the remaining pie crust and filling.
- Place each ramekin on the cookie sheet and bake 35-40 minutes or until the top is golden brown. Cool for 15 minutes. Serve warm with ice cream or cool to room temperature.
Notes
- If you use ramekins that are not six ounces, you may need to adjust the amount of pie crust and filling used. Use your best judgement.
- Enjoyed this recipe? Check out my other Ramekin Dessert Recipes includingMini Cherry Pies and Mini Strawberry Pies.
- Don’t have ramekins? Make my Small Apple Pie instead.
Did you make this recipe?
Let me know what you think! Rate the recipe above, leave a comment below, and/or share a photo on Instagram using #HITKrecipes
Originally published on September 15, 2014
