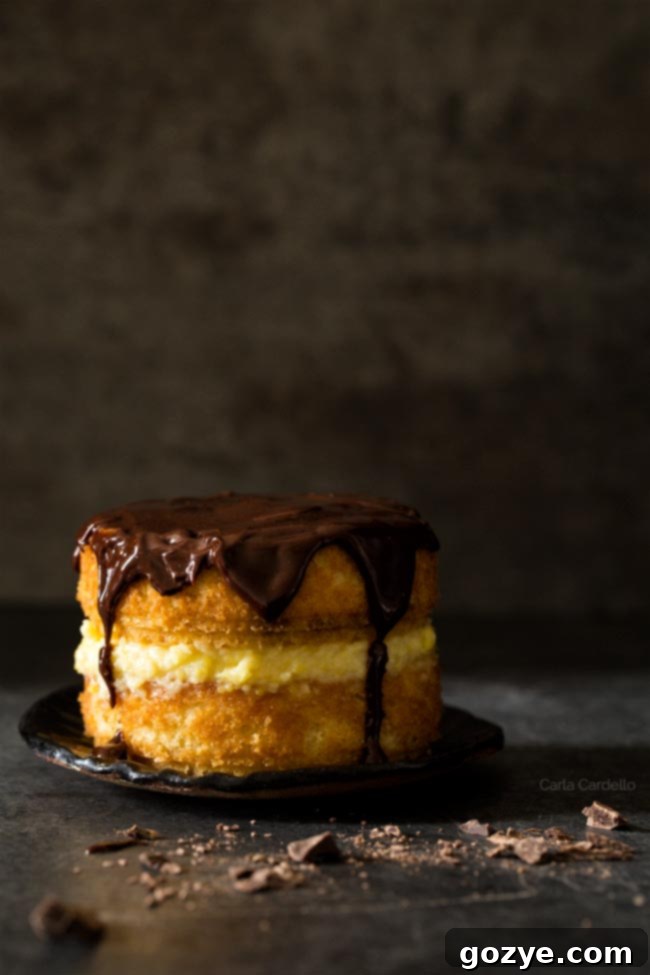
Indulge in Mini Boston Cream Pie for Two: A Small Batch Classic Recipe
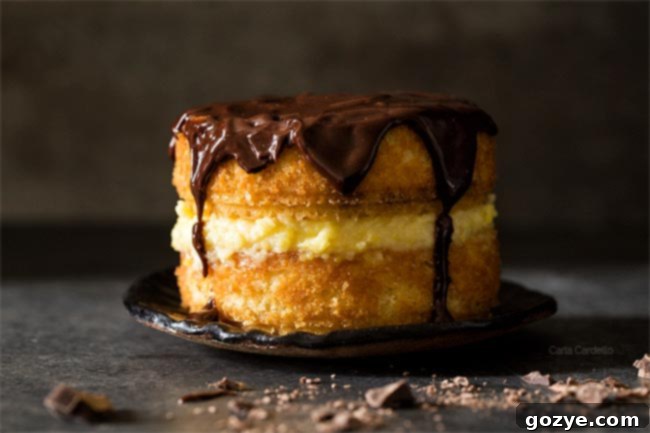
This delightful Mini Boston Cream Pie for Two is a charming 4-inch sponge cake, lovingly filled with creamy vanilla custard and crowned with a luscious, melted chocolate ganache. It’s the perfect sweet escape for a special occasion or simply to satisfy a craving for something truly decadent.
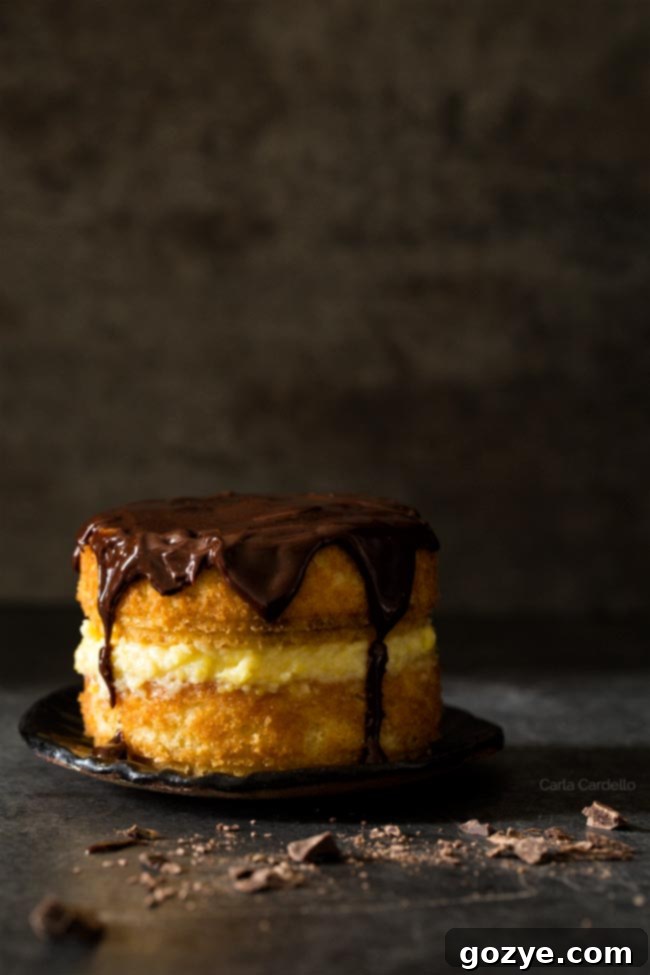
As I continue my culinary journey to bring you beloved classic recipes in more manageable, small batch sizes, this Mini Boston Cream Pie takes center stage. There’s an undeniable joy in creating a dessert that’s perfectly portioned, ensuring fresh indulgence without an overwhelming amount of leftovers. This particular recipe, featuring a delicate 4-inch sponge cake, a velvety vanilla custard, and a smooth chocolate glaze, is designed for sharing with a loved one or enjoying over a couple of days.
This isn’t just any new recipe; it’s a cherished one from my archives, originally published way back in 2008! However, like all good things, it needed a refresh. I’ve updated the recipe for clarity and ease, and of course, reshot the photos to truly capture its irresistible charm. Diving back into making Boston cream pie reminded me just how much I adore this iconic dessert, and I’m thrilled to share this perfected version with you.
To simplify the baking process and achieve a beautiful two-layer cake without any fuss, I opted to bake the sponge cake layers in two separate 4-inch springform pans. This clever trick means you won’t need to deal with the challenge of slicing a single cake layer in half, ensuring two perfectly even rounds for your masterpiece.
While this Mini Boston Cream Pie does require a bit of patience, mainly due to the essential chilling time for the custard (at least an hour!), it’s incredibly forgiving and ideal for making ahead. The components can be prepared in stages, transforming a potentially lengthy process into a relaxing, enjoyable baking experience. Imagine baking the delicate sponge cakes and preparing the rich vanilla custard one day, then assembling and whisking together the glossy chocolate ganache the next. It’s the ultimate dessert for two, whether you’re celebrating a birthday, an anniversary, or simply craving a perfectly portioned slice of cake.
What Exactly is Boston Cream Pie? Unraveling a Classic
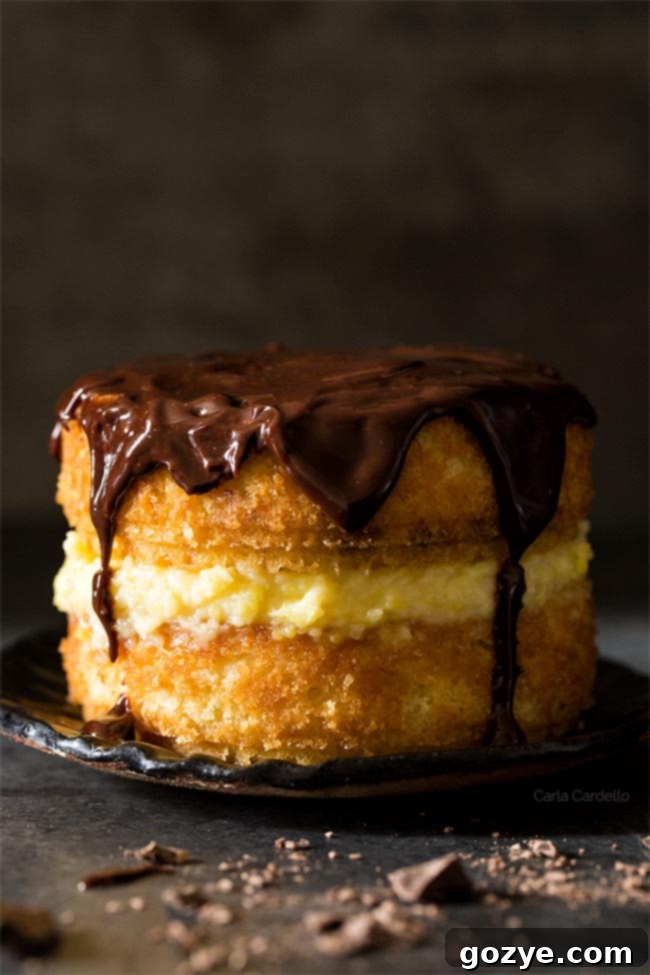
Despite its misleading name, Boston cream pie is not a pie at all, but rather a splendid cake. This iconic American dessert is a harmonious blend of a light, buttery sponge cake, generously filled with a silky vanilla custard, and elegantly topped with a glistening chocolate glaze. Its unique name stems from its origins: back in the day, bakers would often prepare this creation in a pie plate rather than a traditional cake pan, a charming nod to historical baking practices.
The Storied History of Boston Cream Pie
As its name suggests, the Boston cream pie proudly originated in Boston, Massachusetts. Its birthplace is none other than the Omni Parker House, a historic hotel that first served this dessert in 1856. Initially called “Chocolate Cream Pie” or “Parker House Chocolate Cream Pie,” it quickly gained popularity and eventually earned its famous moniker. The Parker House hotel still serves this dessert today, cementing its status as a timeless culinary invention.
Deconstructing the Classic: The Three Pillars of Boston Cream Pie
A true Boston cream pie, whether mini or full-sized, is defined by its three distinct and equally important components working in perfect harmony:
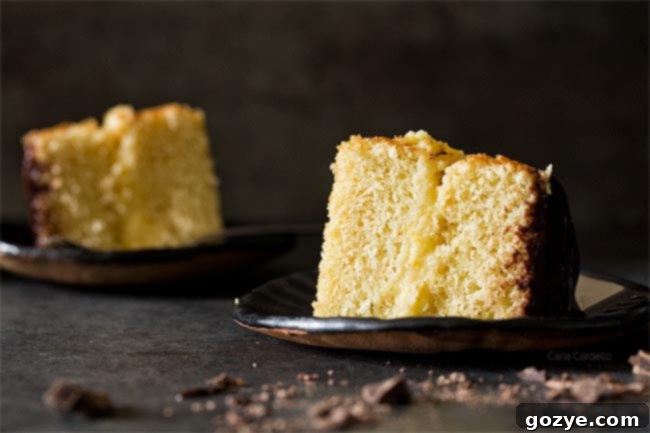
- Buttery Sponge Cake: The foundation of this dessert is a light, airy, and moist sponge cake. It’s not overly sweet, providing a perfect counterpoint to the rich filling and glaze. The term “sponge” aptly describes its delicate, open crumb texture.
- Velvety Vanilla Custard: This is the “cream” in Boston cream pie. A luscious, smooth, and intensely vanilla-flavored custard forms the generous filling between the cake layers. Its cool, rich consistency is what truly sets this dessert apart.
- Decadent Chocolate Ganache: A glossy, melted chocolate glaze crowns the entire cake. This simple yet elegant topping adds a touch of bitterness and intense chocolate flavor that beautifully balances the sweetness of the custard and cake.
How Many Servings Does a 4-Inch Cake Provide?
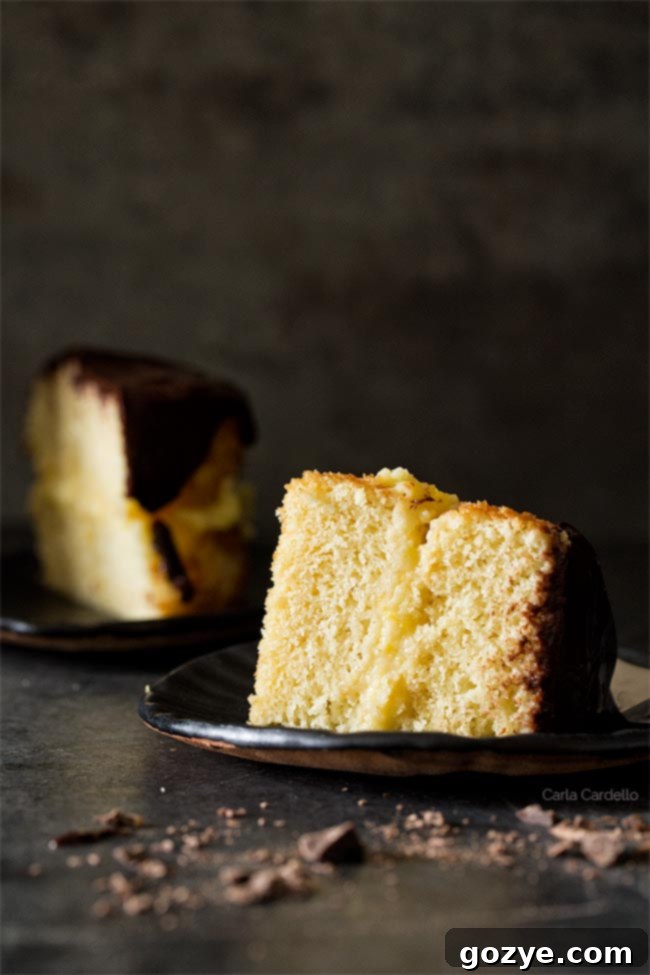
A 4-inch cake, while small, is surprisingly versatile for serving. You can typically get 4 modest slices from a cake of this size, which translates to 2-4 servings depending on appetite. I affectionately call it “dessert for two” because I believe each person deserves two slices – one for a satisfying dessert, and perhaps a sneaky second for a delightful breakfast treat the next day!
Where to Purchase 4-Inch Cake Pans for Your Small Batch Baking Adventures
For this Mini Boston Cream Pie recipe, I specifically use 4-inch mini springform pans. I was lucky enough to acquire mine at Target a very long time ago. However, thanks to the convenience of the internet, finding these specialized pans is now easier than ever. You can readily purchase 4-inch springform pans on Amazon (affiliate link). Having these pans in your baking arsenal opens up a world of small batch baking possibilities. Once you own them, you can also explore making other delightful treats like my Mini Peanut Butter Layer Cake.
Crafting Your Mini Boston Cream Pie from Scratch: A Step-by-Step Guide
Embarking on making a Boston cream pie from scratch is a rewarding experience. It’s about building layers of flavor and texture, starting with the perfect base.
Creating the Perfect Small Sponge Cakes
The sponge cake layers are critical for a truly authentic Boston cream pie. Here’s how to ensure they’re light, tender, and flavorful:
- Begin by preheating your oven and lightly greasing two 4-inch springform pans to prevent sticking.
- In a small bowl, whisk together your dry ingredients: all-purpose flour, baking powder, and a touch of salt. This ensures even distribution of leavening agents.
- In a larger mixing bowl, combine melted butter (cooled slightly), granulated sugar, a room-temperature egg, and vanilla extract. Beat these together until the mixture is pale yellow and smooth – about a minute with an electric mixer. This creaming process incorporates air, contributing to the cake’s light texture.
- With your mixer on the lowest speed, alternately add the whisked dry ingredients and the room-temperature whole milk to the wet mixture. Start and end with the flour mixture, making three additions of flour and two of milk. This method helps maintain a smooth batter and prevents overmixing, which can lead to a tough cake. Scrape down the sides of the bowl as needed to ensure everything is incorporated.
- Divide the batter evenly between your two prepared 4-inch springform pans (roughly 1/2 cup batter per pan).
- Bake at 350°F (175°C) for 20-23 minutes, or until the cakes are golden brown and a toothpick inserted into the center comes out clean. Be careful not to overbake, as this can dry out the sponge.
- Once baked, let the cakes cool completely in their pans before gently removing them. This prevents them from breaking apart.
Mastering the Silky Vanilla Custard Filling for Boston Cream Pie
The heart of Boston cream pie is its rich, vanilla-infused custard. Achieving a perfectly smooth and thick consistency is key, and it all starts with proper technique, especially tempering the egg yolk.
- In a medium saucepan, gently warm the whole milk over medium heat until it’s hot but not yet boiling. Look for small bubbles forming around the edges of the pan.
- In a separate small bowl, whisk together the single egg yolk, granulated sugar, cornstarch, and salt until the mixture is smooth and lump-free. The cornstarch is crucial for thickening the custard.
- Now, for the critical step: tempering the eggs. This involves slowly whisking a small amount of the hot milk into the egg yolk mixture. This gradually raises the temperature of the egg without scrambling it. If you were to add the egg yolk directly to the hot milk, you’d likely end up with cooked, lumpy bits of egg in your custard.
- Once tempered, pour the egg mixture back into the saucepan with the remaining hot milk.
- Cook over medium heat, whisking constantly, until the mixture comes to a boil. Continue to whisk for another 60 seconds once boiling; this ensures the cornstarch fully activates and thickens the custard to the desired consistency.
- Immediately remove the saucepan from the heat and vigorously whisk in the unsalted butter and vanilla extract. The butter adds richness and shine, while the vanilla enhances the flavor.
- Transfer the hot custard to a clean bowl and immediately cover the surface directly with plastic wrap. This prevents a “skin” from forming as it cools.
- Allow the custard to cool to room temperature, then refrigerate for at least 1 hour, or until it’s firm and perfectly chilled. This chilling time is essential for the custard to set properly.
Since this recipe only calls for one egg yolk, you might find yourself with a leftover egg white. Don’t let it go to waste! There are many fantastic recipes using leftover egg whites. I highly recommend making a Mini Angel Food Cake, as it shares a similar delicate cake texture but utilizes egg whites instead of yolks, offering a delightful contrast.
Crafting the Perfect Chocolate Ganache Glaze
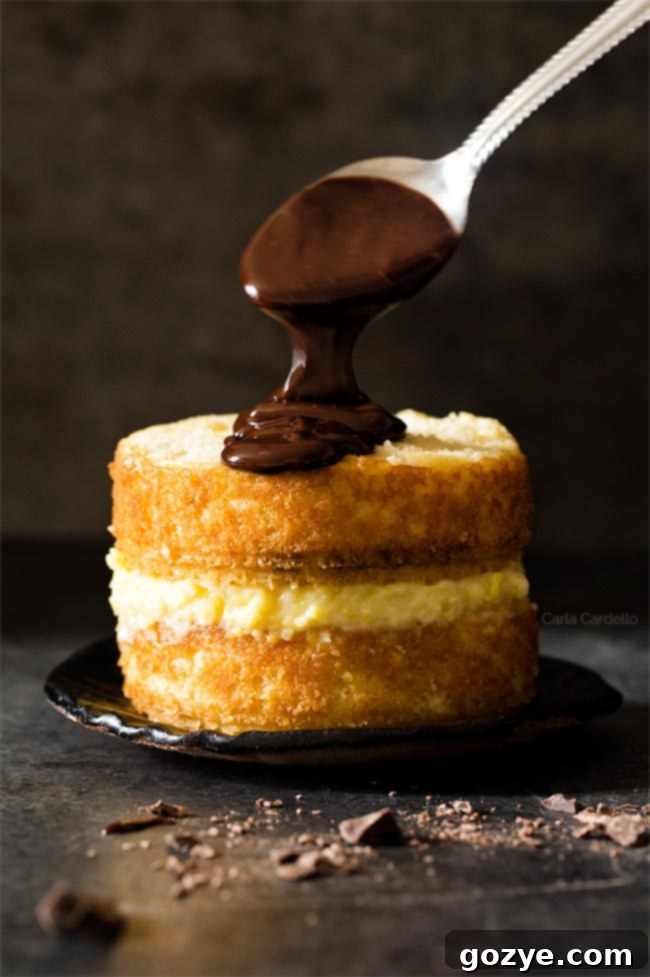
Ganache, a French term, is a luxurious glaze, frosting, or filling made from a simple combination of chocolate and heavy cream. The ratio of chocolate to cream determines its consistency, allowing it to be used for everything from dense truffles to pourable glazes. For our Mini Boston Cream Pie, we’re aiming for a perfectly pourable, glossy glaze that sets beautifully on top of the cake.
For a detailed breakdown with step-by-step photos, you can refer to my comprehensive guide on how to make ganache. However, for this recipe, the process is straightforward:
- Add finely chopped semisweet chocolate to a heatproof bowl. Chopping the chocolate ensures it melts evenly and quickly.
- In a small saucepan, heat the heavy whipping cream, corn syrup, and vanilla extract until the mixture is hot but not boiling. The corn syrup adds a beautiful sheen to the ganache and helps prevent crystallization.
- Pour the hot cream mixture directly over the chopped chocolate. Let it sit undisturbed for about 1 minute. This allows the hot cream to melt the chocolate.
- After a minute, gently stir the mixture with a whisk or spatula, starting from the center and working your way out, until it’s completely smooth, glossy, and emulsified.
- Immediately spread the warm chocolate ganache over the top of your assembled cake. Allow it to set and firm up slightly before serving for the best presentation and texture.
Important Storage Information: Does Boston Cream Pie Need Refrigeration?
Yes, absolutely! Due to its delicate, perishable vanilla custard filling, an assembled Boston cream pie must be refrigerated. The custard contains dairy and eggs, making it susceptible to spoilage if left at room temperature for extended periods. To enjoy your cake at its best, allow it to sit out at room temperature for about 15-30 minutes before serving. This slight warming period helps to soften the cake and custard, enhancing their textures and flavors.
Storing Components Separately for Convenience
If you’re preparing the cake components ahead of time, here’s how to store each part:
- Sponge Cake: Once cooled, the baked sponge cake layers can be wrapped tightly in plastic wrap and stored at room temperature for up to two days.
- Custard: The vanilla custard must be refrigerated in an airtight container, with plastic wrap pressed directly onto its surface, for up to 3 days.
- Chocolate Ganache: While it’s best to make the ganache just before assembly for a perfectly smooth pour, you can prepare it ahead of time. Store it in an airtight container in the refrigerator. When ready to use, gently rewarm it over a double boiler or in short bursts in the microwave, stirring frequently, until it returns to a pourable consistency.
How Long Does Boston Cream Pie Remain Fresh?
Because of its sensitive custard filling, Boston cream pie generally has a shorter shelf life compared to typical butter cakes. When stored properly in an airtight container in the refrigerator, your Mini Boston Cream Pie will remain fresh and delicious for 3-4 days. Always trust your senses; if it looks or smells off, it’s best to discard it.
Can You Freeze Boston Cream Pie?
Freezing an assembled Boston cream pie is generally not recommended. The cornstarch in the custard filling can break down when frozen and thawed, leading to a watery, grainy texture that significantly detracts from the custard’s creamy appeal.
However, you can successfully freeze the sponge cake layers on their own. Once baked and completely cooled, wrap them tightly in plastic wrap and then in aluminum foil. They can be frozen for up to 1-2 months. When you’re ready to enjoy, simply thaw the cake layers at room temperature, then prepare the custard and ganache fresh before assembling.
Explore More Boston Cream Pie Inspired Recipes
If you’ve fallen in love with the flavors of Boston cream pie, you might enjoy these other creative takes on the classic:
- Boston Cream Pie Cupcakes (Small Batch): All the deliciousness in individual portions.
- Boston Cream Blondies by Spend With Pennies: A delightful bar cookie interpretation.
Mini Boston Cream Pie For Two
4 servings
30 minutes
30 minutes
1 hour
2 hours
Mini Boston Cream Pie For Two is a 4 inch small sponge cake filled with custard then topped with a melted chocolate ganache.
Ingredients
- 3/4 cup all-purpose flour
- 1 teaspoon baking powder
- 1/4 teaspoon salt
- 1/2 cup granulated sugar
- 1/4 cup (2 ounces or 4 tablespoons) unsalted butter, melted and cooled slightly
- 1 egg, room temperature
- 1/2 teaspoon vanilla extract
- 1/4 cup whole milk, room temperature
Custard
- 1/2 cup whole milk, room temperature
- 1 egg yolk, room temperature
- 2 tablespoons granulated sugar
- 2 teaspoons cornstarch
- 1/4 teaspoon salt
- 1 tablespoon unsalted butter
- 1/2 teaspoon vanilla extract
Chocolate Ganache
- 1 ounce semisweet chocolate, chopped
- 1 1/2 tablespoons heavy whipping cream
- 1 1/2 teaspoons corn syrup
- 1/8 teaspoon vanilla extract
Instructions
- Preheat oven to 350F. Lightly grease two 4-inch springform pans.
- In a small bowl, whisk together the flour, baking powder, and salt.
- In a large mixing bowl, beat together the sugar, melted butter, egg, and vanilla until pale yellow and smooth, about 1 minute.
- On the lowest speed possible, alternately add the flour mixture and milk, making three additions of flour and two additions of milk. Scrape down the bowl.
- Transfer the batter to the two pans (roughly 1/2 cup batter per pan). Bake 20-23 minutes or until golden brown and a toothpick inserted in the center comes out clean. Cool completely then remove from the cake pans.
- For the custard: In a large saucepan, warm the milk until hot but not boiling.
- In a small bowl, whisk together the egg yolk, sugar, cornstarch, and salt until smooth. Whisk some of the hot milk into the egg mixture then pour the mixture back into the saucepan.
- Cook until boiling, whisking constantly. Once boiling whisk for another 60 seconds or until the custard thickens.
- Immediately remove from the heat and whisk in the butter and vanilla. Transfer to a clean bowl and cover the surface with plastic wrap. Cool to room temperature then refrigerate for 1 hour or until firm.
- To assemble: Place one cake layer on a serving plate. Top with the custard. If the custard is too cold to spread, you can warm it back up with some milk until spreadable.
- Top with the remaining cake layer. The cake should be fully assembled before making and adding the ganache.
- For the ganache: Add the chopped chocolate to a heatproof bowl.
- In a medium saucepan, heat the cream, corn syrup, and vanilla until hot but not boiling. Pour the hot cream over the chocolate and wait 1 minute. Stir together until completely smooth.
- Immediately spread the chocolate ganache on top of the cake. Let the chocolate firm before serving.
Store cake in an airtight container in the refrigerator for up to 3 days. Let sit at room temperature for 15-30 minutes before serving.
Recommended Products
As an Amazon Associate and member of other affiliate programs, I earn from qualifying purchases.
- 4 Inch Pan
Did you make this recipe?
Let me know what you think! Rate the recipe above, leave a comment below, and/or share a photo on Instagram using #HITKrecipes
