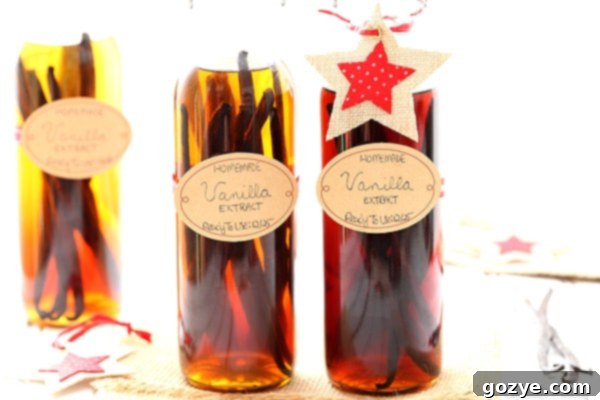
Master Homemade Vanilla Extract: Your Guide to Crafting Perfect Flavor & Gifts
Unlock the secret to rich, aromatic baked goods by learning how to make your own vanilla extract at home! This simple DIY project is not only incredibly satisfying but also yields a superior product that elevates any recipe. Homemade vanilla extract also makes an exquisite and thoughtful Christmas gift, or a delightful present for any occasion, for your favorite bakers, friends, and family. All you need are a few quality vanilla beans, your choice of alcohol, some elegant bottles, and as little as 10 minutes of hands-on prep time to start your journey to culinary excellence.
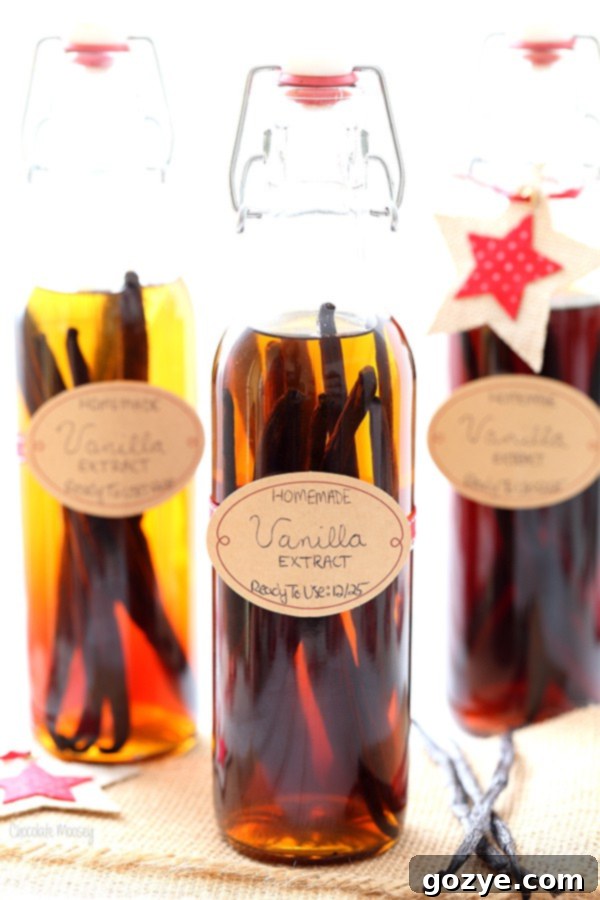
As the holiday season draws near, the festive spirit fills the air, and many of us turn our thoughts to finding the perfect gifts for our loved ones. While store shelves are brimming with options, there’s something uniquely special about a gift crafted with your own hands. This December, instead of braving crowded stores and navigating endless aisles, consider the heartwarming tradition of homemade presents. Not only does it offer a welcome escape from the holiday rush, but a handmade gift carries a personal touch that mass-produced items simply cannot replicate. It’s a tangible expression of care, thoughtfulness, and dedication.
This year, I’m particularly excited to share my go-to homemade gift: Vanilla Extract. This isn’t just any vanilla extract; it’s a deeply flavorful, aromatic concoction that far surpasses most store-bought varieties. For passionate bakers (and truly, who isn’t a passionate baker around the holidays?), vanilla extract is an indispensable ingredient, used in everything from cookies and cakes to custards and creams. Having a high-quality supply on hand is a game-changer, and making it yourself offers significant advantages.
Why Homemade Vanilla Extract is a Game-Changer
Superior Flavor and Quality
One of the first lessons any aspiring baker learns is the crucial difference between real vanilla extract and imitation vanilla. While imitation vanilla uses synthetic vanillin, real vanilla extract is derived from genuine vanilla beans, steeped in alcohol. This difference is not subtle; it’s profound. Real vanilla offers a complex, rich, and nuanced flavor profile that imitation vanilla simply cannot replicate. It adds depth, warmth, and a sophisticated aroma to your baked goods, transforming them from good to truly extraordinary. When you make your own, you control the quality of the beans and the alcohol, ensuring a pure, unadulterated flavor.
Cost-Effective Elegance
If you’ve ever purchased high-quality vanilla beans or gourmet vanilla extract from a specialty store, you know how quickly the cost can add up. Even a small bottle of premium extract can be surprisingly expensive, and a handful of vanilla beans often comes with a hefty price tag. This is where homemade vanilla extract truly shines as an affordable luxury. By purchasing vanilla beans and alcohol in larger quantities, you can produce a significant amount of top-tier extract for a fraction of the cost of store-bought versions. This makes it not only economical for your own pantry but also incredibly cost-effective for creating multiple thoughtful gifts.
The Perfect Personalized Gift for Any Occasion
Beyond the savings and superior flavor, homemade vanilla extract stands out as an exceptional gift. It’s practical, luxurious, and deeply personal. Imagine gifting a beautifully bottled, custom-labeled vanilla extract to your baker friends – they’ll cherish it, especially knowing the care that went into its creation. It’s an ideal present for Christmas, birthdays, hostess gifts, bridal showers, or simply as a thoughtful thank-you. The elegance of the packaging combined with the exquisite contents makes it a universally appreciated token of affection.
The Simple Ingredients You’ll Need
Making your own vanilla extract is surprisingly straightforward, requiring minimal ingredients and equipment. With just 10 minutes of active prep time, you’ll be well on your way to crafting this liquid gold. Here’s what you’ll need:
- Quality Vanilla Beans
- Your Choice of Alcohol (Vodka, Rum, Bourbon, or Brandy)
- Clean Glass Bottles
Choosing Your Vanilla Beans: The Heart of the Flavor
The type of vanilla bean you choose will significantly influence the flavor profile of your extract. As you explore your options, you’ll encounter various varieties, each with its unique characteristics. It’s important to note that vanilla beans can be quite expensive, especially when purchased from grocery stores or specialty shops. For the best value and selection, I highly recommend buying vanilla beans online from reputable suppliers. Online retailers often offer better prices, bulk options, and a wider range of bean varieties.
Popular Vanilla Bean Varieties:
- Madagascar Bourbon Vanilla Beans: These are arguably the most popular and widely recognized vanilla beans, famed for their classic, rich, dark, and creamy flavor with a sweet, buttery aroma. They are incredibly versatile and produce a well-rounded extract perfect for most baking applications. The beans I used in this recipe are Madagascar Bourbon, embodying this classic profile.
- Mexican Vanilla Beans: Known for their bold, smoky, and slightly spicy notes with hints of chocolate, Mexican vanilla beans create a wonderfully distinctive extract. I’ve personally enjoyed Mexican vanilla extract in various recipes and can attest to its delightful character.
- Tahitian Vanilla Beans: These beans are prized for their floral, fruity, and cherry-chocolate notes, offering a more delicate and aromatic extract. They are excellent for lighter desserts, custards, and fruit-based recipes where their nuanced flavors can shine.
- Ugandan Vanilla Beans: Offering a robust and earthy flavor, Ugandan beans often have notes of fig and raisin. They are less common but provide a strong vanilla presence, excellent for richer, darker baked goods.
- Tongan Vanilla Beans: With a unique flavor profile that includes notes of cherry, fig, and chocolate, Tongan vanilla beans are an exotic choice that can add an interesting twist to your extract.
Ultimately, you can’t go wrong with any quality vanilla bean you choose. Experimenting with different varieties can be a fun way to discover your favorite flavor profiles. A useful tip for bakers: if you use the seeds from vanilla beans in a recipe, such as my vanilla bean ice cream, don’t discard the pods! These “spent” pods still contain flavor and can absolutely be used to make vanilla extract, allowing you to maximize their value.
Choosing the Right Grade of Vanilla Bean
Vanilla beans are typically sold as Grade A (gourmet/prime) or Grade B (extract/curing).
- Grade A beans are moist, pliable, and plump, ideal for recipes where the bean itself is a star, like ice cream or custards.
- Grade B beans are drier, less aesthetically perfect, and generally cheaper. They are absolutely perfect for making extract because their lower moisture content means a higher concentration of vanillin, which will be fully extracted by the alcohol over time. For vanilla extract, Grade B beans are often the preferred and most economical choice.
Selecting Your Alcohol: The Extraction Medium
The alcohol acts as the solvent, drawing out the complex vanilla flavors from the beans. A common question I receive is whether water can be substituted for alcohol, and the answer, for this recipe, is a firm no. Alcohol is essential for extracting and preserving the vanilla’s flavor compounds. While there are methods to make alcohol-free vanilla using food-grade glycerin, this traditional recipe relies on alcohol for its superior extraction capabilities and indefinite shelf life.
Best Alcohols for Vanilla Extract:
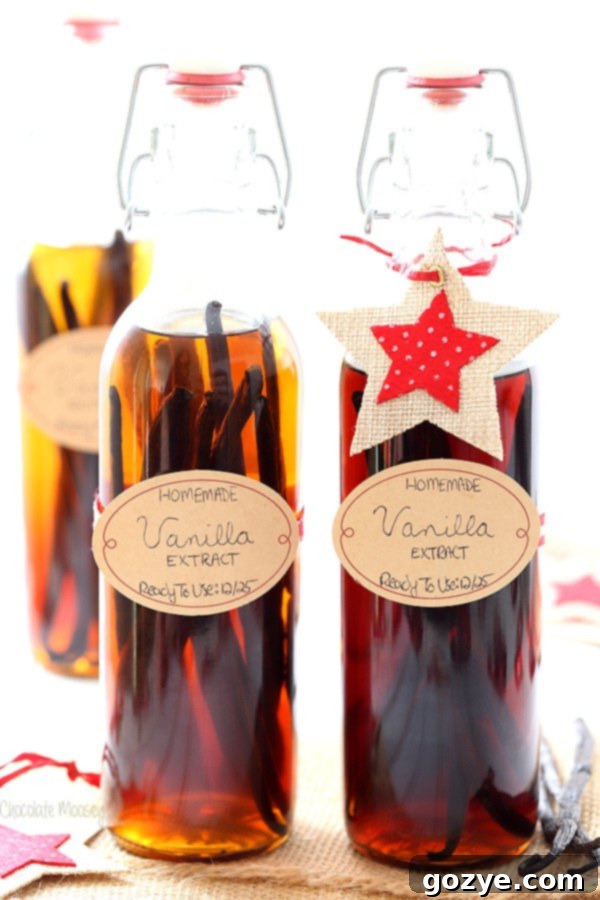
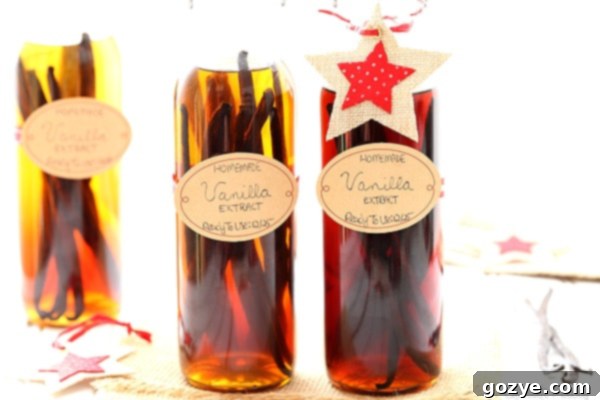
- Vodka: This is the most commonly used alcohol for vanilla extract due to its neutral flavor profile. Vodka allows the pure essence of the vanilla beans to shine through, making it a versatile choice that complements any type of bean. In the photo above, both bottles on the left were made with vodka. Ideally, you want a vodka that is 70 Proof (35% Alcohol) or 80 Proof (40% Alcohol). Most commonly available vodkas are 80 proof, which works perfectly fine.
- Rum: For a warmer, sweeter, and slightly caramelized flavor, rum is an excellent choice. Dark rum, like the Jamaican dark rum I used in the right bottle of the photo, can impart rich, molasses-like undertones that pair beautifully with vanilla, especially in baked goods like spiced cakes or custards.
- Bourbon: If you enjoy a smoky, woody, and subtly sweet vanilla extract, bourbon is your go-to. Its distinct notes of caramel and oak can add another layer of complexity, making it fantastic for use in richer desserts, chocolate recipes, or barbecue sauces.
- Brandy: Offering fruity and floral notes, brandy creates a sophisticated vanilla extract that can be particularly delightful in fruit tarts, crème brûlée, or other elegant desserts where a hint of complexity is desired.
Feel free to experiment with different alcohols and vanilla bean combinations to create unique extracts tailored to your culinary preferences. Just ensure your chosen alcohol is at least 70 proof (35% alcohol by volume) for effective extraction and preservation.
Choosing Your Containers: Bottling Your Brew
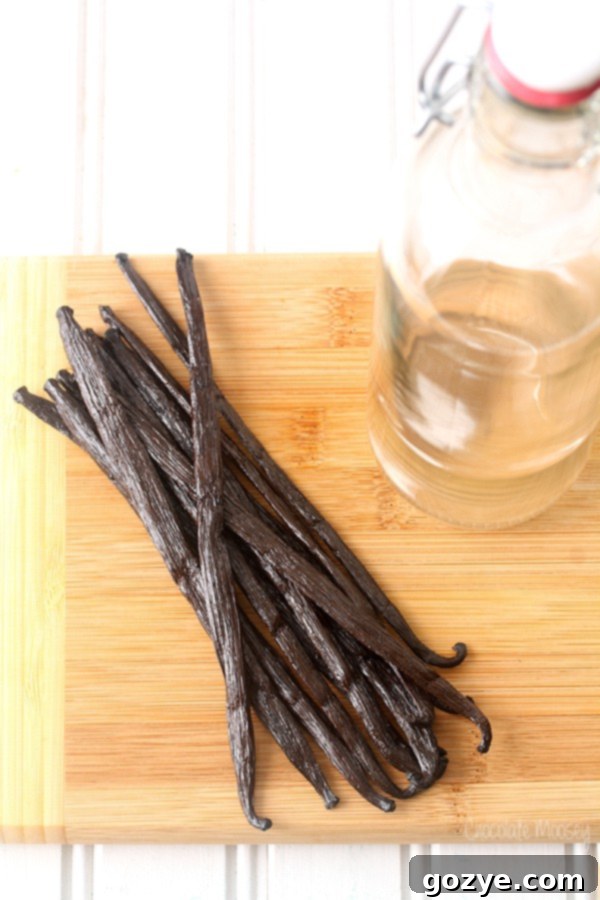
The containers you choose are not just for storage; they’re also part of the presentation, especially if you plan to give your extract as a gift. While any clean glass bottle with a tight-sealing lid will work, investing in attractive bottles enhances the homemade charm. I personally love using swingtop glass bottles for their elegant appearance and secure seal, which is crucial for long-term storage and preventing evaporation. The 12.5-ounce bottles pictured in this post are an ideal size, tall enough to accommodate whole vanilla beans without needing to cut them. However, don’t hesitate to use smaller bottles if that’s what you have on hand; simply bend or cut your vanilla beans in half or thirds to ensure they fit snugly inside and are fully submerged in the alcohol.
Tips for Choosing Bottles:
- Glass is best: Glass is non-reactive and won’t impart any unwanted flavors.
- Dark Glass (Optional but Recommended): While not strictly necessary, amber or dark-colored glass bottles can help protect the extract from light, which can degrade the flavor over a very long period. If using clear bottles, ensure they are stored in a dark place.
- Tight-Sealing Lids: Swingtop stoppers, corks, or screw caps that create an airtight seal are essential to prevent alcohol evaporation and maintain flavor integrity.
- Sterilization: Always ensure your bottles are thoroughly cleaned and sterilized before use to prevent any unwanted microbial growth that could affect the extract’s quality. A run through the dishwasher on a hot cycle or boiling them in water for 10 minutes usually suffices.
The Patience of Perfection: Aging Your Extract
One crucial element of making homemade vanilla extract is patience. The vanilla beans need time – typically a minimum of 6-8 weeks – to infuse their rich flavors into the alcohol. During this aging process, it’s vital to store your bottles in a cool, dark place, away from direct sunlight. Sunlight can degrade the vanilla compounds and diminish the extract’s potency. While 6-8 weeks is the minimum, many seasoned extract makers (and my followers on Instagram agree!) recommend letting it sit even longer, with some advocating for at least six months or even a year for the deepest, most complex flavor. The longer it ages, the richer and more robust your vanilla extract will become.
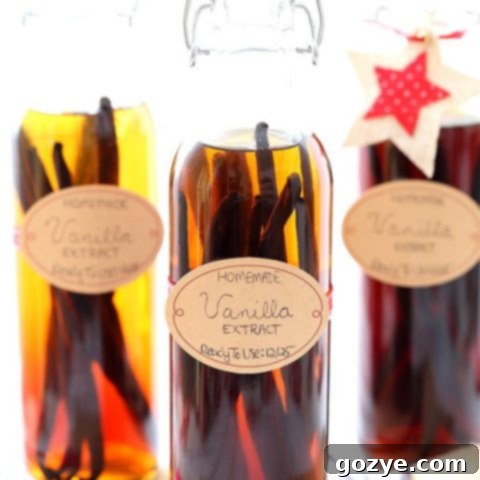
This aging period doesn’t mean you have to wait to give your homemade extract as a gift. When preparing bottles for gifting, simply attach a custom label that includes a “Ready To Use” date, clearly indicating when the extract will have reached its optimal flavor. This adds to the charm and ensures the recipient knows exactly when to start enjoying their thoughtful present.
Labeling Your Homemade Masterpiece
Beautiful labeling is the final touch that transforms your homemade extract into a truly professional-looking gift. I initially used some simple kraft tags I found at Target, which worked well for a rustic look. However, for a more secure and polished finish, I highly recommend using kraft printable labels. These self-adhesive labels offer a much better stick and a cleaner appearance. Unfortunately, I thought of this detail at the last minute, and my closest office supply store didn’t have any in stock at the time, but planning ahead makes a big difference!
On your labels, consider including:
- “Homemade Vanilla Extract”
- The type of vanilla bean (e.g., “Madagascar Bourbon”)
- The type of alcohol (e.g., “Vodka Base”)
- The “Ready To Use” date
- A small note like “Shake periodically” or “Vanilla beans may be left in the bottle.”
Homemade Vanilla Extract
12 ounces per bottle
This recipe provides the ideal ratio for making a single 12.5-ounce bottle of rich, flavorful vanilla extract. For smaller bottles, simply adjust the number of beans accordingly, ensuring they are fully submerged. This base recipe yields a “single-fold” extract, meaning it meets the FDA standard of 13.35 ounces of vanilla beans per gallon of alcohol. For a “double-fold” (more intense) extract, simply double the amount of beans. Prepare to elevate your baking!
Ingredients
- 12.5 ounce clean glass bottle with a tight-sealing lid
- 8 whole vanilla beans (Grade B extract grade beans are ideal)
- Approximately 1 1/2 cups (12 fl oz) alcohol of choice (preferably 70-80 proof / 35-40% alcohol): vodka, bourbon, brandy, or rum
Instructions
- First, prepare your vanilla beans. Using a sharp knife, carefully slice each vanilla bean lengthwise down the middle, from end to end, but do not cut all the way through; leave one end intact so the beans remain connected. Gently open up the bean to expose the tiny seeds and maximize the surface area for extraction. Place the prepared beans into your clean, sterilized glass bottle. If you’re using a smaller bottle, cut the beans into shorter pieces to ensure they fit entirely within the bottle and will be fully submerged.
- Next, carefully pour your chosen alcohol (vodka, bourbon, brandy, or rum) into the bottle, making sure that all the vanilla beans are completely submerged. Fill the bottle nearly to the top, leaving a small headspace. Securely seal the bottle with its lid. Give the bottle a good shake a few times to distribute the beans and ensure they are well-coated by the alcohol.
- Store your sealed bottle of vanilla extract at room temperature in a dark place, away from direct sunlight. Allow it to infuse for a minimum of 6-8 weeks, though the longer it sits, the better and more potent the flavor will become (many recommend 6 months to a year for optimal results). Shake the bottle gently once or twice a week during the aging process to help with infusion. If you’re preparing this as a gift, remember to write a “Ready To Use” date on a homemade label so the recipient knows when their delightful extract will be perfectly aged and ready for baking. Enjoy the wait!
Did you make this recipe?
Let me know what you think! Rate the recipe above, leave a comment below, and/or share a photo on Instagram using #HITKrecipes
Tips for a Perpetual Vanilla Extract Supply
Once you’ve experienced the joy of homemade vanilla extract, you might never want to run out. The good news is, you don’t have to! You can create a “perpetual” vanilla extract. As you use your extract, simply top off the bottle with more fresh alcohol. Every few months, consider adding one or two fresh vanilla beans to replenish the flavor. This method ensures you always have a fresh, potent supply on hand, continually infusing and deepening in flavor over time. The original beans can remain in the bottle for many years, continuing to contribute to the extract’s complexity.
Troubleshooting & Frequently Asked Questions
- My beans don’t fit in the bottle. What should I do? No problem! Simply cut your vanilla beans into smaller pieces (halves or thirds) to ensure they fit comfortably inside your chosen bottle and are fully submerged in the alcohol.
- My extract looks cloudy. Is that normal? Yes, it’s completely normal for homemade vanilla extract to appear slightly cloudy, especially in the initial weeks. This is usually due to tiny vanilla particles suspended in the alcohol and is a sign of good extraction. It will often clear slightly over time, but even if it remains cloudy, it’s perfectly fine to use.
- Can I reuse the vanilla beans for another batch? While you can technically reuse “spent” vanilla beans for a second batch of extract, their flavor potency will be significantly diminished. They won’t produce as strong an extract as fresh beans. For best results, it’s generally recommended to use fresh beans for each new batch. However, you can leave the original beans in the bottle indefinitely as you top it off with new alcohol.
- How can I strengthen weak extract? If your extract isn’t as strong as you’d like after the initial aging period, there are a few options: add a couple more fresh vanilla beans to the bottle, and/or simply let it age longer. Time is your best friend when it comes to vanilla extract.
- How long does homemade vanilla extract last? Stored properly in a cool, dark place, homemade vanilla extract made with sufficient alcohol will last indefinitely and actually improves with age. It does not expire.
Embrace the simple pleasure of crafting your own vanilla extract. It’s a project that rewards patience with unparalleled flavor and the joy of giving a truly exceptional, handmade gift. Happy baking, and happy gifting!
Disclosure: This post contains Amazon affiliate links, which means I earn a small percentage of profit for each item you buy through this link. This profit goes back into maintaining this blog, including website hosting and ingredients for recipes. Thank you for your support!
