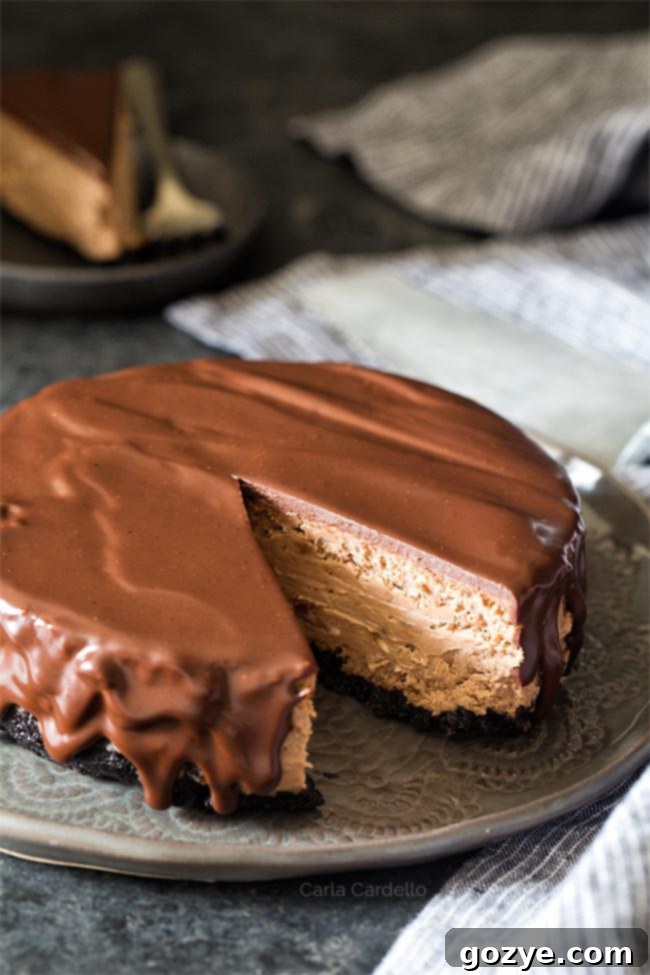
Decadent 6-Inch Chocolate Cheesecake with Oreo Crust: Your Go-To Recipe for Two
Craving a rich, chocolatey indulgence that’s perfectly portioned? Look no further than this exquisite 6-inch chocolate cheesecake recipe. Designed specifically for smaller gatherings or a delightful dessert for two, this homemade treat features a decadent Oreo cookie crust, a luscious chocolate cheesecake filling, and is crowned with a silky, homemade chocolate ganache. It’s the ultimate small batch chocolate dessert that delivers immense flavor without overwhelming you with leftovers.
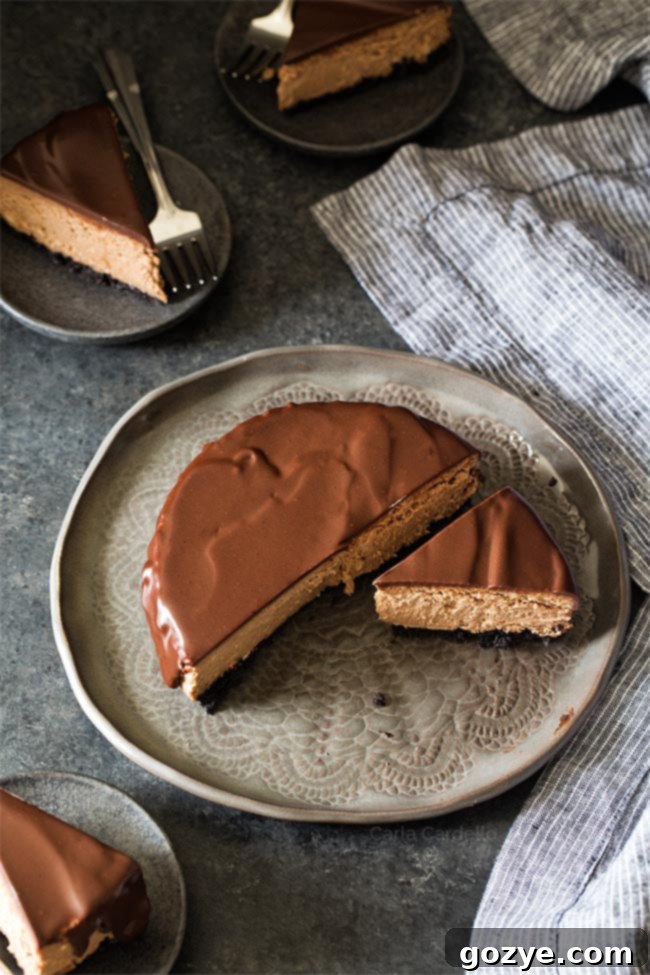
Following a month of sharing both classic and pumpkin-flavored 6-inch cheesecake recipes, it’s only fitting to introduce the chocolate masterpiece. This isn’t just any chocolate cheesecake; it’s a carefully crafted recipe that brings together the best of flavors and textures: a robust Oreo crust, a deeply chocolatey cheesecake batter, and a glossy chocolate glaze (also known as ganache) that elevates every bite. It’s a truly rich chocolate dessert, perfect for celebrating special moments or simply treating yourself.
In challenging times, there’s nothing quite like a comforting, homemade dessert to lift your spirits. This small chocolate cheesecake for two offers just that – a moment of pure chocolate bliss. While incredibly rich and satisfying for any chocolate lover, you can easily balance its intensity by topping it with a dollop of light and airy homemade whipped cream. It’s versatile, utterly delicious, and sure to become a favorite.
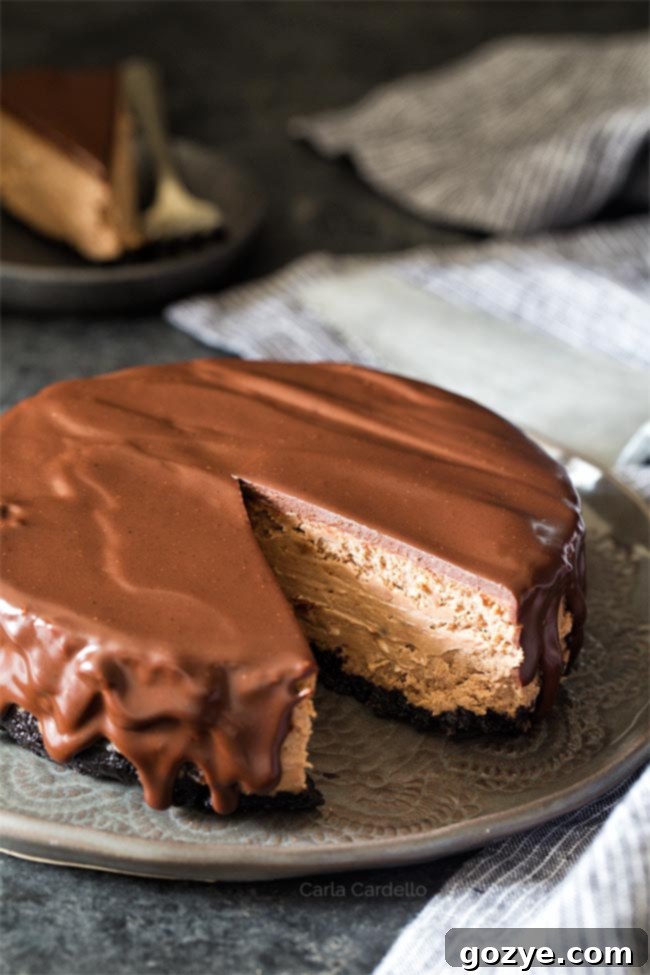
Essential Baking Tools: What Pan Do I Need for a 6-Inch Cheesecake?
To achieve the perfect shape and effortless removal for your small chocolate cheesecake, a 6-inch springform pan is absolutely indispensable. Unlike regular cakes that can be inverted, cheesecake is a delicate custard-based dessert that needs its sides to be released gently. A springform pan allows you to do just that – the sides detach from the base, leaving your beautiful cheesecake intact and ready for presentation. This specialized pan is crucial for maintaining the cheesecake’s structural integrity, ensuring it retains its flawless form.
The pan I personally recommend and frequently use is a 6 x 2 inch springform pan (Amazon affiliate link). This specific size is ideal for this small cheesecake recipe, filling the pan perfectly without any risk of overflow during baking. If you opt for a 6 x 3 inch springform pan (Amazon affiliate link), you’ll simply have a bit more room at the top, which won’t affect the recipe outcome, just the visual height of the filling relative to the pan’s edge.
It’s important to note that this recipe is not suitable for a standard 6-inch cake pan. Attempting to remove a delicate cheesecake from a traditional cake pan without removable sides would be incredibly challenging, likely resulting in a damaged dessert. While you might try it if you have no other option, serving it cleanly would prove very difficult. If a springform pan isn’t available, don’t despair! You can still enjoy small batch chocolate treats by baking mini chocolate cheesecakes in a muffin pan, offering a different but equally delicious experience.
Can I Make This 6-Inch Chocolate Cheesecake Recipe in a 7-Inch Pan?
Absolutely! One of the great advantages of this versatile recipe is its adaptability. As demonstrated by my popular 7-inch cheesecake recipe, you can indeed bake this 6-inch chocolate cheesecake recipe in a 7-inch springform pan without needing to make any adjustments to the ingredient quantities or baking times. The slight increase in pan diameter will result in a slightly thinner cheesecake, but it will still be incredibly delicious and bake beautifully. This flexibility makes it a convenient option if you happen to have a 7-inch springform pan on hand.
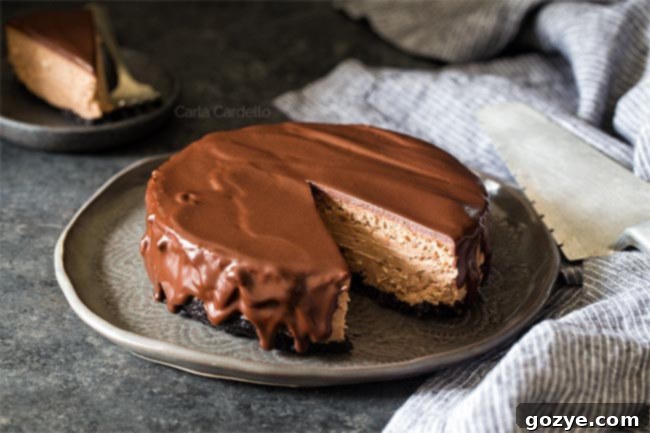
Serving Suggestions: How Many Does a 6-Inch Cheesecake Feed?
A 6-inch cheesecake is wonderfully versatile when it comes to serving. Typically, you can slice it into 4 to 6 generous portions, meaning it comfortably serves 4 to 6 people. However, for true chocolate lovers, I often think of this as the perfect small chocolate cheesecake for two. This allows each person to indulge in 2-3 slices throughout the week, savoring every moment of this rich dessert.
Let’s be honest, who can truly stop at just one slice of a decadent chocolate cheesecake? This recipe embraces the joy of indulgence without leaving you with an overwhelming amount of dessert. If, by chance, this still feels like too much cheesecake for your needs, or if you’re looking for an even smaller serving, you might want to explore my chocolate cheesecake for two recipe, which is specifically designed for ultra-small batches.
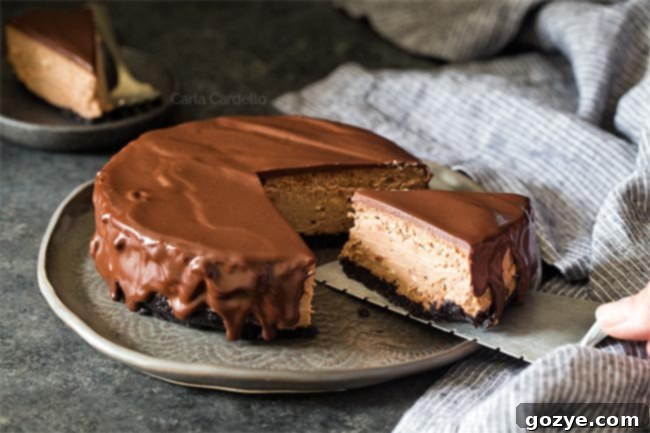
Crafting Perfection: How to Make a 6-Inch Chocolate Cheesecake from Scratch
Creating this irresistible 6-inch chocolate cheesecake from scratch is a rewarding process, built upon a few key, easy-to-find ingredients. Understanding the role of each component will help you achieve the best possible results:
- Oreo Cookie Crumbs: For a classic chocolate cheesecake crust, Oreo cookies are the traditional choice, offering a deep chocolate flavor and a perfect texture. If Oreos aren’t available, chocolate graham crackers are a good alternative. However, be aware that graham crackers lack the cream filling found in Oreos, so you might need to slightly increase the amount of melted butter to ensure the crust binds properly.
- Butter: Essential for binding the cookie crumbs together, melted butter creates a firm, flavorful crust that holds its shape.
- Cream Cheese: The star of any cheesecake! Always opt for full-fat cream cheese. Low-fat or fat-free versions contain more water, which can result in a watery, less stable cheesecake after baking. Ensure your cream cheese is at room temperature for a smooth, lump-free batter.
- Granulated Sugar: Provides the perfect touch of sweetness, balancing the tangy notes of the cream cheese and enhancing the chocolate flavor.
- Eggs: As with most baking recipes, large eggs are recommended. They act as a binder and contribute to the cheesecake’s rich, creamy texture and structure. Ensure they are also at room temperature to incorporate smoothly into the batter.
- Melted Chocolate: For the best chocolate flavor and texture in your cheesecake, use high-quality baking chocolate (not chocolate chips, which contain stabilizers that prevent them from melting as smoothly). Semisweet chocolate is a popular choice, offering a balanced sweetness, but if you prefer a deeper, more intense flavor, bittersweet or dark chocolate can be used.
- Vanilla Extract: A touch of vanilla is crucial for enhancing the overall flavor profile. It doesn’t just add its own aroma; it subtly amplifies the taste of the chocolate, making it even more pronounced and delicious.
The process begins by combining the crushed Oreo crumbs with melted butter. This mixture is then firmly pressed into the bottom of your prepared springform pan to form the foundational crust.
Next, the creamy filling comes together. Beat the room-temperature cream cheese with granulated sugar until the mixture is incredibly smooth and light, ensuring to scrape down the sides of the bowl frequently to incorporate everything evenly.
Carefully beat in the eggs, adding them one at a time. This step requires a gentle hand – avoid overbeating, as too much air can lead to cracks in your finished cheesecake. Finally, fold in the cooled melted chocolate and vanilla extract, blending until just combined, creating a velvety smooth chocolate batter.
Pour this luxurious batter over your prepared Oreo crust. The cheesecake is then ready for its essential water bath, baking at 325°F (160°C) for approximately 65-75 minutes until perfectly set.
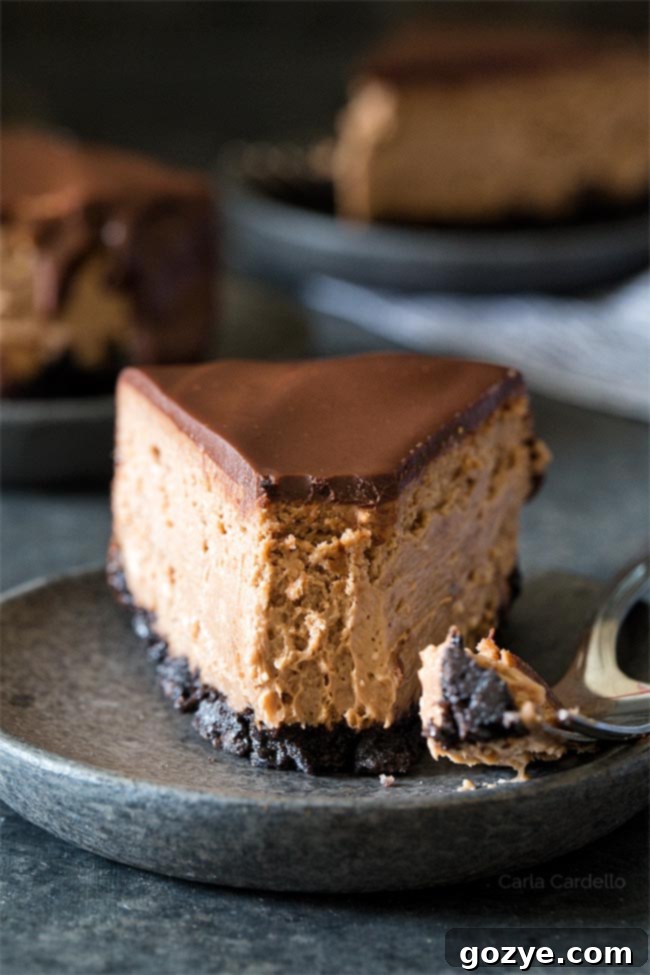
The Water Bath Debate: Do I Need a Water Bath for Cheesecake?
For this specific 6-inch chocolate cheesecake recipe, the answer is a resounding yes – a water bath is absolutely necessary. While some larger cheesecake recipes, such as my 9-inch chocolate cheesecake recipe, might bake evenly without one due to their different dimensions, smaller, thicker cheesecakes like this 6-inch version benefit immensely from a water bath. Let me explain why.
A 6-inch cheesecake, being smaller in diameter but relatively tall, tends to bake faster around the edges and top than in its dense center. Without the gentle, even heat provided by a water bath, the top and edges would likely brown and overbake before the middle is fully cooked. This leads to an undesirable dry texture on the outside and an underbaked, soft center, often resulting in unsightly cracks on the surface.
By surrounding your cheesecake with hot water, the water bath creates a humid, consistent cooking environment. This even distribution of heat allows the cheesecake to bake more slowly and uniformly. The result is a perfectly cooked cheesecake with a silky-smooth, creamy texture from edge to center, a beautifully golden top that’s free from cracks, and a delightfully moist crumb. It’s a small extra step that makes a huge difference in the final quality of your homemade chocolate cheesecake.
Step-by-Step: How to Make a Water Bath for Cheesecake
Creating a water bath might sound intimidating, but it’s a simple process that ensures a flawlessly baked cheesecake. Here’s how to set it up correctly:
- Prepare Your Springform Pan: Begin by securely wrapping the outside of your springform pan with heavy-duty aluminum foil. Use several layers to create a watertight seal. This is crucial to prevent any water from seeping into the pan and making your delicious Oreo crust soggy. Ensure the foil is tightly crimped around the edges.
- Place the Cheesecake: Once your springform pan is filled with the chocolate cheesecake batter, carefully place it inside a larger baking pan. An 8×8 inch square pan or any pan large enough to comfortably hold your springform pan while allowing room for water is suitable.
- Add Hot Water: Now, very carefully pour hot water into the larger outer pan. Pour slowly and steadily until the water level reaches approximately halfway up the sides of the springform pan. Exercise extreme caution during this step to avoid splashing any water into the foil-wrapped cheesecake pan. The hot water creates the necessary steam and gentle heat for even baking.
- Transfer to Oven: With your water bath assembled, carefully transfer the entire setup (outer pan with water and inner springform pan) to your preheated oven. Bake according to the recipe instructions, knowing that your cheesecake is in the ideal environment for a perfect bake.
Perfectly Baked: How to Know When Cheesecake is Done
Determining when a cheesecake is perfectly baked can be one of the trickiest aspects of the process, as it behaves differently from other cakes. Since cheesecake is essentially a baked custard, it will retain a slight wiggle in the very center even when fully cooked. If your cheesecake appears completely firm and doesn’t jiggle at all, it’s a sign that you’ve likely overbaked it, which can lead to a dry texture and cracks.
Here’s what to look for: The edges of the cheesecake should appear set, firm, and perhaps slightly golden brown. The area about an inch or two from the perimeter should also be firm. Only the direct middle, typically a small 2-3 inch circle, should still have a gentle, custardy wobble when the pan is lightly shaken. This subtle jiggle indicates that the residual heat will continue to cook it to perfection as it cools.
For the most accurate and foolproof method to ensure your chocolate cheesecake is done, a digital thermometer is your best friend. Insert the thermometer into the center of the cheesecake – it should register an internal temperature of 150°F (65°C). While this will leave a small hole (or two) in your beautiful cheesecake, don’t fret! These can be easily disguised and covered with your homemade chocolate ganache, whipped cream, or other decorative toppings. It’s far better to have a tiny hole than to serve an underbaked cheesecake, which can be unpleasantly gooey and unsafe to consume.
Storage and Shelf Life: How Long is Cheesecake Good For?
Once baked and thoroughly chilled, your 6-inch chocolate cheesecake can be stored in the refrigerator for up to 5-7 days. To maintain its freshness and prevent it from absorbing other flavors from your fridge, make sure to store it in an airtight container or tightly wrapped with plastic cling film. With such a delicious and perfectly sized small cheesecake, however, I wager it will be devoured long before the week is out!
Food Safety: Is It Okay to Leave Cheesecake Out Overnight?
No, it is not advisable to leave cheesecake out overnight. Due to its main ingredient, cream cheese, cheesecake is a perishable dairy product and must be refrigerated. Leaving it at room temperature for extended periods can encourage bacterial growth, making it unsafe to eat.
However, there’s a crucial step right after baking: allowing it to cool. After removing your cheesecake from the oven and the water bath, it’s perfectly fine, and even recommended, to let it cool down at room temperature for a few hours. This gradual cooling prevents drastic temperature changes that can lead to cracking. Once the cheesecake has cooled sufficiently and is no longer warm to the touch (typically 1-2 hours), it must be covered and transferred to the refrigerator for proper chilling and storage.
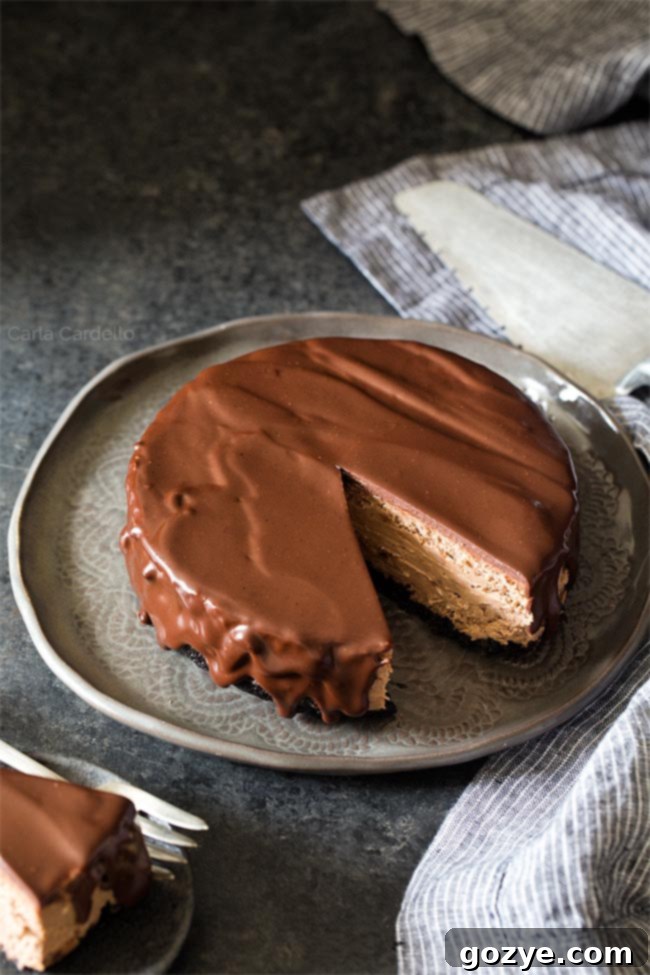
Finishing Touches: How Do You Decorate a Chocolate Cheesecake?
While this homemade chocolate cheesecake is undeniably delicious on its own, adding a beautiful garnish can elevate it from delightful to truly spectacular. The simplest and often most stunning choice is a luscious chocolate ganache.
Our featured chocolate ganache is a classic chocolate glaze made from just two ingredients: heavy cream and chocolate. When prepared correctly, it boasts a remarkably silky-smooth texture with a soft, rich bite that perfectly complements the creamy cheesecake beneath. If you’d like to master this versatile topping, learn how to make ganache with comprehensive step-by-step photos.
Beyond ganache, the decoration possibilities are endless! You can also adorn your chocolate cheesecake with other delightful toppings such as homemade peanut butter whipped cream for a sweet and salty twist, or chocolate whipped cream for an extra layer of chocolatey goodness. Fresh berries, chocolate shavings, or a dusting of cocoa powder also make elegant and tasty additions. Choose a garnish that speaks to your taste and makes your small chocolate cheesecake truly shine!
Troubleshooting: Why Did My Cheesecake Crack?
There’s nothing quite as disheartening as carefully baking a cheesecake for over an hour, only to find a large crack marring its perfect surface. Cracks are a common frustration for bakers, but understanding their causes can help you prevent them. Here are several reasons why your cheesecake may have cracked, along with effective solutions:
- Overbeating the Batter: We all strive for a perfectly smooth cheesecake, but overbeating the cream cheese mixture incorporates too much air. This excess air causes the cheesecake to puff up significantly higher than it should during baking. As it cools and naturally contracts, it sinks, leading to tears and cracks on the surface.
Solution: Only beat the cream cheese and sugar until they are just combined and smooth. When adding eggs and other wet ingredients, mix them in one at a time, on low speed, just until incorporated. Gentle mixing minimizes air incorporation. - Overbaking the Cheesecake: It’s tempting to bake cheesecake until it’s completely firm to ensure it’s cooked through. However, overbaking dries out the top layer of the cheesecake, making it less elastic. As the cheesecake cools and contracts, this dry surface layer can’t flex, causing it to crack.
Solution: Use a water bath to ensure even, moist baking. Crucially, rely on a digital thermometer to confirm the internal temperature reaches 150°F (65°C). The center should still have a slight jiggle; it will continue to set as it cools. - Cheesecake Stuck to the Pan: As cheesecake cools, it naturally deflates and shrinks slightly. If the edges of the cheesecake stick to the sides of the springform pan, the center will pull away as it deflates, leading to cracks. The edges act as an anchor, creating tension.
Solution: Immediately after removing the cheesecake from the oven, gently run a thin, sharp knife or an offset spatula around the entire inner perimeter of the pan to loosen the edges. This allows the cheesecake to cool and contract freely without sticking. - Opening the Oven Door Too Much: While it’s acceptable to briefly open the oven door towards the end of baking to check for doneness, doing so too frequently or too early can cause problems. Each time the door opens, heat escapes, and the oven temperature drops drastically. These sudden and significant temperature fluctuations can shock the delicate cheesecake, leading to uneven setting and cracking.
Solution: Resist the urge to peek! Only open the oven door towards the very end of the baking time, when you are ready to check for doneness using visual cues and a thermometer.
Why is My Cheesecake Batter Lumpy?
If your cheesecake batter has an unfortunate lumpy texture, the most common culprit is ingredients that are too cold. Cream cheese and eggs need to be at proper room temperature to emulsify smoothly with sugar and other ingredients. When they are cold, they don’t blend well, resulting in stubborn lumps.
Ensure your full-fat cream cheese and large eggs have ample time to sit out at room temperature until they are no longer cold to the touch. This can take about 2 hours, but the exact time will vary depending on your kitchen’s ambient temperature (e.g., warmer in summer, colder in winter).
If your cream cheese is still too cold in a pinch, you can gently microwave it (after removing any foil wrappers!) in 5-10 second bursts, stirring between each interval, until it feels soft but not melted. For eggs, simply place them in a bowl of warm (not hot) water for about 15 minutes, or until they’ve lost their chill.
What to Do if My Cheesecake Batter is Lumpy
Unfortunately, once lumps have formed in cheesecake batter, no amount of aggressive beating will smooth them out – and those lumps certainly won’t magically melt away during baking. They will remain as distinct, unappetizing pockets in your finished cheesecake.
However, you do have a couple of salvage options:
- Use a Blender: Transfer the lumpy batter to a blender and process until smooth. While effective, this method might incorporate too much air into the batter, which, as discussed, can increase the risk of cracking during baking. The good news is that any resulting cracks can be beautifully concealed with a generous layer of ganache or whipped cream.
- Pass Through a Strainer: Another technique is to push the batter through a fine-mesh strainer. This will separate the smooth batter from any stubborn lumps. You might lose a small amount of batter in the process, but it guarantees a silky-smooth texture for your cheesecake.
Remember, prevention is key. Always ensure your ingredients are at room temperature to avoid lumps from the start!
More Small Cheesecake Recipes to Explore
If you’ve fallen in love with the convenience and charm of small batch desserts, here are more small cheesecake recipes for two that you might enjoy, perfect for any occasion:
- Classic 6-Inch Cheesecake
- Decadent Peanut Butter Cheesecake
- Rich Red Velvet Oreo Cheesecake
- Seasonal Small Pumpkin Cheesecake
- Effortless Instant Pot Pumpkin Cheesecake
- Small Batch Strawberry Swirl Cheesecake Bars (in a loaf pan)
Chocolate Cheesecake with Oreo Crust
4-6 servings
20 minutes
1 hour 15 minutes
4 hours
5 hours 35 minutes
In the mood to bake a small cheesecake? My 6-inch Chocolate Cheesecake recipe with Oreo Crust and homemade ganache is a perfect chocolate dessert for two.
Ingredients
- 2 ounces semisweet chocolate, chopped
- 1 cup chocolate sandwich cookie crumbs, such as Oreo*
- 2 tablespoons butter, melted
- 16 ounces (2 blocks or 16 tablespoons) full-fat cream cheese, room temperature and not cold to the touch (do not sub fat free)
- 1/2 cup granulated sugar
- 2 eggs, room temperature and not cold to the touch
- 1 teaspoon vanilla extract
Garnish Ideas (Pick One)
- Ganache
- Chocolate Whipped Cream
- Vanilla Whipped Cream
- Peanut Butter Whipped Cream
- German Chocolate Cake Frosting
Instructions
- Preheat oven to 325F (160°C). Wrap the outside of a 6×2 or 6×3 springform pan tightly with several layers of foil to create a waterproof seal. Lightly grease the inside of the pan.
This recipe will also fit in a 7-inch springform pan without adjustments, resulting in a slightly thinner cheesecake.
- In a large microwave-safe bowl, add the chopped semisweet chocolate. Microwave for 30 seconds, then stir. Continue microwaving in 15-second increments, stirring after each, until the chocolate is completely smooth and melted. Allow it to cool for 15 minutes.
Alternatively, set up a double boiler: add about an inch of water to a saucepan and bring to a simmer on the stove. Turn off the heat and place a heatproof bowl over top (ensuring the bottom does not touch the water). Add the chocolate to the bowl and stir until smooth and melted. Remove from the heat and cool for 15 minutes.
- In a separate large bowl, combine the chocolate sandwich cookie crumbs and melted butter. Mix until the crumbs are evenly moistened. Press this mixture firmly and evenly into the bottom of the prepared springform pan to form the crust.
- In a large mixing bowl, using an electric mixer, beat together the room-temperature cream cheese and granulated sugar until the mixture is light, fluffy, and completely smooth, about 2-3 minutes. Scrape down the bowl as needed to ensure all ingredients are well combined.
- Beat in the room-temperature eggs, one at a time, mixing for about 1 minute after each addition or until just smooth. Be careful not to overbeat the batter, as this can incorporate too much air and lead to cracks. Finally, gently beat in the cooled melted chocolate and vanilla extract until just combined.
- Carefully transfer the smooth cheesecake batter over the prepared Oreo crust in the springform pan. If using a 6×2 pan, the batter will fill it close to the top. Place the springform pan inside a larger baking pan, such as an 8×8 inch pan or a roasting pan.
- Pour hot water into the larger outer pan until the springform pan is about halfway submerged in the water. Exercise extreme caution to prevent any water from getting inside the foil-wrapped springform pan.
- Carefully transfer the entire pan setup (with the water bath) to the preheated oven. Bake for 65-75 minutes, or until the edges of the cheesecake are set and slightly browned, the center has a slight jiggle (about a 2-3 inch circle in the middle), and the internal temperature reaches 150°F (65°C) when measured with a digital thermometer.
- Remove the cheesecake from the oven and carefully lift it out of the water bath. Immediately run a thin knife along the inner edge of the springform pan to loosen the cheesecake from the sides. Let the cheesecake cool in the pan, still within the outer water bath, for 15 minutes.
- Remove the springform pan from the water bath and let it cool completely at room temperature for at least 1 hour.
- Once fully cooled to room temperature, cover the cheesecake with plastic wrap and refrigerate for a minimum of 4 hours, or preferably overnight, to allow it to fully set. Once chilled, garnish as desired. Store any leftovers in an airtight container in the refrigerator for up to 5-7 days.
Notes
- *This recipe makes a bottom crust only. If you desire a crust that extends up the sides of the cheesecake, increase the cookie crumbs to 1 1/2 cups and the melted butter to 4 tablespoons.
- Looking for more delicious 6-inch cheesecake recipes? Be sure to check out our Classic 6-Inch Cheesecake recipe, Peanut Butter Cheesecake, Small Pumpkin Cheesecake, and Red Velvet Oreo Cheesecake.
- Want to bake a chocolate cheesecake in a different pan size? Explore my recipes for Mini Chocolate Cheesecakes (baked in a muffin pan), a 4-Inch Chocolate Cheesecake, and a larger 9-Inch Chocolate Cheesecake.
Recommended Products
As an Amazon Associate and member of other affiliate programs, I earn from qualifying purchases.
- 6 Inch Springform Pan
- Digital Thermometer
Did you make this recipe?
Let me know what you think! Rate the recipe above, leave a comment below, and/or share a photo on Instagram using #HITKrecipes
