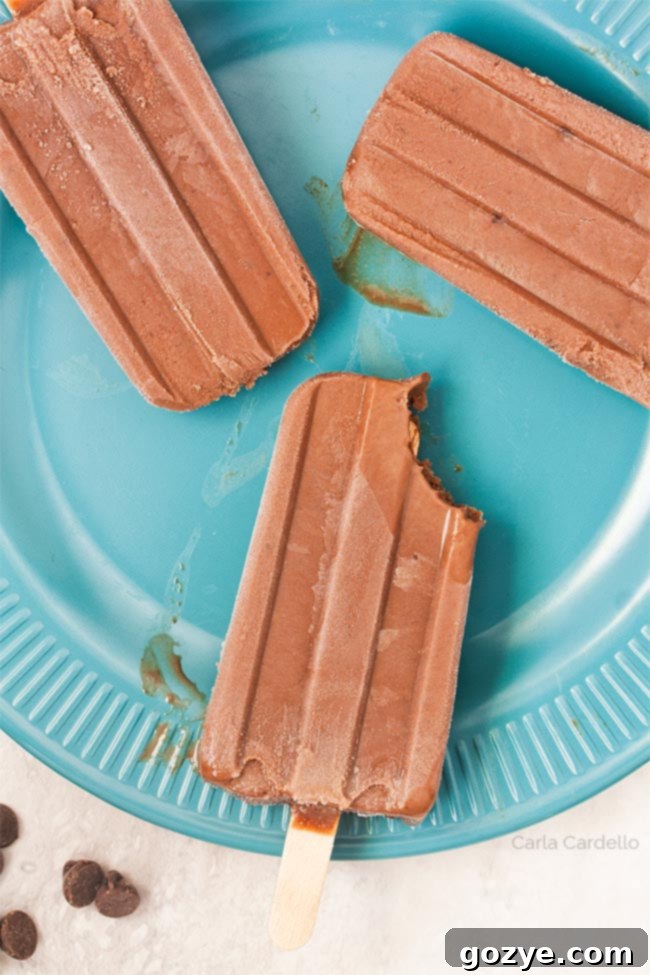
The Ultimate Homemade Fudgesicles: Easy, Creamy, & No Pudding Mix Needed!
There’s something uniquely nostalgic and utterly delightful about a Fudgesicle on a warm day. For many, including myself, summer simply isn’t complete without indulging in at least one of these iconic frozen treats. Whether it’s the familiar jingle of an ice cream truck drawing closer or the satisfying chill straight from your home freezer, the call of a rich, chocolatey Fudgesicle is hard to resist. The sheer joy of biting into that smooth, cold, chocolatey goodness is a quintessential summer experience.
Forget the days of waiting for the ice cream truck or settling for store-bought versions that might lack that authentic, creamy texture and deep flavor. This recipe guides you through making homemade fudgesicles from scratch that are incredibly easy to prepare. You’ll achieve that deep, decadent fudge taste you crave, and the best part? There’s absolutely no pudding mix required, making this a simpler, more wholesome option. Plus, this small-batch recipe yields four perfectly sized, gluten-free fudgesicles, ideal for a quick indulgence without an overwhelming freezer stash.
My journey to perfecting homemade fudgesicles even led me on a quest for the ideal popsicle mold, specifically to capture that classic, recognizable shape. But don’t be deterred if you don’t have a fancy mold; we’ll discuss easy alternatives that work just as well. The process itself is wonderfully straightforward: simply melt a few key ingredients together in a saucepan, pour the mixture into your molds, and let the freezer do the rest. Get ready to enjoy a double dose of chocolatey goodness that will cool you down and put a smile on your face in no time!
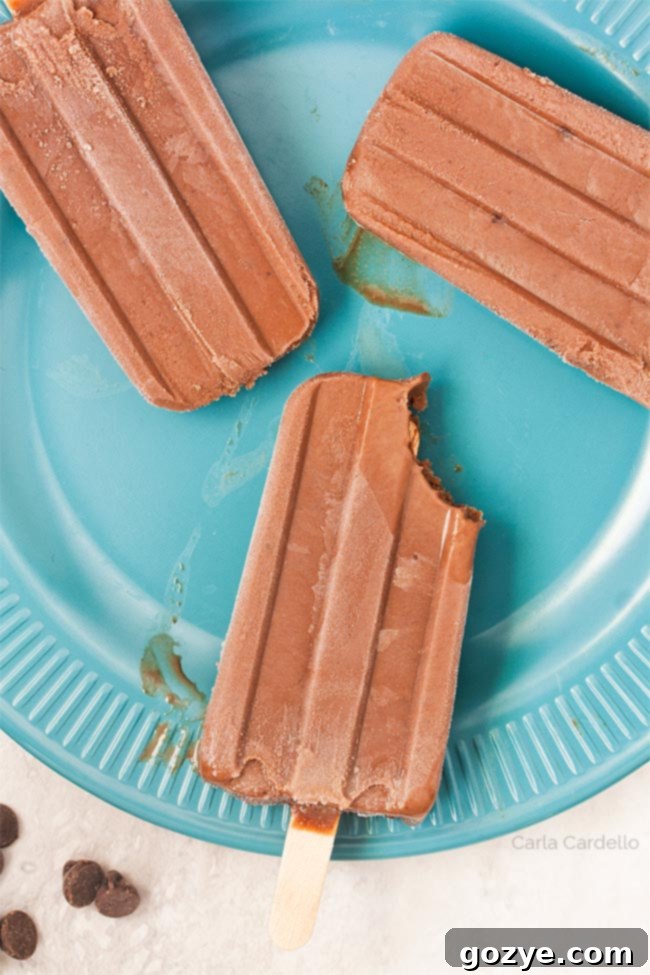
What Exactly Are Fudgesicles? A Delicious Dive into a Classic Treat
If you’re new to the world of Fudgesicles, prepare for a delightful introduction. Imagine the luxurious texture and rich flavor of frozen chocolate pudding, conveniently served on a stick. That’s essentially what a Fudgesicle is! The name itself is a perfect descriptor, hinting at the deep, decadent fudge taste that makes these treats so irresistible. Unlike many icy pops, Fudgesicles are known for their incredibly creamy, smooth consistency that melts slowly and satisfyingly in your mouth, leaving a lingering chocolate flavor.
They strike a perfect balance between a refreshing frozen treat and a comforting chocolate dessert, making them a year-round favorite for many. Their enduring popularity speaks volumes about their simple yet profound appeal. While traditional Fudgesicles are synonymous with deep chocolate, the concept of a creamy frozen pop on a stick has inspired many delicious variations. If chocolate isn’t your primary craving, you might enjoy the delightful creaminess of my Vanilla Popsicles, which offer a rich, smooth vanilla pudding-like experience. And for those who believe chocolate and peanut butter are a match made in heaven, my Chocolate Peanut Butter Fudgesicles take this classic pairing to a new, frozen level. No matter your preference, the simple pleasure of a Fudgesicle-style treat is an experience worth savoring.
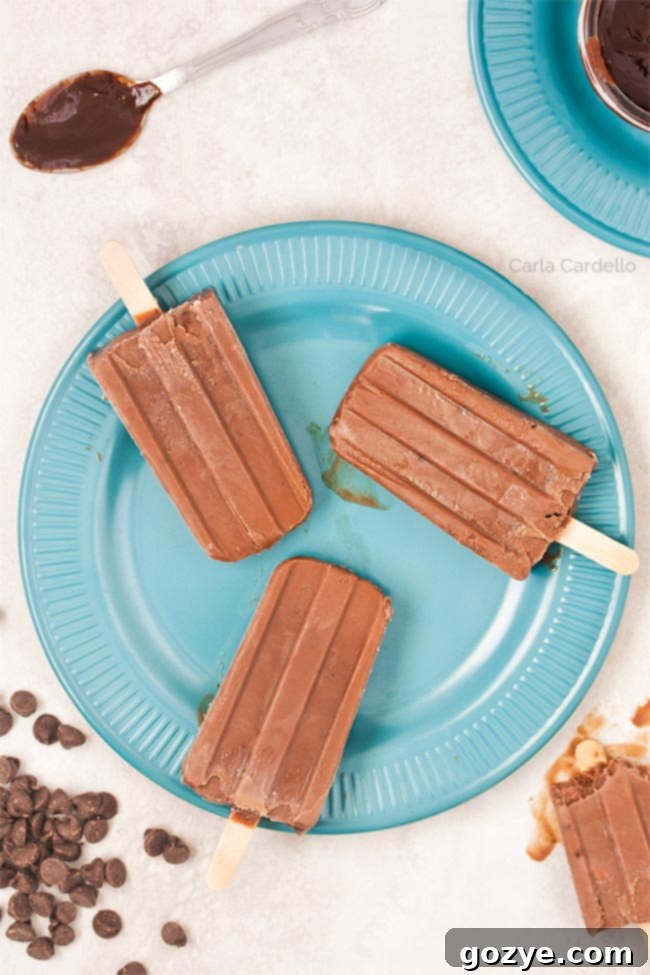
Why Make Your Fudgesicles from Scratch? The Benefits of Homemade Goodness
While store-bought Fudgesicles are undeniably convenient, there are numerous compelling reasons to whip up a batch from your own kitchen. Taking the homemade route offers a level of control and customization that pre-packaged options simply can’t match, resulting in a superior treat you’ll be proud to share (or, let’s be honest, keep all to yourself!).
- Superior Flavor & Texture: When you make fudgesicles from scratch, you’re in charge of the ingredients. This means using high-quality cocoa powder and real chocolate, which translates to a much richer, deeper, and more authentic chocolate flavor than you’ll find in most commercial products. You also get to perfect that coveted creamy, smooth texture without relying on artificial thickeners or stabilizers, which often leave an unnatural aftertaste.
- No Pudding Mix or Unwanted Additives: Many conventional fudgesicle recipes call for instant pudding mix, which often contains artificial flavors, colors, preservatives, and excess sugars. Our recipe proudly skips the pudding mix, relying instead on natural ingredients like cornstarch to achieve that desirable thickness and creaminess. This means a cleaner ingredient list and a treat you can feel better about consuming.
- Dietary Control & Inclusivity: This recipe is naturally gluten-free, a huge plus for those with dietary restrictions or sensitivities. Furthermore, by making them yourself, you can easily explore dairy-free alternatives (like full-fat canned coconut milk) if needed, or adjust sugar levels to your personal preference for a healthier indulgence.
- Cost-Effective: While the initial purchase of a few staple ingredients might seem like an outlay, homemade treats are often more economical in the long run, especially when you consider the quality and quantity you get compared to buying individual pops regularly. You’ll often find you have most of these ingredients already in your pantry.
- Customization Opportunities: Once you master the basic recipe, the possibilities for customization are endless! Add a pinch of espresso powder to deepen the chocolate flavor, swirl in a tablespoon of peanut butter for a Reese’s-like experience, introduce a hint of mint extract, or even mix in finely chopped nuts or mini chocolate chips for added texture. Homemade allows you to truly make it your own signature treat.
- Fun & Rewarding: Making fudgesicles is a simple, enjoyable kitchen project, perfect for a relaxing afternoon or a fun activity with kids. There’s immense satisfaction in creating such a delicious and refreshing treat from simple, wholesome ingredients. It’s a great way to engage children in the kitchen and teach them about where their food comes from.
Essential Ingredients for Irresistible Homemade Fudgesicles
Creating these rich and creamy fudgesicles requires a handful of common pantry staples. The magic truly happens when these quality ingredients come together, transforming into a luxurious chocolate mixture. Here’s a closer look at each component and its vital role in achieving fudgesicle perfection:
- Milk: The foundation of our fudgesicles, milk is essential for creating that wonderfully creamy texture and binding all the chocolate elements together. While you can use lower-fat milk, whole milk is highly recommended as its higher fat content contributes significantly to the luxurious mouthfeel and prevents the fudgesicles from becoming too icy. For a dairy-free option, full-fat canned coconut milk (the kind used for cooking) can work beautifully, offering its own unique richness and a subtle tropical note.
- Sugar: Beyond simply sweetening the fudgesicles, granulated sugar also plays a crucial role in their final texture. It helps to lower the freezing point of the mixture, which contributes to a smoother, less icy, and more “bite-able” consistency. Adjust the amount slightly to suit your personal sweetness preference, though the specified amount provides a balanced chocolatey sweetness that isn’t overpowering.
- Cocoa Powder: This is where the deep, intense chocolate flavor truly comes alive. Using a high-quality, unsweetened cocoa powder is paramount, as its taste will be prominent in the final product. Natural cocoa powder (like standard Hershey’s) will give a classic, slightly reddish-brown fudgesicle with a bright chocolate flavor, while Dutch-processed cocoa will yield a darker, more mellow, and less acidic chocolate flavor. Sifting your cocoa powder is also a crucial step to prevent lumps and ensure a silky-smooth mixture.
- Cornstarch: This is our secret weapon for achieving that coveted pudding-like thickness without using actual pudding mix. Cornstarch acts as a natural thickening agent; when heated, it gelatinizes and gives the fudgesicles their incredibly smooth, creamy, and non-icy texture. It’s a key ingredient for developing that satisfyingly fudgy mouthfeel that distinguishes a fudgesicle from a mere ice pop.
- Salt: A small pinch of salt works wonders in enhancing and balancing the chocolate flavor. Much like in baking, salt helps to cut through the sweetness and highlights the complex notes of the cocoa and chocolate, making the overall taste much more vibrant, nuanced, and delicious. It prevents the flavor from being flat.
- Semisweet Chocolate: For an even deeper and richer chocolate profile, we incorporate finely chopped semisweet chocolate. Again, the quality of your baking chocolate truly shines through here. Choose a good brand you enjoy eating on its own, as its flavor will be front and center. If you prefer a bolder, less sweet treat, feel free to use dark chocolate. Ensuring it’s finely chopped is important for quick and even melting into the warm mixture.
- Vanilla Extract: Like salt, vanilla extract doesn’t just add its own flavor; it also acts as a powerful enhancer for the chocolate. A good quality pure vanilla extract rounds out the flavors, adds a hint of warmth, and makes the chocolate taste even more pronounced and complex, elevating the overall taste experience.
Essential Equipment You’ll Need for Fudgesicle Success
Beyond the ingredients, you’ll need a few basic kitchen tools to make the process smooth and enjoyable:
- Large Saucepan: A sturdy, heavy-bottomed saucepan is ideal for combining and heating your fudgesicle mixture, preventing sticking and scorching.
- Whisk: Essential for thoroughly combining dry ingredients into the milk and for stirring during the heating process, preventing lumps and ensuring a smooth base.
- Popsicle Molds: The star of the show! You can purchase dedicated molds and popsicle sticks (either from Amazon or your local craft store). When choosing a mold, consider one with a secure lid or individual slots for sticks to keep them upright during freezing. Many come with reusable sticks or disposable wooden ones.
- Popsicle Sticks: Wooden or reusable plastic sticks work equally well. Ensure they are food-grade if using wooden sticks from a craft store.
- Alternatives to Molds: Don’t have official molds? No problem! You can easily use 3-ounce Dixie paper or plastic cups, as demonstrated in my Peach Yogurt Popsicles recipe. Once frozen, you can simply cut away the cup to release the fudgesicle if it doesn’t unmold easily. Small yogurt cups, shot glasses, or even ice cube trays with toothpicks (for mini fudgesicles) can also work in a pinch.
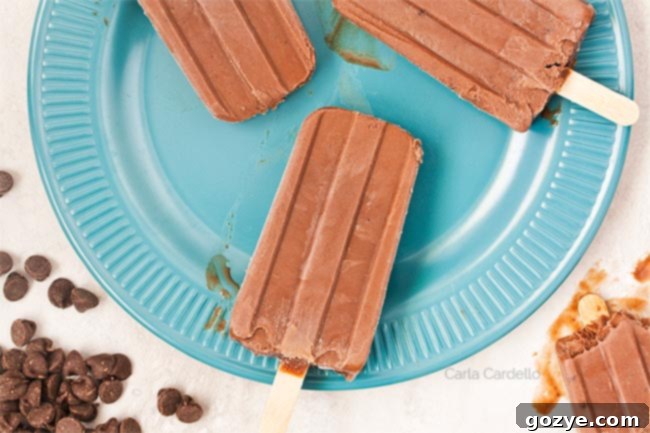
Step-by-Step Guide: How to Make Creamy Homemade Fudgesicles
Making your own fudgesicles from scratch is a surprisingly simple and rewarding process. Follow these detailed steps to achieve perfect, creamy, and deeply chocolatey frozen treats every time:
- Combine Dry and Wet Ingredients: Begin by adding your whole milk, granulated sugar, unsweetened cocoa powder (sifted, if possible, to avoid lumps), cornstarch, and salt to a large, heavy-bottomed saucepan. Using a sturdy whisk, thoroughly combine all these ingredients. Whisk continuously until the dry ingredients are fully dissolved into the milk, leaving you with a smooth, lump-free chocolate mixture. This initial vigorous whisking is a critical step to ensure a smooth final product, free from any powdery pockets.
- Heat the Mixture: Place the saucepan over medium heat. Stir or whisk often to prevent the mixture from sticking to the bottom and scorching, which can impart a burnt taste. Continue heating until the mixture becomes hot and visibly bubbly around the edges, but be careful not to bring it to a vigorous, rolling boil. Maintaining this controlled, simmering heat ensures the cornstarch activates properly to thicken the mixture without curdling the milk.
- Melt the Chocolate: Once the mixture is hot and bubbly, immediately remove the saucepan from the heat (or reduce heat to very low if you prefer). Add your finely chopped semisweet chocolate to the warm liquid. Stir continuously with your whisk or a rubber spatula until the chocolate is completely melted and smoothly incorporated into the mixture. The residual heat from the milk mixture should be sufficient to melt the chocolate evenly.
- Thicken the Mixture: Return the saucepan to medium-low heat (if you removed it entirely). Cook for another 1-2 minutes, stirring constantly. You’ll notice the chocolate mixture will visibly thicken to a consistency similar to a pourable pudding or a thin custard. The cornstarch will now have fully activated, giving you that rich, creamy base that’s essential for a fudgesicle. It should coat the back of a spoon.
- Add Vanilla: Remove the saucepan from the heat once more. Stir in the vanilla extract. Adding vanilla after the cooking process helps to preserve its delicate flavor and aromatic qualities, ensuring a vibrant vanilla note in your fudgesicles.
- Cool Slightly and Prepare for Molds: At this point, your mixture should resemble a luscious, thick chocolate pudding. It will be thick but still pourable. Allow it to cool for about 10-15 minutes at room temperature, stirring occasionally to prevent a skin from forming. This slight cooling helps prevent the popsicle sticks from floating too much initially when placed in the molds.
- Fill the Molds: Carefully pour the chocolate pudding mixture into your chosen popsicle molds. If you’re using a standard mold (like the one I prefer), this recipe should yield approximately 4 pops. If your molds are smaller, you might get a few more. Leave a little space at the top for expansion during freezing, usually about a quarter inch.
- Insert Sticks and Freeze: Insert your popsicle sticks into the center of each filled mold. Ensure they are straight and centered for easy handling later. Transfer the filled molds to your freezer and freeze until completely firm. This typically takes about 4-6 hours, but for the best, most solid fudgesicles that won’t melt too quickly, it’s often best to let them chill overnight. Patience is key for perfectly set pops!
Expert Tips for Perfect Homemade Fudgesicles
To ensure your fudgesicles turn out absolutely perfect every time – creamy, rich, and easy to enjoy – keep these expert tips in mind throughout the process:
- Sift Your Cocoa Powder: This simple but often overlooked step is crucial for preventing tiny lumps of cocoa powder in your final mixture, ensuring a smooth, silky chocolate base. Don’t skip it!
- Prioritize Quality Ingredients: As with any recipe, the better your ingredients, the better your final product. Invest in good quality unsweetened cocoa powder and a decent brand of semisweet chocolate; their flavors will truly shine through.
- Avoid Overheating the Milk: While you want the mixture hot and bubbly to activate the cornstarch and thicken properly, a vigorous rolling boil can scald the milk or affect the delicate texture and flavor. Keep the heat moderate and watch carefully.
- Whisk, Whisk, Whisk: Consistent and thorough whisking, especially in the initial stages when combining dry ingredients and during the thickening process, is crucial for dissolving all ingredients evenly and preventing any burning or lumps from forming at the bottom of the pan.
- Allow for Adequate Freezing Time: Rushing the freezing process can lead to soft, easily broken, or overly icy fudgesicles. Give them ample time, ideally a full overnight freeze, to become rock solid and achieve that perfectly creamy, firm texture.
- Experiment with Flavor Variations: Once you’re comfortable with the base recipe, feel free to get creative! Consider adding a dash of espresso powder (which intensifies chocolate flavor without making it taste like coffee), a tiny bit of almond extract, a pinch of cayenne pepper for a Mexican chocolate kick, or a hint of orange zest for a delightful chocolate-orange twist.
- For Extra Creaminess: If you desire an even richer, more luxurious texture, you can substitute a quarter cup of the whole milk with an equal amount of heavy cream. This will significantly boost the fat content and result in an incredibly decadent fudgesicle.
- Prevent a Skin: While the mixture is cooling before pouring into molds, stir it occasionally to prevent a skin from forming on top, which could lead to a less smooth final product.
Mastering the Unmolding Process for Your Homemade Fudgesicles
Once your fudgesicles are perfectly frozen and firm, the next step is carefully releasing them from their molds. This process can sometimes be a bit tricky, and as you might notice in some of the photos (I’ve been guilty of impatience!), rushing it can lead to a quick melt or a broken pop. Here’s how to properly unmold your homemade fudgesicles to preserve their perfect shape and texture, ensuring a satisfying treat every time.
The ideal scenario is to unmold them, and if you’re not eating them immediately, briefly re-freeze them until they’re firm again. This helps them withstand the initial temperature change. However, if the urge for chocolate is too strong and you don’t mind a little melty goodness (we’ve all been there!), I certainly won’t judge your impatience!
The Warm Water Method: For Single Pops
The most common and effective way to unmold individual fudgesicles is to use lukewarm water. Avoid hot water, as this can melt the fudgesicle too quickly and cause it to slide right off the stick. Gently run each individual mold under lukewarm (not hot!) tap water for about 30 seconds to a minute. The goal is to slightly warm the outer layer of the mold, which creates a thin, almost invisible film of melted fudgesicle between the pop and the mold, allowing for an easy release. Be very careful to prevent any water from entering the mold itself, as this can make your fudgesicle watery and affect its texture.
After about a minute under running water, gently pull the popsicle stick straight up. If it doesn’t release easily, do not force it, as this can cause the fudgesicle to break in half, leaving half in the mold. Simply run it under lukewarm water for another 15-30 seconds, and then try again with a gentle pull. With a little patience, it should slide out smoothly and cleanly.
The Water Bath Method: For Multiple Pops or Full Molds
If you’re unmolding an entire batch of fudgesicles at once (especially useful if your mold holds several pops together), the water bath method is very efficient. Fill a large, deep container (like a baking dish, a clean sink, or a deep bowl) with lukewarm water. Carefully submerge the entire popsicle mold (ensuring the tops/sticks remain out of the water to avoid getting them wet) into the water bath for 30-60 seconds. This allows the heat to transfer evenly around all the molds simultaneously, loosening them all at once. Remove the mold from the water and gently pull out each fudgesicle. They should come out with ease, ready to be enjoyed or stored.
For Paper Cups: The Easiest Unmolding
If you opted for disposable paper or plastic cups as your molds (a fantastic alternative!), the unmolding process is even simpler. Once frozen solid, you can easily unmold your fudgesicles by carefully tearing or cutting away the cup itself. This method guarantees a clean release every single time, with virtually no effort or risk of breakage.
Storing Your Homemade Fudgesicles for Lasting Freshness
Proper storage is absolutely key to enjoying your homemade fudgesicles for as long as possible while maintaining their delicious flavor and wonderfully creamy texture. There are two main approaches, depending on how quickly you plan to devour them after making them:
Short-Term Storage (Within 1 Week)
If you anticipate eating your fudgesicles within a week of making them, you can store them fairly simply. Once unmolded, arrange the fudgesicles in a single layer on a piece of wax paper or parchment paper. This initial layer helps prevent them from sticking to each other. Then, carefully place them directly into a freezer-safe container with an airtight lid. For best results, avoid stacking them directly on top of each other without a layer of paper in between, as they can freeze together and be difficult to separate without damage. Keep this container in the coldest part of your freezer for optimal freshness. They will maintain their best quality during this period.
Long-Term Storage (Up to 1 Month)
For fudgesicles you want to keep for a longer duration, up to about a month, an extra step will ensure they remain fresh and protected from freezer burn. After you’ve unmolded them, and ideally, after they’ve had a chance to refreeze solid for about an hour to firm up again (this prevents the plastic wrap from sticking and tearing easily), individually wrap each fudgesicle tightly in plastic wrap. This tight seal is crucial for preventing freezer burn, which can lead to unsightly ice crystals forming on the surface and a significant loss of flavor and creamy texture.
Once individually wrapped, place the fudgesicles into a large freezer bag, squeezing out as much air as possible before sealing, or store them in an airtight freezer-safe container. Label the bag or container with the date so you know exactly when they were made and can monitor their freshness. While they can technically last longer, for optimal taste and texture, consuming them within a month is highly recommended. Enjoying them before this timeframe ensures you experience them at their peak deliciousness.
By following these simple yet effective storage tips, you’ll be able to enjoy your delicious homemade fudgesicles whenever a chocolate craving strikes, preserving their quality for weeks.
Troubleshooting Common Homemade Fudgesicle Problems
Even with a straightforward recipe, sometimes things don’t go exactly as planned in the kitchen. Don’t worry, many common issues with homemade fudgesicles are easily fixable! Here are some problems you might encounter and how to troubleshoot them:
- Fudgesicles are Icy, Not Creamy:
- Cause: This is often due to too much water content, not enough fat, or insufficient thickener.
- Solution: Ensure you’re using whole milk (or full-fat canned coconut milk for dairy-free options), as the fat contributes significantly to creaminess. Don’t dilute the mixture. Most importantly, make sure the cornstarch fully activates by heating the mixture until it visibly thickens to a pourable pudding consistency. If your climate is very humid, you might consider adding a tiny bit more cornstarch next time.
- Fudgesicles Are Not Setting Firmly:
- Cause: The most common reason is simply not enough freezing time, or your freezer might not be cold enough.
- Solution: Patience is key! Allow them to freeze for a full 4-6 hours, or ideally, overnight, to achieve maximum firmness. Check your freezer temperature; it should be set to 0°F (-18°C) or colder. Ensure the molds are placed in the coldest part of your freezer, usually towards the back.
- Fudgesicles Break When Unmolding:
- Cause: This happens when you try to force them out, or the mold hasn’t been warmed enough.
- Solution: Always use the warm water method described in the “Unmolding” section above. Be patient and gentle. If using paper cups, simply cut them away – it’s the most foolproof method for a clean release. Never twist or pull too hard.
- Grainy or Lumpy Texture:
- Cause: This can occur if the sugar isn’t fully dissolved, the cocoa powder wasn’t sifted, or the mixture wasn’t whisked thoroughly enough.
- Solution: Always sift your cocoa powder before adding it to the saucepan. Whisk the dry ingredients vigorously into the milk until everything is fully dissolved and smooth. Continue whisking regularly while heating to prevent scorching and ensure a consistently smooth texture throughout the cooking process.
- Flavor is Not Strong Enough:
- Cause: Using low-quality chocolate/cocoa, or not including enough flavor enhancers.
- Solution: Invest in good quality unsweetened cocoa powder and semisweet chocolate – they are the stars of the show. Don’t skip the salt and vanilla extract, as they significantly enhance and deepen the chocolate flavor, making it more vibrant. For an even richer chocolate note, consider adding a pinch of espresso powder (about 1/4 teaspoon) to the dry ingredients.
Frequently Asked Questions About Homemade Fudgesicles
Here are some common questions people ask about making Fudgesicles from scratch, providing quick answers to help you on your culinary journey:
- Are these fudgesicles gluten-free? Yes, absolutely! This recipe uses naturally gluten-free ingredients, including whole milk, sugar, cocoa powder, cornstarch, salt, chocolate, and vanilla extract. This makes it a safe and delicious treat for those following a gluten-free diet.
- Can I make these fudgesicles dairy-free? You certainly can! To make them dairy-free, substitute the whole milk with an equal amount of full-fat canned coconut milk (the kind used for cooking, not the beverage). The texture might be slightly different, but still wonderfully creamy and delicious, with a hint of coconut flavor.
- What kind of cocoa powder should I use for the best flavor? For a classic Fudgesicle flavor with a bright chocolate note, a good quality unsweetened natural cocoa powder works wonderfully. If you prefer a darker, milder, and less acidic chocolate, Dutch-processed cocoa powder is an excellent choice. The most important thing is to use a high-quality brand that you enjoy the taste of.
- Do I really need cornstarch? Can I skip it? Cornstarch is crucial in this recipe as it acts as the primary thickening agent that gives the fudgesicles their signature creamy, pudding-like texture without needing actual pudding mix. Skipping it will likely result in a much icier, less satisfying texture, more akin to a simple ice pop.
- How long do homemade fudgesicles last in the freezer? When stored properly (individually wrapped tightly in plastic wrap and then sealed in an airtight container or freezer bag), homemade fudgesicles can last for up to a month in the freezer. For the absolute best quality and flavor, it’s ideal to consume them within 2-3 weeks.
- Can I make a bigger batch of this fudgesicle recipe? Yes, you can easily double or triple this recipe if you want to make more. Just be sure to use a larger saucepan to accommodate the increased volume and ensure you have enough popsicle molds to hold all the mixture. The freezing time might also extend slightly for larger quantities.
- Can I use milk chocolate instead of semi-sweet chocolate? You can, but it will result in a significantly sweeter fudgesicle with a milder, less intense chocolate flavor. For a richer, more balanced, and classic fudgesicle taste, semisweet or even dark chocolate is generally preferred, as it provides a deeper chocolate profile that stands up well to freezing.
More Delicious Popsicle Recipes to Try
- Orange Creamsicles
- Watermelon Popsicles
- Root Beer Ice Cream Bars
- Strawberry Popsicles
- Blueberry Yogurt Popsicles
- Pineapple Popsicles
- Coconut Popsicles
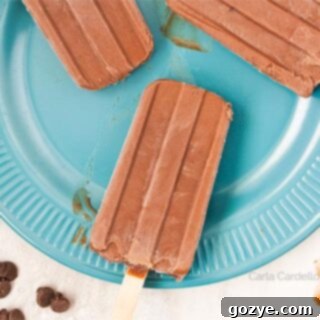
Homemade Fudgesicles
4 servings
15 minutes
15 minutes
30 minutes
Love eating Fudgesicles? Make this easy Fudgesicle recipe from scratch without pudding mix! This small batch recipe makes 4 delicious gluten-free fudgesicles, perfect for a refreshing treat.
Ingredients
- 1 cup whole milk, room temperature
- 1/3 cup granulated sugar
- 2 tablespoons unsweetened cocoa powder, sifted
- 1 tablespoon cornstarch
- 1/8 teaspoon salt (preferably kosher)
- 1 ounce semisweet chocolate, chopped
- 1/2 teaspoon vanilla extract
Instructions
- In a large saucepan, whisk together the milk, sugar, cornstarch, cocoa, and salt. Heat until hot and bubbly but not boiling.
- Add the chocolate and stir until melted. Continue cooking until the mixture thickens, about 1-2 minutes.
- Remove from the heat then stir in the vanilla.
- Transfer the mixture to the popsicle molds. It’ll be thick like pudding but should still be pourable. Add sticks then freeze until firm, at least 4 hours or overnight.
Notes
- Enjoyed this recipe? You might also love our Vanilla Popsicles and Chocolate Peanut Butter Fudgesicles for more creamy frozen delights.
Recommended Products
As an Amazon Associate and member of other affiliate programs, I earn from qualifying purchases.
- Popsicle Mold
- Popsicle Sticks
Did you make this recipe?
Let me know what you think! Rate the recipe above, leave a comment below, and/or share a photo on Instagram using #HITKrecipes
Source: Adapted from Smitten Kitchen
Originally published June 10, 2014
