The Best Homemade Pita Chips Recipe: Crispy, Flavorful & Easy for Dipping
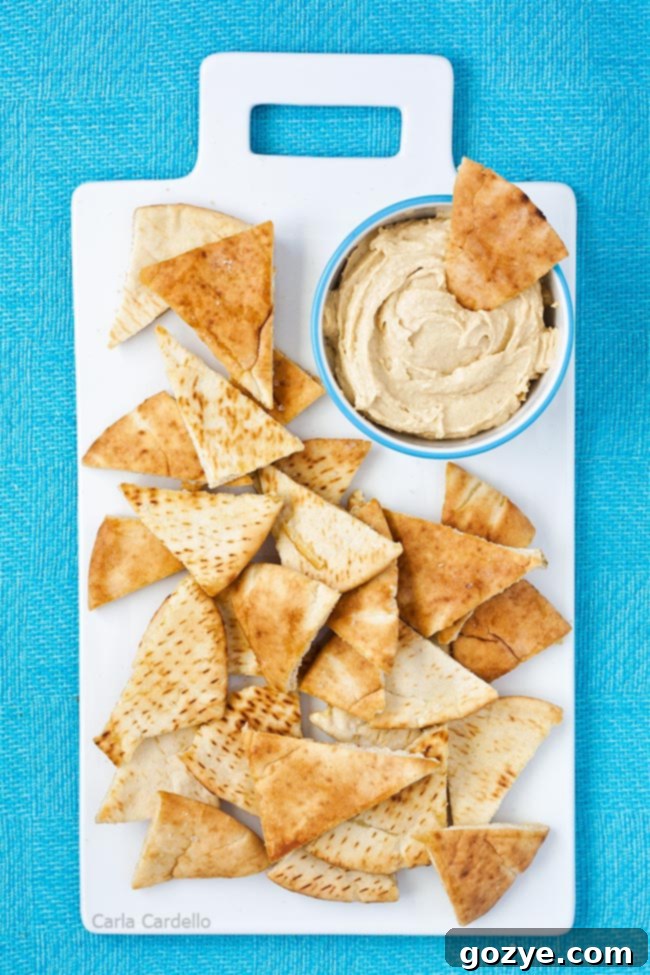
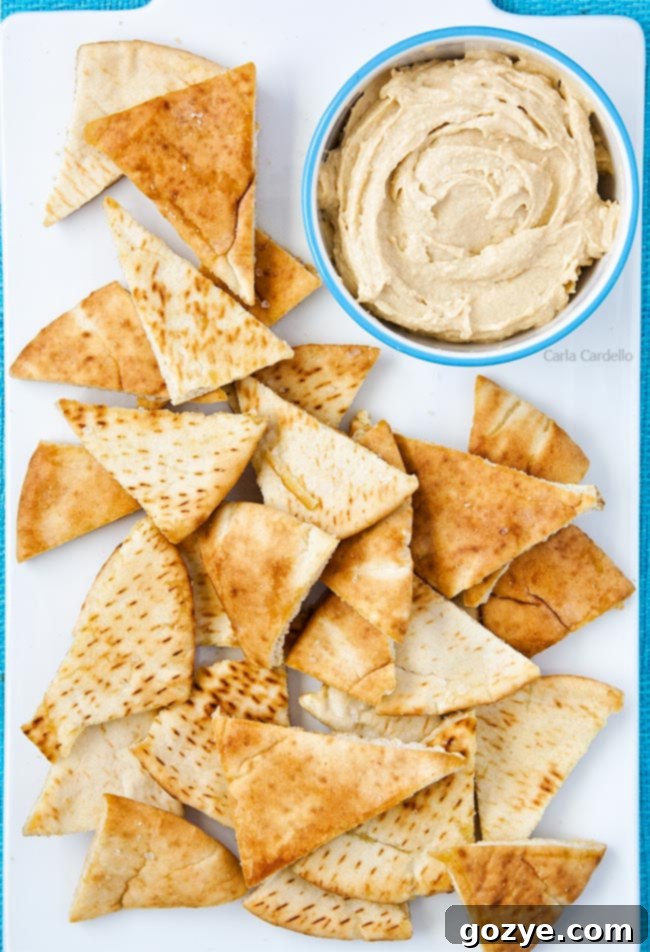
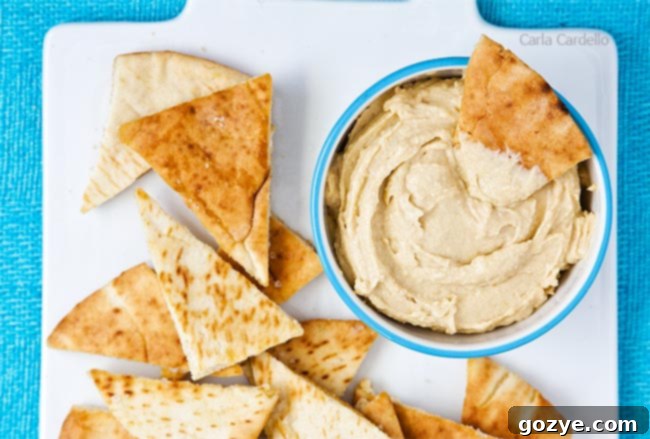
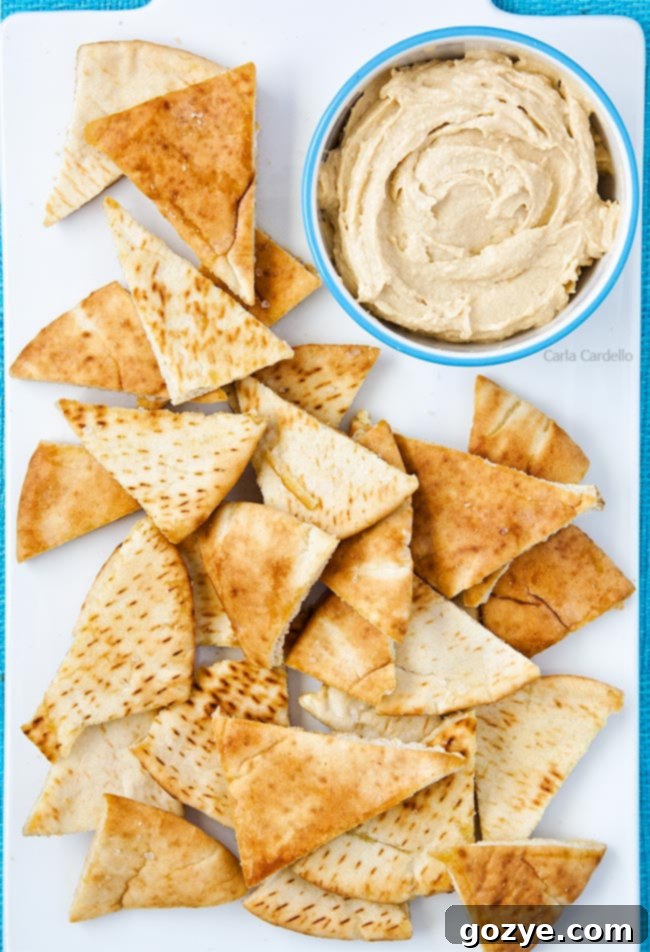
Homemade Pita Chips, lightly coated with high-quality olive oil and a delicate sprinkle of sea salt, then perfectly baked in the oven or quickly air-fried, are an incredibly easy and satisfying snack anyone can master! These golden, crunchy delights are absolutely ideal for scooping up your favorite creamy hummus, but their versatility extends far beyond that. Get ready to elevate your snacking experience with a batch of perfectly crispy, homemade pita chips that will have everyone asking for more.

Life has a funny way of bringing us unexpected gifts, and sometimes, those gifts come in the most delicious forms. While winning the lottery might still be a distant dream, I’ve certainly hit the jackpot when it comes to culinary delights. One memorable summer, I found myself the proud owner of a half bushel of sweet, juicy peaches from a local farm. Another year, I somehow managed to win an astounding 30 pounds of potatoes after attending a bustling food conference. But perhaps the most fortuitous win came a weekend later when I bagged a year’s supply of creamy, delectable hummus from a food retreat.
As luck would have it, the generous hummus representative also had connections with a fantastic pita company. When I mentioned my hummus bounty, they kindly offered to send “a little bit of pita” to ensure my dipping needs were met. What arrived on my porch, however, was anything but “a little bit”! Two GIANT boxes were overflowing with every imaginable type of pita bread: large, classic rounds, adorable mini pitas, versatile pita bread pockets, and even a stack of tortilla wraps and bagels. It was a carb lover’s paradise, and I suddenly had a very delicious “problem” to solve.
After sharing generously with family and friends and freezing a good portion, my year’s supply of hummus finally arrived. Now, with an abundance of creamy dip and mountains of pita bread, a culinary challenge presented itself. Instead of reaching for a bag of store-bought chips, I realized I had everything I needed to craft my own superior snack: Homemade Pita Chips. Much like the satisfaction I found in making my BBQ chips and Salt and Vinegar Chips from scratch, the idea of transforming simple pita bread into crispy, golden chips was irresistible. And with so much pita readily available, it was clearly destiny to embark on this simple yet rewarding kitchen adventure.
The process is surprisingly simple, requiring minimal effort and ingredients. All you have to do is cut up pita bread into uniform pieces, give them a light toss in good quality olive oil and a dash of sea salt, then bake them until they’re golden brown and perfectly crunchy. For those busy days or when you’re craving a quick snack, my trusty air fryer often steps in to deliver perfectly crisp chips in even less time. Voila! Easy, delicious, and incredibly satisfying homemade pita chips, ready for any snacking occasion. It’s truly a game-changer for anyone who loves a good dip!

Why Make Your Own Pita Chips? The Ultimate Snack Upgrade
You might be wondering, with so many convenient options available in stores, why bother making pita chips at home? The answer lies in the unparalleled taste, texture, and customization possibilities that homemade offers. Here’s why diving into DIY pita chips is a culinary decision you won’t regret – it’s an upgrade to your snacking routine that delivers on all fronts:
- Superior Freshness & Flavor: Store-bought chips can often taste a little stale or lack the vibrant flavor that fresh ingredients provide. Homemade pita chips, made with quality olive oil and your choice of salt and seasonings, simply taste better and offer a more authentic, satisfying flavor profile.
- Perfect Texture Every Time: Achieve that ideal golden-brown crispness that’s satisfying without being overly hard or greasy. You have complete control over the bake or air fry time, ensuring they’re just right for your preference – from lightly crisp to extra crunchy.
- Cost-Effective Snacking: A stack of pita bread is typically quite inexpensive, making homemade chips a far more economical option than repeatedly buying pre-packaged bags. This is especially true if you snack on them frequently or need a large batch for entertaining.
- Complete Control Over Ingredients: Homemade means you avoid unwanted preservatives, artificial flavors, and excessive sodium often found in commercial products. You dictate exactly what goes into your snack, allowing for a cleaner, potentially healthier choice. This is great for those with dietary restrictions or who prefer to know exactly what they’re eating.
- Endless Customization Possibilities: This is where the fun truly begins! Beyond simple salt, you can experiment with a myriad of seasonings and spices to match any dip, cuisine, or craving. From savory to spicy, or even sweet, the possibilities are endless.
- Reduces Food Waste: Have a few aging pita breads that are a little past their prime for sandwiches or wraps? Transform them into delicious, crispy chips instead of letting them go to waste. It’s a fantastic and flavorful way to repurpose leftovers and be more sustainable in the kitchen.
Essential Ingredients for Perfect Homemade Pita Chips
Crafting these delectable chips requires a surprisingly short list of ingredients, proving that simplicity often yields the best results. You only truly need three core components, but a fourth, optional ingredient can elevate your chips to gourmet status, allowing for endless flavor variations.
- Pita Bread: The absolute foundation of our snack! You can use any type of pita bread available to you – large classic rounds, adorable mini pitas, or the thicker pita pockets. If you opt for pita pockets, a crucial step is to cut each pita in half horizontally, effectively separating it into two single layers. This ensures even cooking and maximum crispiness, preventing soggy centers. Fresh pita works wonderfully, but even day-old pita that’s slightly firm can be perfectly repurposed into chips, making it a great way to use up bread that might otherwise go stale. Look for pitas with a good, sturdy texture that can hold up to slicing and baking.
- Olive Oil: This isn’t just a coating; it’s a vital flavor enhancer and a key player in achieving that coveted golden, crispy texture. Always opt for a high-quality extra virgin olive oil. Its fruity, robust, and often slightly peppery flavor will subtly infuse into your chips, creating a more complex and delicious taste than plain vegetable oil. While other oils like avocado oil or a light vegetable oil can work, olive oil consistently offers the best flavor profile for a classic Mediterranean-style pita chip. The oil also helps the salt and any additional seasonings adhere beautifully, and facilitates even browning during baking or air frying.
- Salt: A simple seasoning that makes all the difference in bringing out the natural flavors of the pita and olive oil. For optimal flavor and texture, we highly recommend using coarse sea salt or kosher salt. The larger crystals cling better to the oiled pita, providing satisfying bursts of savory flavor and a delightful textural contrast. While standard table salt will work in a pinch, its fine grain might not distribute as evenly and can sometimes lead to an overly salty taste if not measured carefully. A good pinch of coarse salt truly makes these chips shine!
An incredibly versatile and highly recommended optional fourth ingredient is seasoning. This is where you can truly personalize your pita chips and cater them to your specific taste, a particular cuisine, or the dip you plan to serve alongside them. Here are some fantastic ideas to get your creativity flowing:
- Garlic Powder & Onion Powder: A classic, savory duo that adds an aromatic depth that complements almost any dip.
- Paprika: Sweet, smoked, or hot – for a hint of color and warm, earthy flavor. Smoked paprika, in particular, adds a wonderful BBQ-like note.
- Cumin: Earthy and robust, perfect for Middle Eastern-inspired dips like baba ghanoush or for a spicier kick.
- Za’atar: A traditional Middle Eastern spice blend of dried thyme, sumac, and sesame seeds – absolutely divine and authentic with pita chips!
- Italian Seasoning: A fragrant mix of dried herbs like oregano, basil, and rosemary, perfect for pairing with marinara or pesto dips.
- Chili Powder or Cayenne Pepper: For those who love a little heat and spice in their snacks.
- Fajita Seasoning: As mentioned in the original recipe, a pre-made blend of spices for a zesty, Tex-Mex twist that’s great with salsa or guacamole.
- Dried Herbs: Beyond Italian seasoning, consider individual dried herbs like oregano, thyme, or even a touch of finely minced fresh rosemary or dill for a gourmet touch.
- Sweet Pita Chips: For a delightful dessert-like snack, omit savory seasonings and sprinkle generously with cinnamon sugar after oiling. These are fantastic with fruit salsa or yogurt dips.
When adding seasonings, it’s best to mix them directly with the salt and olive oil before tossing with the pita. This helps ensure an even coating on every chip, so you get flavor in every bite!

How To Make Homemade Pita Chips: Step-by-Step Baking Guide
Making perfectly crispy pita chips in your oven is a straightforward process that yields consistently delicious results. Follow these simple steps for perfectly golden, crunchy, and flavorful chips:
- Preheat Your Oven: Begin by preheating your oven to 350°F (175°C). This ensures the oven is at the correct, consistent temperature when your pita chips go in, promoting even cooking and optimal crisping. While the oven heats up, you can efficiently prepare your pita bread. Line a large baking sheet with parchment paper for easier cleanup and to prevent any potential sticking.
- Prepare the Pita Bread: Take your pita bread and cut it into small, uniform wedges or triangles. You can also cut them into strips or squares, depending on your preferred shape and dipping style. Aim for pieces that are roughly 1.5 to 2 inches in size. If you’re using thicker pita pockets, remember the crucial step of separating them into two single layers first. Uniformity in size is incredibly important for even baking – smaller pieces will cook faster, while larger, thicker ones will take longer.
- Season & Toss Thoroughly: In a large mixing bowl, combine your uniformly cut pita pieces with 1 to 2 tablespoons of high-quality olive oil. Start with 1 tablespoon and add a bit more if needed to ensure every piece is lightly and evenly coated. Next, generously sprinkle your chosen sea salt (and any other desired seasonings like garlic powder or za’atar) over the oiled pita. Toss again, either gently with your hands or a spatula, to ensure the salt and seasonings are distributed evenly across all the pita pieces. Every chip should have a little flavor!
- Arrange on Baking Sheet: Spread the seasoned pita pieces into a single layer on the prepared baking sheet. It is absolutely essential to avoid overcrowding the pan; if the chips are piled up, they will steam rather than crisp, resulting in chewy rather than crunchy results. If necessary, use two baking sheets to accommodate all your pita chips in a single layer.
- Bake to Crispy Perfection: Place the baking sheet (or sheets) in the preheated oven. Bake for approximately 10-15 minutes. The exact cooking time will vary slightly depending on your specific oven and the thickness of your pita bread. Begin checking for doneness after about 8 minutes. You’re looking for a beautiful golden-brown color and a firm, crispy texture throughout. If some pieces are browning faster than others, you can carefully flip them or rotate the pan halfway through the baking time for even results.
- Cool & Serve: Once your pita chips are perfectly crispy and golden, carefully remove them from the oven. Immediately transfer them to a wire rack to cool completely. This cooling step is crucial; as they cool, they will continue to crisp up even further, reaching their optimal crunch. Serve immediately with your favorite dip, or store them for later enjoyment.
How To Make Pita Chips In An Air Fryer: Quick-Crisp Method
If you’re short on time, preparing a smaller batch, or simply prefer the intense crunch an air fryer delivers, it’s an excellent and efficient tool for making incredibly crispy pita chips quickly. This method often results in an even crunchier texture with less oil.
- Prepare & Season: Just like with the oven method, start by cutting your pita bread into uniform wedges, triangles, or squares. Ensure they are all roughly the same size for even cooking. In a bowl, toss the pita pieces with 1-2 tablespoons of olive oil and your preferred amount of salt and any additional seasonings, ensuring an even coating on all sides.
- Load the Air Fryer Basket: Add the seasoned pita pieces to your air fryer basket. The most important rule for successful air frying is to avoid overcrowding. Work in batches if necessary, ensuring there’s plenty of space for hot air to circulate freely around each piece. A single layer is ideal for maximum crispness and even cooking.
- Air Fry to Crispy: Set your air fryer to 400°F (200°C). Cook for 5-8 minutes. Halfway through the cooking time (around the 3-4 minute mark), open the basket and shake it vigorously or toss the chips with tongs. This promotes even browning and ensures all sides get perfectly crispy.
- Check for Doneness: Keep a close eye on the chips, as air fryers can vary in power and cooking speed. They should be beautifully golden brown and perfectly crisp. If they need a little more time, cook for an additional 1-2 minutes, checking frequently to prevent burning.
- Cool & Enjoy: Once cooked to your desired crispness, transfer the air-fried pita chips to a wire rack to cool completely. Just like with oven-baked chips, they will become even crispier as they cool. Serve warm or at room temperature.
How To Store Homemade Pita Chips: Keeping Them Crispy
While homemade pita chips are at their absolute best enjoyed fresh out of the oven or air fryer, proper storage is key if you plan to save some for later. They have a natural tendency to absorb moisture from the air and lose their delightful crispness if not stored correctly. Here’s how to keep your chips as fresh and crunchy as possible for future snacking:
- Cool Completely First: This is the most crucial step for successful storage. Do not store warm pita chips! Any residual heat will create condensation inside your storage container, which is the fastest way to turn your perfectly crispy chips into soggy ones. Always let them cool completely on a wire rack at room temperature for at least 30 minutes to an hour before storing.
- Airtight Container is Essential: Once fully cooled, transfer your homemade pita chips to an airtight container. A plastic container with a tight-fitting lid, a glass jar, or a resealable freezer bag (with as much air pressed out as possible) works perfectly. The goal is to minimize exposure to air and humidity, which are the enemies of crispness.
- Choose the Right Location: Store the airtight container at room temperature in a cool, dry place. Avoid direct sunlight or areas prone to humidity, such as near a stove, oven, or sink, as these conditions can accelerate moisture absorption. A pantry or cupboard is ideal.
- Best Consumed Fresh: For the ultimate crunch and flavor, I highly recommend baking or air frying your pita chips the day you plan to serve them, or at most, the night before. They are typically at their peak crispness and flavor within 1-2 days when stored properly. While they might last a bit longer, their quality will gradually diminish.
- Re-crisping Stale Chips: If your homemade pita chips do lose some of their crispness after a day or two, don’t despair! You can often revive them with a quick reheat. Spread them in a single layer on a baking sheet and bake at 300°F (150°C) for 5-7 minutes, or air fry at 300°F (150°C) for 2-3 minutes, until they are crisp again. Keep a close watch to prevent burning, as they can go from crisp to burnt very quickly during this process.
What To Eat With Pita Chips: Beyond The Dip
Homemade pita chips are incredibly versatile and can be paired with so much more than just classic hummus. Whether you’re looking for the perfect dipper, a crunchy accompaniment to a meal, or an ingredient in another dish, these chips deliver a satisfying crunch and flavor. Here are some fantastic ideas to serve with your crispy creations, ensuring you make the most of every batch:
Delicious Dips & Spreads:
- Classic Hummus: The timeless, quintessential pairing! Whether store-bought or a fresh batch of homemade hummus, the creamy texture and earthy flavor are a match made in heaven for crispy pita chips.
- Chicken Fajita Dip: A zesty, flavorful, and hearty dip perfect for a party or game night, offering a vibrant Tex-Mex twist.
- Spinach Ranch Dip: Creamy, herby, and always a crowd-pleaser, this dip is a fantastic option for potlucks and gatherings.
- Pesto Dip: A vibrant, aromatic dip that brings the fresh, herbaceous flavors of basil to every bite, excellent with Italian-seasoned pita chips.
- Creamy Onion Dip: A savory, comforting, and incredibly addictive dip that’s a staple for any snack spread, whether store-bought or homemade.
- Guacamole: The rich, creamy texture and fresh, zesty flavors of avocado are simply wonderful with crisp pita chips.
- Baba Ghanoush: A smoky, rich roasted eggplant dip, another fantastic and authentic Mediterranean pairing.
- Tzatziki: A cool, refreshing cucumber-yogurt dip, especially good with garlic and dill flavored pita chips.
- Salsa & Queso: For a delightful Tex-Mex twist, try your pita chips with your favorite chunky salsa or a warm, gooey cheesy queso dip.
- Layered Dips: Use pita chips as the perfect scoop for elaborate layered dips, such as a seven-layer dip or a Mediterranean-inspired layer dip featuring hummus, feta, olives, and diced tomatoes.
Beyond Dips: Creative Ways to Enjoy Pita Chips:
- Alongside Sandwiches & Wraps: Offer a delicious and crunchy alternative to traditional potato chips or fries as a side for your favorite sandwiches, burgers, or wraps.
- Crumbled on Salads: Use them as flavorful, textural “croutons” for a variety of salads, from a classic Greek salad to a vibrant fattoush, or any green salad that needs a crunch.
- With Soups: Provide a satisfying crunch when served alongside creamy tomato soup, hearty lentil soup, chicken noodle, or any comforting bowl of soup.
- As a Base for Nachos: Get creative by layering your pita chips with cheese, beans, olives, and your favorite nacho toppings for a unique and delicious twist on classic nachos.
- Part of a Mezze Platter: They are an essential component for any authentic Mediterranean appetizer spread, beautifully complementing olives, various cheeses, cured meats, and fresh vegetables.
- With Burgers: Serve them as a crisp and light side for delicious homemade burgers like Avocado Burgers or Pesto Burgers.
- Sweet Treat: If you made cinnamon sugar pita chips, they are fantastic served with fresh fruit salsas, creamy yogurt parfaits, or even as a crunchy topping for ice cream.

Homemade Pita Chips
2 servings (approx. 4 cups)
10 minutes
15 minutes
25 minutes
Turn simple pita bread into perfectly crispy, golden homemade pita chips with just three essential ingredients! Ideal for dipping in hummus or enjoying as a standalone snack. This recipe includes easy instructions for both oven-baked and air-fried methods.
Ingredients
- 1 large pita bread (roughly 8-10 inches in diameter), cut into 2-inch wedges (yields about 2 cups of chips)
- 1-2 tablespoons olive oil (start with 1 tablespoon, add more if needed for even coating)
- ½ – 1 teaspoon sea salt or kosher salt, for seasoning (adjust to taste)
- Optional Seasonings: ½ teaspoon garlic powder, ½ teaspoon onion powder, a pinch of smoked paprika, or 1 teaspoon Za’atar seasoning.
Instructions
- Preheat the oven to 350°F (175°C). Prepare a large baking sheet, lining it with parchment paper for easier cleanup if desired.
- In a large bowl, toss together the pita wedges and olive oil, ensuring each piece is lightly coated. Sprinkle generously with sea salt and any optional seasonings. Toss again to distribute evenly.
- Spread the seasoned pita chips into a single layer onto the prepared baking sheet. Ensure they are not overcrowded to allow for even crisping. If necessary, use a second baking sheet.
- Bake for 10-15 minutes, or until the pita chips are golden brown and crispy. Keep a close eye on them, especially towards the end, as they can burn quickly. You may need to flip them halfway through for even browning.
- Remove from the oven and transfer to a wire rack to cool completely. The chips will crisp up further as they cool. Serve immediately or store as directed below.
To Air Fry Pita Chips:
- Preheat your air fryer to 400°F (200°C).
- Toss together the pita wedges, olive oil, salt, and any desired seasonings as described above, ensuring an even coat.
- Place the seasoned pita chips in a single layer in the air fryer basket. Do not overcrowd; you will likely need to work in batches for the best results.
- Air fry for 5-8 minutes, shaking the basket halfway through the cooking time to ensure even crisping and browning. Cook until golden brown and crispy.
- Transfer to a wire rack to cool completely before serving.
Notes
- Storage: Once completely cooled, store homemade pita chips in an airtight container at room temperature for up to 2-3 days. They are truly best enjoyed fresh. If they lose some crispness, you can re-crisp them in a 300°F (150°C) oven for 5-7 minutes or an air fryer for 2-3 minutes.
- Flavor Variations: Get creative with your seasonings! Kick your pita chips up a notch by adding Fajita Seasoning, a blend of garlic powder and onion powder, smoked paprika, dried oregano, or a Middle Eastern Za’atar blend. For a sweet treat, simply omit savory spices and sprinkle with cinnamon sugar after oiling.
- Serving Suggestions: These versatile chips are perfect with classic hummus, Pesto Dip, Creamy Onion Dip, guacamole, salsa, tzatziki, or baba ghanoush. They also make a fantastic crunchy side for Avocado Burgers, soups, or salads!
Did you make this recipe?
Let me know what you think! Rate the recipe above, leave a comment below, and/or share a photo on Instagram using #HITKrecipes
Originally published September 5, 2013, this recipe has been thoroughly updated and expanded to provide even more tips, details, and serving suggestions for perfect homemade pita chips every time!
