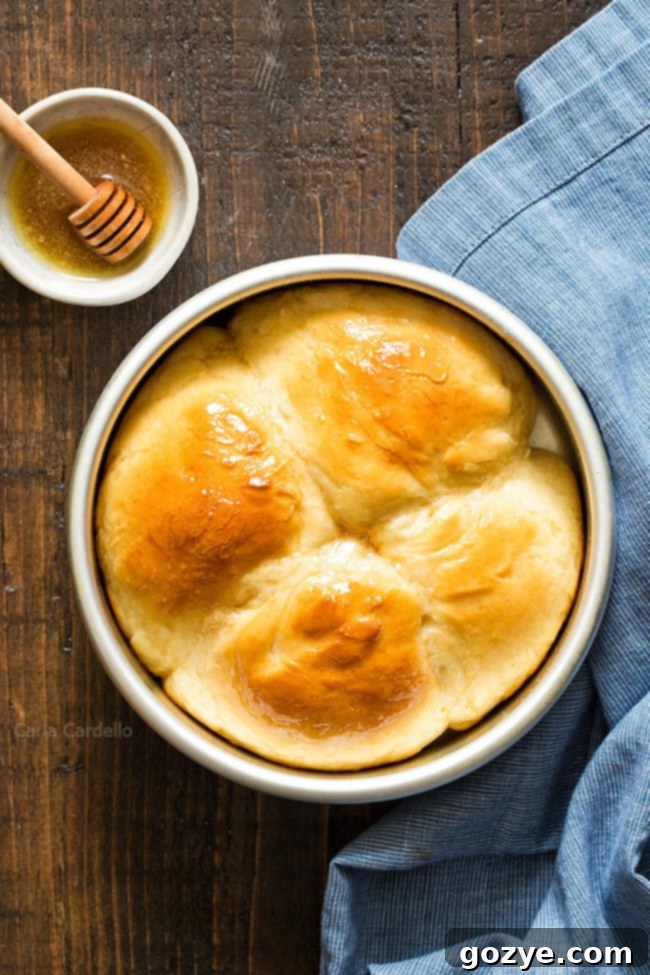
Fluffy Small Batch Dinner Rolls: Homemade & Eggless with Honey Butter Glaze
There’s something truly magical about homemade bread. The aroma filling your kitchen, the warmth in your hands, and the incredible taste of fresh-baked goods are unparalleled. And when it comes to dinner rolls, a small batch ensures you always have warm, fluffy goodness without an overwhelming amount of leftovers. These Small Batch Dinner Rolls are a dream come true for smaller households or anyone looking to enjoy fresh bread without baking a huge loaf. Best of all, they’re eggless, making them suitable for those with dietary restrictions or when you simply run out of eggs. Crowned with a sweet and savory homemade honey butter, these rolls are not just an accompaniment; they’re a highlight of any meal.
Baking bread, especially kneading homemade dough, can be incredibly therapeutic. It’s a wonderful way to connect with your food and create something truly special from scratch. While it does require a bit of patience – patience for the dough to rise twice, patience for the kneading process, and a little more patience for them to bake and cool slightly before you can dive in – the reward is absolutely worth every moment. Nothing quite beats the satisfaction of pulling these fresh, soft Small Batch Dinner Rolls from the oven.
The beauty of this yeast dough recipe is that the active preparation time is surprisingly short. Most of the process involves waiting for the dough to rest and rise, which means you can effortlessly fit bread baking into your busy schedule. While your dough is happily doing its thing, you can use that precious time to prepare the rest of your dinner, making these rolls a perfect addition to any meal, from a simple weeknight supper to a special holiday feast.
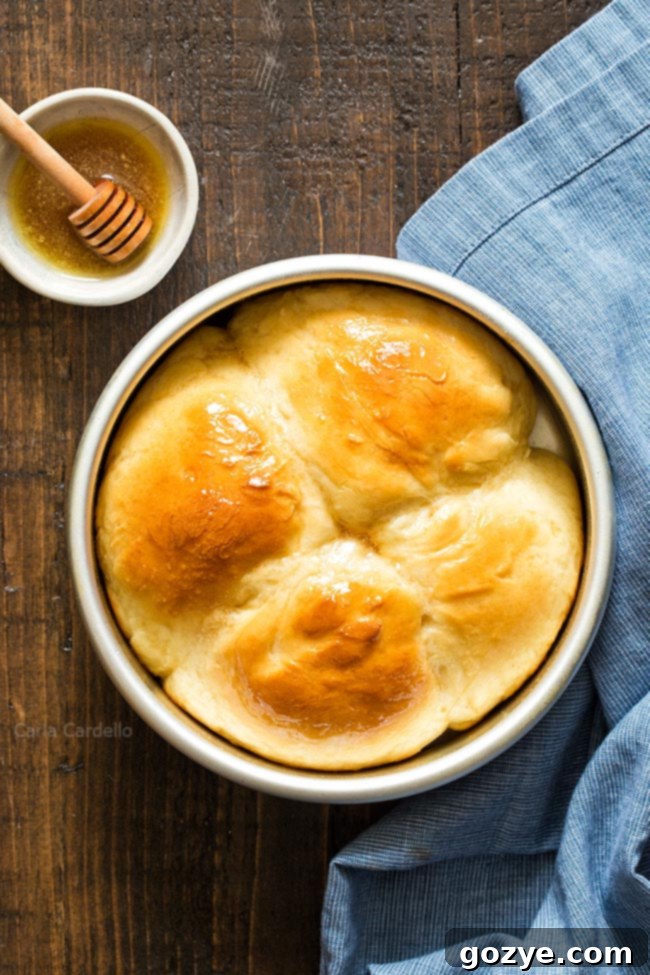
Why Choose Small Batch Dinner Rolls?
Traditional dinner roll recipes often yield a dozen or more rolls, which can be excessive for a single meal, especially if you’re cooking for one or two. This recipe is specifically designed to produce a manageable 4-6 rolls, making it ideal for:
- Dinner for Two: Perfectly portioned for a romantic evening or a cozy meal.
- Holiday Feasts: Supplementing a holiday menu for a smaller gathering, such as Thanksgiving Dinner For Two, Christmas Dinner For Two, or Easter For Two.
- Everyday Enjoyment: Having fresh bread without the commitment of a large batch, perfect with lasagna for two or a refreshing green onion salad.
- Reducing Waste: Enjoying warm, fresh rolls without worrying about leftovers going stale.
If the idea of baking with yeast seems daunting, please don’t let it scare you away! I promise to guide you through every step of making this homemade bread dough from scratch. The process is much simpler than you might think, and the result is incredibly rewarding. (Though if you’d like to start with a yeast-free option, my small batch biscuits are a fantastic choice!). Really, the two main things to keep in mind for successful yeast rolls are using active yeast before its expiration date and ensuring your liquid is at the correct temperature – two very easy tasks, and we’ll cover them in detail.
And for those with dietary concerns or an empty egg carton, you’ll be delighted to know these are truly no-egg dinner rolls. No need to compromise on flavor or texture; these small dinner rolls are just as fluffy and delicious without eggs!
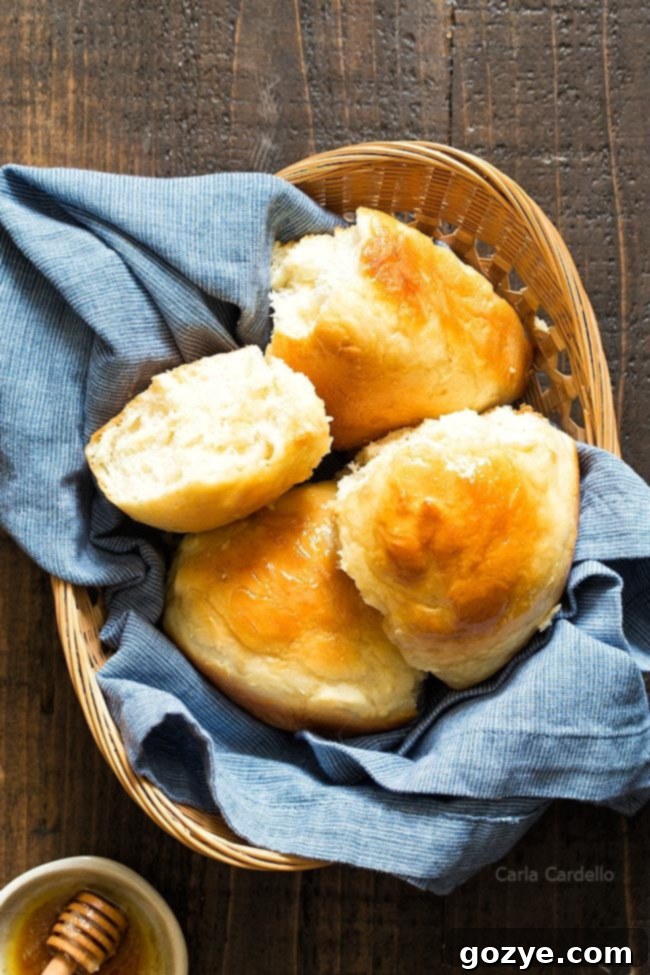
Understanding Yeast: Your Key to Fluffy Rolls
What is Yeast?
Yeast is a living organism, specifically a single-celled fungus. If that sounds a bit intimidating, think of it like eating edible mushrooms or enjoying blue cheese, which gets its distinctive flavor from mold – both perfectly safe and delicious! In baking, yeast is a magical ingredient that helps bread rise by consuming sugars in the dough and producing carbon dioxide gas. These gas bubbles get trapped in the gluten network of the dough, causing it to expand and create that signature light and airy texture we love in dinner rolls.
You’ll typically find yeast sold in small packets or jars in the baking aisle of your grocery store. It’s an inexpensive ingredient that makes a huge impact on your homemade bread.
Active Dry Yeast vs. Instant Yeast: Which Should You Use?
When you’re at the store, you’ll likely encounter two main types of dry yeast: active dry yeast and instant (or rapid rise) yeast. While both are used to leaven bread, they have slight differences in how they’re used and how quickly they work.
- Active Dry Yeast: This is the traditional yeast specified in most classic bread recipes, including this one. It usually requires “proofing” (dissolving in warm liquid first) to activate it and typically needs two rounds of rising for the dough.
- Instant (Rapid Rise) Yeast: This type of yeast is designed to work faster. It has smaller granules, allowing it to dissolve quickly, and often doesn’t require proofing. It can also shorten the overall rise time, sometimes requiring only one rise.
My recipe for these dinner rolls calls for active dry yeast, which means you’ll typically have two rising periods. However, if instant yeast is all you have on hand, you can still use it! The first resting period after kneading may be reduced to about 10 minutes before shaping your rolls, and the second rise might also be quicker. Just keep an eye on the dough to ensure it doubles in size.
Do I Need to Proof Yeast Before Using?
Proofing yeast involves adding it to a small amount of warm liquid (usually water or milk) with a pinch of sugar and letting it sit for 5-10 minutes. If the mixture becomes foamy and bubbly, it’s a sign that your yeast is alive and active, ready to work its magic. If nothing happens, your yeast might be dead, and it’s best to discard it and get a fresh batch.
While proofing yeast certainly never hurts – especially if you’re unsure about the age or freshness of your yeast – it’s often not a strictly necessary step for active dry yeast as long as the packet hasn’t expired. The warm liquid and sugar already present in the recipe are typically enough to activate the yeast, assuming it’s still viable. For instant yeast, proofing is almost never required as it’s designed to be added directly to dry ingredients.
Essential Ingredients For Small Batch Dinner Rolls
To create these wonderfully fluffy small batch yeast rolls, gather these simple yet essential ingredients:
- All-Purpose Flour: This forms the structural backbone of your rolls. As you knead, the protein in the flour develops gluten, which creates the elastic network that traps the yeast’s gases, giving your rolls their characteristic chewiness and rise.
- Granulated Sugar: More than just sweetness, sugar acts as food for the yeast, encouraging its activity. It also aids in browning the crust, giving your rolls a beautiful golden hue.
- Active Dry Yeast: As discussed, this is the leavening agent that makes your rolls light and airy. Always check the expiration date for best results!
- Salt: Far from just a flavor enhancer, salt plays a crucial role in controlling yeast activity (preventing it from rising too quickly) and strengthening the gluten structure, which improves the dough’s elasticity and overall texture.
- Garlic and Onion Powders (Optional): These powders add a subtle, savory depth of flavor to your rolls, elevating them beyond a simple bread. A fantastic option for those who love savory bread!
- Whole Milk: The liquid component. It’s critical that the milk temperature is between 120°F – 130°F (49°C – 54°C). Too cold, and the yeast won’t activate; too hot, and you risk killing the yeast entirely, resulting in dense, unrisen rolls. Whole milk also contributes to a richer flavor and a softer crumb compared to water.
- Unsalted Butter: Butter provides incredible flavor and richness. Melted butter also helps create air pockets within the dough, contributing significantly to that desirable soft and fluffy texture.
- Shredded Cheddar Cheese (Optional): For an extra layer of indulgence, stir in some shredded cheddar. Who doesn’t love cheesy dinner rolls? This is a delightful addition if you’re looking for a savory twist.
- Honey: This is for our irresistible honey butter glaze, brushed on top after baking.
You can even take it one step further and stuff your rolls with delicious fillings, much like I did with my Jalapeno Popper Rolls for a truly unique treat!
Can You Make Small Batch Dinner Rolls Vegan?
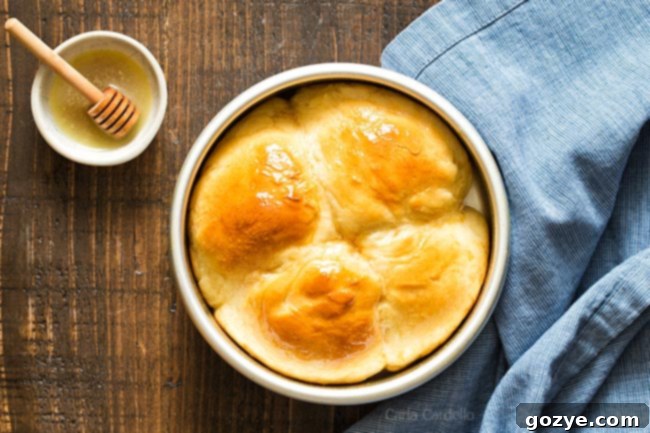
Absolutely! These small dinner rolls can be easily adapted to be vegan-friendly. Here’s how to make the simple substitutions:
- For Milk: Substitute with an equal amount of warm water or unsweetened plant-based milk (like almond or soy milk). Ensure it’s within the 120°F – 130°F temperature range.
- For Melted Butter: Use vegetable oil, melted vegan butter, or a neutral-flavored oil like canola oil.
- For Honey Butter: Omit the honey butter glaze entirely, or create a simple vegan glaze using melted vegan butter and a touch of maple syrup or agave nectar for sweetness.
- For Cheddar Cheese: Omit the cheese, or use your favorite vegan shredded cheese alternative.
With these simple swaps, you can enjoy delicious homemade vegan dinner rolls!
How To Make Small Batch Dinner Rolls: A Step-by-Step Guide
While the overall process for these small batch dinner rolls might seem lengthy at first glance, remember that a significant portion of that time is dedicated to resting and rising. This passive time is your cue to relax or tackle other kitchen tasks, making the actual hands-on work quite manageable. The baking time itself is a quick 12-15 minutes, allowing you to pop them into the oven just as your main course is finishing up.
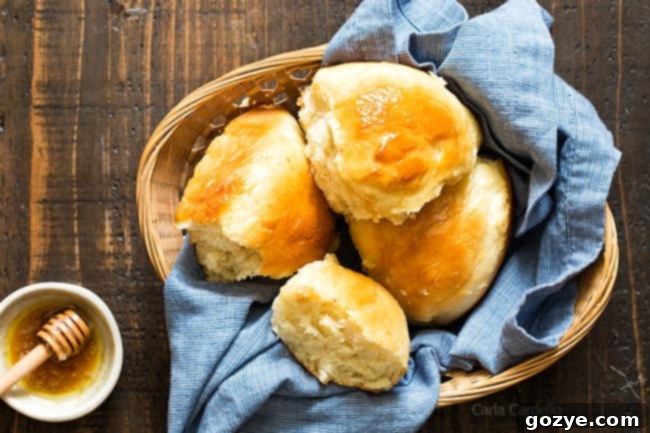
1. Prepare Your Ingredients: Temperature is Key!
Begin by measuring out all your ingredients. The most crucial step here is getting your milk to the correct temperature. You absolutely need to measure your liquid temperature with a digital thermometer. The ideal range is between 120°F-130°F (49°C-54°C) degrees. This warm temperature awakens the yeast without killing it. If the milk is too cold, the yeast won’t activate and the dough won’t rise. If it’s too hot, the high temperature will kill the yeast, leading to the same flat result.
I find it easiest to put the milk in a heat-proof measuring cup and microwave it in 10-second increments, checking the temperature with my thermometer, until it reaches the desired range. If you accidentally overheat the milk, don’t panic! Simply let it sit on the counter while you measure out the rest of your ingredients; it will cool down naturally.
2. Mixing the Dough
In a large mixing bowl, combine the dry ingredients: 3/4 cup flour, granulated sugar, active dry yeast, salt, and the optional garlic and onion powders. Give them a quick stir to distribute evenly. Then, add your perfectly warmed milk and the slightly cooled melted butter. Using a low speed on your stand mixer with a paddle attachment, or by hand with a sturdy spoon, beat the mixture until it’s smooth and well combined.
Next, if you’re using it, stir in the shredded cheddar cheese, along with the remaining 1/4 cup of flour. Continue mixing until a soft dough begins to form. At this stage, the dough should be slightly sticky to the touch, but not so sticky that it’s unmanageable. If it’s excessively sticky, you can add a tablespoon of flour at a time, up to 4 tablespoons, until it’s easier to handle without becoming too stiff.
3. The Art of Kneading Dough for Dinner Rolls
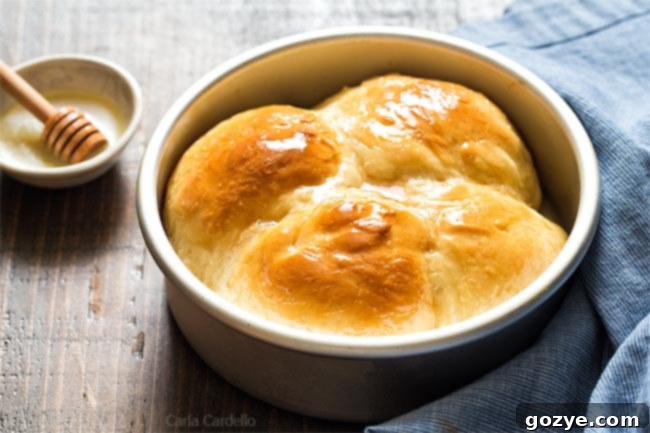
Kneading is a fundamental step in bread making. It’s the process of working the dough with your hands (or a mixer) to develop the gluten strands in the flour. This development creates elasticity and strength, giving your rolls their characteristic structure, chewiness, and ability to rise beautifully.
Kneading by Hand:
Once your dough has formed, transfer it to a lightly flour-dusted surface. Ensure your hands are also lightly floured to prevent sticking. Gather all the dough pieces into a rough ball. Using the heels of your hands, push the dough away from you, stretching it. Then, fold the dough in half towards you, rotate it 90 degrees, and push it away again. Repeat this push-fold-rotate motion continuously. You’ll notice the dough slowly transforming from a shaggy, sticky mass into a smooth, elastic ball.
For small batch dinner rolls, kneading by hand typically takes about 4-6 minutes, rather than the usual 10 minutes for larger batches. You’ll know your dough is well-kneaded when it feels smooth, is no longer sticky, can hold its shape (meaning it won’t droop when picked up), and when you gently poke it with your finger, the indentation quickly springs back.
Kneading with a Stand Mixer:
If you own a stand mixer equipped with a dough hook, this step becomes even easier! Simply attach the dough hook and run the mixer on medium-low speed for 4-6 minutes. The mixer will do all the work for you, achieving the same smooth, elastic dough without the manual effort.
4. First Rise: The Patience Game
After kneading, lightly grease a clean bowl with a little oil or cooking spray. Place your well-kneaded dough ball into the greased bowl, turning it once to coat all sides. Loosely cover the bowl with a clean kitchen towel or plastic wrap. Now, find a warm, draft-free spot for your dough to rest and rise for about 1 hour. This first rise allows the yeast to become active and start producing those essential gas bubbles.
How Warm Does The Dough Need To Be To Rise?
The ideal temperature for dough to rise efficiently is between 80°F-90°F (27°C-32°C) degrees. A warm environment encourages yeast activity. If your kitchen isn’t naturally warm, here’s a simple trick: turn your oven on for exactly 1 minute, then immediately turn it off. Let the oven door stay ajar for a few moments to release any excessive heat, then place your covered dough bowl inside the slightly warmed, turned-off oven. Just be very careful not to forget it’s there when you’re ready to preheat for baking!
Your dough is ready for the next step when it has visibly doubled in size and, when gently poked with a floured finger, the indentation remains (it doesn’t spring back immediately).
5. Shaping Your Small Batch Dinner Rolls
Once your dough has completed its first rise, gently punch it down to release the trapped gases. Turn the dough out onto a lightly floured surface and divide it into equal pieces. For this recipe, I usually opt to make 4 larger, more substantial dinner rolls. However, you can also divide the dough into 6 smaller, more delicate rolls, depending on your preference. Roll each piece into a smooth, tight ball.
Lightly grease a 6-inch round baking pan. Arrange your dough balls in the pan, ensuring they have a little space between them – they will expand significantly. Cover the pan loosely with a clean towel again and let the rolls rise in a warm place for another 30 minutes. This second rise allows the rolls to become even fluffier and lighter before baking.
Don’t have a 6-inch round cake pan? No problem! You can place the dough balls into individual muffin cups. While they won’t have that classic rustic look from being pulled apart from a collective pan, they will still be equally delicious and perfectly portioned.
6. Prepping for the Oven: What to Brush On Rolls
Traditionally, many roll recipes call for brushing the tops with an egg wash (a whisked egg with a little water) before baking to achieve a golden, shiny crust. However, for these eggless dinner rolls, and to avoid wasting a tiny bit of egg, we’ll use a simple milk wash instead. Just before baking, gently brush the tops of your risen rolls with a little milk. This milk wash will help them achieve a beautiful golden-brown color and a slightly softer crust.
7. Baking to Golden Perfection
Preheat your oven to 375°F (190°C). Once the rolls have completed their second rise and been brushed with milk, place the pan in the preheated oven. Bake for 12-15 minutes, or until the rolls are beautifully golden brown on top and cooked through. They should sound hollow when tapped gently on the bottom.
8. The Irresistible Honey Butter Glaze
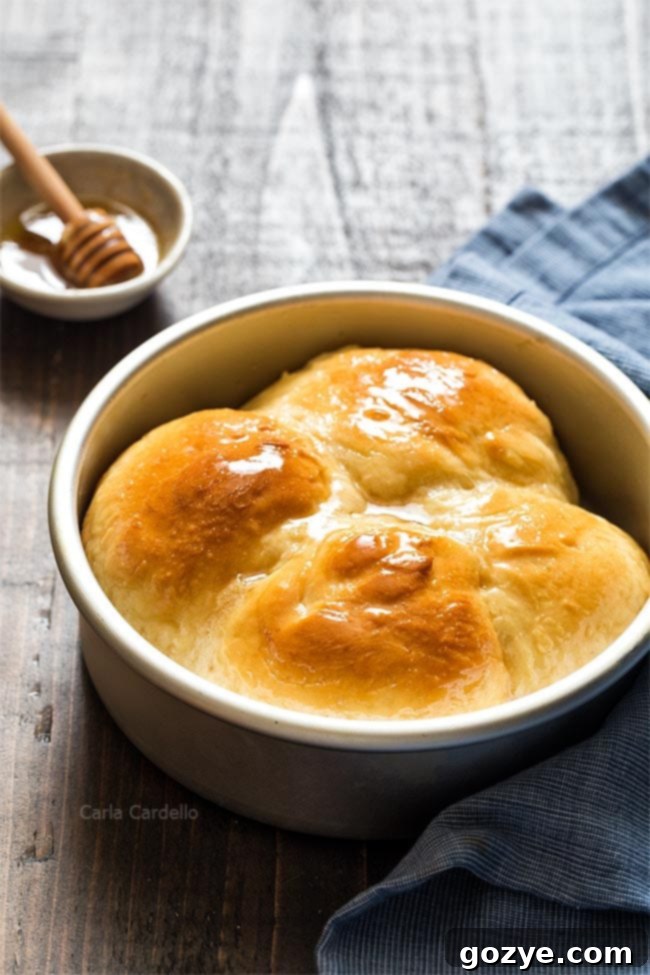
While your rolls are basking in the oven, it’s the perfect time to whip up the simple yet incredibly delicious honey butter glaze. In a small bowl, whisk together the melted unsalted butter, honey, and a pinch of salt. The salt is crucial, especially if using unsalted butter, as it balances the sweetness of the honey and enhances all the flavors – trust me on this!
As soon as the rolls emerge from the oven, immediately brush them generously with the warm honey butter glaze. The warm rolls will readily absorb the butter, infusing them with an extra layer of flavor and moisture. Let them sit for about 15 minutes to cool slightly and allow the glaze to set before serving warm. This brief cooling period also allows the internal structure of the rolls to stabilize, preventing them from becoming gummy when you tear into them.
Tips for Success with Your Homemade Dinner Rolls
- Master Milk Temperature: This is non-negotiable for active yeast. Always use a thermometer.
- Don’t Over-Flour: While extra flour helps with stickiness during kneading, too much will result in tough, dry rolls. Add flour sparingly.
- Listen to Your Dough: The “dough is ready” tests for kneading and rising (spring-back, finger indent) are crucial indicators.
- Patience is a Virtue: Don’t rush the rising times. The yeast needs its time to work for truly fluffy rolls.
- Experiment with Flavors: Don’t be afraid to try other herbs or cheeses in the dough!
How To Make Small Batch Yeast Rolls Ahead Of Time & Storage
One of the great advantages of baking with yeast is the flexibility to prepare elements ahead of time, which is especially helpful when planning for busy days or holiday meals.
Preparing Dough Ahead of Time:
Bread dough rises fastest at warm temperatures, but it will still rise in the refrigerator, just at a much slower pace. This is fantastic for make-ahead convenience!
After you’ve shaped your dough into individual rolls and placed them in the greased pan (step 5), instead of letting them rise at room temperature, you can loosely cover the pan with plastic wrap and refrigerate it overnight (up to 24 hours). The cold temperature will significantly slow down the yeast activity.
When you’re ready to bake the next day, remove the pan from the refrigerator and let it sit at room temperature for about 30-60 minutes, or until the rolls are no longer cold to the touch and have visibly started to puff up again. Then, proceed with brushing with milk and baking as directed.
How To Store Homemade Dinner Rolls:
Homemade small batch yeast rolls are truly at their absolute best when eaten the day they are made, while they are still warm and fresh from the oven. The texture and flavor are unparalleled. However, if you do have leftovers, you can store them in an airtight container at room temperature for up to 2 days. For longer storage, you can freeze baked rolls. Once completely cooled, place them in a freezer-safe bag or container and freeze for up to 1 month. To reheat, thaw at room temperature and warm gently in the oven or microwave.
More Yeast Recipes
Since you’ll likely have some active dry yeast leftover after making these delightful rolls, here are some more fantastic bread recipes using yeast to inspire your next baking adventure:
- Small Batch Hot Cross Buns: Perfect for spring and a lovely way to use up yeast.
- Homemade Crescent Rolls: Flaky, buttery, and incredibly satisfying.
- Sweet Potato Rolls by Foxes Love Lemons: A unique and flavorful twist on dinner rolls.

Small Batch Dinner Rolls (Eggless)
4-6 rolls
30 minutes
15 minutes
1 hour 30 minutes
2 hours 15 minutes
Small Batch Dinner Rolls are made from scratch yeast rolls brushed with homemade honey butter on top.
Ingredients
- 1 cup all-purpose flour
- 1 tablespoon granulated sugar
- 1 + 1/8 teaspoons (1/2 package or 1/8 ounce) active dry yeast
- 1/2 teaspoon table salt
- 1/4 teaspoon garlic powder (optional)
- 1/4 teaspoon onion powder (optional)
- 1/3 cup warm milk (120F-130F) plus more for brushing
- 1 tablespoon unsalted butter, melted and cooled slightly
- 1/3 cup shredded cheddar cheese (optional)
Honey Butter
- 1 tablespoon unsalted butter, melted
- 2 teaspoons honey
- 1/8 teaspoon salt (preferably kosher)
Instructions
- In a large mixing bowl, stir together 3/4 cup flour, sugar, yeast, salt, garlic powder, and onion powder.
- Add warm milk and melted butter. Beat on low speed (with paddle attachment if using a stand mixer) or by hand until smooth.
- Add the cheese if using and remaining 1/4 cup flour to form a soft dough. Dough should be slightly sticky. However, if it’s too sticky handle, you may add up to 4 tablespoons more flour.
- On lightly floured surface with floured hands, knead the dough for 4-6 minutes. The dough should be smooth, hold its shape without drooping, and indentations should immediately fill back up. Transfer to a lightly greased bowl, loosely cover with a towel, and rest in a warm, draft-free area for 1 hour.
Alternatively, you can knead the dough in your stand mixer with a dough hook for 4-6 minutes.
- Lightly grease a 6 inch round pan. Divide the dough into 4 large or 6 small pieces, shape into balls, and place in the pan. Cover loosely with a towel and let rise in a warm place until doubled, about 30 minutes.
At this point if you’re not baking them right away, loosely cover the pan with plastic wrap and refrigerate overnight. Let the pan sit out at room temperature for about 30 minutes before baking.
- Preheat the oven to 375F. Once ready, brush the rolls with some milk then bake 12-15 minutes or until golden brown.
- While the rolls are baking, make the honey butter: In a small bowl, whisk together the butter, honey, and salt. Once the rolls are done, immediately brush on the honey butter. Let cool about 15 minutes or until the glaze sets then serve warm.
Rolls are best eaten the day they’re made but can be stored in an airtight container at room temperature for up to 2 days.
Notes
- To make vegan dinner rolls: substitute water for the milk, vegetable oil for the melted butter, and omit the honey butter.
- Baking these for a holiday meal? Check out my menus for Easter Dinner For Two, Christmas Dinner For Two, and Thanksgiving Dinner For Two.
Recommended Products
As an Amazon Associate and member of other affiliate programs, I earn from qualifying purchases.
- 6 Inch Cake Pan
- Digital Thermometer
Did you make this recipe?
Let me know what you think! Rate the recipe above, leave a comment below, and/or share a photo on Instagram using #HITKrecipes
Source: Adapted from Taste of Home
First published June 10, 2012
