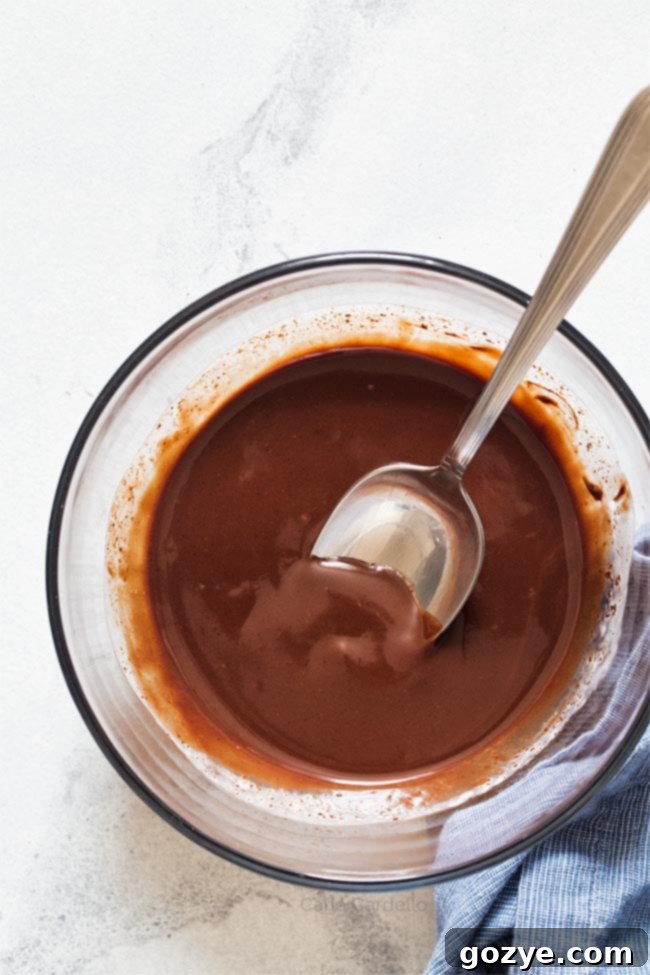
The Ultimate 2-Ingredient Chocolate Ganache Recipe: Perfect for Any Dessert
Unlock the secret to a professional-looking dessert finish with our incredibly simple, homemade chocolate ganache! This essential 2-ingredient recipe is a game-changer for your small cakes, decadent cheesecakes, cupcakes, and beyond. With an easy-to-remember ratio, you’ll achieve perfect results every time, elevating your baking with a rich, silky smooth chocolate glaze.
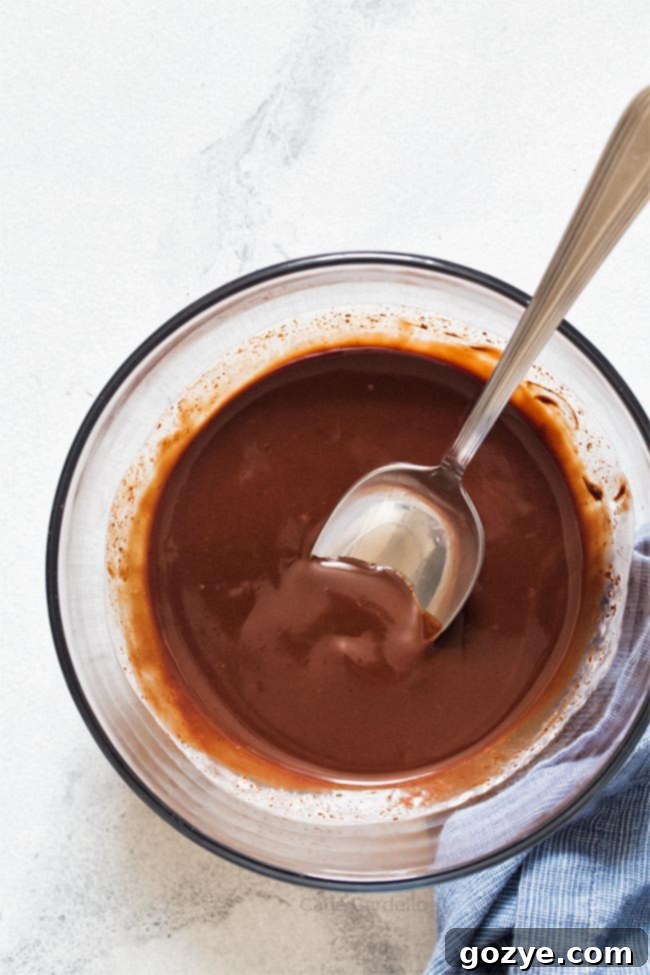
You might already be familiar with this simple ganache technique if you’ve tried my popular Small Chocolate Cake for Two recipe. Its versatility and ease make it a frequent star in my kitchen.
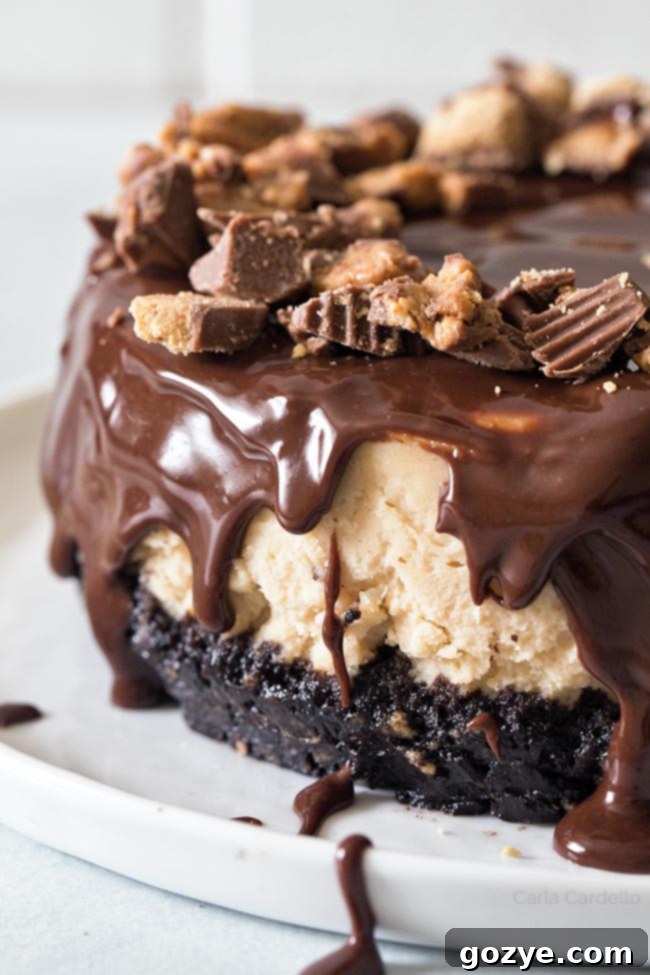
I recently rediscovered its magic when preparing my Peanut Butter Cheesecake, and it became clear that this humble yet luxurious topping deserved its own dedicated guide. While “ganache” sounds like a sophisticated French culinary term, it is, in fact, one of the easiest and most elegant chocolate glazes you can create with just two simple ingredients.
Often, I find myself reaching for homemade ganache over other options like my small batch chocolate frosting or chocolate whipped cream because of its unmatched richness and beautiful sheen. Its simple preparation belies its luxurious result, making it a favorite for both everyday treats and special occasions.
I recall a time working in rural south-central PA, bringing in a ganache-covered dessert for my colleagues. Though the exact dessert (likely my Triple Chocolate Cheesecake) has faded from memory, the enthusiastic, if slightly mispronounced, exclamations of “ganache?!” by one coworker remain vivid. It’s a testament to the irresistible allure of this chocolate wonder.
Beyond being incredibly decadent and delicious, making ganache offers a fantastic learning opportunity for any home baker, demystifying a seemingly complex technique. And in true form with my other recipes, this is a small batch ganache recipe, perfectly portioned for modest desserts. It yields enough to elegantly coat a 6-inch cheesecake, 7-inch cheesecake, a single-layer chocolate cake, or even a batch of small batch cupcakes. Its straightforward chocolate-to-cream ratio also makes it incredibly easy to scale up for larger projects, like a grand layer cake.
What Exactly is Chocolate Ganache?
Ganache (pronounced “guh-NAHSH”) is a fundamental and incredibly versatile confection in the culinary world, originating from French patisserie. At its core, it’s a luscious emulsion created by combining rich chocolate with hot heavy cream. The result is a remarkably silky smooth mixture that solidifies into a soft, melt-in-your-mouth glaze or filling, depending on its consistency and how it’s used. Its simplicity in ingredients belies the depth of flavor and luxurious texture it brings to any dessert.
While often used as a pourable glaze, ganache can be adapted to various consistencies—from a thin sauce perfect for dipping fruit to a thick, pipeable frosting, or even a firm base for chocolate truffles. The magic lies in the ratio of chocolate to cream, which we’ll explore in detail.
Ganache vs. Frosting: Understanding the Delicious Differences
While both ganache and frosting serve to adorn and enhance desserts, they are fundamentally different in their composition, preparation, and resulting texture. Understanding these distinctions will help you choose the perfect topping for your specific baking needs.
Traditional buttercream frosting, for example, is typically made by creaming together butter, powdered sugar, and often milk or cream, along with flavorings. This process incorporates air, resulting in a light, fluffy, and opaque frosting that can be easily piped and holds its shape well. Its texture is sweet and creamy, with a distinct buttery note.
Ganache, on the other hand, is a much richer, denser, and incredibly silky creation. It’s an emulsion, meaning it’s a stable mixture of two liquids that don’t typically mix well (fat from chocolate/cream and water from cream). It’s made by simply combining finely chopped chocolate with heated heavy cream and gently stirring until the chocolate fully melts and a smooth, uniform mixture forms. As it cools, ganache firms up into a soft, shiny glaze, much like the delicate sheen of my Bundt cake glaze for my small Bundt cake. Its texture is dense, smooth, and melts beautifully on the tongue, offering an intense chocolate flavor without the overwhelming sweetness often found in frostings.
While its primary use is as a glaze or filling, ganache can also be transformed into a delectable frosting. By allowing it to cool and then whipping it, you can create a light and airy “whipped ganache frosting,” similar to what I’ve done for my peanut butter ganache frosting. This versatility makes ganache a valuable tool in any baker’s arsenal.
Essential Ingredients for Perfect Ganache
The beauty of homemade chocolate ganache lies in its utter simplicity. You only need two core ingredients, but their quality and type are paramount to achieving that coveted silky smooth texture and rich flavor.
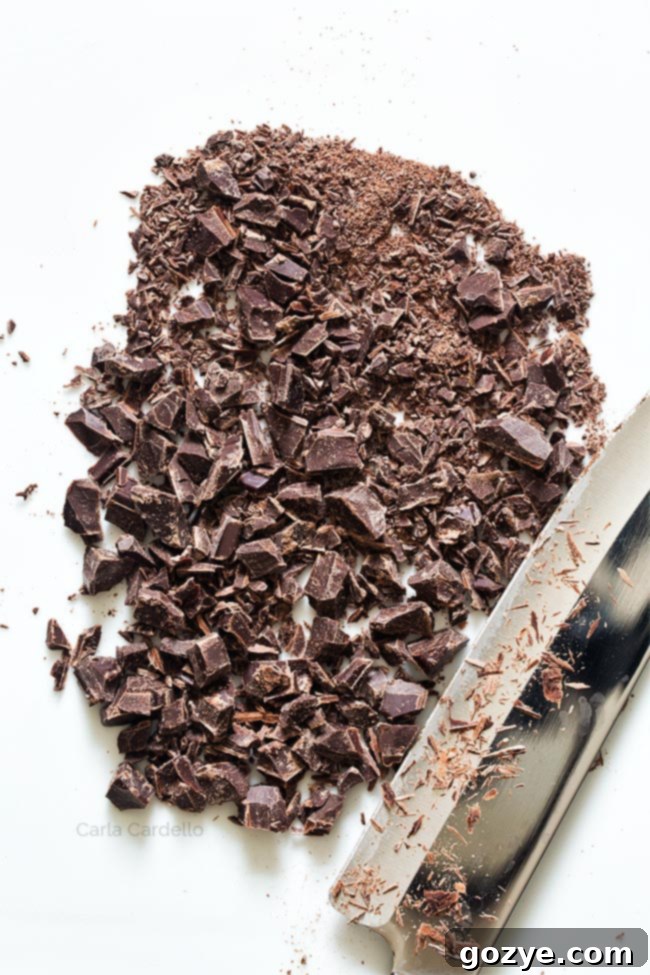
- High-Quality Chocolate: This is where you shouldn’t skimp. Always opt for a high-quality baking chocolate, preferably in bar form, and chop it finely. Avoid chocolate chips if possible, as they often contain stabilizers that prevent them from melting smoothly, resulting in a grainy or pasty ganache.
- Semi-Sweet Chocolate: This is my go-to choice and generally the best chocolate for ganache, typically containing 40%-60% cacao. It strikes a perfect balance, offering a rich chocolate flavor without being overly bitter or sweet.
- Bittersweet Chocolate: For a more intense, less sweet ganache, bittersweet chocolate (often 60% cacao and above) is an excellent choice. It provides a deeper chocolate profile that pairs wonderfully with certain desserts.
- White Chocolate: While technically not chocolate (as it contains no cocoa solids), white chocolate ganache is equally delightful. Choose a good quality white chocolate bar for the best melting and flavor. Note that white chocolate ganache often requires a slightly different ratio due to its higher sugar and fat content.
- Avoid Milk Chocolate: While tempting, milk chocolate is generally not recommended for ganache because its lower cacao content and higher sugar often result in a less pronounced chocolate flavor and a more fragile emulsion.
- Heavy Cream: This ingredient is non-negotiable. You absolutely need heavy cream, also known as heavy whipping cream, due to its high fat content (typically 36% or more). The fat in the cream is crucial for creating a stable emulsion with the chocolate, giving ganache its characteristic smooth texture and ability to set.
- No Substitutions: Do not substitute milk, half-and-half, or light cream. These alternatives have significantly lower fat content and will not emulsify properly, leading to a thin, watery, or separated ganache that simply won’t set.
- Room Temperature (Optional but Recommended): While not strictly necessary, bringing your heavy cream to room temperature can help ensure a smoother, faster emulsion when combined with the hot chocolate.
While a classic ganache uses just these two, don’t hesitate to experiment! You can infuse your ganache with additional flavors. For instance, you can substitute a portion of the cream with beer or coffee, much like I did for my rich chocolate stout cake, to create a unique beer ganache with a delightful depth of flavor.
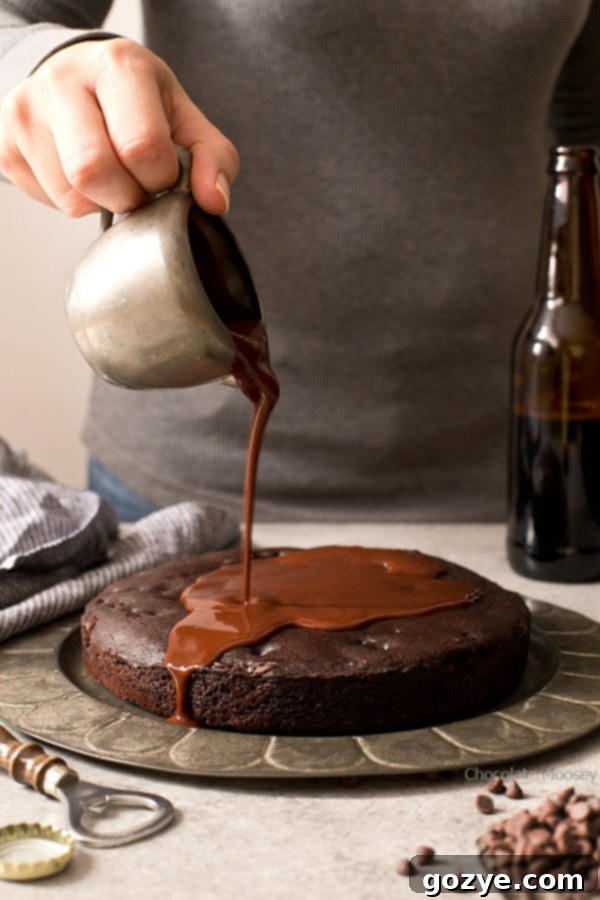
Understanding Ganache Ratios: The Key to Versatility
The magic of ganache isn’t just in its two ingredients, but in their ratio. By adjusting the proportion of chocolate to cream, you can achieve a variety of consistencies, transforming it from a pourable glaze to a thick filling, or even a pipeable frosting. The more cream you use, the softer and thinner your ganache will be; conversely, more chocolate results in a firmer, thicker ganache.
1:1 Ratio (Equal Parts Chocolate to Cream): The Versatile Glaze
This is the ratio I use most frequently and the focus of this particular recipe. A 1:1 ratio means using equal weights of chocolate and heavy cream. For example, if you’re using 2 ounces of chocolate, you’ll use 2 ounces (or 1/4 cup) of heavy cream. This balance creates a ganache with a beautifully silky smooth texture and a soft, yielding bite once set. It’s thin enough to pour effortlessly over your desserts, creating a glossy, elegant finish. While it firms up wonderfully in the refrigerator, it never becomes crunchy like a hardened chocolate shell, maintaining its delightful melt-in-your-mouth quality.
This ratio is perfect for:
- Creating a beautiful drip on cakes and cupcakes.
- Glazing cheesecakes and tarts.
- Making a pourable sauce for ice cream or fruit.
- Providing a soft, luscious filling for cakes or pastries.
2:1 Ratio (Two Parts Chocolate to One Part Cream): For Truffles and Firm Fillings
When you double the amount of chocolate compared to cream, you’ll achieve a much thicker, richer ganache, almost resembling a soft fudge. If you’re using 2 ounces of chocolate, you’ll want to use 1 ounce (or 2 tablespoons) of heavy cream. This firm consistency is ideal for applications where you need the ganache to hold its shape well.
This ratio is excellent for:
- Forming decadent homemade chocolate truffles.
- Creating a thick, pipeable filling for macarons, tarts, or layered cakes.
- Making a denser coating for candies or cake pops.
1:2 Ratio (One Part Chocolate to Two Parts Cream): The Thin Dipping Glaze
Using twice the amount of cream compared to chocolate will result in a much thinner, more fluid ganache. For 2 ounces of chocolate, you’d use 4 ounces (or 1/2 cup) of heavy cream. This consistency is perfect for light glazes and dipping applications where you want a delicate coating rather than a thick layer.
This ratio is fantastic for:
- Dipping fresh strawberries or other fruits.
- Glazing donuts, eclairs, or other pastries.
- Creating a thinner, pourable sauce.
- Fun fact: You can even enjoy this ratio as a luxurious thick hot chocolate (though I’d typically use whole milk instead of cream for drinking, as setting isn’t a concern!).
Whipped Ganache (Cooling and Whipping the 1:1 or 2:1 Ratios)
For an airy, pipeable frosting, you can take a cooled 1:1 or 2:1 ratio ganache and whip it with an electric mixer. As it whips, it incorporates air, lightening its color and creating a fluffy texture that’s perfect for frosting cakes and cupcakes. This adds another layer of versatility to this incredible chocolate creation.
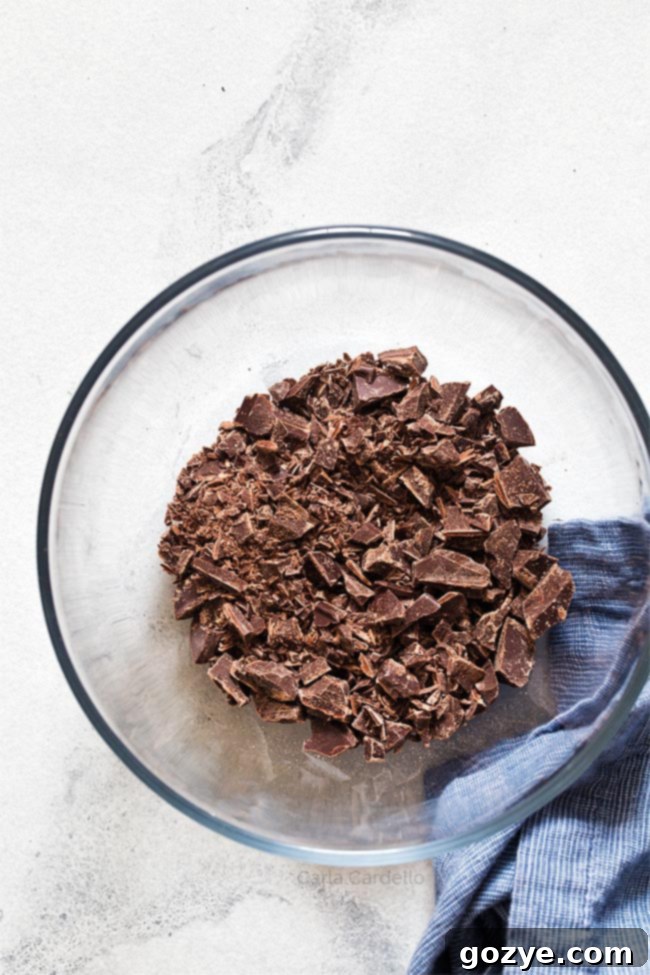
How to Make Homemade Chocolate Ganache: A Step-by-Step Guide
Mastering the art of making ganache is surprisingly simple, yet it yields profoundly delicious results. Follow these steps for a perfect, silky smooth batch every time.
- Prepare Your Chocolate: Begin by adding your finely chopped, high-quality chocolate to a heat-proof bowl. The key here is “finely chopped.” Smaller, more uniform pieces of chocolate will melt more evenly and quickly, preventing lumps and ensuring a perfectly smooth ganache.
- Heat the Heavy Cream: In a small saucepan, gently warm your heavy cream over medium heat until it just begins to simmer. You’ll see tiny bubbles forming around the edges of the pan. It’s crucial not to let the cream come to a rolling boil, as this can make it too hot and potentially scorch the chocolate, leading to a grainy texture. I highly recommend using the stovetop for this step, as it provides more even heating compared to a microwave, ensuring consistent results. Only use a microwave if it’s your absolute only heat source, and heat in short bursts, stirring frequently.
- Combine and Rest: Carefully pour the hot cream directly over the chopped chocolate in the bowl. Do not stir immediately! Let the mixture sit undisturbed for about 2-3 minutes. This crucial resting period allows the hot cream to begin melting the chocolate, gradually bringing both ingredients to a more balanced temperature. This step is vital for a smooth emulsion; stirring too soon can cause the chocolate to seize or separate, resulting in a gritty, broken ganache.
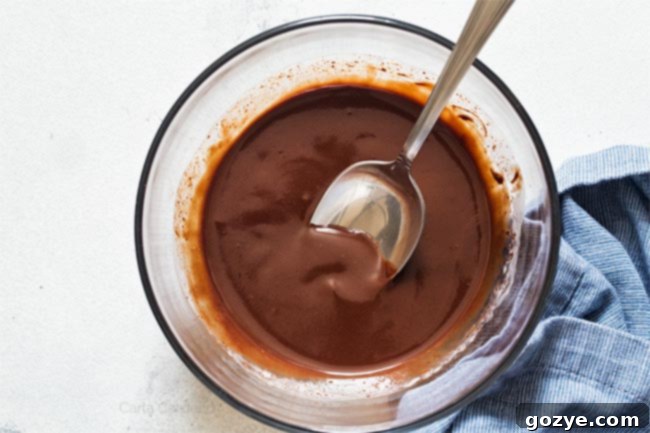
- Slowly Stir to Emulsify: Once the chocolate has visibly softened and relaxed, begin to stir the mixture gently. Use a spatula or whisk and stir slowly in one consistent direction, working from the center outwards. Do not rush this process or introduce too much air. Continue stirring until the chocolate is completely melted and the ganache is utterly smooth, glossy, and uniform in color and texture. The mixture should transform into a beautiful, homogenous emulsion.
- Ready to Pour (or Troubleshoot): At this point, your ganache is likely ready to pour over your chosen dessert! However, if you find your ganache still has a few stubborn lumps, or if it appears slightly separated, don’t despair.
- For Lumps: If there are still small lumps of chocolate not fully melted, create a makeshift double boiler. Fill a saucepan (smaller than your ganache bowl) with about an inch or two of water and bring it to a gentle simmer. Place your bowl of ganache directly on top of the saucepan, ensuring the bottom of your bowl does not touch the simmering water. The steam from the saucepan will gently warm the bowl, helping to melt the remaining chocolate. Continue stirring slowly until completely smooth. Be extremely careful not to get any water or steam directly into the chocolate, as even a tiny drop can cause it to seize and become thick and grainy.
- For Separated Ganache: If your ganache looks oily or separated, it might be too hot or too cold, or the emulsion has broken. Try adding a tablespoon of lukewarm water or cream, stirring very slowly and gently from the center. Sometimes, a quick, brief whisk with an immersion blender can also help bring it back together, but only as a last resort and with extreme caution.
Once your ganache reaches that perfect, glossy consistency, it’s ready for immediate use. Enjoy the rich, decadent flavor and beautiful finish it adds to your baking creations!
Do You Need to Refrigerate Ganache?
Once prepared, ganache can safely be kept at cool room temperature (below 70°F or 21°C) for up to 2 days, especially if made with a higher chocolate-to-cream ratio. This makes it convenient for desserts that will be consumed relatively quickly.
However, I always recommend transferring ganache-covered desserts or any leftover ganache to the refrigerator for optimal freshness and texture. If the chocolate gets too warm, especially in warmer environments, the ganache can become quite soft and messy, making it difficult to cut and serve cleanly. Refrigeration helps it firm up to a perfect consistency for slicing and also extends its shelf life significantly.
Storing and Reheating Ganache
- Refrigeration: Store leftover ganache in an airtight container in the refrigerator for up to 1 week. It will firm up considerably when chilled.
- Freezing: For longer storage, ganache can be frozen in an airtight container for up to 1 month. Thaw it overnight in the refrigerator before reheating.
- Reheating: To bring refrigerated or frozen ganache back to a pourable consistency, gently reheat it. You can do this by placing the container in a bowl of warm water (bain-marie method) or by microwaving it in short, 15-20 second bursts, stirring thoroughly between each burst, until it’s smooth and pourable again. Be careful not to overheat.
Incredible Uses For Your Homemade Chocolate Ganache
Now that you’ve mastered the art of making this decadent chocolate ganache, the possibilities for its use are virtually endless! Here are some of my absolute favorite ways to incorporate this versatile topping into your baking, transforming ordinary desserts into extraordinary delights:
- Elegant Glaze: Pour it over a 6-Inch Chocolate Cheesecake with Oreo Crust or a 4-Inch Chocolate Cheesecake for a stunning, glossy finish.
- Drizzle or Dip: Use a thinner ganache (1:2 ratio) to dip fresh fruit, cookies, or even miniature pastries. It’s perfect for Mini Cheesecakes or No Bake Mini Cheesecakes.
- Rich Filling: Spread it between cake layers for a dense, flavorful filling, ideal for a Mini Boston Cream Pie or as a luscious center for Boston Cream Cupcakes.
- Intense Frosting: If you whip cooled ganache, it transforms into a light, pipeable frosting, perfect for decorating a Chocolate Peanut Butter Cake or a Peanut Butter Birthday Cake.
- Sauce for Warm Desserts: Drizzle warm ganache over ice cream, brownies, or even a Chocolate Skillet Cake for an extra touch of indulgence.
- Specialty Creations: It’s the crowning glory for recipes like No-Bake Chocolate Covered Strawberry Pie or the decadent Peanut Butter Ganache Brownies by Love and Olive Oil.
- Homemade Truffles: With a firmer ganache (2:1 ratio), you can easily roll and coat your own luxurious chocolate truffles for a homemade confectionary treat.
Frequently Asked Questions About Ganache
Q: Can I use milk chocolate for ganache?
A: While technically possible, it’s generally not recommended for best results. Milk chocolate has a lower cacao content and higher sugar, which can lead to a less pronounced chocolate flavor and a more fragile emulsion, making it prone to breaking or not setting properly. Semi-sweet or bittersweet chocolate provides a superior texture and flavor.
Q: Can I substitute milk or half-and-half for heavy cream?
A: No, absolutely not. Heavy cream is essential due to its high fat content, which is crucial for the ganache to emulsify correctly and set into the desired consistency. Milk or half-and-half have significantly lower fat content and will result in a watery, separated, and ultimately failed ganache.
Q: What if my ganache looks oily or separates?
A: This often means your emulsion has broken, possibly due to overheating, underheating, or stirring too vigorously. Don’t panic! Try adding a tablespoon of lukewarm water or cream, stirring very slowly from the center. If it’s still resistant, a quick, brief pulse with an immersion blender can sometimes rescue it. Ensure all your equipment is dry.
Q: How long does homemade ganache last?
A: Poured ganache on a dessert or stored ganache in an airtight container can last up to 2 days at cool room temperature. In the refrigerator, it will keep for up to 1 week. For longer storage, it can be frozen for up to 1 month.
Q: Can I freeze ganache?
A: Yes! Ganache freezes beautifully. Store it in an airtight container for up to 1 month. When you’re ready to use it, thaw it overnight in the refrigerator, then gently rewarm it using a bain-marie or short bursts in the microwave until it reaches your desired consistency.
Q: What kind of chocolate is truly best for ganache?
A: For a classic, balanced flavor, semi-sweet chocolate (40-60% cacao) is highly recommended. For a richer, more intense chocolate experience, opt for bittersweet chocolate (60%+ cacao). Always choose high-quality baking chocolate bars and finely chop them for the best melting and emulsification.
How To Make Ganache (Small Batch)
1/2 cup (enough to elegantly cover a 6-inch cake or small dessert)
15 minutes
5 minutes
20 minutes
Learn how to effortlessly make the perfect chocolate ganache for your small cakes, decadent cheesecakes, and so much more! This homemade chocolate ganache is a simple 2-ingredient recipe with an incredibly easy ratio to remember, ensuring a flawless, silky smooth result every time.
Ingredients
- 2 ounces high-quality semisweet chocolate, finely chopped (essential for smooth melting; avoid chocolate chips)
- 1/4 cup (2 ounces) heavy whipping cream, preferably at room temperature (do not substitute with milk or half-and-half, as fat content is crucial)
Instructions
- Place the finely chopped chocolate into a heatproof bowl. Ensure it’s chopped as small and evenly as possible for optimal melting.
- In a small saucepan, gently heat the heavy cream over medium heat until it just begins to simmer, showing small bubbles around the edges. Do not let it come to a rolling boil.
- Carefully pour the hot cream directly over the chopped chocolate in the bowl. Allow it to sit undisturbed for 2-3 minutes, giving the chocolate time to soften and begin melting. Then, slowly and gently stir the mixture together in one direction until it becomes completely smooth, glossy, and fully emulsified.
If any chocolate lumps remain, place the bowl over a pan of simmering water (creating a double boiler), ensuring the bottom of your bowl does not touch the water. Continue stirring until smooth. Be very careful not to get any water or steam into the chocolate, as this can cause it to seize.
- Immediately pour the warm, silky ganache over your desired dessert and spread evenly as needed. For the best set and clean serving, refrigerate for at least 15 minutes, or until the ganache firms up. Your homemade ganache can be kept at cool room temperature for up to 2 days or stored in the refrigerator in an airtight container for up to 1 week.
Notes
- To achieve a firmer ganache, perfect for rolling into truffles or using as a thick filling, adjust the ratio to 2 ounces chocolate + 2 tablespoons cream.
- For a thinner ganache, ideal for delicate dipping or a light glaze, use 2 ounces chocolate + 1/2 cup cream.
- Looking for delicious ideas to use your fresh ganache? It’s divine poured over my Small Chocolate Cake, as a rich topping for a Chocolate Cheesecake with Oreo Crust, or enhancing a creamy Peanut Butter Cheesecake.
- You can also allow a 1:1 or 2:1 ganache to cool completely, then whip it with an electric mixer for a light, airy whipped ganache frosting!
Did you make this recipe?
Let me know what you think! Rate the recipe above, leave a comment below, and/or share a photo on Instagram using #HITKrecipes
