Mastering Custom White Balance: Achieve Perfect Colors in Your Photography
In the vast world of photography, achieving accurate and vibrant colors is paramount to creating stunning images. Whether you’re capturing mouth-watering food shots, breathtaking landscapes, intimate portraits, or grand wedding ceremonies, color fidelity is key. While modern cameras offer a range of automatic and preset white balance settings, relying solely on them can often lead to undesirable color casts. This comprehensive guide will demystify one of the most essential camera techniques: **customizing white balance**. By mastering this fundamental skill, you can ensure your colors are spot-on every single time, regardless of the challenging lighting conditions you face.
You’re likely familiar with your camera’s options to change white balance to ‘Automatic,’ ‘Outdoors,’ ‘Indoors,’ or specific presets like ‘Cloudy’ or ‘Fluorescent.’ While these presets are convenient, they often fall short because of the immense number of variables in any given lighting situation. The camera tries its best to guess the correct color temperature, but these guesses can frequently be inaccurate, resulting in photos with unnatural blue, yellow, or green tints. Instead of letting your camera make critical color decisions, learning to customize your white balance empowers you to take full control and guarantee true-to-life color reproduction in every shot. This level of precision is invaluable for professional results and a consistent aesthetic across your photographic work.
What Exactly is White Balance and Why Does it Matter?
At its core, white balance (WB) is a camera setting that tells your camera what the color white should look like under a specific light source. It’s the mechanism that ensures objects that are truly white in real life appear white in your photographs, rather than having an unwelcome color cast. When a photo appears too “cool,” it has an excessive blue tint, making the scene feel cold or sterile. Conversely, a photo that’s too “warm” will exhibit a golden or orange tint, which, while sometimes desired for artistic effect, can often make colors look muddy or inaccurate.
The color of light is measured in Kelvin temperature (K), a scale that describes the perceived warmth or coolness of a light source. Lower Kelvin values (e.g., 2000K-3000K) correspond to warmer, more orange light (like candlelight or tungsten bulbs), while higher Kelvin values (e.g., 5500K-7000K+) represent cooler, bluer light (like daylight on an overcast day or open shade). Understanding Kelvin temperature is crucial because your camera needs to compensate for these varying light temperatures to render colors accurately. Without proper white balance, your images can lose their impact, making subjects appear less appealing and detracting from the overall quality.

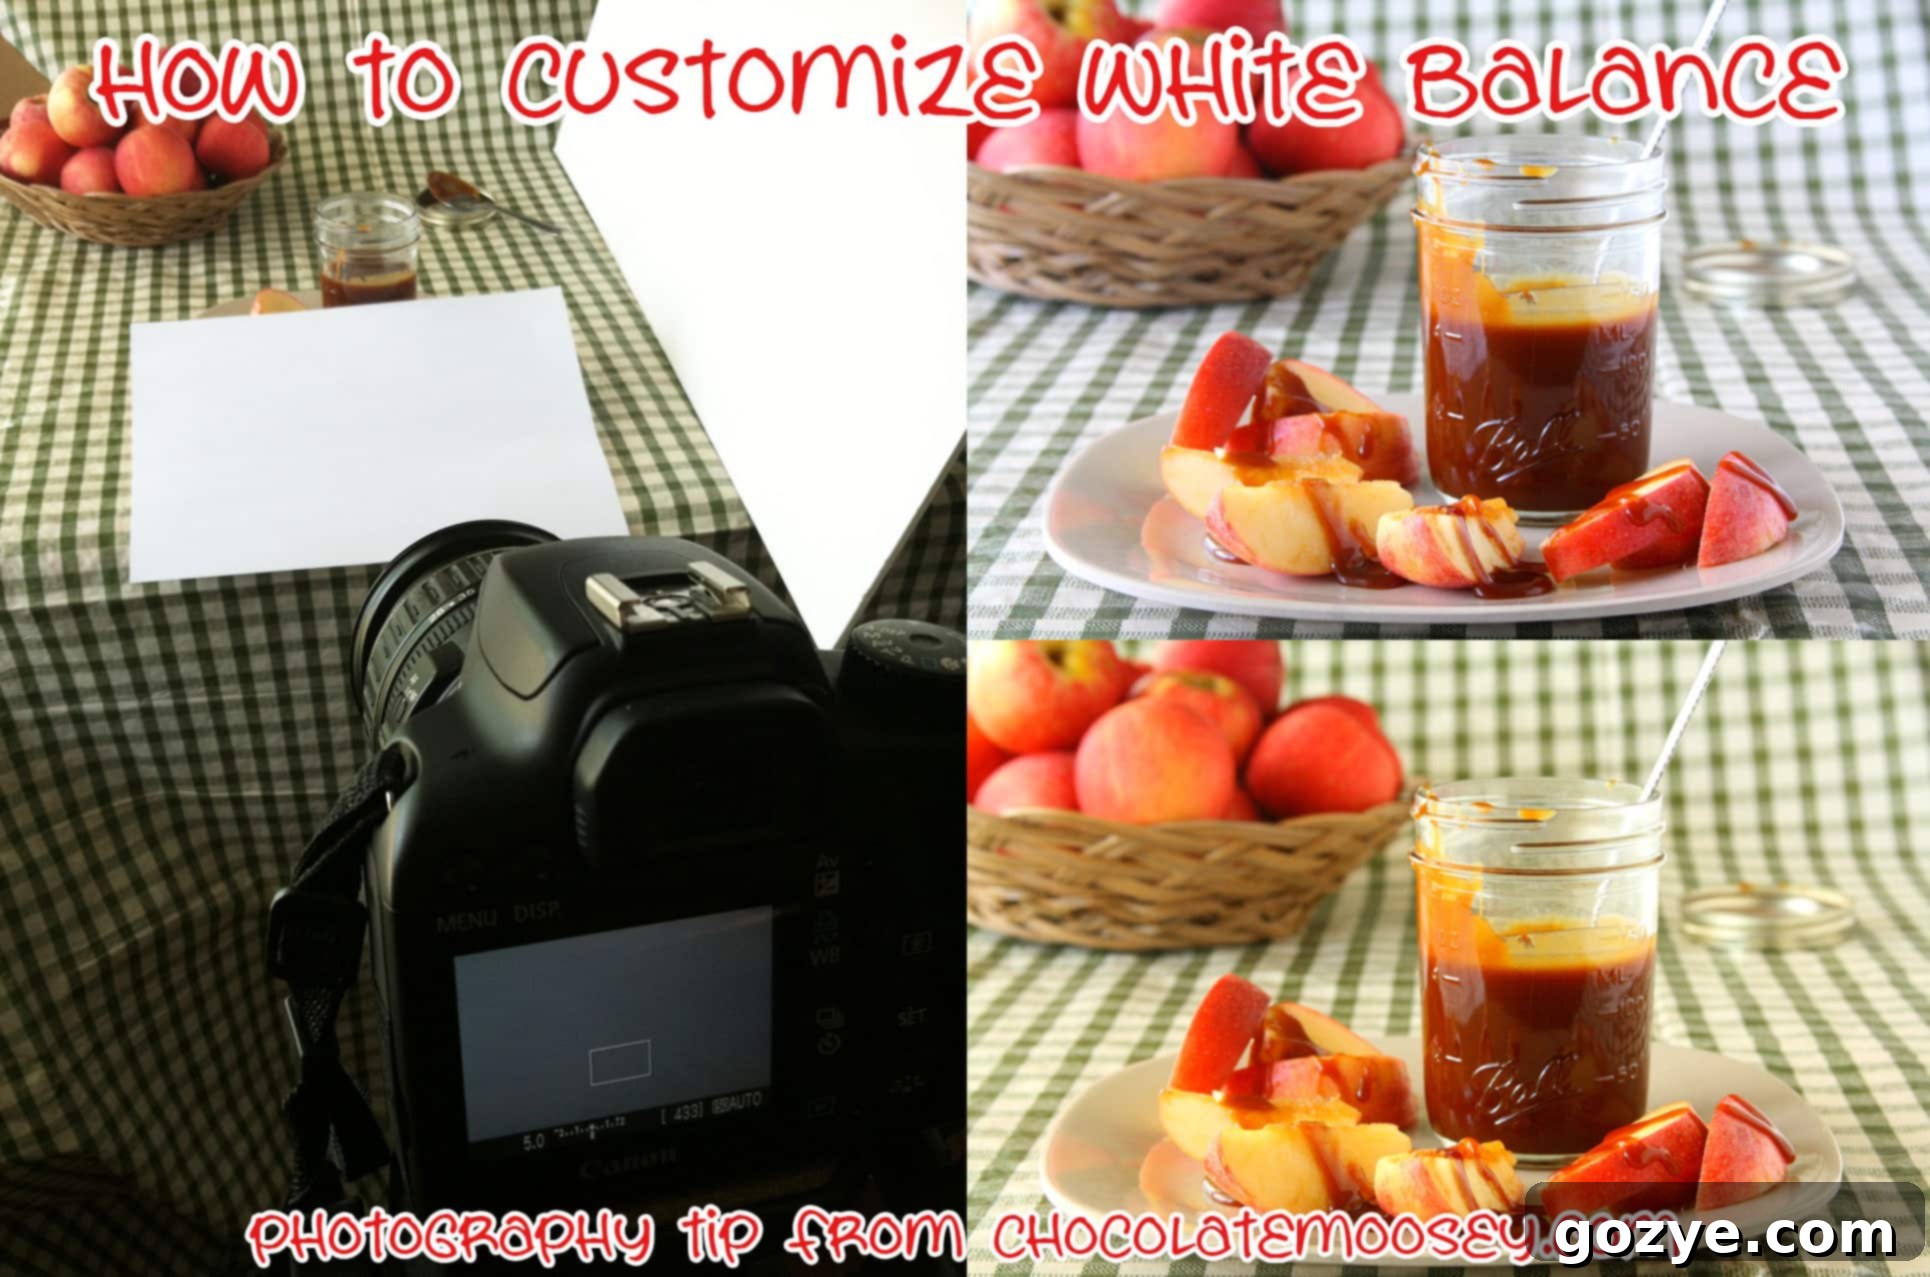
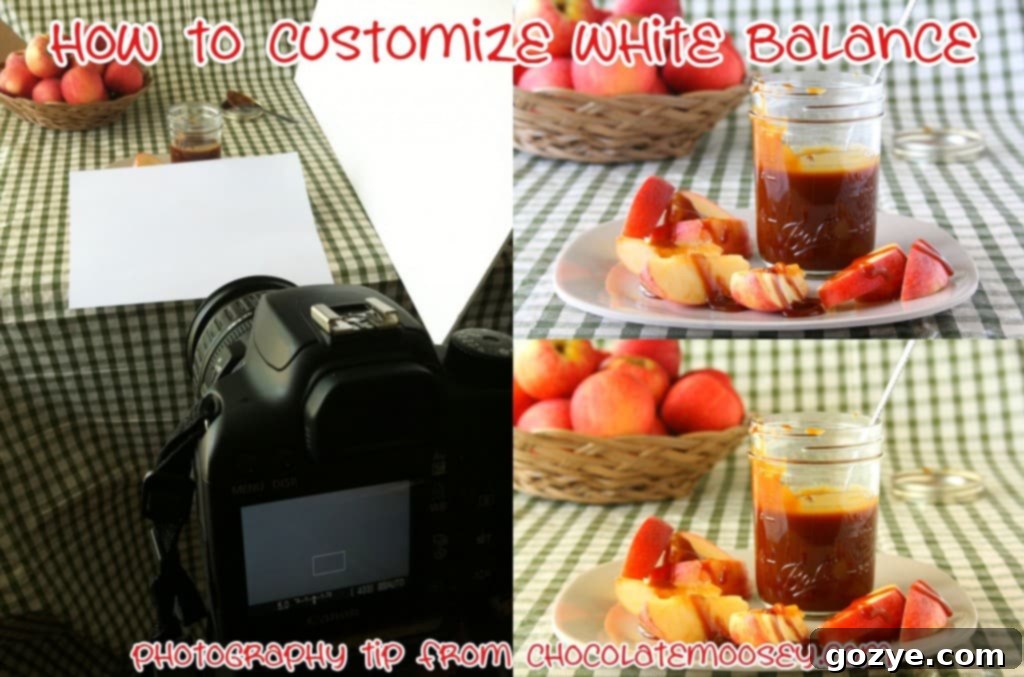
Caramel Apple Butter Cheesecake Dip: Auto WB on left; Custom WB on right
The Challenges of Various Lighting Scenarios
Consider outdoor lighting, which seems straightforward but is anything but consistent. Is it a bright, sunny day with harsh light? Are there soft, diffused clouds covering the sun? Are these fluffy white clouds or heavy, dark storm clouds? Does the sun play hide-and-seek, appearing and disappearing every few minutes? What is the sun’s position – is it low in the west, rising in the east, directly overhead, or behind your subject? Is it early morning, high noon, or the soft light of early evening (the golden hour)? Each of these variables dramatically alters the color temperature of the light, presenting a unique challenge for your camera’s automatic white balance system. A camera set to “Daylight” might work on a clear day, but will often introduce a blue cast on a cloudy day, or an orange cast during sunset.
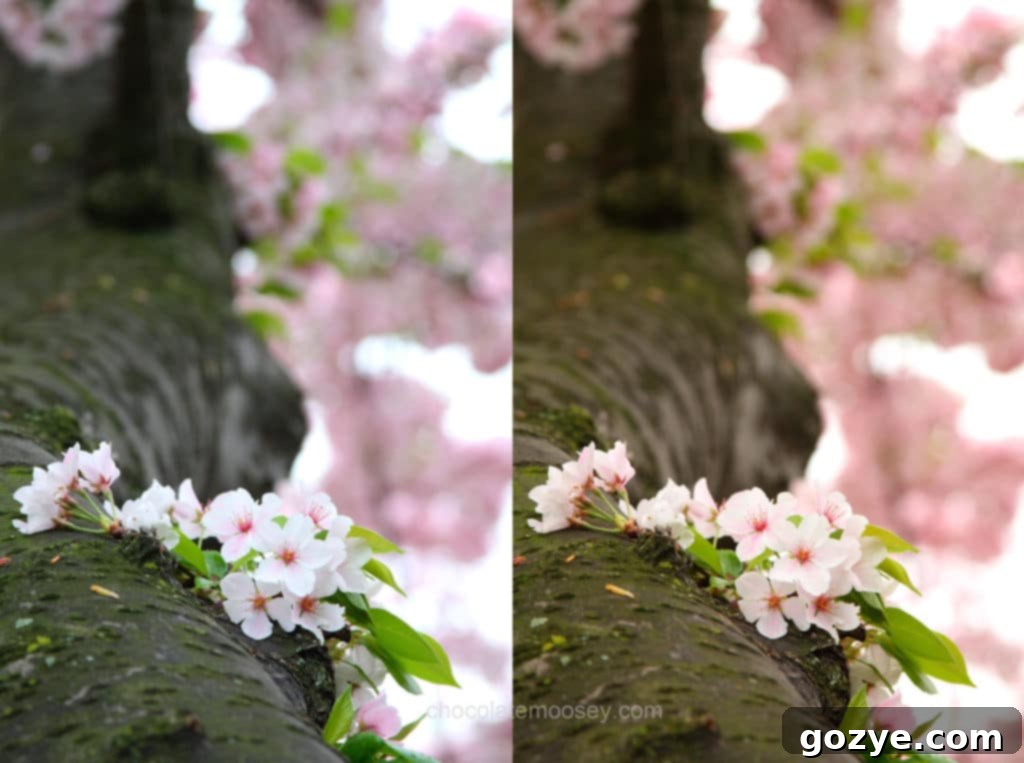
Cherry Blossoms in DC: Auto WB on left; Custom WB on right
Indoor lighting introduces its own complex set of variables. Are there windows providing natural light? Are they large and south-facing, or small and north-facing? Are you positioned right next to them, or far away in a dimly lit corner? What about the color of your walls – are they neutral, or do they reflect a color cast onto your subject? What kind of artificial light bulbs are you using – flickering fluorescent tubes, warm tungsten/incandescent bulbs, or specialized daylight-balanced LEDs? Are these lights directly overhead, creating harsh shadows, or diffused off to the side? The presence of mixed lighting – for instance, natural light from a window combined with artificial overhead lights – creates a particularly difficult scenario for automatic white balance, often resulting in conflicting color temperatures that yield an unappealing, muddled look.

White Chocolate Candy Corn M&M Cookies: Auto WB on left; Custom WB on right
Given this incredible array of scenarios, how can one generalized camera setting possibly accommodate all of these situations with perfect accuracy? While modern cameras, both DSLRs and mirrorless systems, offer an increasing number of white balance presets (like ‘Shade,’ ‘Cloudy,’ ‘Fluorescent H,’ ‘Fluorescent L’), they are still generalized solutions. To achieve truly accurate white balance every single time, you must take the extra step to customize your white balance manually, tailoring it precisely to your current lighting conditions. This manual calibration provides a neutral reference point for your camera, ensuring colors are rendered exactly as they should be.

Apple Turnovers: Auto WB on left; Custom WB on right
Why Custom White Balance is Crucial for Professional Photography
As we’ve explored, lighting conditions fluctuate wildly, making it imperative to set the white balance for the specific light present at that particular moment. Have you ever encountered a situation where your photo looks wrong with the ‘Outdoor’ white balance setting, but also looks equally wrong with ‘Indoor’ white balance? You cycle through all the available options, yet none seem to capture the true colors of your scene. This is where custom white balance becomes your secret weapon.
Customizing white balance allows you to explicitly tell your camera what a true white looks like under your exact lighting conditions, removing all guesswork. This is especially vital in complex lighting scenarios, such as when you’re mixing natural light from a window with artificial light sources, or shooting indoors with various types of bulbs. Imagine photographing an art exhibit inside an observation tower, where artifacts are lit by spotlights, but significant natural light streams in from large windows. Auto white balance would struggle immensely, likely resulting in some areas appearing blue and others orange. Custom white balance ensures a consistent, accurate color rendition throughout the entire image, providing a professional and polished result that would otherwise require extensive, time-consuming corrections in post-production.

Murray ready for some football: Auto WB on left; Custom WB on right
Achieving accurate colors in-camera not only saves countless hours in editing but also produces a higher quality image overall. While you can adjust white balance in post-production, especially when shooting in RAW, making significant corrections can degrade image quality, introduce banding, or make skin tones look unnatural. Getting it right at the source preserves the integrity of your image and delivers a superior foundation for any further creative edits.

Apple Nachos: Auto WB on left; Custom WB on right
How to Customize White Balance: A Step-by-Step Guide
Customizing white balance is a straightforward process once you understand the steps. You don’t necessarily need expensive, specialty white balance cards, although they do offer the most precise reference. The key is to find something that is truly neutral white or a medium gray to photograph. A plain piece of white paper, a white napkin, or a matte white plate can often serve as an effective substitute. When choosing your reference, try to avoid items with text, patterns, or any subtle color tints, as these can mislead your camera. A neutral gray card is often preferred over white as it offers a more consistent light reflectance across varying light intensities.
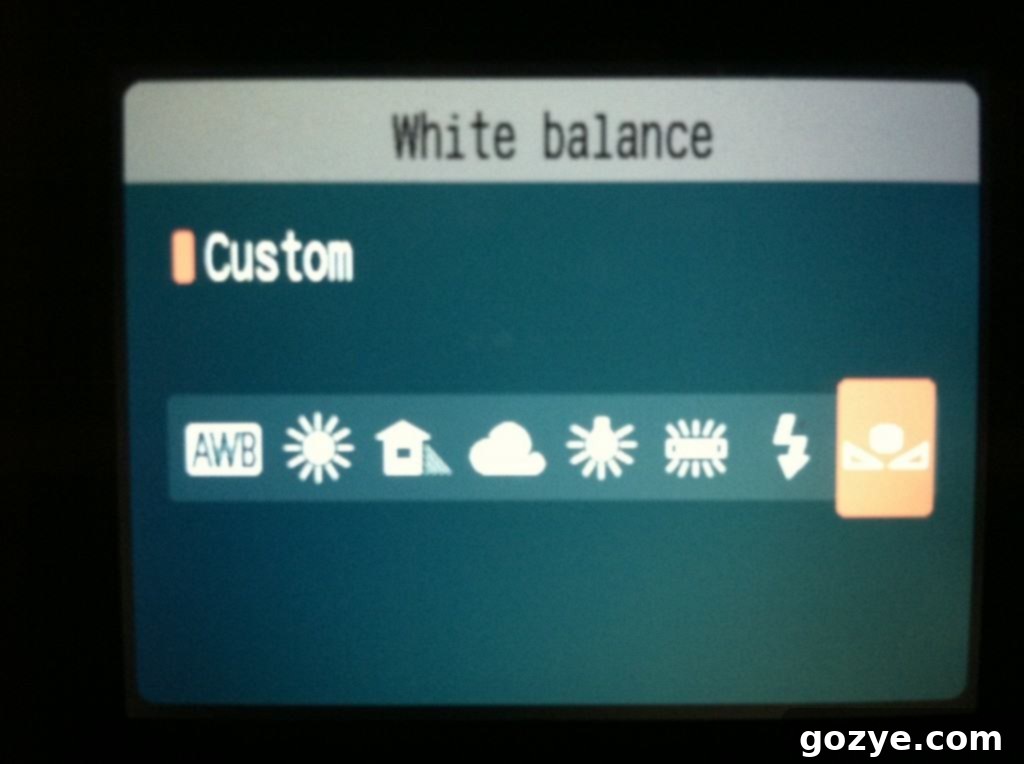
Step 1: Set Your Camera to Custom White Balance Mode
The first step is to navigate your camera’s settings to find the Custom White Balance (often abbreviated as ‘CWB’ or ‘PRE’ for preset manual) mode. This process varies slightly between camera manufacturers (e.g., Canon, Nikon, Sony), so consulting your camera’s manual for precise instructions is always recommended. Typically, you’ll access this through your camera’s main menu, a dedicated WB button, or a quick menu (Q button). Once in the WB settings, select the option to register a custom white balance reading.
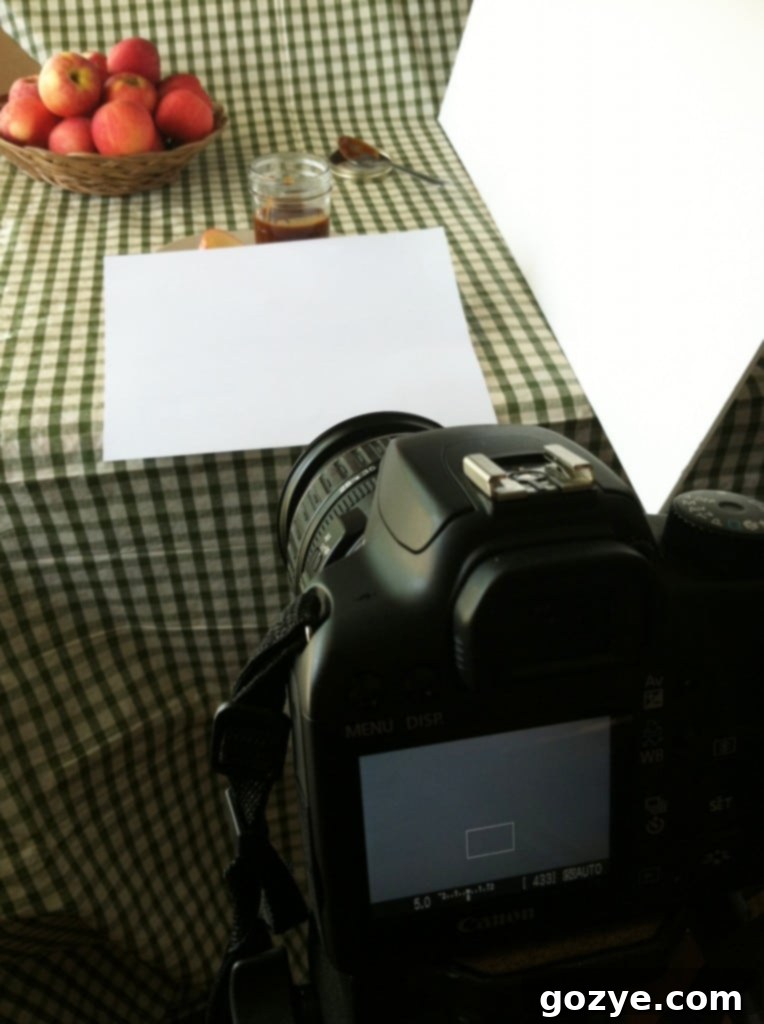
Step 2: Position Your White Reference
Next, place or hold your chosen white or gray reference item in the exact spot where your main subject will be. It is absolutely crucial that the white object is illuminated by the same light source that will fall on your subject. If you are using natural light, such as sunlight coming through a window, take the white balance picture just before you begin your shoot. Remember that natural light is constantly shifting – the sun moves, clouds pass by, and the intensity and color temperature change even within minutes. A white balance shot taken at noon might be significantly different from one taken at 1:00 PM, especially outdoors. For artificial lighting, ensure the reference is lit by all the light sources you intend to use.
Step 3: Capture the White Reference Image

Once your white reference is correctly positioned, frame it in your viewfinder or on your LCD screen. Zoom in or get close enough so that the white item fills a significant portion – ideally, the majority – of your frame. The goal here isn’t to create a perfectly focused, artistic shot of the paper; it’s to provide your camera with an even, pure sample of white under the current lighting conditions. You can even set your lens to manual focus to ensure the camera doesn’t hunt for focus on a flat surface. Take the picture. This image will serve as the reference point for your camera to calibrate its white balance.
Step 4: Register the Custom White Balance Setting
Now, you’ll need to tell your camera to use the image you just took as its custom white balance reference. Again, consult your camera manual as menus can vary. Generally, you will go back into your camera’s white balance settings, select ‘Custom WB’ or ‘Set Custom WB,’ and then browse through your captured images to select the photograph of your white reference item. Confirm your selection (often by pressing an ‘OK’ or ‘Set’ button). Your camera will then analyze this image and store the appropriate white balance setting. If your camera is not currently set to use the custom white balance mode, it may prompt you to switch to it.
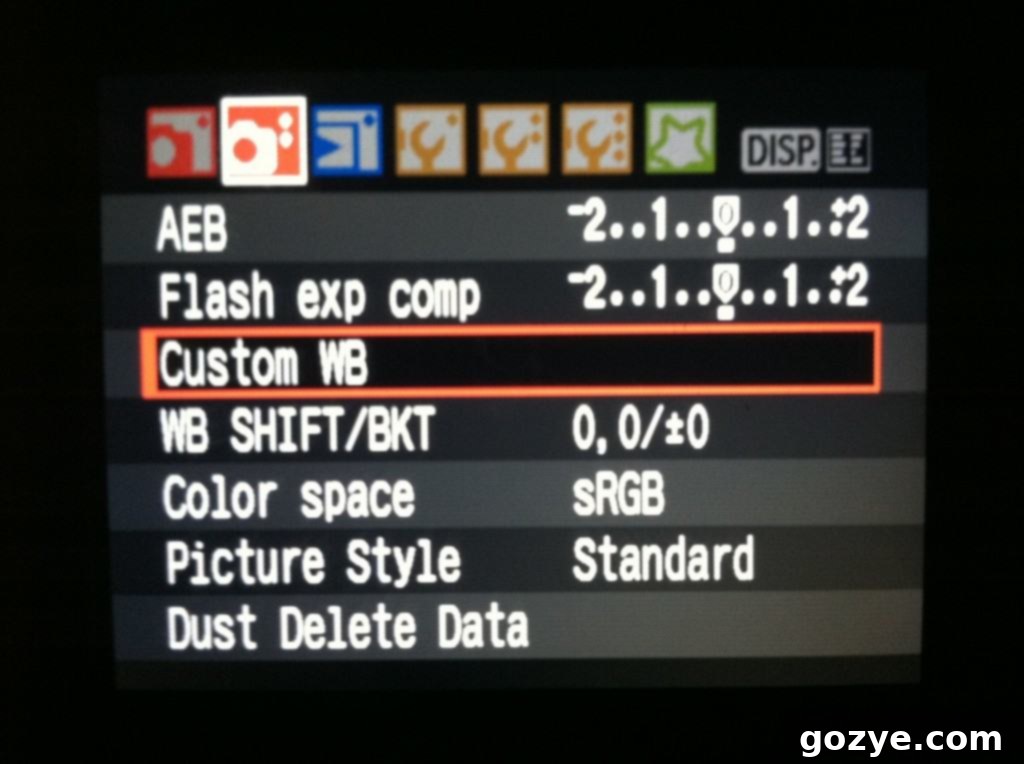
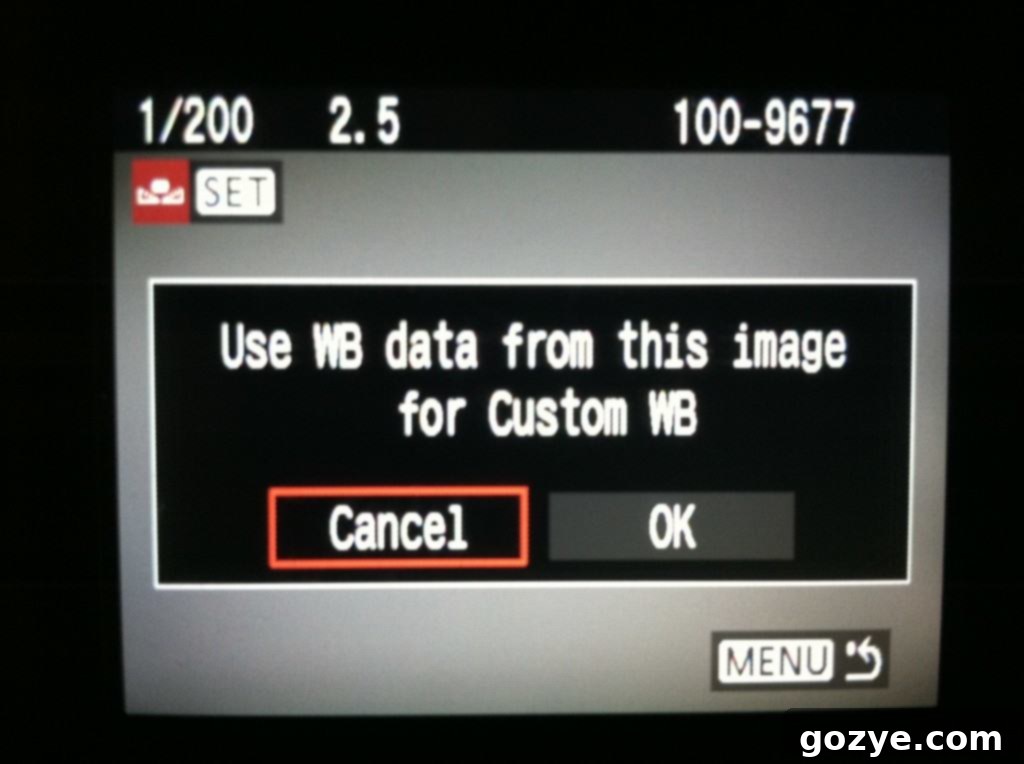
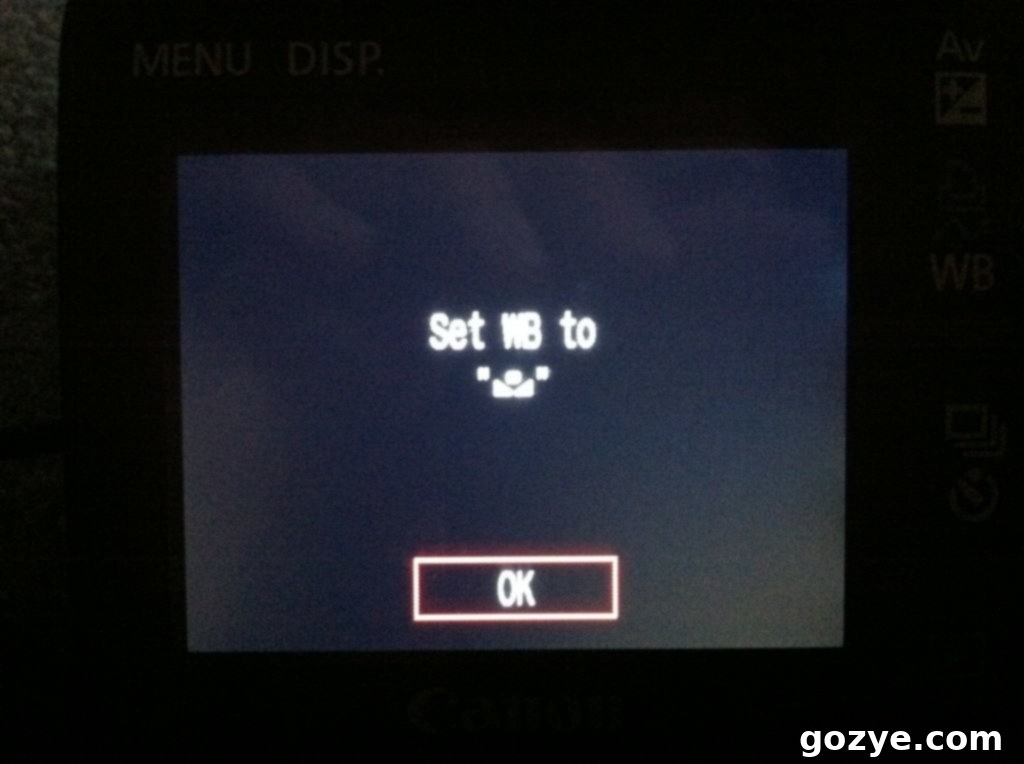
Step 5: Verify and Adjust
After setting the custom white balance, take a test shot of your actual subject and check your viewfinder or LCD screen. Objects that are meant to be white should now appear truly white, without any discernible blue, yellow, or green tint. Your colors should look natural and vibrant. If you’re not completely satisfied with the shade of white, don’t hesitate to try again. Experiment with a different white object, adjust its placement, or re-take the reference shot. Practice makes perfect, and with a little experience, you’ll quickly develop an eye for truly accurate white balance.

Homemade Caramel Sauce: Auto WB on left, Custom WB on right
The Dynamic Nature of Natural Light: When to Re-Calibrate
One crucial aspect to remember when working with natural light is its constantly changing nature. If you are relying on window light or shooting outdoors, you may find yourself needing to customize your white balance multiple times during a single shoot. I’ve personally experienced days where I recalibrated my white balance three times within an hour because the sun kept peeking out from behind clouds, dramatically altering the light.
Even if the sky remains consistent, the sun’s position changes over time. If your photography session extends longer than an hour, it’s a good practice to re-evaluate and potentially re-adjust your custom white balance. This ensures that your entire series of images maintains a consistent color temperature, which is especially important for professional shoots where consistency across a gallery is expected. Developing a habit of checking your white balance every 30-60 minutes, or whenever you notice a significant shift in lighting, will greatly improve the quality and uniformity of your work.

Murray playing with his Easter egg: Auto WB
Conclusion: Embrace Custom White Balance for Superior Photography
Customizing white balance is a powerful technique that will elevate your photography from good to exceptional. It’s an essential skill for any serious photographer aiming for accuracy and consistency in their images. By taking a few extra moments to set your white balance manually, you gain unparalleled control over your colors, ensuring that your subjects are always rendered with stunning, true-to-life vibrancy. This proactive approach saves you valuable time in post-production and guarantees a more professional final product.
While mastering custom white balance is highly recommended, there are indeed times when the convenience of automatic white balance is acceptable. For spontaneous, fleeting moments – like capturing a pet playing (as with Murray and his toys), a quick travel snapshot, or an unexpected event (like a sudden dust storm!) – where speed is more critical than absolute color perfection, switching to auto WB can be a practical choice. Even in these situations, knowing how to quickly set custom WB means you’re prepared for any scenario. Remember, while white balance can be adjusted in post-production software, getting it right in-camera is always the best practice for maintaining image quality and efficiency. Incorporate custom white balance into your regular workflow, and watch your photographs transform with newfound color accuracy and brilliance.
