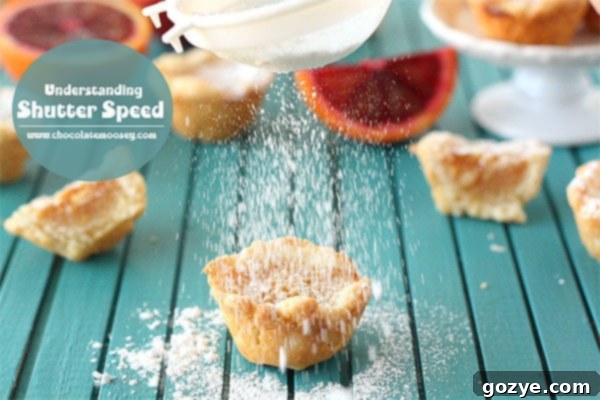
Mastering Shutter Speed: Your Ultimate Guide to Freezing Motion and Controlling Light in Photography
Welcome back to our photography essentials series! After delving into the various camera modes for most DSLRs, it’s time to shine a spotlight on one of the most dynamic and creative settings at your disposal: Shutter Speed. Often abbreviated as ‘Tv’ for Canon cameras (Time Value) or ‘S’ for Nikon cameras (Shutter Priority), this fundamental setting is your key to capturing fast-paced action, creating mesmerizing motion blur, and precisely controlling the brightness of your images. Whether you’re aiming to freeze a child’s playful jump outdoors or capture the delicate pour of a sauce in your kitchen, understanding shutter speed is paramount. While this guide is primarily tailored for DSLR users, many advanced point-and-shoot cameras also offer Tv/S modes, allowing a broader range of photographers to apply these principles.
In this comprehensive guide, we’ll explore exactly what shutter speed is, how it’s measured, when to select different speed values, and how it intricately ties into various photography genres, with a special focus on its powerful applications in food photography. Get ready to transform your photos from static snapshots into dynamic visual stories!
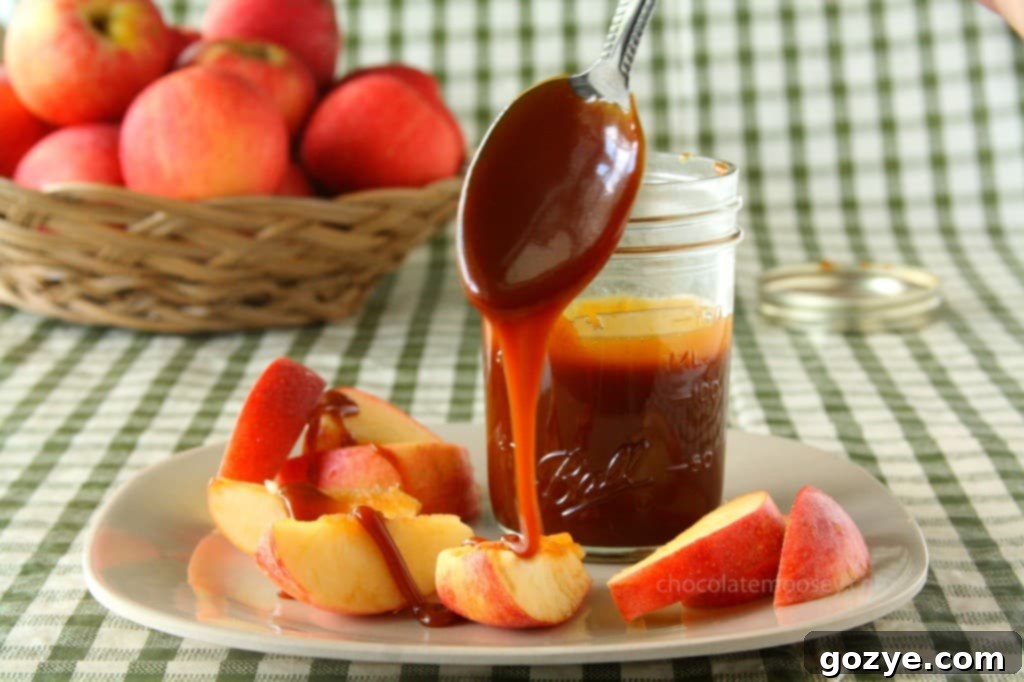
Homemade Caramel Sauce
Shutter speed: 1/40; Aperture: f/8; ISO: 800
What Exactly is Shutter Speed?
At its core, shutter speed refers to the duration for which your camera’s shutter remains open, allowing light to hit the camera’s sensor. Think of it like blinking – the longer your eye stays open, the more you see. Similarly, the longer your camera’s shutter stays open, the more light reaches the sensor, and consequently, the brighter your image will be. This is why some photographers often refer to shutter speed as “exposure time.”
Beyond controlling brightness, shutter speed plays a critical role in how motion is depicted in your photographs. A fast shutter speed “freezes” movement, capturing a single, crisp moment in time. Conversely, a slow shutter speed allows moving subjects to blur, creating a sense of motion, speed, or ethereal softness. Understanding this dual function – controlling both light and motion – is fundamental to mastering your camera.
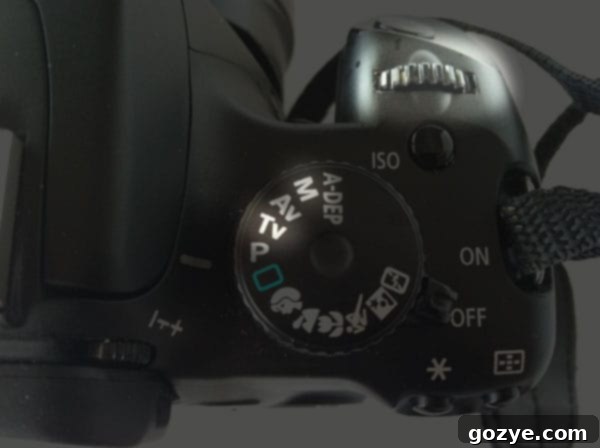
Setting Your Shutter Speed: Camera Modes
To gain direct control over your shutter speed, you’ll typically need to set your camera to either Shutter Priority mode (Tv for Canon, S for Nikon) or Manual (M) mode. In Shutter Priority mode, you select your desired shutter speed, and the camera automatically adjusts the aperture to achieve a balanced exposure. In Manual mode, you have complete control over shutter speed, aperture, and ISO, giving you ultimate creative freedom but requiring a more hands-on approach to exposure. Consult your camera’s manual to locate the specific dial or button used to adjust this setting. On most DSLRs, it’s often a command dial positioned near the shutter button or on the back of the camera.
Understanding Shutter Speed Measurements
Shutter speed is measured in seconds or fractions of a second. The numbers you see on your camera display represent these durations:
- Fractions of a Second (e.g., 1/125, 1/200, 1/500): These are “fast” shutter speeds. The larger the denominator (the number after the slash), the faster the shutter opens and closes. For instance, 1/500th of a second is much faster than 1/125th of a second. These speeds are ideal for stopping fast action.
- Whole Seconds (e.g., 1″, 5″, 10″): These are “slow” shutter speeds, indicated by a single quote mark (“) or sometimes the letter ‘s’ after the number. Here, the camera’s shutter remains open for multiple full seconds. A shutter speed of 5 seconds is significantly slower than 1 second. These speeds are used for capturing motion blur or brightening very dark scenes.
It’s crucial to grasp that a higher number in a fraction (like 1/1000) signifies a *faster* shutter speed, while a higher whole number (like 30 seconds) signifies a *slower* shutter speed.
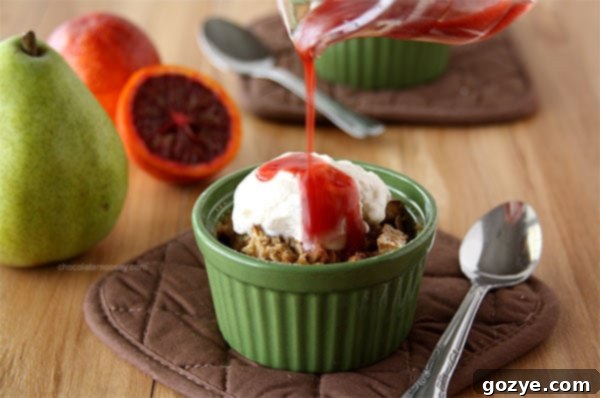
Mini Pear Walnut Crisps With Blood Orange Caramel Sauce
Shutter speed: 1/6; Aperture: f/5; ISO: 100
When to Use a Slow Shutter Speed
Slow shutter speeds are powerful tools for two primary creative and technical purposes:
1. Creating Motion Blur
Motion blur occurs when your subject is moving during the camera’s exposure time, resulting in a blurred streak that conveys movement. This effect can add a dynamic and artistic quality to your photographs. Think of the silky flow of a waterfall, the streaking lights of cars at night, or the swirling patterns of a dancer’s dress. In food photography, a subtle motion blur can soften the flow of liquids, such as pouring sauce over a dessert or adding milk to coffee, making the image feel more inviting and less static. Even at a fraction like 1/6th of a second, as seen with the blood orange caramel sauce above, there’s enough delay to introduce an appealing blur to the liquid’s movement.
- Waterfall Photography: Speeds from 1/2 to 2 seconds can create beautifully smooth water.
- Light Trails: At night, speeds from 5 to 30 seconds can transform car headlights and taillights into vibrant streaks of light.
- Panning: When photographing a moving subject (like a cyclist), you can pan your camera along with it at a moderate slow speed (e.g., 1/30 to 1/60) to keep the subject relatively sharp while blurring the background.
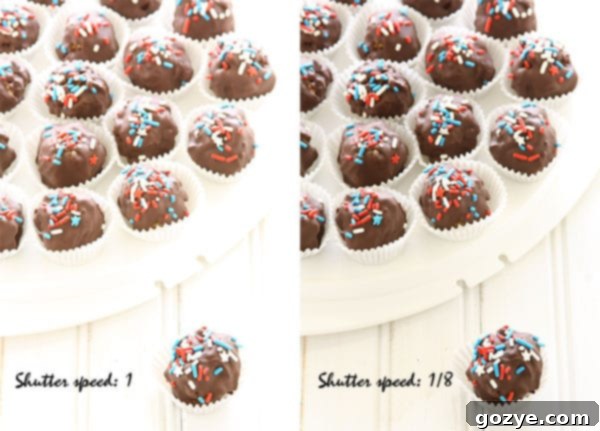
2. Enhancing Brightness in Low Light
As mentioned, a slower shutter speed means the camera’s sensor is exposed to light for a longer duration, allowing more light to be gathered. This is incredibly useful in dimly lit environments where you don’t want to use a flash, or when you simply want to achieve a brighter overall exposure without significantly increasing your ISO (which can introduce noise). For instance, if you’re photographing indoors with natural light on a cloudy day, gradually decreasing your shutter speed can brighten your scene considerably. The difference in brightness, as seen in the truffle example above, vividly illustrates this principle.
However, there’s a crucial trade-off: the longer your shutter stays open, the higher the risk of camera shake and unwanted blur. Unless motion blur is your artistic goal, you will almost certainly need a tripod or a very stable surface to prevent blur when using slow shutter speeds (generally anything slower than 1/60th of a second, depending on your lens and personal stability). If a tripod isn’t available, try bracing yourself against a wall or using a sturdy table or ledge to stabilize your camera, minimizing movement during the exposure.
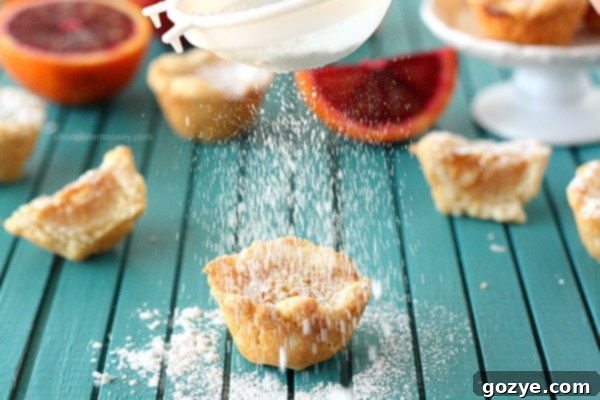
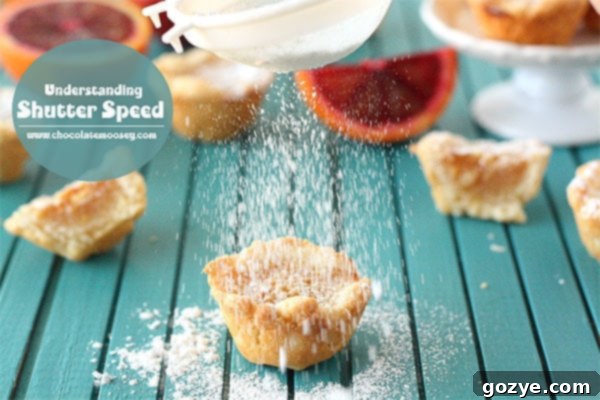
Blood Orange Pie Bites
Shutter speed: 1/250; Aperture: f/4; ISO: 1600
When to Use a High Shutter Speed
High, or fast, shutter speeds are primarily used to “freeze” action, capturing a precise moment in time with crisp clarity. This is invaluable when photographing subjects that are moving quickly:
- Sports Photography: Capturing a basketball player mid-jump, a football being kicked, or a race car speeding by without any blur requires very fast shutter speeds (e.g., 1/1000s or faster).
- Wildlife Photography: Freezing a bird in flight or a swift animal in motion demands high shutter speeds to ensure every detail is sharp.
- Children and Pets: These subjects are notoriously unpredictable. A fast shutter speed helps you catch their fleeting expressions and energetic movements without blur.
- Splash Photography: Want to capture individual droplets of water or milk frozen in mid-air? High shutter speeds are essential.
Consider the example of dusting pie bites above. To capture the individual sugar particles suspended in the air, a high shutter speed of 1/250th of a second was chosen. This ensures that the tiny, fast-moving particles are distinct. However, the trade-off with fast shutter speeds is that less light reaches the sensor, potentially resulting in a darker image. To compensate for this, other settings like ISO or aperture often need to be adjusted. In the pie bites example, the ISO was increased to 1600 to brighten the image, while the aperture was kept at f/4 to maintain a slightly blurred background and draw focus to the subject.
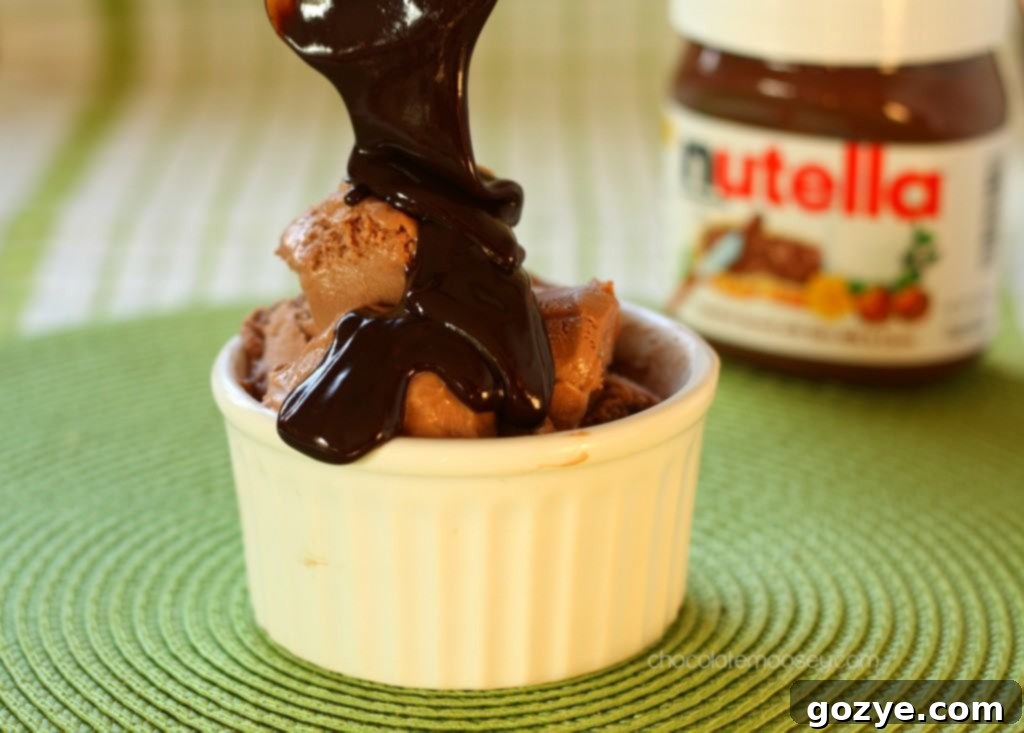
Nutella Espresso Hot Fudge Sauce
Shutter speed: 1/50; Aperture: f/3.2; ISO: 400
Shutter Speed in Food Photography: Beyond the Static Shot
Many aspiring food photographers initially focus on perfectly styled, static shots. While important, incorporating dynamic elements using shutter speed can elevate your food photography, making dishes look more appealing, fresh, and inviting. Don’t limit your imagination! Think beyond the comfort zone of a perfectly plated dish.
Creative Action Shots for Food Photography:
- Pouring and Drizzling: Capture the elegant cascade of syrup over pancakes, sauce over ice cream, or a delicate drizzle of olive oil. A moderate slow shutter speed (e.g., 1/15s to 1/60s) can create a beautiful, soft blur in the liquid, emphasizing its movement and texture.
- Dusting and Sprinkling: Freeze sugar dust or spice sprinkles in mid-air over a cake or pie for a sense of freshness and activity. Fast shutter speeds (1/200s or higher) are ideal here.
- Dunking and Dipping: Whether it’s a cookie into milk, a chip into salsa, or a donut into coffee, catching the moment of immersion can be incredibly engaging. This often requires a fast shutter speed to freeze the splash or ripples.
- Steam and Smoke: Highlight the warmth and freshness of food by capturing rising steam. A slightly slower shutter speed might help make the steam appear more ethereal.
- Cutting and Serving: A hand cutting into a pie, scooping ice cream, or lifting a piece of pizza with a cheese pull can add a human element and tell a story.
- Stirring and Mixing: If you’re documenting a cooking process, a subtle motion blur from stirring ingredients in a pot can be far more captivating than a static shot of ingredients.
Achieving these shots often involves a bit of choreography. If you’re working alone, a tripod is your best friend. Set up your camera, compose your shot, and then use your camera’s self-timer, a remote control, or even a continuous shooting mode while performing the action. This allows you to focus on the movement while the camera captures a series of images.
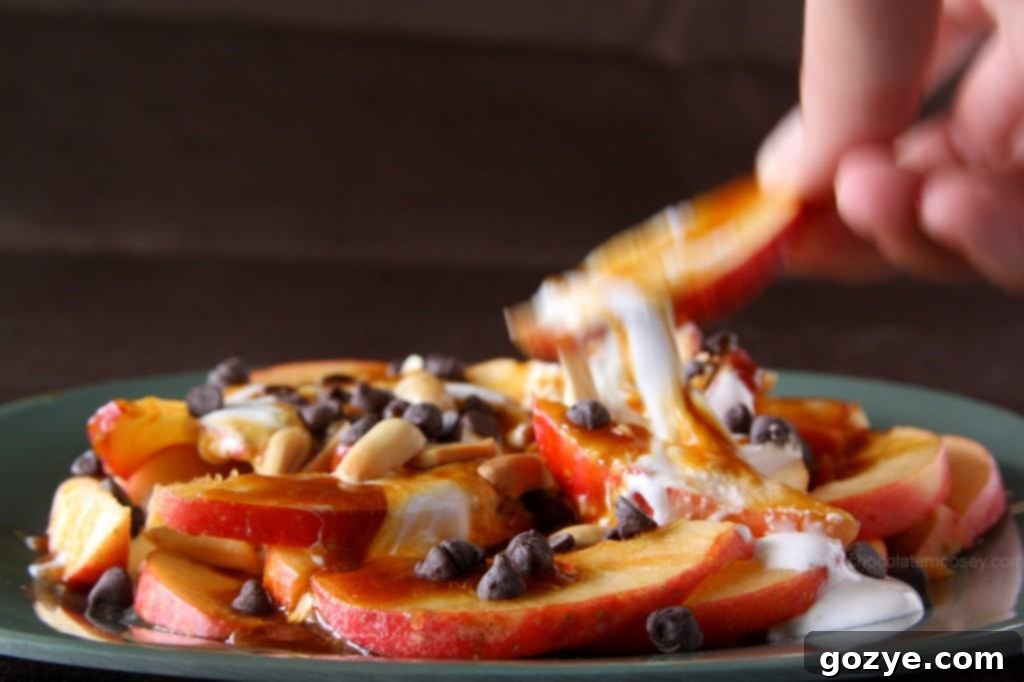
Apple Nachos
Shutter speed: 1/8; Aperture: f/10; ISO: 800
The Exposure Triangle: Shutter Speed’s Relationship with Aperture and ISO
One of the most common frustrations photographers face when adjusting shutter speed is its direct impact on lighting. The faster your shutter speed, the darker your picture becomes because less light has time to reach the sensor. Conversely, a slower shutter speed lets in more light, brightening the image but increasing the risk of blur.
This is where the concept of the “Exposure Triangle” comes into play. Shutter speed doesn’t work in isolation; it’s intricately linked with two other fundamental camera settings: Aperture (controlling depth of field and light) and ISO (controlling sensor sensitivity to light). Think of these three settings as balancing weights on a scale. When you adjust one, the others often need to be compensated to maintain a balanced, well-exposed image.
- Shutter Speed & Aperture: If you increase your shutter speed (to freeze action), you’re letting in less light. To compensate, you might need to open your aperture wider (use a smaller f-number, e.g., from f/8 to f/2.8) to let in more light. This will, however, result in a shallower depth of field. Conversely, if you slow your shutter speed (for motion blur or more light), you might need to close your aperture (use a larger f-number) to prevent overexposure.
- Shutter Speed & ISO: If you’re using a fast shutter speed in a low-light scenario, and you’ve already opened your aperture as wide as you can, increasing your ISO will make your sensor more sensitive to the available light, brightening the image. However, higher ISO settings typically introduce digital noise, which can degrade image quality.
Consider the Apple Nachos example above. To capture the hand mid-action (grabbing a nacho), a moderate shutter speed of 1/8th of a second was used, which resulted in some motion blur in the hand. Despite this relatively slow speed, the aperture was set to f/10 to ensure a good portion of the plate remained in focus. To compensate for the limited light entering through the narrow aperture and the fast-moving hand, the ISO was boosted to 800. This combination showcases the delicate balance required to achieve a desired look – here, a focused plate with a dynamic, slightly blurred hand.
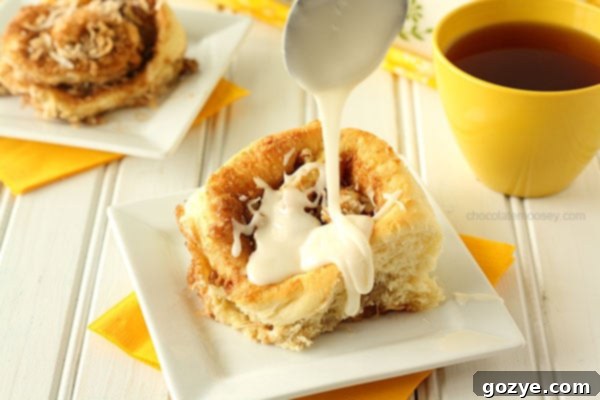
Lemon Coconut Cinnamon Rolls
Shutter speed: 1/25; Aperture: f/5.6; ISO: 400
Unleash Your Creativity with Shutter Speed
Now that you have a deeper understanding of shutter speed and its profound impact on your photography, it’s time to put theory into practice. Don’t be afraid to experiment! Start with simple action shots, like pouring a beverage, dropping an ingredient into a bowl, or gently stirring a mixture. Observe how different shutter speeds change the outcome – from freezing individual droplets to creating soft, flowing blurs.
While many step-by-step cooking photos might seem challenging to capture dynamically, especially if you’re working alone, a little creativity goes a long way. Think about setting up your camera on a tripod, utilizing a self-timer, or even investing in a remote shutter release. These tools can give you the freedom to engage with your subject (stirring, chopping, drizzling) while simultaneously triggering your camera.
Shutter speed is not just a technical setting; it’s a powerful artistic tool that allows you to tell stories, evoke emotions, and add a sense of dynamism to your images. Keep practicing, keep experimenting, and watch as your photographs transform into truly captivating visual narratives.
Speaking of action shots and making photography easier, stay tuned! Next week, we’ll dive into another essential aspect of photography that can further enhance your control over light and motion, building on the foundations we’ve explored today.
