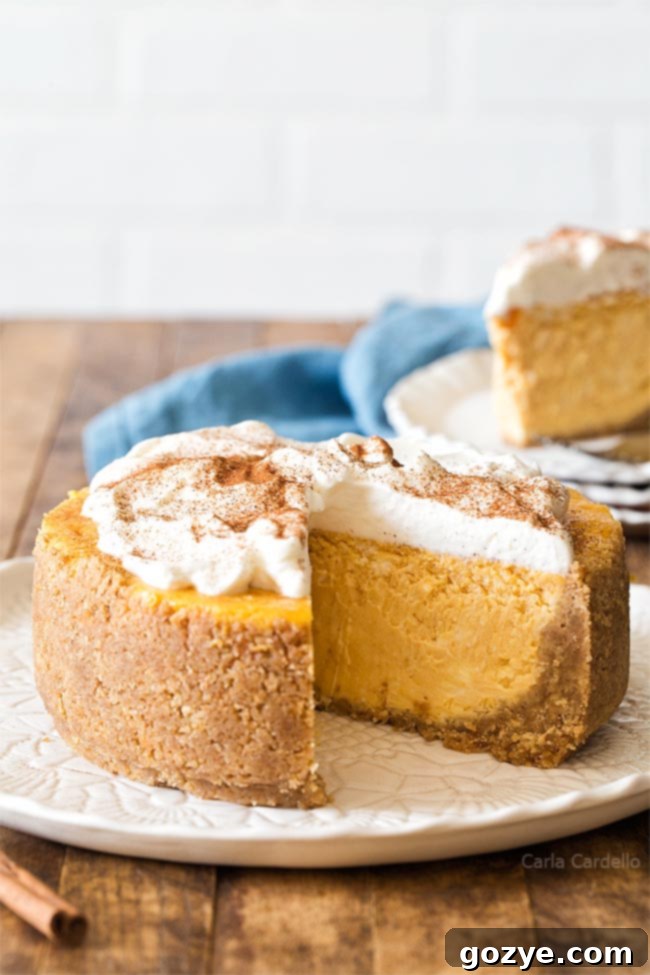
Easy 6-Inch Pumpkin Cheesecake Recipe: The Ultimate Small Batch Fall & Thanksgiving Dessert
Welcome to your new favorite fall dessert! If you’re looking for a delightful, creamy, and perfectly spiced pumpkin cheesecake but don’t need to feed a crowd, this 6-Inch Pumpkin Cheesecake recipe is an absolute winner. Ideal for small gatherings, Thanksgiving Dinner for Two, or simply a cozy treat on a crisp autumn evening, this recipe delivers all the classic flavors you love in a manageable size. Served with a dollop of homemade whipped cream, it’s a dessert that truly celebrates the season.
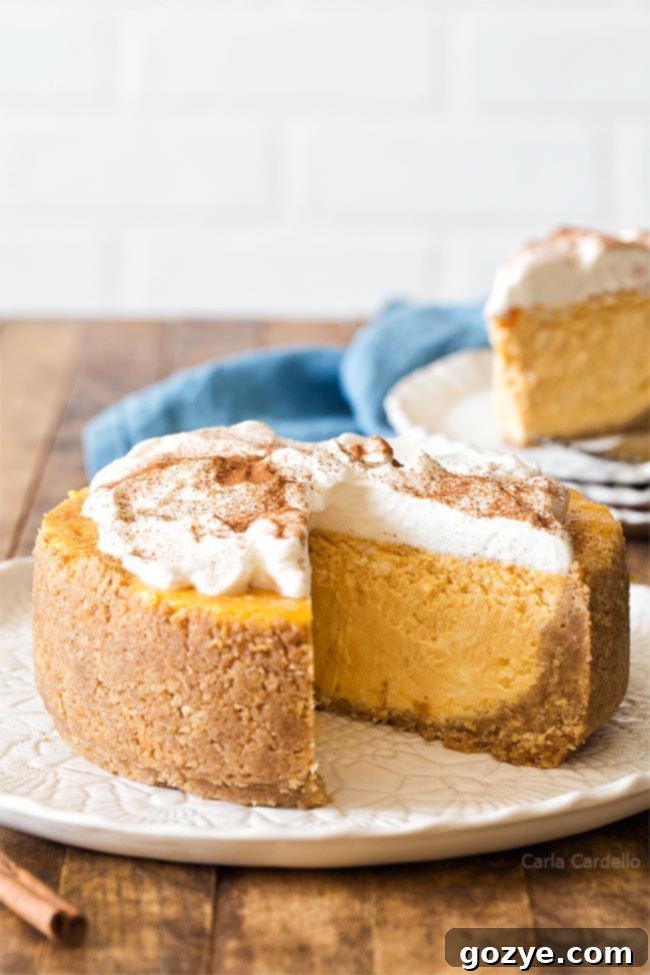
The journey to perfecting this small batch pumpkin cheesecake began with a true-to-life quest: a hunt for canned pumpkin! Just last week, when I shared my popular 6 Inch Cheesecake recipe, I mentioned the unexpected challenge of finding this essential fall ingredient. It turns out, it wasn’t a shortage but rather a delay in the pumpkin crops this year. Thankfully, this means canned pumpkin should become much more readily available soon. But for those of us eager to bake, waiting isn’t always an option!
My persistence ultimately paid off over the weekend when I finally spotted four precious cans tucked away on a shelf. As I happily scooped up two, another avid baker swiftly claimed the remaining two. Just like that, an empty shelf in a matter of seconds! This moment perfectly encapsulates the thrill (and sometimes, the minor stress) of baking with seasonal ingredients. Fortunately, the beauty of crafting small batch recipes means that even a single can of pumpkin can go a long way, allowing for several delightful culinary creations. Hopefully, by the time I need more, the shelves will be fully stocked!
I simply couldn’t wait to bring you this incredible 6-inch pumpkin cheesecake recipe. It’s the perfect, decadent addition to your Thanksgiving Dinner For Two menu, offering a luscious, creamy alternative to traditional pumpkin pie. But its appeal isn’t limited to Thanksgiving alone. If you don’t celebrate the holiday (or if you’ve already celebrated in Canada), this pumpkin cheesecake is equally wonderful as a general fall dessert for two, or even more if you’re feeling generous and want to share!
Looking for a fun, festive twist? Consider creating an Oreo crust for a striking black and orange Halloween dessert, much like I did with my Mini Pumpkin Cheesecakes. Imagine piping a cute chocolate spider web or some spooky bat silhouettes on top for an extra touch of seasonal charm! No matter your reason for baking, this recipe is meticulously designed to be the best pumpkin cheesecake you’ll create in a 6-inch pan – rich, smooth, and utterly irresistible.
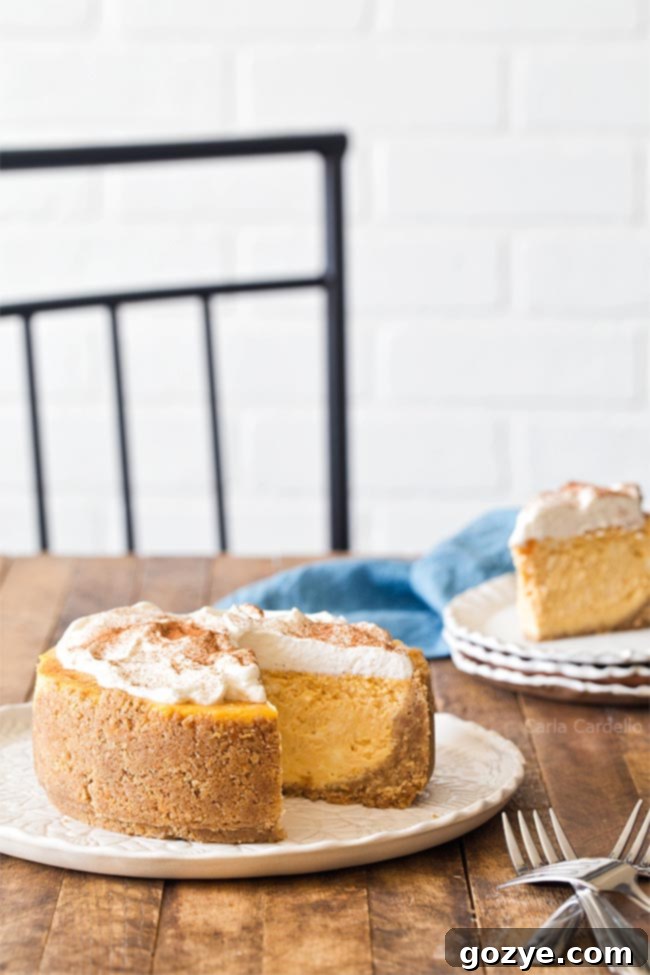
Choosing the Right Pan for Your Small Batch Cheesecake
A key to successful cheesecake baking, especially for a delicate small batch like this 6-inch pumpkin cheesecake, is having the correct equipment. You will absolutely need a 6-inch springform pan. Unlike regular cakes that can be inverted, cheesecake is too delicate and will crumble or fall apart without the removable sides of a springform pan. This clever design allows you to release the cake easily and cleanly without disturbing its perfect structure or creamy texture.
This is the exact 6×2 inch springform pan I use and highly recommend (Amazon affiliate link). This specific recipe is perfectly formulated to fill this pan right up to the very top, creating a wonderfully thick and satisfying cheesecake without any overflow issues. If you prefer a little more room at the top, perhaps for a slightly taller crust or a richer, piled-high topping, you could also opt for a 6×3 inch springform pan (Amazon affiliate link). Either size will work beautifully for this recipe, offering similar delightful results.
It’s crucial to note that this 6-inch pumpkin cheesecake recipe is not suitable for a standard 6-inch cake pan. While the batter might technically fit, removing the delicate cheesecake would be an extremely difficult task, almost certainly resulting in a less-than-picturesque presentation. If a springform pan isn’t available, and you’re truly without other options, you might manage, but be prepared for a significant challenge and potential aesthetic compromises. For those without a 6-inch pan at all, don’t despair! You can still enjoy these amazing pumpkin flavors by making mini pumpkin cheesecakes baked in a muffin pan – a fantastic and equally delicious alternative for individual servings.
Scaling Up? Can I Make This Recipe in a 7-Inch Pan?
Good news for those with a slightly larger springform pan! As demonstrated with my popular 7-inch cheesecake recipe, you can absolutely make this 6-inch pumpkin cheesecake recipe in a 7-inch springform pan without needing to make any adjustments to the ingredient quantities. The cheesecake will simply be a little less thick, but it will be just as delicious, perfectly baked, and offer a slightly larger surface area for your creative garnishes. This flexibility makes it even easier to enjoy this delightful dessert, regardless of minor pan variations.
How Many Does a 6-Inch Cheesecake Serve? The Perfect Size for Intimate Gatherings
A 6-inch cheesecake is often considered the ideal size for smaller households, intimate gatherings, or those who simply crave a smaller indulgence. You can comfortably cut this cheesecake into 4 to 6 generous slices, making it suitable for 4 to 6 servings. However, I personally love to think of this as a luxurious “cheesecake for two.” This allows each person to enjoy 2 to 3 slices over a few days, savoring every moment without feeling overwhelmed by a massive dessert that might linger too long.
This perfect small size also makes it an excellent candidate for your Thanksgiving for Two dessert table. Instead of a large pumpkin pie that might go to waste or prove too much after a big meal, this pumpkin cheesecake offers a rich, decadent, and perfectly portioned alternative. It provides that comforting taste of fall without the commitment of a full-sized dessert. And let’s be honest, when was the last time you truly ate *only* one slice of cheesecake? This small batch version allows for delightful indulgence without the guilt or the worry of excessive leftovers. If even this size feels like too much, remember you can always explore my dedicated cheesecake for two recipe for even smaller, individual-sized portions.
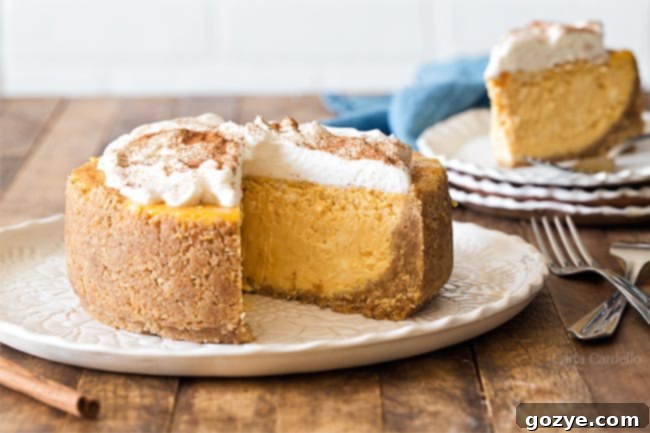
Crafting Your 6-Inch Pumpkin Cheesecake From Scratch: Essential Ingredients & Tips
Creating a luscious 6-inch pumpkin cheesecake from scratch is a rewarding process that relies on a few simple, high-quality ingredients. Understanding the role of each component will help you achieve the perfect texture, balance, and flavor in every bite:
- Graham Cracker Crumbs: These form the traditional, wonderfully buttery, and slightly spiced crust. While graham cracker is a classic choice, don’t hesitate to experiment! For a more festive and autumnal twist that complements the pumpkin beautifully, try using gingersnap cookies or even digestive biscuits. A food processor makes quick work of crushing them into fine, even crumbs.
- Melted Butter: This is absolutely essential for binding the crust ingredients together. It ensures the crust holds its shape perfectly and provides that delightful crisp-tender texture that’s a hallmark of a great cheesecake base. Make sure your butter is fully melted for easy and even mixing.
- Full-Fat Cream Cheese: This is unequivocally the star of any cheesecake! It’s absolutely crucial to use full-fat cream cheese. Low-fat and fat-free versions contain significantly more water, which can result in a watery, less rich, and potentially cracked cheesecake after baking. Most importantly, ensure your cream cheese is at proper room temperature – soft enough to beat smoothly without lumps, which is vital for achieving a silky-smooth batter.
- Granulated Sugar: Provides the perfect touch of sweetness to balance the natural tanginess of the cream cheese and the earthy notes of the pumpkin, creating a harmonious and well-rounded flavor profile.
- Large Eggs: Act as a critical binder and help the cheesecake set beautifully. Always use large eggs for consistent results in baking. Like the cream cheese, ensure your eggs are at room temperature. Cold eggs can cause the batter to curdle or become lumpy when added to the cream cheese mixture.
- Canned Pumpkin Puree: The star flavor of this seasonal dessert! Canned pumpkin puree offers the most consistent results in terms of moisture and texture, which is paramount for cheesecake success. If you have the time and desire, homemade pumpkin puree can also be used, but ensure it’s very well-drained to avoid introducing excess moisture into the batter, which could alter the cheesecake’s set.
- Vanilla Extract: A crucial flavor enhancer that complements and amplifies both the pumpkin and cream cheese, adding a warm, aromatic depth that elevates the entire cheesecake.
Don’t let leftover canned pumpkin go to waste! After making this delicious cheesecake, put the rest to good use by trying my comforting and uniquely flavorful pumpkin mac and cheese for dinner. It’s a fantastic savory way to enjoy the season’s bounty!
Step-by-Step Baking Process: Achieving Cheesecake Perfection
The process for making this creamy pumpkin cheesecake is quite straightforward, but paying close attention to each step will yield the best results. Start by preparing your crust: in a medium bowl, combine the graham cracker (or gingersnap) crumbs with the melted butter. Mix thoroughly until the crumbs are evenly moistened. Press this mixture firmly and evenly into the bottom and slightly up the sides of your prepared 6-inch springform pan. This creates a sturdy, flavorful base for your rich filling.
Next, move on to preparing the luscious filling. In a large mixing bowl, using an electric mixer, beat together the softened, room-temperature cream cheese and granulated sugar until the mixture is incredibly smooth, light, and almost fluffy. This usually takes about 2-3 minutes. Make sure to scrape down the sides of the bowl frequently with a spatula to ensure all ingredients are thoroughly combined and no hidden lumps remain. Then, incorporate the room-temperature eggs, adding them one at a time and beating just until each is fully combined and smooth. Be careful not to overbeat the batter at this stage, as excessive air can lead to cracks later on. Finally, gently beat in the canned pumpkin puree and vanilla extract, mixing just until evenly distributed and the batter is a uniform color.
Once your luscious batter is ready, gently transfer it into your prepared graham cracker crust. If you’re using a 6×2 inch pan, the batter will fill it right up to the top – this is a good sign that it’s a perfectly proportioned small batch recipe! Now comes a critical step for achieving a beautiful, crack-free cheesecake: the water bath. Carefully place your filled springform pan inside a larger baking pan (like an 8×8 inch square baking dish or a larger roasting pan). Then, fill the outer pan with hot water. Bake this entire assembly at 325°F (160°C) for 65-75 minutes.
Short on time but still craving homemade pumpkin cheesecake? If you have an Instant Pot, you can whip up an amazing Instant Pot Pumpkin Cheesecake in just 25 minutes! It’s a game-changer for quick, delicious dessert cravings.
The Indispensable Water Bath: Why It’s Crucial for a 6-Inch Cheesecake
The question often arises among home bakers: Do I need a water bath for cheesecake? For this particular 6-inch pumpkin cheesecake, the answer is an emphatic yes! While my 9-inch pumpkin cheesecake recipe might not strictly require a water bath (due to its wider, shallower profile allowing for more naturally even baking), a smaller, thicker cheesecake like this one absolutely benefits from and often requires it.
A 6-inch cheesecake has a greater height-to-width ratio compared to its larger counterparts, which means the edges tend to bake and brown much faster than the dense center. Without the gentle, moist heat provided by a water bath, the top and edges would likely overbake, become dry, and crack before the thick middle is fully set. The water bath provides a consistent, moist, and even heat environment, gently insulating the cheesecake. This allows the cheesecake to bake more slowly and uniformly, ensuring the middle sets perfectly while preventing the top from becoming dry, rubbery, or unsightly cracked. It’s the secret to achieving that coveted creamy, smooth texture from edge to edge, a hallmark of a professional-quality cheesecake.
Mastering the Water Bath Technique
Setting up a water bath is simpler than it sounds, and it’s a small effort that yields significant rewards:
- Prepare Your Pan: First and foremost, ensure your springform pan is completely sealed and watertight. Wrap the outside of your cheesecake pan tightly with heavy-duty aluminum foil. Use at least two layers, extending the foil well up the sides of the pan, to create a robust barrier that prevents any water from seeping in and making your crust soggy.
- Placement: After carefully filling your springform pan with the cheesecake batter, gently place it inside a larger baking pan. An 8×8 inch square pan, a 9×13 inch rectangular pan, or a larger roasting pan all work perfectly, as long as it’s wide enough to accommodate the springform pan with some space around the edges.
- Add Hot Water: Next, pour hot (preferably boiled) water into the larger pan, surrounding the springform pan. Fill it until the water level reaches about halfway up the sides of your springform pan. Exercise extreme caution here to avoid splashing any water into the foil-wrapped cheesecake itself – a soggy crust is the last thing you want!
- Transfer and Bake: Gently transfer this entire water bath assembly into your preheated oven. Bake according to the recipe instructions, confident that your cheesecake is being pampered in a perfectly moist and even baking environment.
Knowing When Your Cheesecake is Perfectly Done
One of the more challenging aspects of baking cheesecake is accurately determining when it’s perfectly done. Cheesecake is technically a custard, which means it will retain a slight, delicate wiggle in the very center even when fully baked. If it doesn’t wiggle at all, it’s likely overbaked, which can unfortunately lead to a dry, dense texture and, yes, those dreaded cracks!
Here’s how to tell if your 6-inch pumpkin cheesecake is ready for its cooling phase:
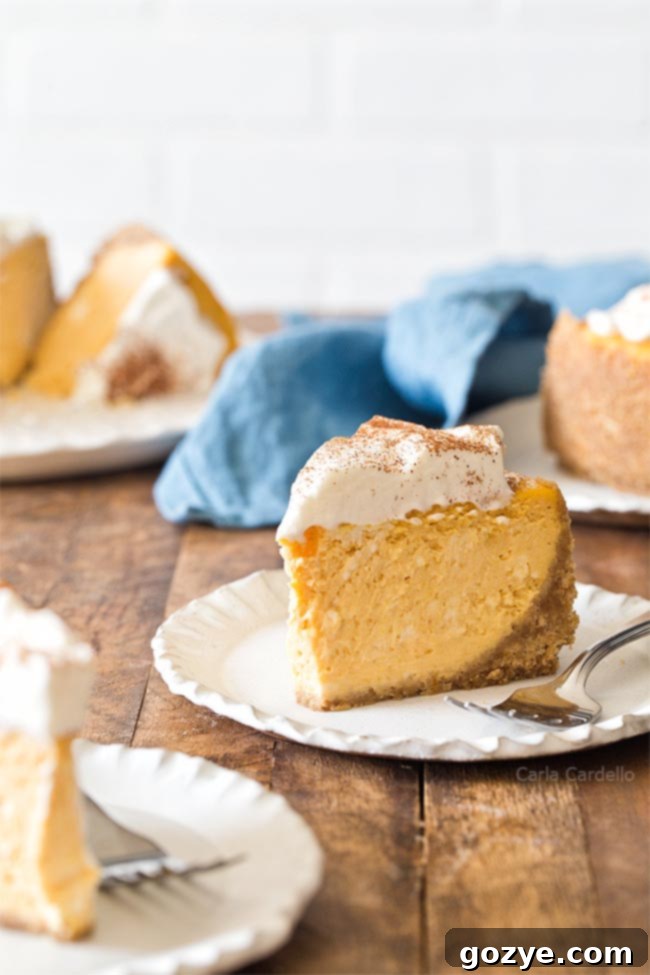
- Visual Cues: The edges of the cheesecake should appear firm and lightly set, often with a subtle golden-brown hue. As you gently jiggle the entire pan, only the direct center (an area about 1-2 inches in diameter) should have a slight, soft wobble, similar to very firm gelatin. The rest of the surface should look set and mostly firm.
- The Thermometer Test: For the most accurate and foolproof method, especially if you’re new to cheesecake baking, use a digital thermometer. Insert the thermometer into the center of the cheesecake – the internal temperature should read precisely 150°F (65°C). While this will leave a small hole (or two) in your beautiful cheesecake, it’s a tiny price to pay for perfectly baked results. These little imperfections can easily be concealed later with a generous dollop of whipped cream or a sprinkle of cinnamon. It’s always better to have a perfectly cooked cheesecake with a small cosmetic imperfection than an underbaked one!
Storage and Decoration: Enjoying Your Pumpkin Cheesecake
How Long is Pumpkin Cheesecake Good For?
Once cooled to room temperature and then properly refrigerated, your delicious pumpkin cheesecake can last for up to 5-7 days in an airtight container in the refrigerator. Given that this is a small batch recipe, it’s highly likely to be enjoyed well before that timeframe! The flavors tend to deepen and meld beautifully over the first day or two, often making it an even better dessert after a day or two of chilling. This also makes it an excellent make-ahead option for holidays or special occasions.
Is It Okay to Leave Cheesecake Out Overnight?
No, it is absolutely not recommended to leave cheesecake out overnight. Due to its perishable ingredients, particularly the cream cheese and eggs, cheesecake is a high-risk food that requires prompt refrigeration to prevent bacterial growth. You can allow it to cool down at room temperature for a couple of hours immediately after baking, which is an important part of the cooling process, but it must then be transferred to the refrigerator for proper chilling and food safety. This critical chilling period also helps the cheesecake firm up and achieve its optimal creamy, dense texture.
How Do You Decorate a Pumpkin Cheesecake?
While a slice of this homemade pumpkin cheesecake is undeniably delicious on its own, a few simple garnishes can elevate it to an even more impressive and visually appealing dessert. Here are some fantastic options to consider:
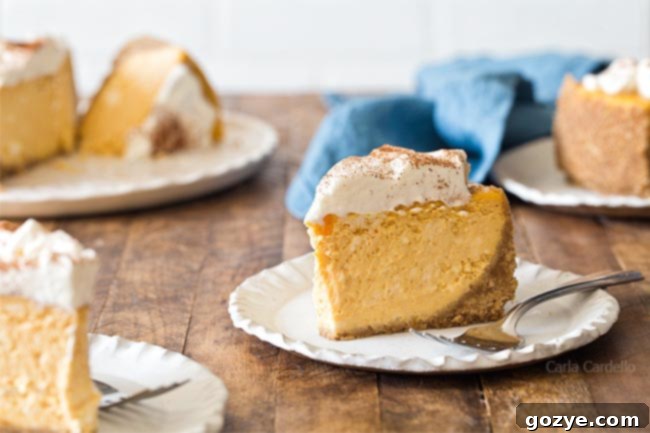
- Classic Whipped Cream: A simple, ethereal dollop of homemade vanilla whipped cream, perhaps with a delicate dusting of cinnamon, nutmeg, or pumpkin pie spice, is always a crowd-pleaser and complements the pumpkin flavor beautifully.
- Flavored Whipped Creams: Elevate your topping with specialized whipped creams like cream cheese whipped cream for an extra tangy richness, maple whipped cream for an additional layer of autumnal flavor, or honey whipped cream for a subtle, natural sweetness.
- Additional Toppings: Consider a luxurious drizzle of caramel sauce or a homemade butterscotch sauce, a sprinkle of crunchy toasted pecans or candied walnuts, or even some mini chocolate chips for added texture and a hint of chocolate. For a sophisticated touch, grate a bit of fresh nutmeg directly over each slice just before serving.
Troubleshooting Common Cheesecake Problems: Cracks and Lumps
Why Did My Cheesecake Crack? Preventing Those Pesky Surface Imperfections
Nothing is quite as disheartening as carefully baking a cheesecake for over an hour, only to discover a gaping crack across its beautiful surface! Cracks are a common frustration for many bakers, but understanding their primary causes can significantly help you prevent them in the future. Here are the main culprits and their effective solutions:
- Overbeating the Batter: While we all desire a perfectly smooth cheesecake, overbeating the batter, especially after adding the eggs, incorporates too much air. This excess air causes the cheesecake to puff up significantly during baking. As it cools, the air escapes, and the cheesecake dramatically sinks, often resulting in unsightly cracks across the top.
Solution: Only beat the batter until the ingredients are just combined and smooth. Don’t aim to whip it like meringue; minimal air incorporation is key. A few tiny lumps from imperfectly mixed cream cheese (addressed below) are far better than a cracked surface. - Overbaking the Cheesecake: It’s tempting to ensure the center is fully cooked, but overbaking leads to a dry, firm top layer. This dry surface then contracts and cracks as the cheesecake cools, unable to flex with the shrinking interior.
Solution: Use a water bath to promote even, gentle baking. Always rely on a digital thermometer to confirm the internal temperature reaches 150°F (65°C), which is the sweet spot for perfect doneness, rather than relying solely on bake time. - Cheesecake Sticking to the Pan: As cheesecake cools, it naturally deflates and contracts. If the edges are stuck to the springform pan, they won’t be able to contract evenly with the rest of the cheesecake, causing tension that results in tears and cracks along the perimeter or even through the center.
Solution: Immediately after removing the cheesecake from the oven, gently run a thin, sharp knife or an offset spatula around the inner edge of the pan. This helps loosen the cheesecake, allowing it to contract naturally as it cools without sticking. - Opening the Oven Door Too Much/Drastic Temperature Changes: It’s fine to peek towards the end of baking to check for doneness, but opening the oven door too early or too frequently allows heat to escape rapidly. Sudden, drastic temperature drops can shock the delicate cheesecake, causing it to deflate unevenly and crack.
Solution: Resist the urge to open the oven door during the initial baking phase. Only open it towards the very end of the baking time when you are truly ready to check for doneness using the jiggle test and/or a thermometer.
Why is My Cheesecake Lumpy? Achieving a Silky-Smooth Batter
A lumpy cheesecake batter is another common issue that can detract from the final smooth, creamy texture. The primary reason for lumps is almost always cold ingredients. For a truly silky-smooth cheesecake, proper ingredient temperature matters immensely!
- Cold Cream Cheese and Eggs: If your cream cheese and eggs are too cold, they won’t emulsify properly with the sugar and other ingredients. This prevents them from blending into a uniform, smooth mixture, resulting in a bumpy batter.
Solution: Ensure your cream cheese and eggs are at proper room temperature. I typically let mine sit out on the counter for at least 2 hours, or until they no longer feel cold to the touch. The exact time will vary depending on your kitchen’s ambient temperature (warmer in summer, longer in winter). - Quick Warming Tips: If you’re short on time, you can gently warm cream cheese (without its foil wrappers!) in the microwave in very short bursts of 5-10 seconds, just until it’s no longer cold and slightly pliable. Be very careful not to accidentally melt it! For eggs, place them in a bowl of warm (not hot) water for about 15 minutes to bring them to room temperature quickly. If you’re using leftover canned pumpkin, ensure it’s also brought to room temperature before adding it to the batter for consistent mixing.
What to Do If My Cheesecake Batter is Lumpy
Unfortunately, once a cheesecake batter is lumpy, simply beating it more will often incorporate too much air (leading to cracks) without fully smoothing out the lumps. And no, the lumps won’t magically melt away during baking; they will remain as textural imperfections.
- Blender Method: In some cases, a high-speed blender or immersion blender can help smooth out a lumpy batter. Be mindful that this method can incorporate a significant amount of air, which might increase the risk of cracking. However, if a perfectly smooth texture is your top priority and you’re prepared to cover any potential cracks with a generous garnish, this can be an effective option.
- Strainer Method: Another approach, and often a more reliable one for achieving a smooth consistency without over-aerating the batter, is to pass the lumpy batter through a fine-mesh strainer. Press the batter through with a spatula. This will effectively remove the lumps, though you might lose a very small amount of batter in the process.
More Small Cheesecake Recipes to Explore
If you’ve fallen in love with the convenience and deliciousness of small batch cheesecakes, you’re in luck! There’s a whole world of perfectly portioned desserts waiting. Here are even more fantastic cheesecake recipes for two people, perfect for any occasion, from weeknight treats to special celebrations:
- Rich 6-Inch Chocolate Cheesecake with Oreo Crust
- Decadent Peanut Butter Cheesecake
- Vibrant Red Velvet Oreo Cheesecake
- Easy Small Batch Strawberry Swirl Cheesecake Bars (baked conveniently in a loaf pan!)
- Surprisingly Simple Air Fryer Cheesecake
6 Inch Pumpkin Cheesecake Recipe
4-6 servings
20 minutes
1 hour 15 minutes
4 hours
5 hours 35 minutes
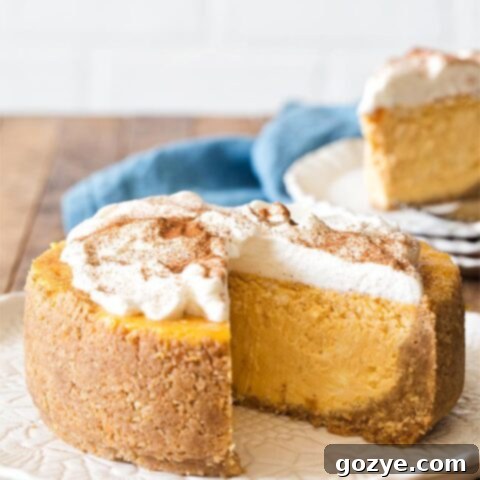
In the mood to bake a small cheesecake? This 6
Inch Pumpkin Cheesecake recipe is a creamy Thanksgiving dessert for two served with homemade whipped cream.
Ingredients
- 1 1/2 cups graham cracker crumbs
- 6 tablespoons butter, melted
- 16 ounces (2 blocks or 16 tablespoons) full-fat cream cheese, room temperature and not cold to the touch (do not sub fat free)
- 1/2 cup granulated sugar
- 2 eggs, room temperature and not cold to the touch
- 1/2 cup canned pumpkin
- 1 teaspoon vanilla extract
- Cream Cheese Whipped Cream, Maple Whipped Cream, or Vanilla Whipped Cream and cinnamon, for garnish
Instructions
- Preheat oven to 325F. Wrap the outside of a 6×2 or 6×3 springform pan with foil.
This recipe will also work in a 7 inch springform pan without adjustments.
- In a large bowl, mix together the graham cracker crumbs and melted butter. Pat into the bottom and up the sides of the springform pan.
- In a large mixing bowl, beat together the cream cheese and sugar until light and fluffy, about 2-3 minutes. Scrape down the bowl as needed.
- Beat in the eggs, one at a time, for 1 minute each or until smooth (do not overbeat). Beat in the pumpkin and vanilla.
- Transfer the batter to the crust (if using a 6×2 pan, it’ll fill to the top). Place the pan inside an 8×8 or larger pan.
- Pour hot water into the outside pan until the springform pan is halfway submerged in the water. Be careful you don’t get water inside the foil.
- Bake 65-75 minutes or until the edges are set and brown, the center is mostly set with some wiggling, and internal temperature reaches 150F degrees.
- Remove from the oven and carefully run a knife along the edge to loosen the cheesecake. Cool 15 minutes in the water bath.
- Remove the pan from the water bath and let cool at room temperature for 1 hour.
- Cover and refrigerate at least 4 hours or overnight before garnishing and serving. Store leftovers in an airtight container in the refrigerator for up to 5-7 days.
Notes
- Looking for more small cheesecake recipes? Check out my 6 Inch Cheesecake,Chocolate Cheesecake with Oreo Crust, Red Velvet Oreo Cheesecake, and Peanut Butter Cheesecake.
- Want to bake this in another pan? Check out my 9 Inch Pumpkin Cheesecakeand Mini Pumpkin Cheesecakes.
Recommended Products
As an Amazon Associate and member of other affiliate programs, I earn from qualifying purchases.
- 6 Inch Springform Pan
- Digital Thermometer
Did you make this recipe?
Let me know what you think! Rate the recipe above, leave a comment below, and/or share a photo on Instagram using #HITKrecipes
