Baked Cheesecake In A Jar: Your Ultimate Guide to Easy & Elegant Individual Desserts
Experience the joy of baking and serving this incredibly creamy Cheesecake In A Jar, presented beautifully with delightful layers of crunchy cookie crust and luscious fruit sauce! These individual cheesecakes are not only a feast for the eyes but also the perfect solution for thoughtful holiday gifts, party favors, or simply for mindful portion control. Get ready to impress with this charming and delicious dessert.
Let’s be honest, for many of us, the mere mention of cheesecake brings a smile to our faces and a craving to our hearts. As an avid baker, I (Carla) can confidently say, “Hi, my name is Carla, and I am addicted to cheesecake.” It’s an addiction I happily embrace, and whenever I brainstorm new recipes, cheesecake almost invariably finds its way onto my list. My refrigerator is practically a cream cheese sanctuary, always stocked with blocks ready to be transformed into something utterly sinful and delicious at a moment’s notice.
Over the years, my kitchen has become a testament to the incredible versatility of cheesecake. I’ve explored it in every conceivable shape, size, and flavor, from perfectly proportioned 6-inch cheesecakes and 7-inch cheesecakes designed for smaller gatherings, to charming ramekin cheesecakes, delightful mini cheesecakes, and even innovative no-bake mini cheesecakes. I’ve even experimented with the convenience of an air fryer cheesecake! Given this extensive cheesecake journey, it’s only fitting that I add the wonderfully inventive Cheesecake In A Jar to my repertoire and yours.
These individual cheesecakes are a true game-changer. Imagine a perfectly portioned, creamy cheesecake, baked directly within its own charming glass jar, showcasing beautiful layers of buttery crust and vibrant fruit topping. This presentation makes them absolutely perfect for gift-giving – who wouldn’t be thrilled to receive a delicious, homemade mason jar cheesecake? They elevate any occasion, transforming a simple dessert into a memorable experience.
While the trend of serving foods in jars might seem a bit “overdone” to some, I believe it’s actually quite ingenious when executed thoughtfully, especially for desserts like cheesecake. Traditionally, “gifts in jars” often conjure images of dry baking mixes, which, while lovely, require the recipient to actually bake. And for those who find baking intimidating or lack the necessary equipment, these mixes can go unused. Baking, after all, is both an art and a science, and not everyone feels confident in their culinary skills.
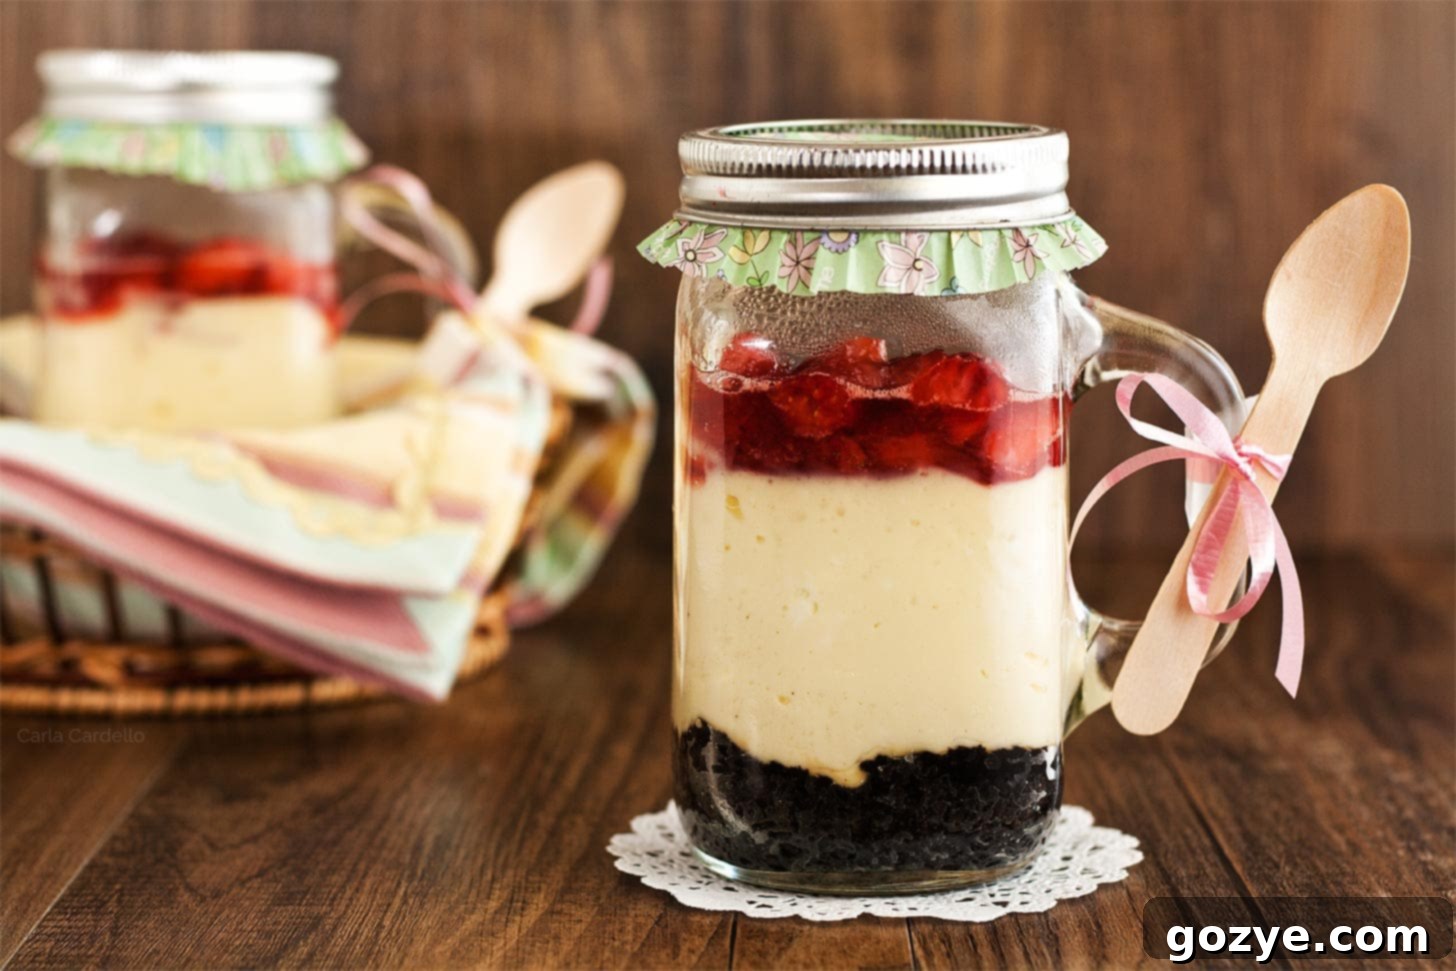
This is precisely where the brilliance of a baked mason jar cheesecake shines. You’re not just giving a gift; you’re giving a ready-to-eat dessert, a delightful treat that can be enjoyed right on the spot. It’s a thoughtful gesture that caters to everyone, from the busiest professional to the most reluctant baker. And as a bonus, tucking a small spoon alongside it makes it an even more complete and irresistible present!
Why You’ll Absolutely Love Baking Individual Cheesecake Jars
You might be asking yourself, “Why should I go through the effort of baking cheesecake in a jar when a classic cheesecake recipe is so familiar?” The answer lies in the unique advantages and sheer delight these individual desserts offer. Here are compelling reasons why mason jar cheesecakes are a fantastic choice:
- Unforgettable Gifts: Forget generic store-bought presents! Dress up these individual cheesecake jars with a ribbon and a personalized tag, and voilà – you have a heartfelt, homemade gift that is far more cherished than any mass-produced item. They’re perfect for holidays, birthdays, hostess gifts, or as a thoughtful gesture for a friend in need of a sweet pick-me-up. The presentation itself feels luxurious and personal, showing you put extra care into your offering.
- Unmatched Flavor & Topping Versatility: When you bake a single, whole cheesecake, you’re generally committed to one topping for the entire dessert. Mason jar cheesecakes, however, open up a world of culinary possibilities! Each jar can be customized with a different topping, allowing everyone to enjoy their favorite flavor. You can even set up a “cheesecake topping bar” at your next gathering, letting guests create their own personalized masterpiece. Imagine a spread of fresh berries, chocolate ganache, caramel sauce, and various pie fillings – the options are truly endless, catering to every palate.
- Effortless Portability & Serving Convenience: Heading to a party, potluck, or picnic? Transporting and serving individual cheesecakes is significantly easier and less messy than trying to cut and plate slices from a large cake. The jars keep each dessert perfectly contained, fresh, and protected, eliminating the need for extra plates or serving utensils. Simply grab a jar, and you’re ready to enjoy! This convenience makes them ideal for events where easy grab-and-go options are appreciated.
- Built-in Portion Control: While I’m certainly not a fan of the “D” word (diet), as we mature, being mindful of our dessert consumption becomes increasingly important. Serving cheesecake jars provides automatic portion control, ensuring you (and your guests) can indulge in a decadent treat without the temptation to overeat. Each jar is a satisfying single serving, allowing you to fully enjoy your dessert guilt-free and mindfully.
Selecting the Perfect Mason Jars for Baking
Choosing the right jars is key to a successful cheesecake in a jar experience. You can use most glass mason jars, typically ranging from 6 to 8 ounces, which are ideal for single servings. For ease of layering your crust, cheesecake batter, and toppings, opting for jars with a wider mouth will make the process much smoother.
It is crucial to ensure that the jars you select are specifically labeled as “oven safe” for baking. Not all glass jars are designed to withstand oven temperatures, and using non-oven-safe jars could lead to breakage. Always check the manufacturer’s guidelines.
The charming jars featured in the photos here are not traditional canning jars, but rather repurposed jam jars that my parents saved due to their unique, convenient handles. After measuring their volume, each of these specific jars holds 14 ounces, totaling 28 ounces for the two pictured. To determine how many jars you’ll need for this recipe, simply take the total yield volume (approximately 28 ounces for this recipe) and divide it by the volume of your chosen jars (e.g., 6 ounces, 8 ounces, etc.).
For example, if you’re using 6-ounce jars, you’ll need approximately 4-5 jars. For 8-ounce jars, you’ll need 3-4 jars. Remember that cheesecake doesn’t rise significantly during baking, but it’s important to leave sufficient room at the top of each jar for your delicious garnishes and toppings.
Essential Ingredients for Your Cheesecake In A Jar
Crafting these delectable cheesecake jars requires just a few simple, high-quality ingredients. Each component plays a vital role in achieving that perfect creamy texture and balanced flavor:
- Cookie Crumbs: The foundation of any great cheesecake is its crust. I personally love using Oreo cookie crumbs for a rich, chocolatey base, but you have endless possibilities! Graham cracker crumbs are a classic choice, or you could experiment with vanilla wafers, gingersnaps, shortbread cookies, or even Biscoff cookies for a unique twist. Ensure they are finely crushed to form a compact crust.
- Unsalted Butter: Melted butter is essential for binding the cookie crumbs together, creating a firm and flavorful crust that won’t crumble apart. Using unsalted butter allows you to control the overall saltiness of your dessert.
- Full-Fat Cream Cheese: This is, without a doubt, the star of your cheesecake! For the creamiest, richest, and most luxurious texture, always opt for full-fat block cream cheese. Low-fat or fat-free versions contain a higher water content, which can result in a runnier, less stable cheesecake texture that may not set properly. Make sure it’s at room temperature for a smooth, lump-free batter.
- Granulated Sugar: Sugar provides the perfect balance to the natural tanginess of the cream cheese, sweetening the cheesecake without overpowering its delicate flavor.
- Large Egg: A single large egg acts as a binder and helps to set the cheesecake, contributing to its smooth, custard-like consistency. Ensure your egg is also at room temperature to help it emulsify better with the cream cheese, preventing lumps and ensuring even baking.
- Vanilla Extract: A touch of pure vanilla extract enhances all the flavors in the cheesecake, adding a warm, aromatic note that is universally loved. For best results, use a good quality vanilla extract.
Craving a No-Bake Cheesecake In A Jar?
If you’re looking for a quicker, oven-free alternative, a no-bake cheesecake in a jar is a fantastic option! While this specific recipe is for a baked version, you can easily adapt the concept. Simply check out my recipe for no-bake caramel apple cheesecake parfaits, then layer the delicious filling into your jars with your chosen toppings. It’s a wonderfully refreshing dessert for warmer months or when you’re short on time.
Step-by-Step Guide: How To Make Baked Cheesecake In A Jar
Ready to create your beautiful and delicious cheesecake jars? Follow these straightforward steps for a perfect result every time:
- Prepare the Crust: In a medium bowl, combine your chosen cookie crumbs with the melted butter. Mix thoroughly until all the crumbs are moistened. Divide this mixture evenly among your oven-safe jars. Use your fingers or the back of a spoon to firmly press the crumb mixture into an even layer at the bottom of each jar. A cocktail muddler or the bottom of a smaller glass can also work wonders for compacting the crust.
- Whip the Cream Cheese and Sugar: In a large mixing bowl, using an electric mixer (with the paddle attachment if using a stand mixer), beat the room-temperature cream cheese and granulated sugar together on medium-high speed. Continue beating for 1-2 minutes until the mixture is light, fluffy, and completely smooth, with no lumps. Be sure to scrape down the sides of the bowl periodically to ensure everything is fully incorporated.
- Incorporate Egg and Vanilla: Reduce the mixer speed to low. Add the room-temperature egg and vanilla extract, beating just until they are fully incorporated. Be careful not to overbeat the batter once the egg is added, as this can incorporate too much air, leading to cracks in your cheesecake during baking. Once mixed, carefully spoon or pour the smooth cheesecake batter evenly into each prepared jar, filling them to about three-quarters full. Gently tap the jars on the counter a few times to release any trapped air bubbles and smooth the top surface.
- Set Up a Water Bath (Bain-Marie): A water bath is crucial for baking cheesecake as it helps to regulate the temperature, ensuring a slow, even bake and preventing the cheesecake from cracking. Place your filled jars inside a larger baking pan (an 8×8-inch pan works well). Carefully pour hot (ideally boiling) water into the larger pan, making sure it comes about halfway up the sides of your jars. Be very careful not to splash any water into the cheesecake batter itself.
- Bake to Perfection: Carefully transfer the baking pan with the jars and water bath to your preheated oven at 325°F (160°C). Bake for approximately 20-25 minutes, or until the internal temperature of the cheesecake reaches 150°F (65°C). The centers may still have a slight jiggle, which is perfectly normal and indicates a creamy texture to come.
- Cool and Chill: Once baked, carefully remove the baking pan from the oven. Let the cheesecake jars cool in the water bath for about 15 minutes. This gradual cooling helps prevent cracking. After 15 minutes, carefully remove the jars from the water bath and place them on a wire rack to cool completely at room temperature for at least 1 hour. Once cooled, cover the jars with their lids and transfer them to the refrigerator. Chill for a minimum of 4 hours, or ideally, overnight, to allow the cheesecake to fully set and for the flavors to develop. Garnish lavishly just before serving!
These delightful cheesecake jars can be stored in the refrigerator for up to 5-7 days, making them excellent for meal prepping desserts or gifting throughout the week.
Can You “Can” Cheesecake In A Jar for Shelf-Stable Storage?
When I first published this recipe back in 2013, one question I didn’t anticipate was: “Can you can cheesecake in a jar?” The answer is a definitive **no**. These cheesecake jars are not shelf-stable and cannot be canned using traditional methods. Due to their dairy content and low acidity, they require constant refrigeration to remain safe to eat.
If you’re planning to give these as gifts, it’s absolutely essential to clearly communicate to your recipient that the cheesecake must be stored in the refrigerator immediately upon receipt and enjoyed within 5-7 days. This ensures both safety and the best possible taste experience.
Creative Ways To Garnish Your Cheesecake In A Jar
One of the most exciting aspects of making individual cheesecakes in a jar is the endless possibilities for customization! Because each cheesecake is its own distinct serving, you can truly get creative with toppings, tailoring each one to your preference or that of your guests. This makes them perfect for any occasion and ensures everyone gets exactly what they desire. Here are some fantastic ideas to inspire your garnishing:
- Fruity Pie Fillings: Elevate your cheesecake with a generous spoonful of homemade or store-bought pie filling. Popular choices include luscious cherry pie filling, vibrant blueberry pie filling, or sweet peach pie filling. You could also try apple, mixed berry, or even tropical fruit fillings.
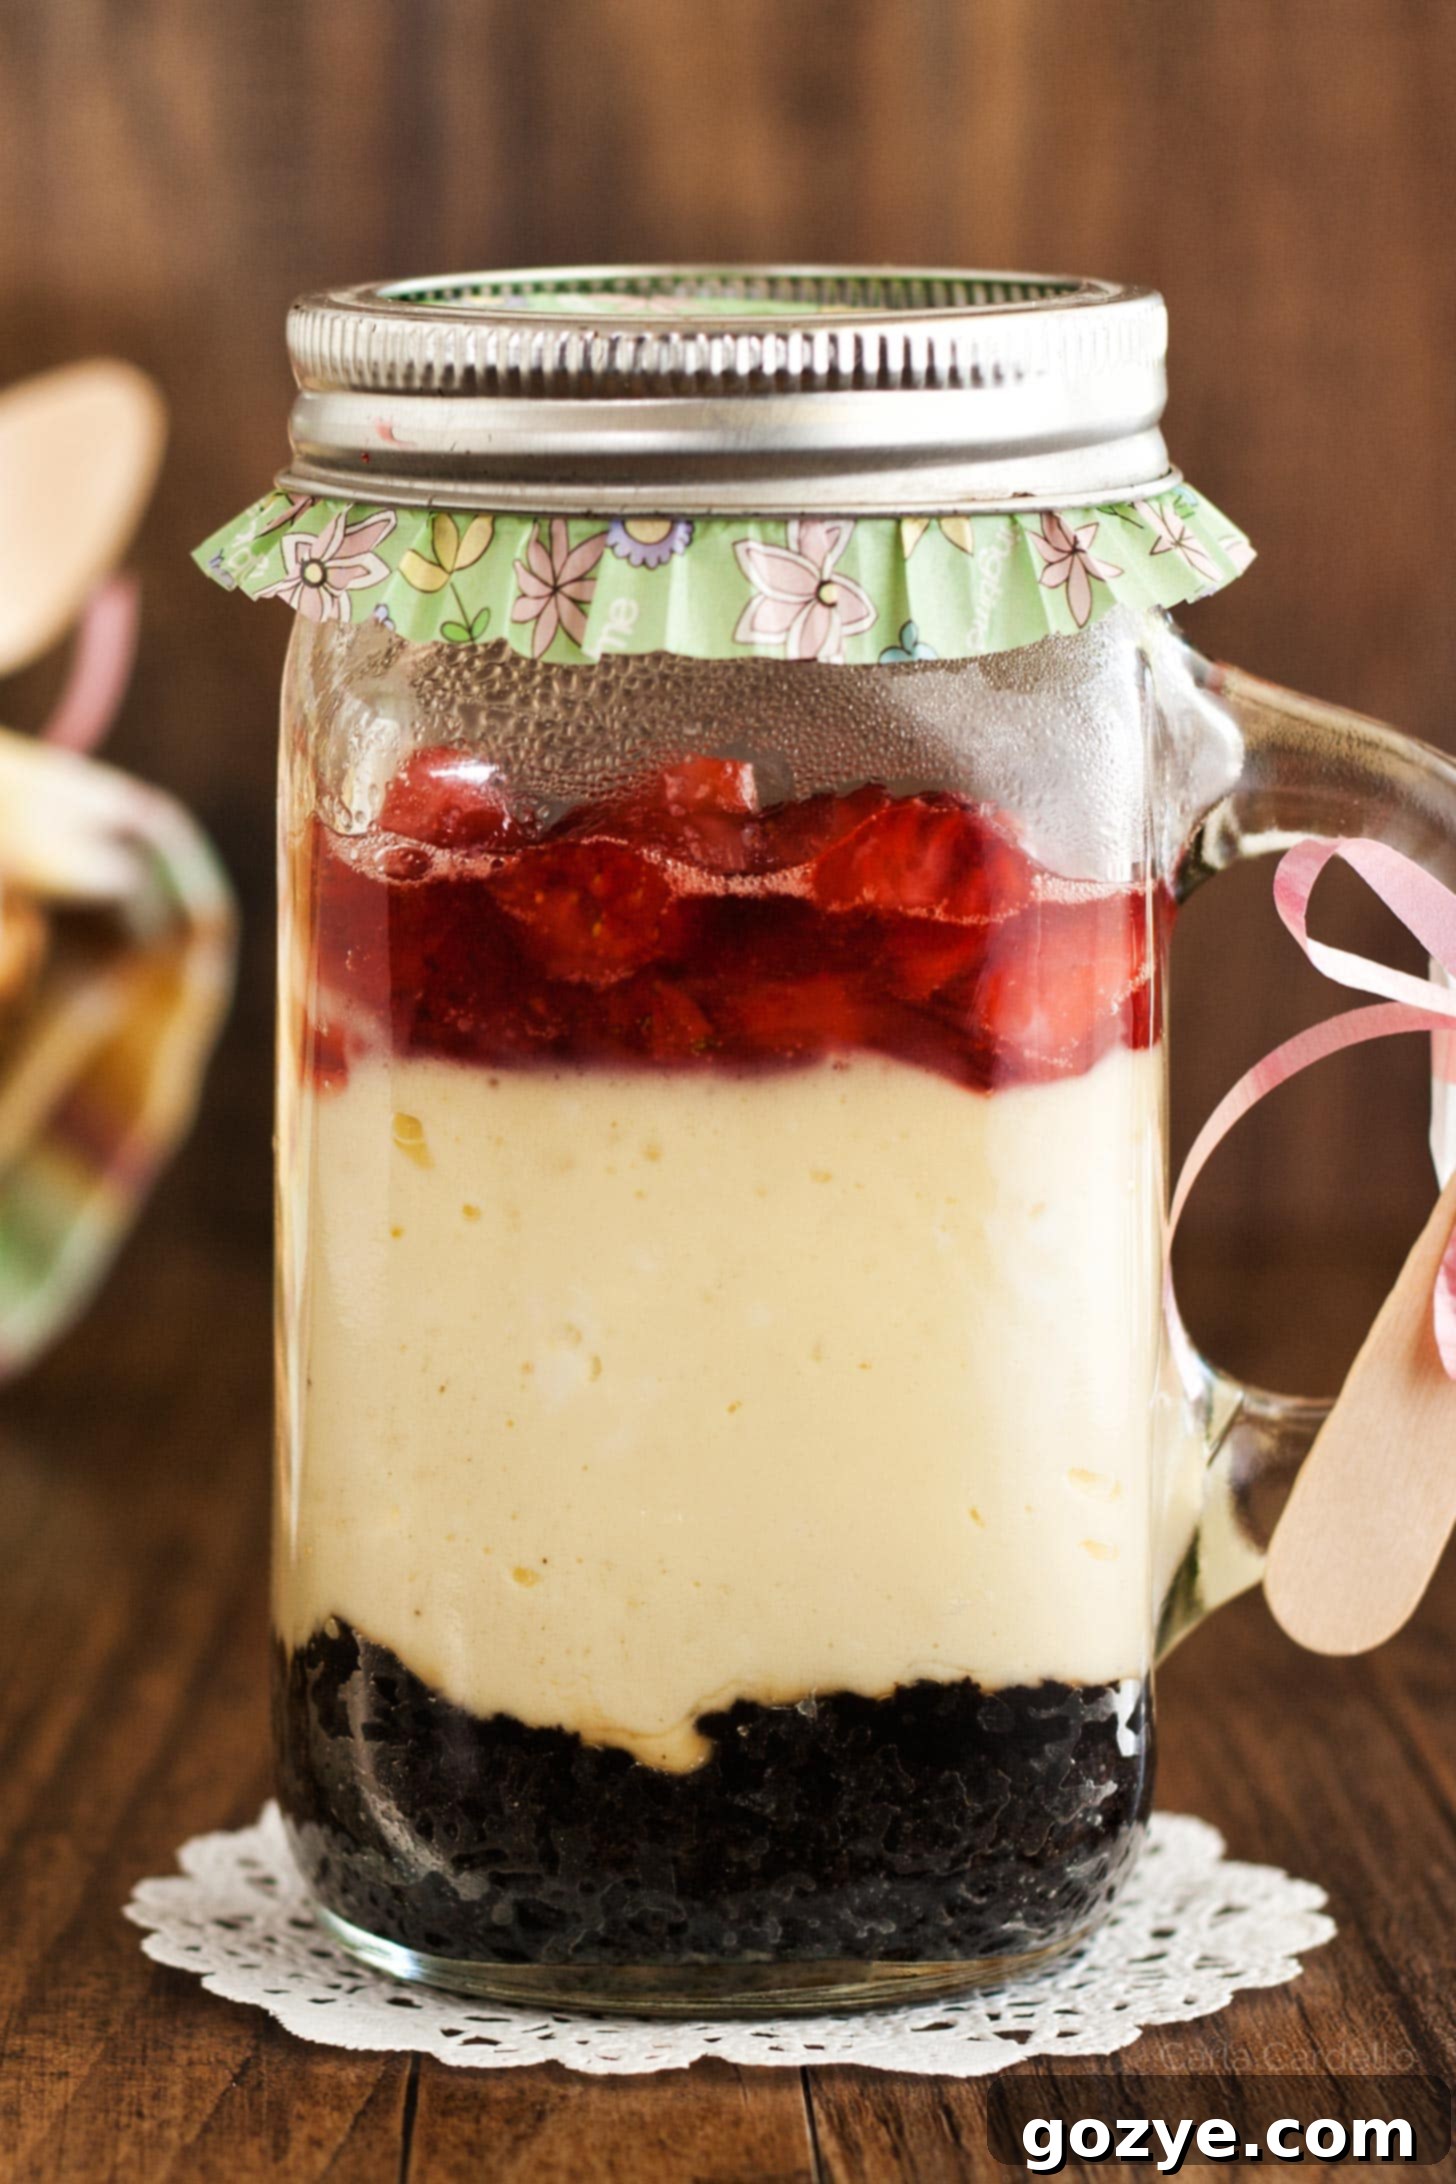
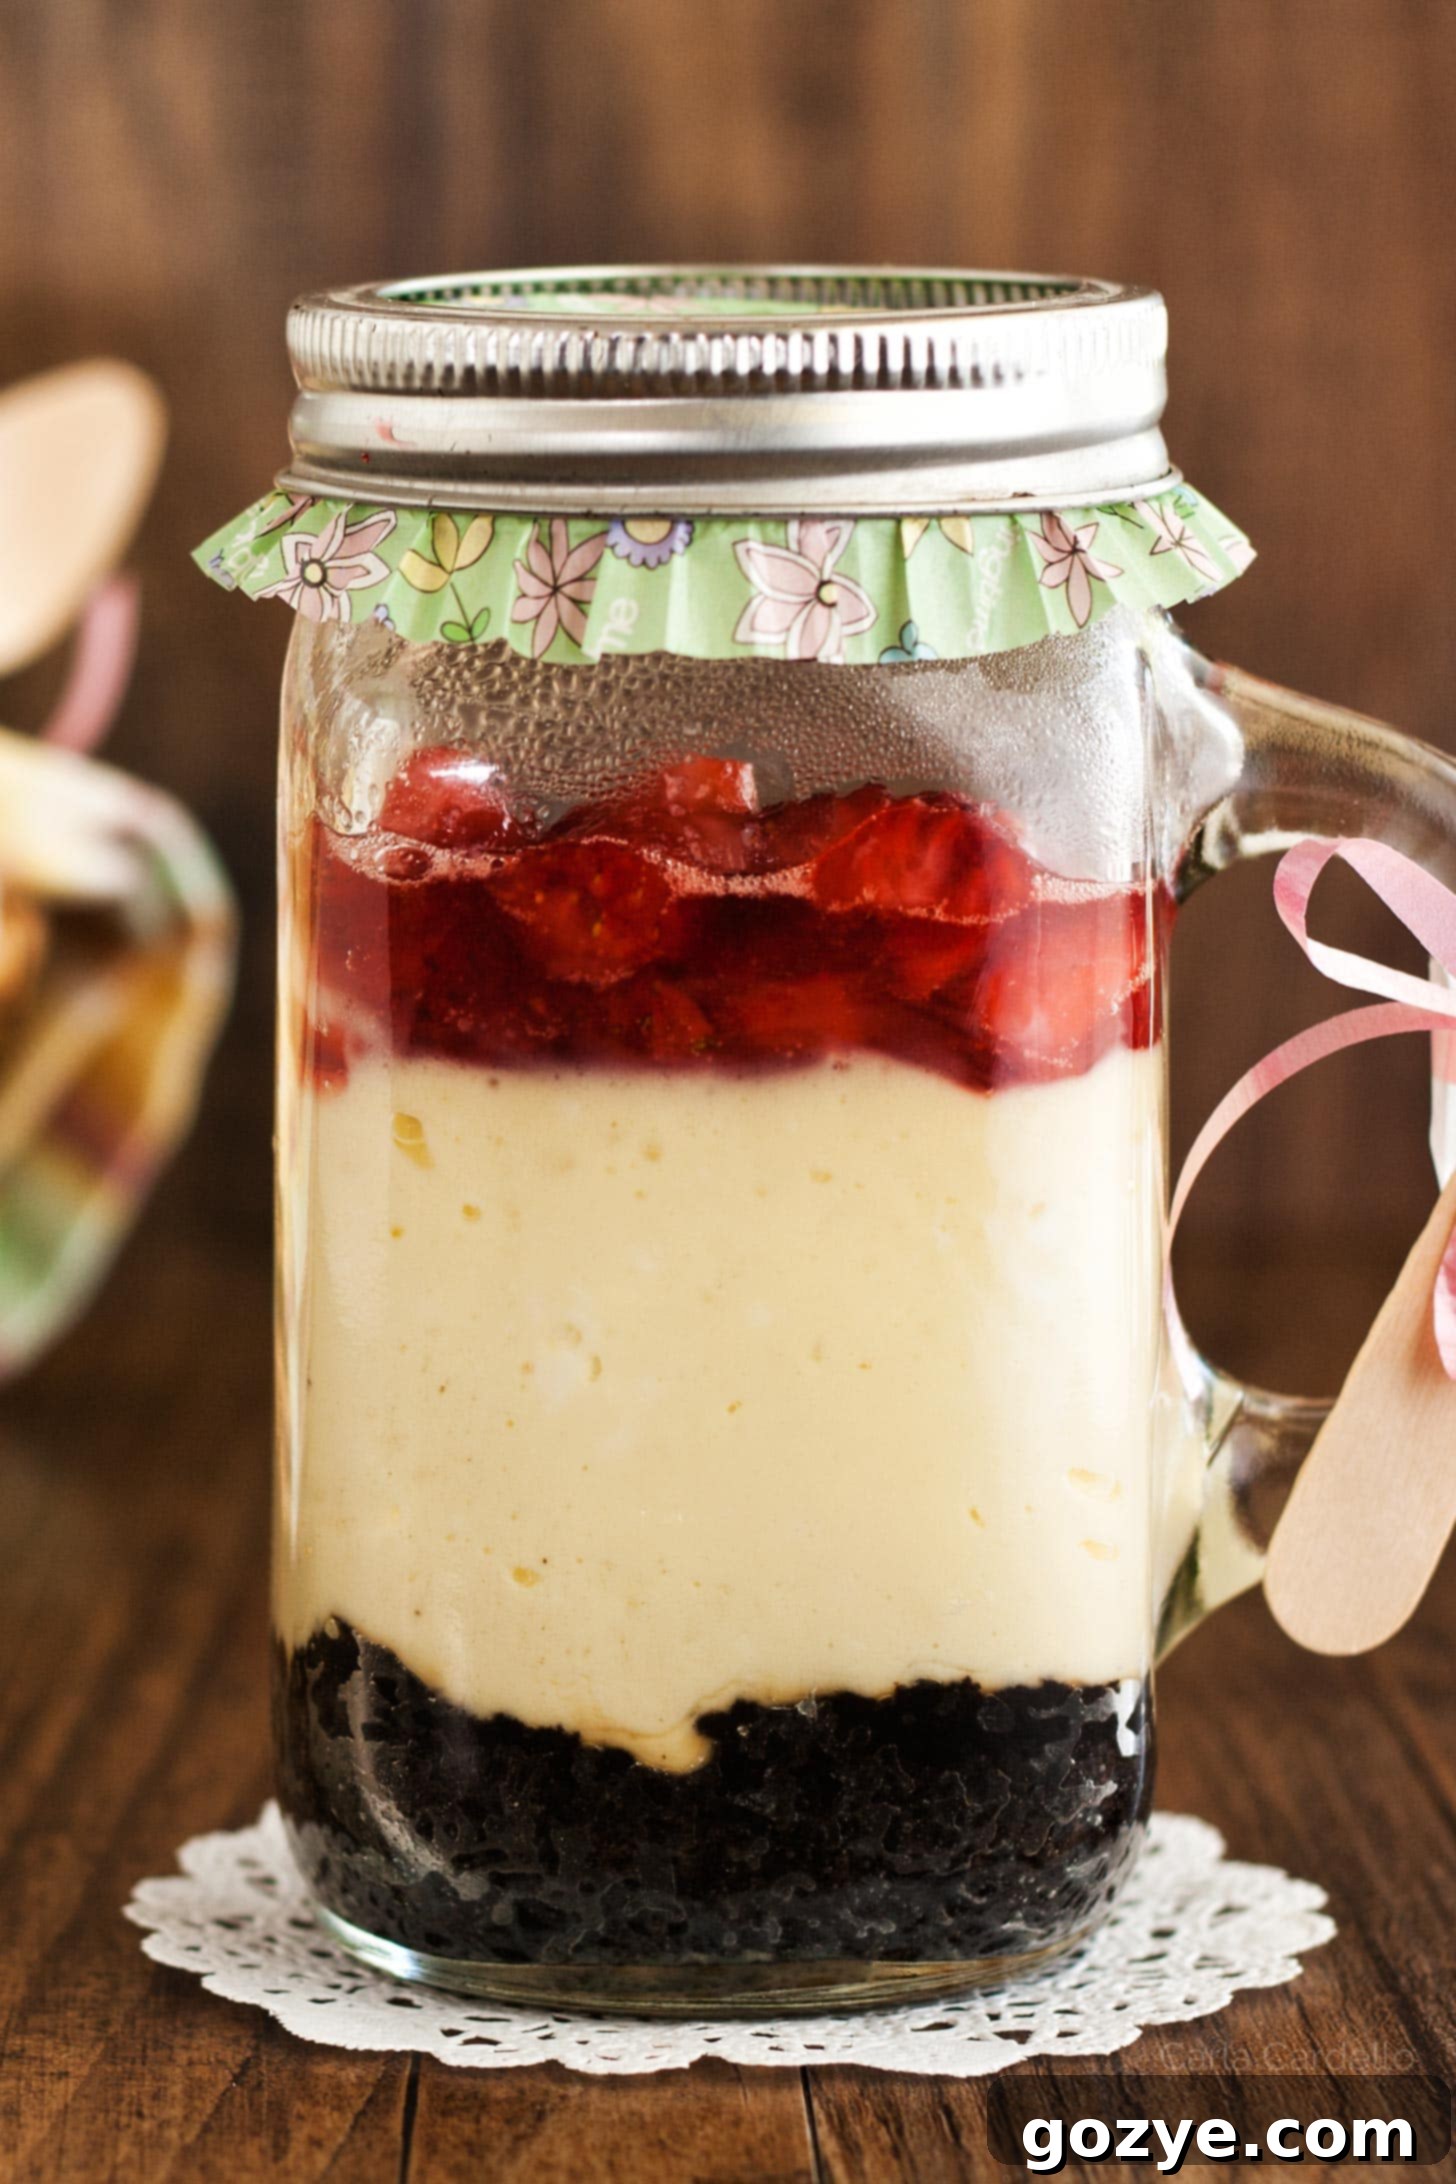
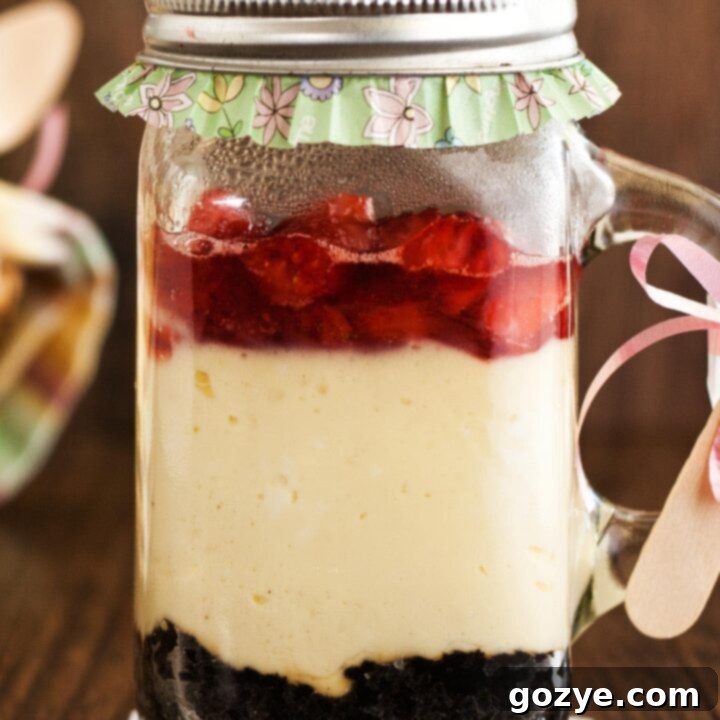
- Decadent Sauces: A silky smooth sauce drizzled over your cheesecake adds an extra layer of indulgence. My personal favorite is strawberry sauce (as pictured), but other incredible options include rich homemade caramel sauce, glossy chocolate ganache, tangy lemon curd, or a bright raspberry coulis.
- Light & Airy Whipped Cream: A dollop of fresh whipped cream is a classic topping that adds a beautiful finishing touch and a delightful contrast in texture. Consider making a small batch whipped cream for freshness, or experiment with flavored versions like peanut butter whipped cream or chocolate whipped cream for an extra special treat.
- Fresh Fruits: For a lighter, fresher touch, top your cheesecakes with an array of seasonal fresh berries (strawberries, blueberries, raspberries), sliced kiwi, mango chunks, or pomegranate seeds. The vibrant colors and natural sweetness are irresistible.
- Crunchy Elements: Add textural interest with chopped nuts (pecans, walnuts, pistachios), toasted coconut flakes, mini chocolate chips, crushed candy bars, or even a sprinkle of granola.
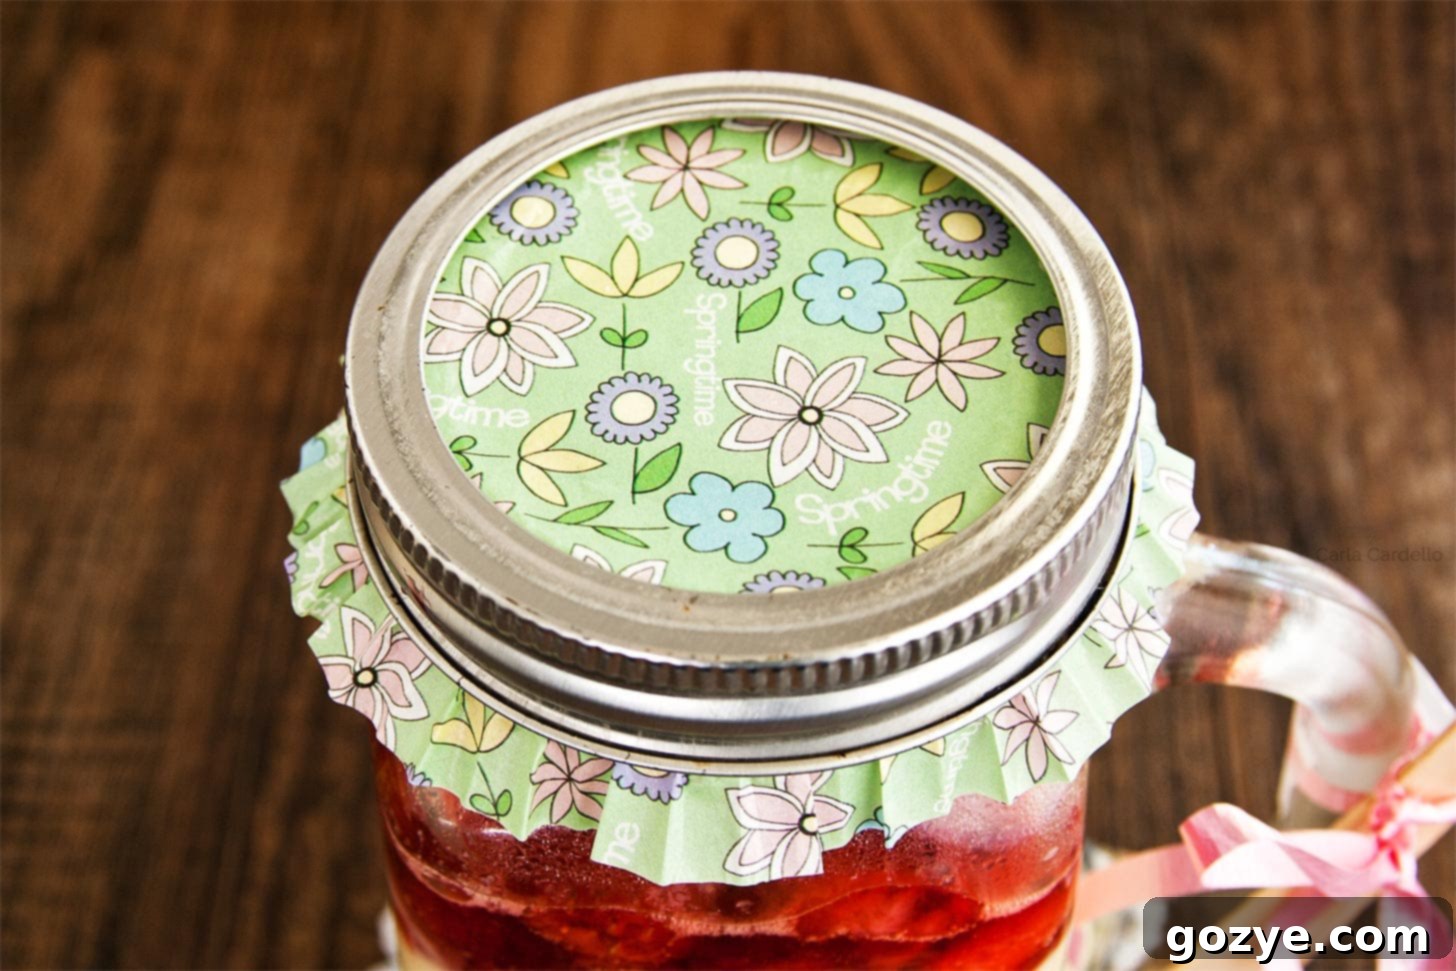
Looking for a super cute and clever way to decorate your cheesecake jars for gifting? I’ve got a fantastic trick! You know those mason jar lids that come in two pieces – a flat center disc and a screw-on rim? Here’s what you do: place the flat center piece onto the jar as usual, then invert a standard cupcake liner over the lid. Finally, screw the outer rim onto the jar, securing the cupcake liner in place. This instantly transforms your cheesecake jar into an adorable, gift-ready package! It’s a simple, inexpensive, and incredibly charming way to add a personal touch.
Cheesecake In A Jar FAQ
Yes, absolutely! Using a water bath (or bain-marie) for cheesecake is a critical step that ensures your jars bake evenly and gently. The moist heat from the water bath helps to prevent the cheesecake from drying out, cracking, or browning too much on top, while also ensuring that the delicate center is perfectly baked through without being undercooked. It’s the secret to achieving that signature silky-smooth, creamy texture that cheesecake is known for.
Yes, cheesecake is an ideal dessert to prepare in advance! In fact, making cheesecake jars ahead of time is highly recommended. Not only does it allow you to manage your time better, but cheesecake truly benefits from a long chill. It needs to refrigerate for at least 4 hours, but ideally overnight, for the flavors to fully meld and the texture to set perfectly. You can confidently prepare these cheesecake jars up to 2 days ahead of serving, keeping them covered in the refrigerator.
No mason jars? No problem! While the jars are charming, you can still enjoy this delicious cheesecake. This recipe can be easily adapted to bake in two mini springform pans (typically 4-inch or 5-inch), which will yield small, individual cheesecakes that can be sliced. Please refer to my 4-inch cheesecake recipe for specific directions on baking in small springform pans. Alternatively, you can also bake this recipe in individual ramekins, similar to my ramekin cheesecakes, adjusting baking time as needed.
Absolutely! Mason jars are designed to be durable and reusable. As long as your jars are not cracked, chipped, or otherwise damaged from the baking process or prior use, you can wash them thoroughly and reuse them for future cheesecake creations, other desserts, or even for storing various pantry items. Always inspect your jars for any damage before using them for baking to ensure safety.
Cheesecake In A Jar
2-4 jars
20 minutes
25 minutes
4 hours
4 hours 45 minutes
Bake this creamy Cheesecake In A Jar for a pretty presentation with layers of cookie crust and strawberry sauce! Give away as holiday gifts or keep for yourself as portion control.
Ingredients
- 2/3 cup cookie or graham cracker crumbs
- 2 tablespoons unsalted butter, melted
- 8 ounces (1 block or 8 tablespoons) full-fat cream cheese, room temperature and not cold to the touch (do not sub fat free)
- 1/3 cup granulated sugar
- 1 large egg, room temperature and not cold to the touch
- 1 teaspoon vanilla extract
Toppings Such As
- Strawberry Sauce
- Cherry Pie Filling
- Blueberry Pie Filling
- Small Batch Whipped Cream
- Ganache
Instructions
- Preheat oven to 325F degrees. Have an 8×8 pan and two 14-ounce jars ready.* Prepare hot water in a kettle or pan as you’ll need it for the water bath.
- In a medium bowl, mix together the crumbs and butter. Divide between the two jars and press down firmly with either your fingers or a spoon.
- In a large mixing bowl on medium-high speed (with paddle attachment if using a stand mixer), beat together the cream cheese and sugar until light and fluffy, about 1-2 minutes.
- Scrape down the bowl then beat in the egg and vanilla.
- Divide batter evenly between the jars then place inside the 8×8 pan. Fill pan halfway up with boiling water. Do not get water inside the jars themselves.
- Bake 20-25 minutes uncovered without lids or until the internal temperature reaches 150F degrees (it may still wiggle a little).
- Cool in the water bath for 15 minutes then carefully remove the jars. Cool uncovered at room temperature for 1 hour.
- Cover with lids and refrigerate at least 4 hours or overnight before garnishing and serving.
Store in the refrigerator for up to 5-7 days.
Notes
- *To use smaller jars, divide 28 ounces by however many ounces your jars are to determine how many you’ll need. For 6 ounce jars, you’ll need 4-5 jars. For 8 ounce jars, you’ll need 3-4 jars.
- Don’t have mason jars? Check out my 4 inch cheesecake recipe or ramekin cheesecakes.
- You cannot can this recipe. If giving as gifts, please inform your recipient to refrigerate until ready to eat.
Recommended Products
As an Amazon Associate and member of other affiliate programs, I earn from qualifying purchases.
- Mason Jar
Did you make this recipe?
Let me know what you think! Rate the recipe above, leave a comment below, and/or share a photo on Instagram using #HITKrecipes
First published June 23, 2013, this recipe has been a beloved favorite, continuously inspiring delightful individual cheesecake creations.
