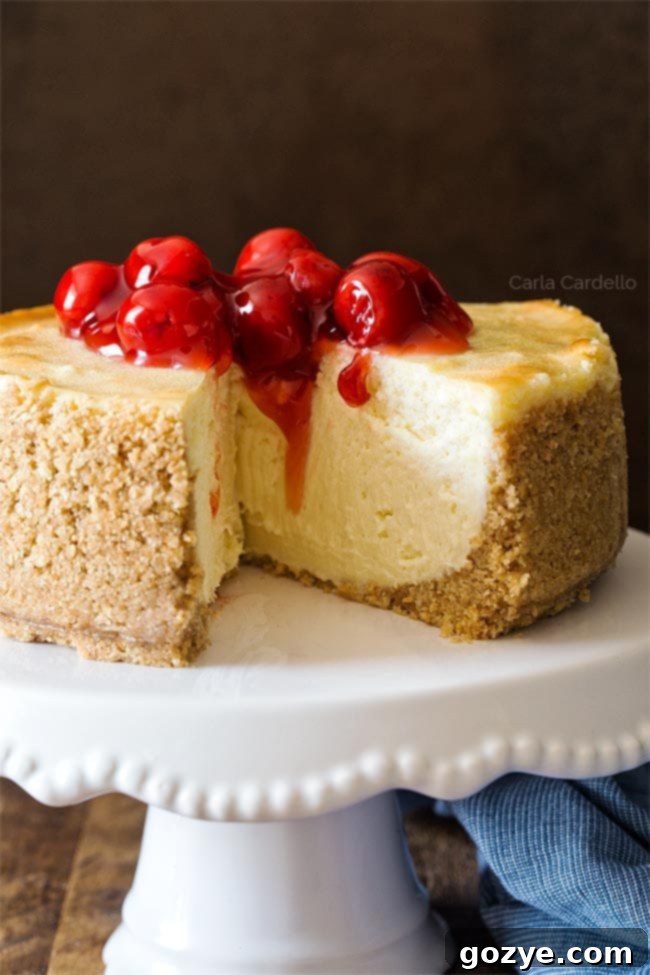
Perfect 6 Inch Cheesecake Recipe: Your Guide to a Creamy, Crack-Free Dessert for Two
Dreaming of a luscious, creamy cheesecake but don’t want a huge, leftover-filled dessert? Our comprehensive 6 Inch Cheesecake recipe is your answer! This small-batch cheesecake is perfectly sized for two people, making it an ideal sweet treat for any occasion. From a romantic dinner to a cozy night in, this dessert delivers a smooth, velvety texture every time. Plus, we’ll guide you through garnishing options, including classic cherry pie filling, light whipped cream, and many more creative toppings!
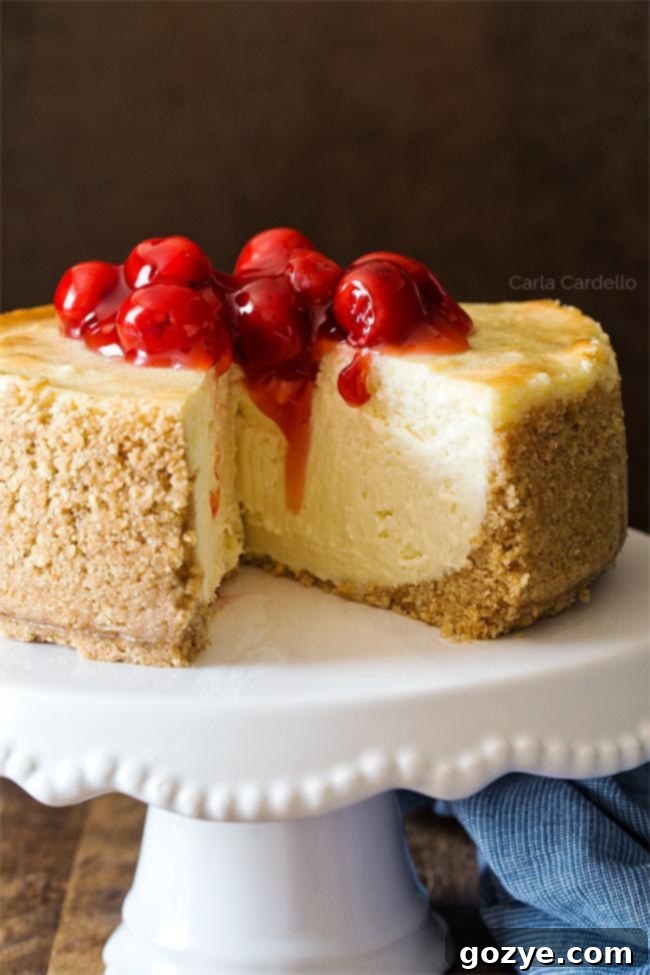
Many home bakers, just like you, have reached out asking for a reliable 6-inch cheesecake recipe, especially those who already own a small springform pan. The demand for a perfectly scaled-down, individual-sized cheesecake has been overwhelming, and for good reason! Full-sized cheesecakes can be daunting, often leading to too many leftovers or a less-than-perfect bake when scaled down incorrectly.
That’s why I dedicated time to developing and perfecting this 6 Inch Cheesecake recipe. It’s designed specifically for a 6-inch springform pan, ensuring precise measurements and an impeccable bake every time. This recipe yields a delightfully small cheesecake, ideal for two people to savor over a few days, or for a small gathering of 4-6 if you’re feeling generous!
This dessert features a delightful, homemade graham cracker crust that provides the perfect balance to the rich, creamy filling. The beauty of a classic cheesecake lies in its versatility when it comes to garnishes. You can customize it to your heart’s content, choosing from sweet cherry pie filling, tangy blueberry jam, light and airy whipped cream, or even a drizzle of chocolate ganache.
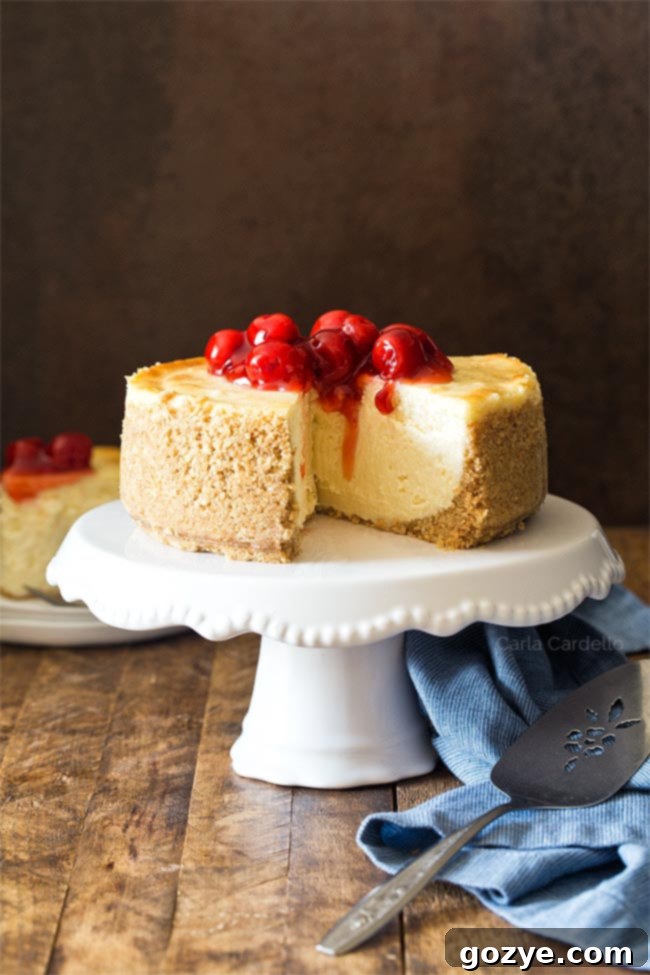
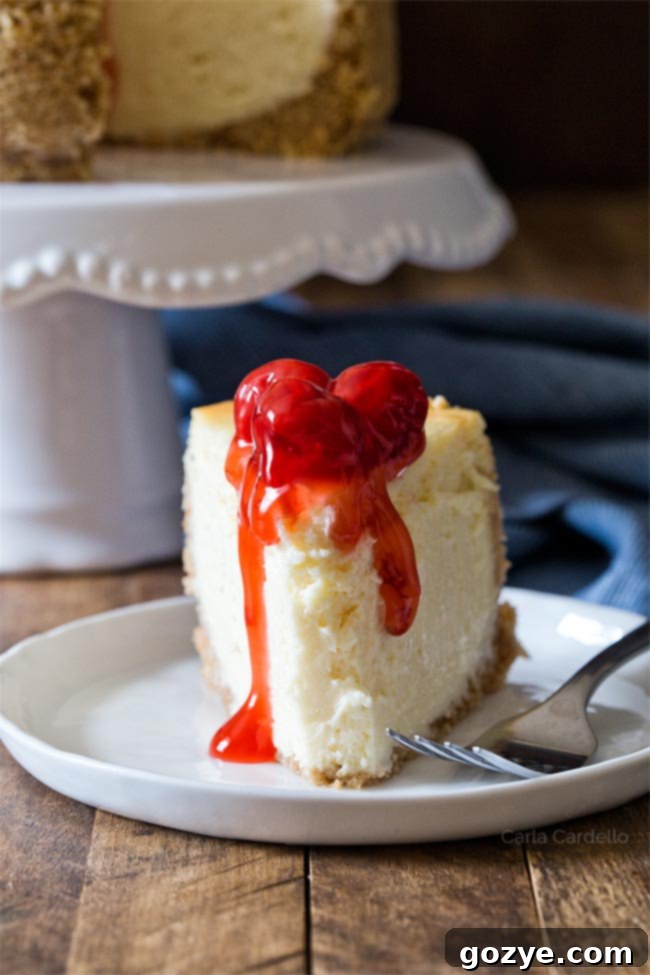
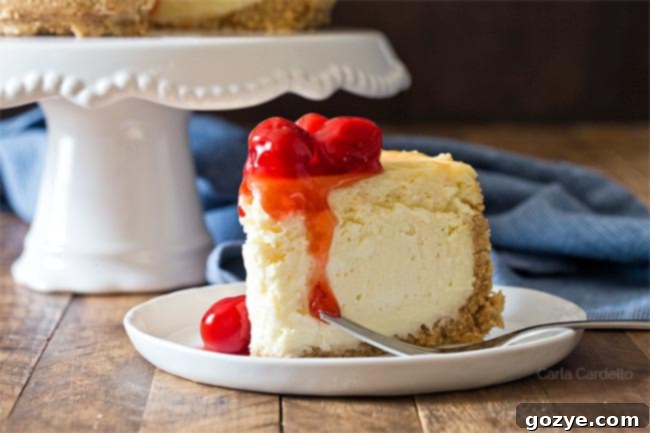
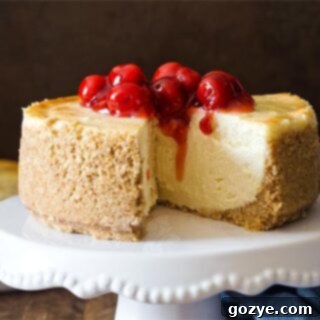
For this particular six-inch cheesecake, I opted for a vibrant cherry topping, a personal favorite that offers a lovely tart contrast to the sweet creaminess of the cheesecake. The visual appeal is as stunning as the taste!
This easy-to-follow small cheesecake recipe is accompanied by step-by-step photos, making the baking process straightforward for even novice bakers. We focus on techniques that guarantee a smooth, velvety texture and a perfectly baked, crack-free surface. Say goodbye to the frustrations of cracked tops or lumpy fillings!
I’ve included all my tried-and-true tips and tricks—the result of extensive testing—to help you achieve the perfect 6-inch cheesecake. While this guide may seem a little long, I promise every detail is crucial and will lead you to cheesecake success. Your patience will be rewarded with a flawless, delicious dessert.
What Pan Do I Need for a 6 Inch Cheesecake?
For an ideal 6-inch cheesecake, a 6-inch springform pan is absolutely essential. Cheesecake, unlike many other baked goods, is incredibly delicate and cannot be inverted or flipped out of a standard cake pan without risking damage to its pristine appearance and creamy structure. The removable sides of a springform pan allow for a gentle release, preserving the perfect edges of your homemade cheesecake.
The pan I personally use and recommend (an Amazon affiliate link) is a 6 x 2-inch springform pan. This particular 6-inch cheesecake recipe is specifically developed to fill this pan almost to the very top, creating a wonderfully thick and satisfying slice without any risk of overflowing during baking. The slightly higher sides are perfect for containing the rich batter and ensuring an impressive height.
You can also opt for a 6 x 3-inch springform pan (another Amazon affiliate link). This simply means you’ll have a bit more headroom in the pan, which doesn’t alter the outcome of this recipe significantly, but might give you a slightly less tall cheesecake depending on how the batter settles. Either size will work beautifully, with the 6×2 being slightly more tailored for the height of this particular recipe.
It’s important to note that this recipe is not designed for a standard 6-inch cake pan. While it might seem like a suitable alternative, removing the delicate cheesecake from a fixed-side cake pan would be exceedingly difficult and almost certainly compromise its structure and presentation. If you absolutely have no other option, you might attempt it by lining the pan with parchment paper slings, but be prepared that your cheesecake may not look as pristine when served.
What If I Don’t Have a 6 Inch Springform Pan?
No small springform pan on hand? Don’t despair! You still have plenty of options to enjoy delicious cheesecake:
- For individual portions, you can bake mini cheesecakes or even no-bake mini cheesecakes in a standard muffin pan using paper liners.
- If you prefer a bar format, try our small batch cheesecake bars baked in a loaf pan, which offers easy slicing.
- Already have a slightly larger 7 inch springform pan? We have a dedicated recipe for that size.
- If you have even smaller mini springform pans, our 4 Inch Cheesecake recipe is perfect for those.
- For a fun, portable dessert, try making cheesecake in a jar.
- And for the ultimate no-fuss option, whip up some No Bake Cheesecake Cups, which can be assembled in any serving vessel you have available.
How Many Does a 6 Inch Cheesecake Feed?
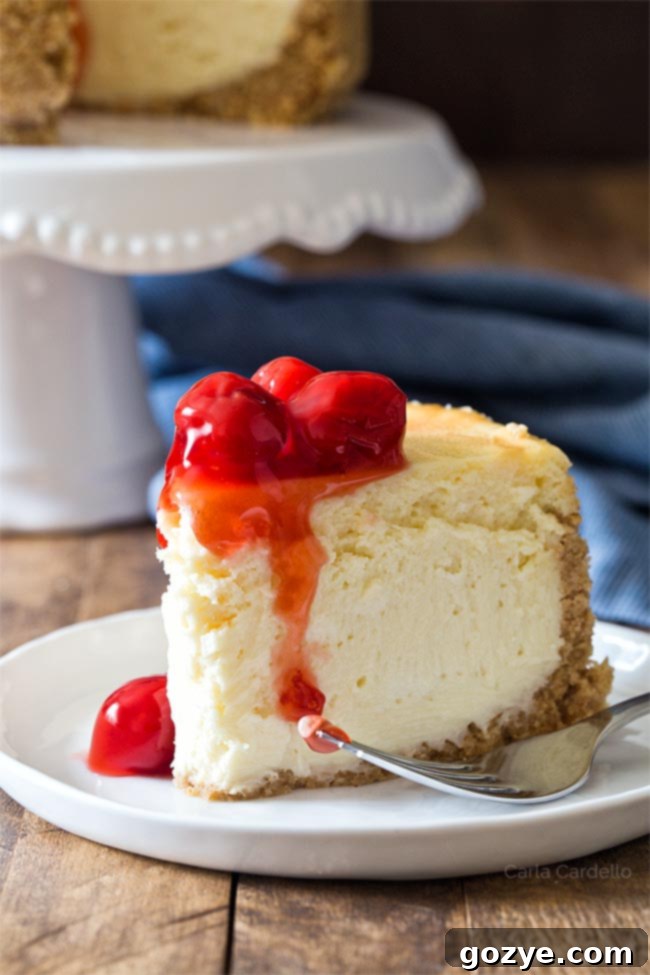
A beautifully crafted 6-inch cheesecake is surprisingly versatile in its serving size. You can typically cut it into 4 to 6 generous slices, which translates to 4 to 6 servings. This makes it a fantastic option for a small family dessert or when entertaining a few guests.
However, I often think of this as the ultimate “small cheesecake for two people.” When enjoyed as a dessert for two, each person can indulge in 2-3 slices, allowing you to savor this delightful treat over a few days. After all, when was the last time you truly ate only one slice of cheesecake and felt completely satisfied?
If even this small-batch cheesecake feels like too much, or if you’re looking for an even more intimate dessert experience, you might want to check out my dedicated cheesecake for two recipe, which offers even smaller individual portions.
How Do You Bake Cheesecake Faster?
While this baked 6-inch cheesecake recipe delivers unparalleled creaminess and texture, it does require a fair amount of time in the oven, followed by essential cooling and chilling periods. If you’re short on time but still craving a delicious cheesecake, there are quicker alternatives:
- Consider my Instant Pot Cheesecake recipe. This method drastically reduces baking time, and many Instant Pot cheesecake recipes, including mine, can be adapted for a 6-inch pan, making it a fantastic fast-track option.
- Alternatively, for a completely no-bake solution, explore our No-Bake Mini Cheesecakes which set in the refrigerator and require zero oven time.
Essential Ingredients For The Best 6 Inch Cheesecake
A truly exceptional cheesecake relies on a few simple, yet crucial, ingredients. Quality matters here, so choose the best you can find to ensure that rich, creamy texture and delightful flavor.
- Graham Cracker Crumbs: These form the traditional base of our cheesecake crust, providing a subtly sweet and crumbly texture. While graham crackers are classic, feel free to experiment with other cookie crumbs like vanilla wafers, shortbread, or even chocolate cookies for a different flavor profile. I recommend using a food processor for uniformly fine crumbs.
- Butter: Melted butter is the binding agent for the crust, holding the crumbs together and creating a firm, flavorful foundation. Unsalted butter is preferred so you can control the salt content.
- Cream Cheese: This is the star of any cheesecake! For the absolute best results, always use full-fat block cream cheese. Low-fat or fat-free versions contain more water, which can lead to a watery, less stable, and less creamy cheesecake after baking. Ensure your cream cheese is at room temperature to prevent lumps and ensure a smooth batter.
- Granulated Sugar: Sugar provides the essential sweetness, balancing out the tangy flavor of the cream cheese. It also contributes to the cheesecake’s tender texture.
- Eggs: Eggs act as the primary binder and thickener, giving the cheesecake its characteristic custardy texture. Always use large eggs and, critically, ensure they are at room temperature. Cold eggs can cause the batter to seize and create lumps.
- Vanilla Extract: A touch of pure vanilla extract enhances all the other flavors, adding a warm, aromatic depth to the cheesecake batter. Don’t skimp on good quality vanilla!
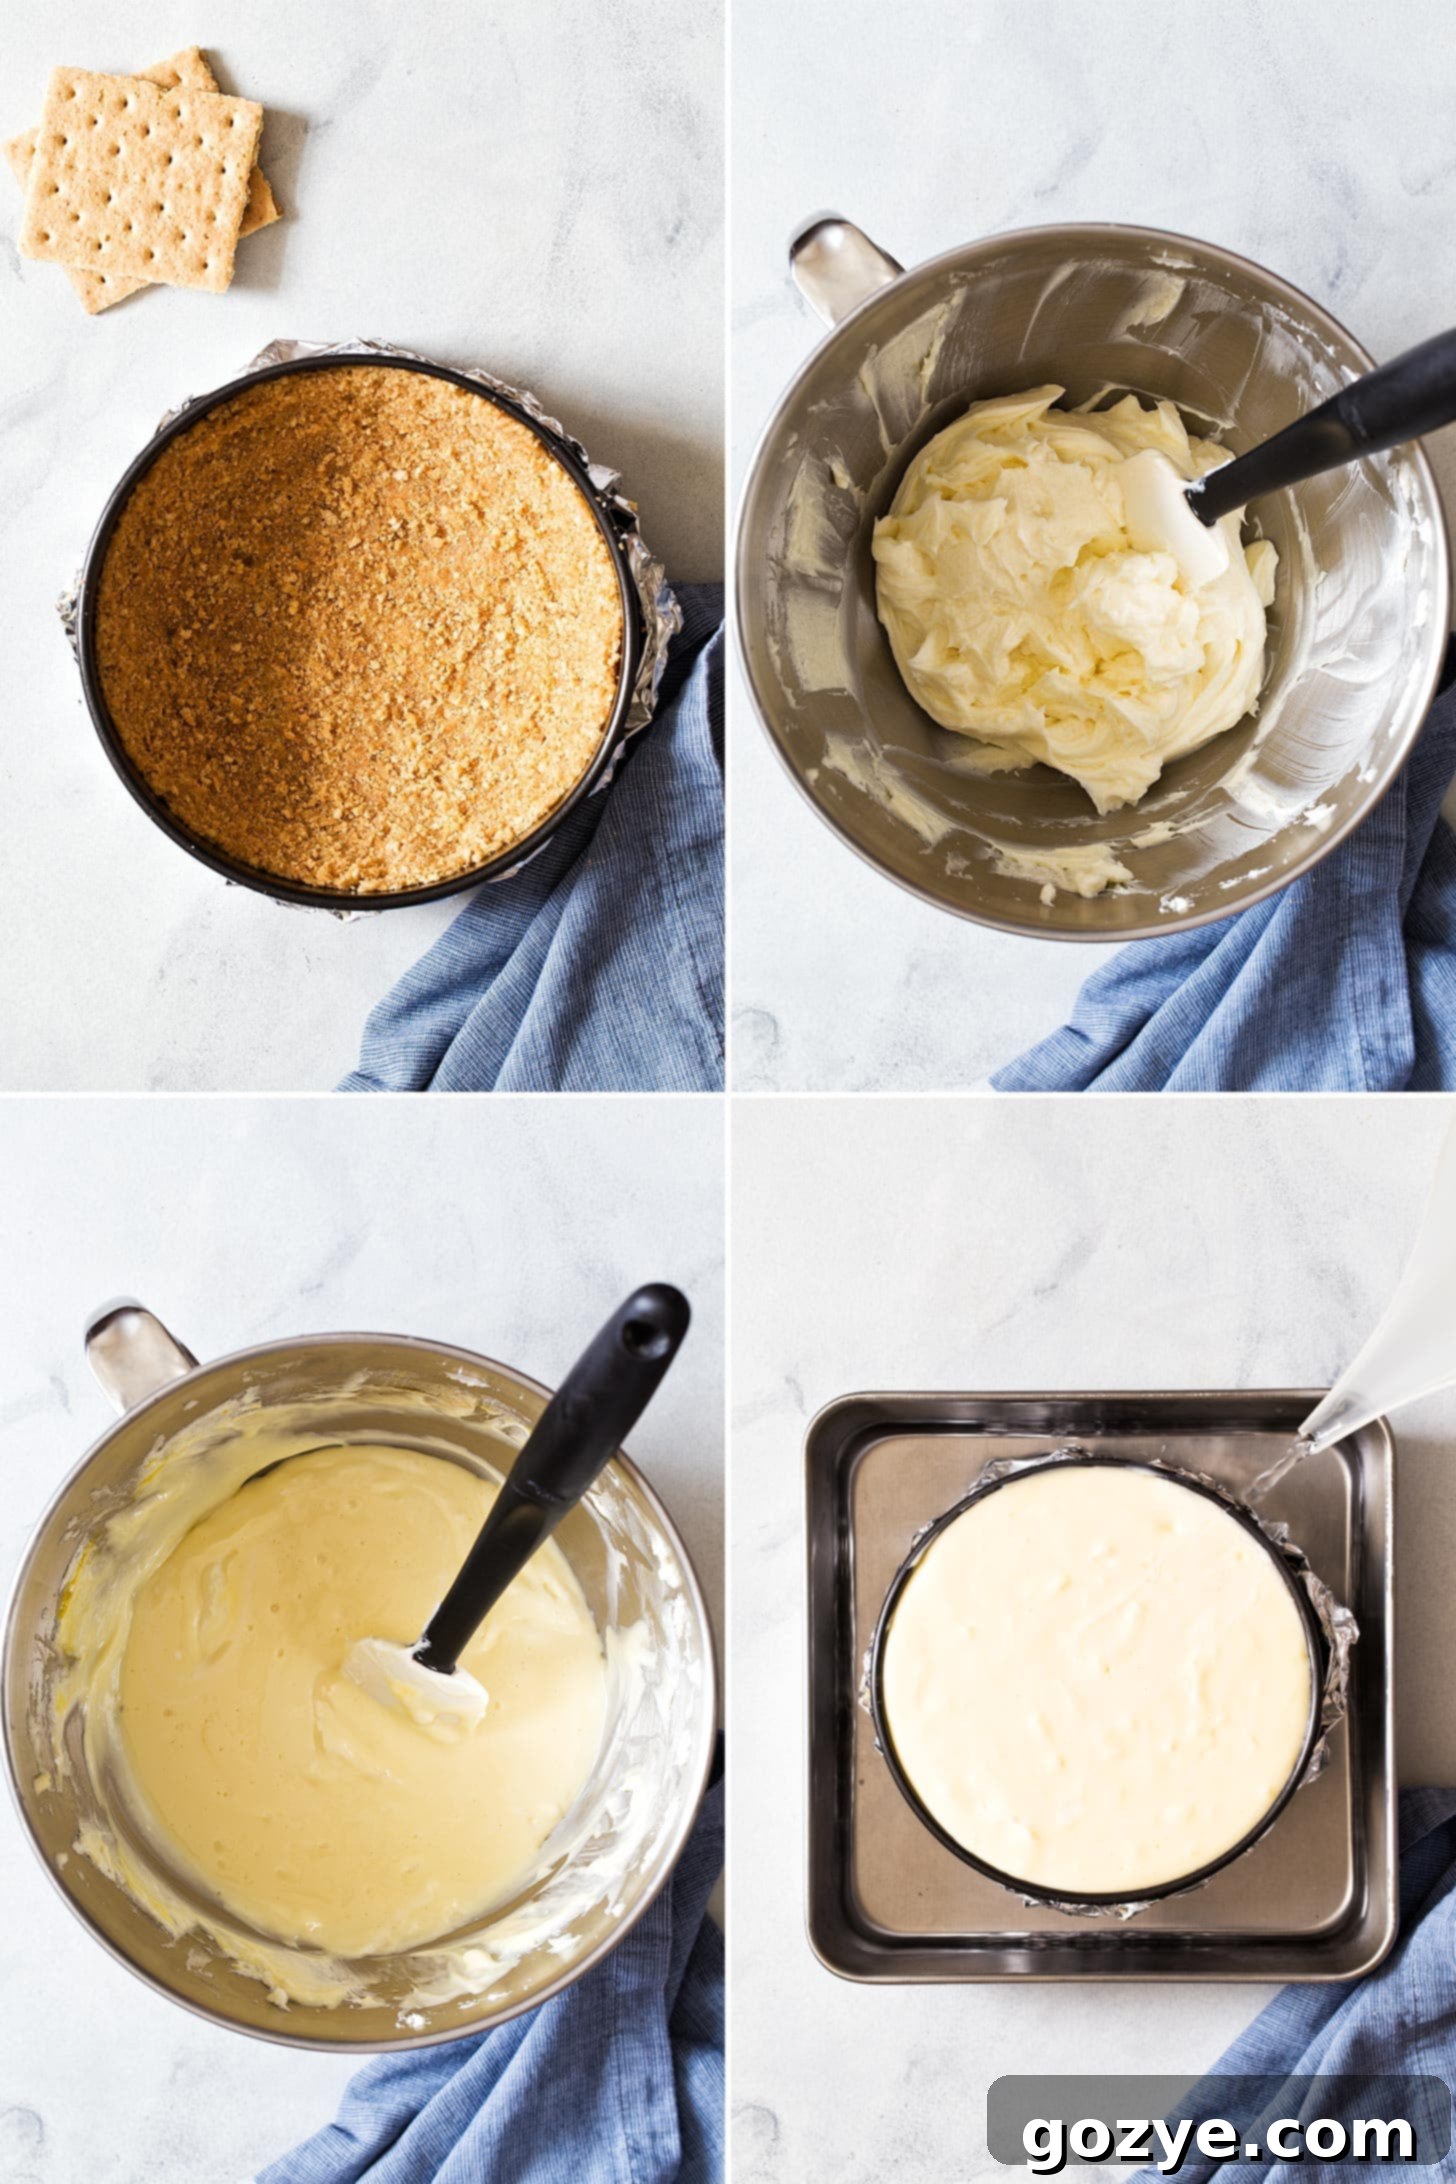
How To Make Your 6 Inch Cheesecake From Scratch
Creating this delicious homemade cheesecake is a rewarding process. Follow these steps carefully for a perfect result:
- Prepare the Crust: In a medium bowl, thoroughly mix your graham cracker crumbs, melted butter, sugar, and salt until well combined and resembling wet sand. Press this mixture firmly and evenly into the bottom and slightly up the sides of your foil-wrapped 6-inch springform pan. A flat-bottomed glass or your fingers can help achieve a compact crust.
- Cream the Cheese and Sugar: In a large mixing bowl, using an electric mixer, beat the room-temperature cream cheese and granulated sugar together until the mixture is incredibly smooth, light, and fluffy. This usually takes 2-3 minutes. Stop frequently to scrape down the sides and bottom of the bowl to ensure no unmixed pockets remain.
- Incorporate Eggs and Vanilla: Add the room-temperature eggs, one at a time, beating just until each egg is incorporated before adding the next. Overbeating at this stage can introduce too much air, leading to cracks. Finally, stir in the vanilla extract until just combined.
- Fill and Prepare for Baking: Carefully pour the smooth cheesecake batter over the prepared crust in your springform pan. The batter should fill a 6×2 inch pan almost to the top. Gently tap the pan a few times on the counter to release any large air bubbles. Place the springform pan inside a larger roasting pan (an 8×8 inch square pan or larger works well).
- Bake in a Water Bath: Pour hot water into the larger roasting pan, making sure it comes about halfway up the sides of the springform pan. Ensure the foil wrapping around your springform pan is tight to prevent any water from seeping in. Carefully transfer the entire setup to your preheated oven.
- Bake to Perfection: Bake at 325°F (160°C) for 65-75 minutes, or until the edges are set and lightly browned, the center has a slight jiggle, and an internal temperature of 150°F (65°C) is reached.
- Cool and Chill: Once baked, carefully remove the pan from the oven and run a thin knife around the edges to prevent sticking as it cools. Cool for 15 minutes in the water bath, then remove from the water bath and cool completely at room temperature for about 1 hour. Finally, cover the cheesecake with plastic wrap and refrigerate for at least 4 hours, or ideally overnight, for the best firm and creamy texture.
Store any leftover 6-inch cheesecake in an airtight container in the refrigerator for up to 5-7 days, maintaining its freshness and delightful flavor.
Do I Need a Water Bath for Cheesecake? Yes, Absolutely!
This is a question I get asked frequently, and for this 6-inch cheesecake recipe, the answer is a resounding yes, you absolutely need a water bath. While some larger cheesecake recipes might occasionally skip this step, it’s particularly crucial for smaller, thicker cheesecakes like our 6-inch version.
This recipe is adapted from my classic 9-inch cheesecake recipe. In that case, the larger diameter means the cheesecake is relatively thinner, allowing for more even baking without a water bath—the middle and edges tend to cook at a similar rate.
However, a 6-inch cheesecake is much thicker and taller by comparison. Without the gentle, even heat distribution of a water bath, the top and edges of the cheesecake would brown and overbake long before the dense center could fully set. My initial rounds of testing confirmed this: the top would be a beautiful golden brown, but the middle would still be noticeably underbaked, often by a good 10 minutes of cooking time. Continuing to bake until the center was done would inevitably lead to an overbaked, dry, and potentially cracked top.
By using a water bath, the cheesecake bakes more slowly and evenly. The steam created by the hot water keeps the oven environment moist, preventing the top from drying out and cracking, and ensuring that the entire cheesecake, from edge to center, cooks through to a perfectly smooth and creamy consistency without overbaking any part.
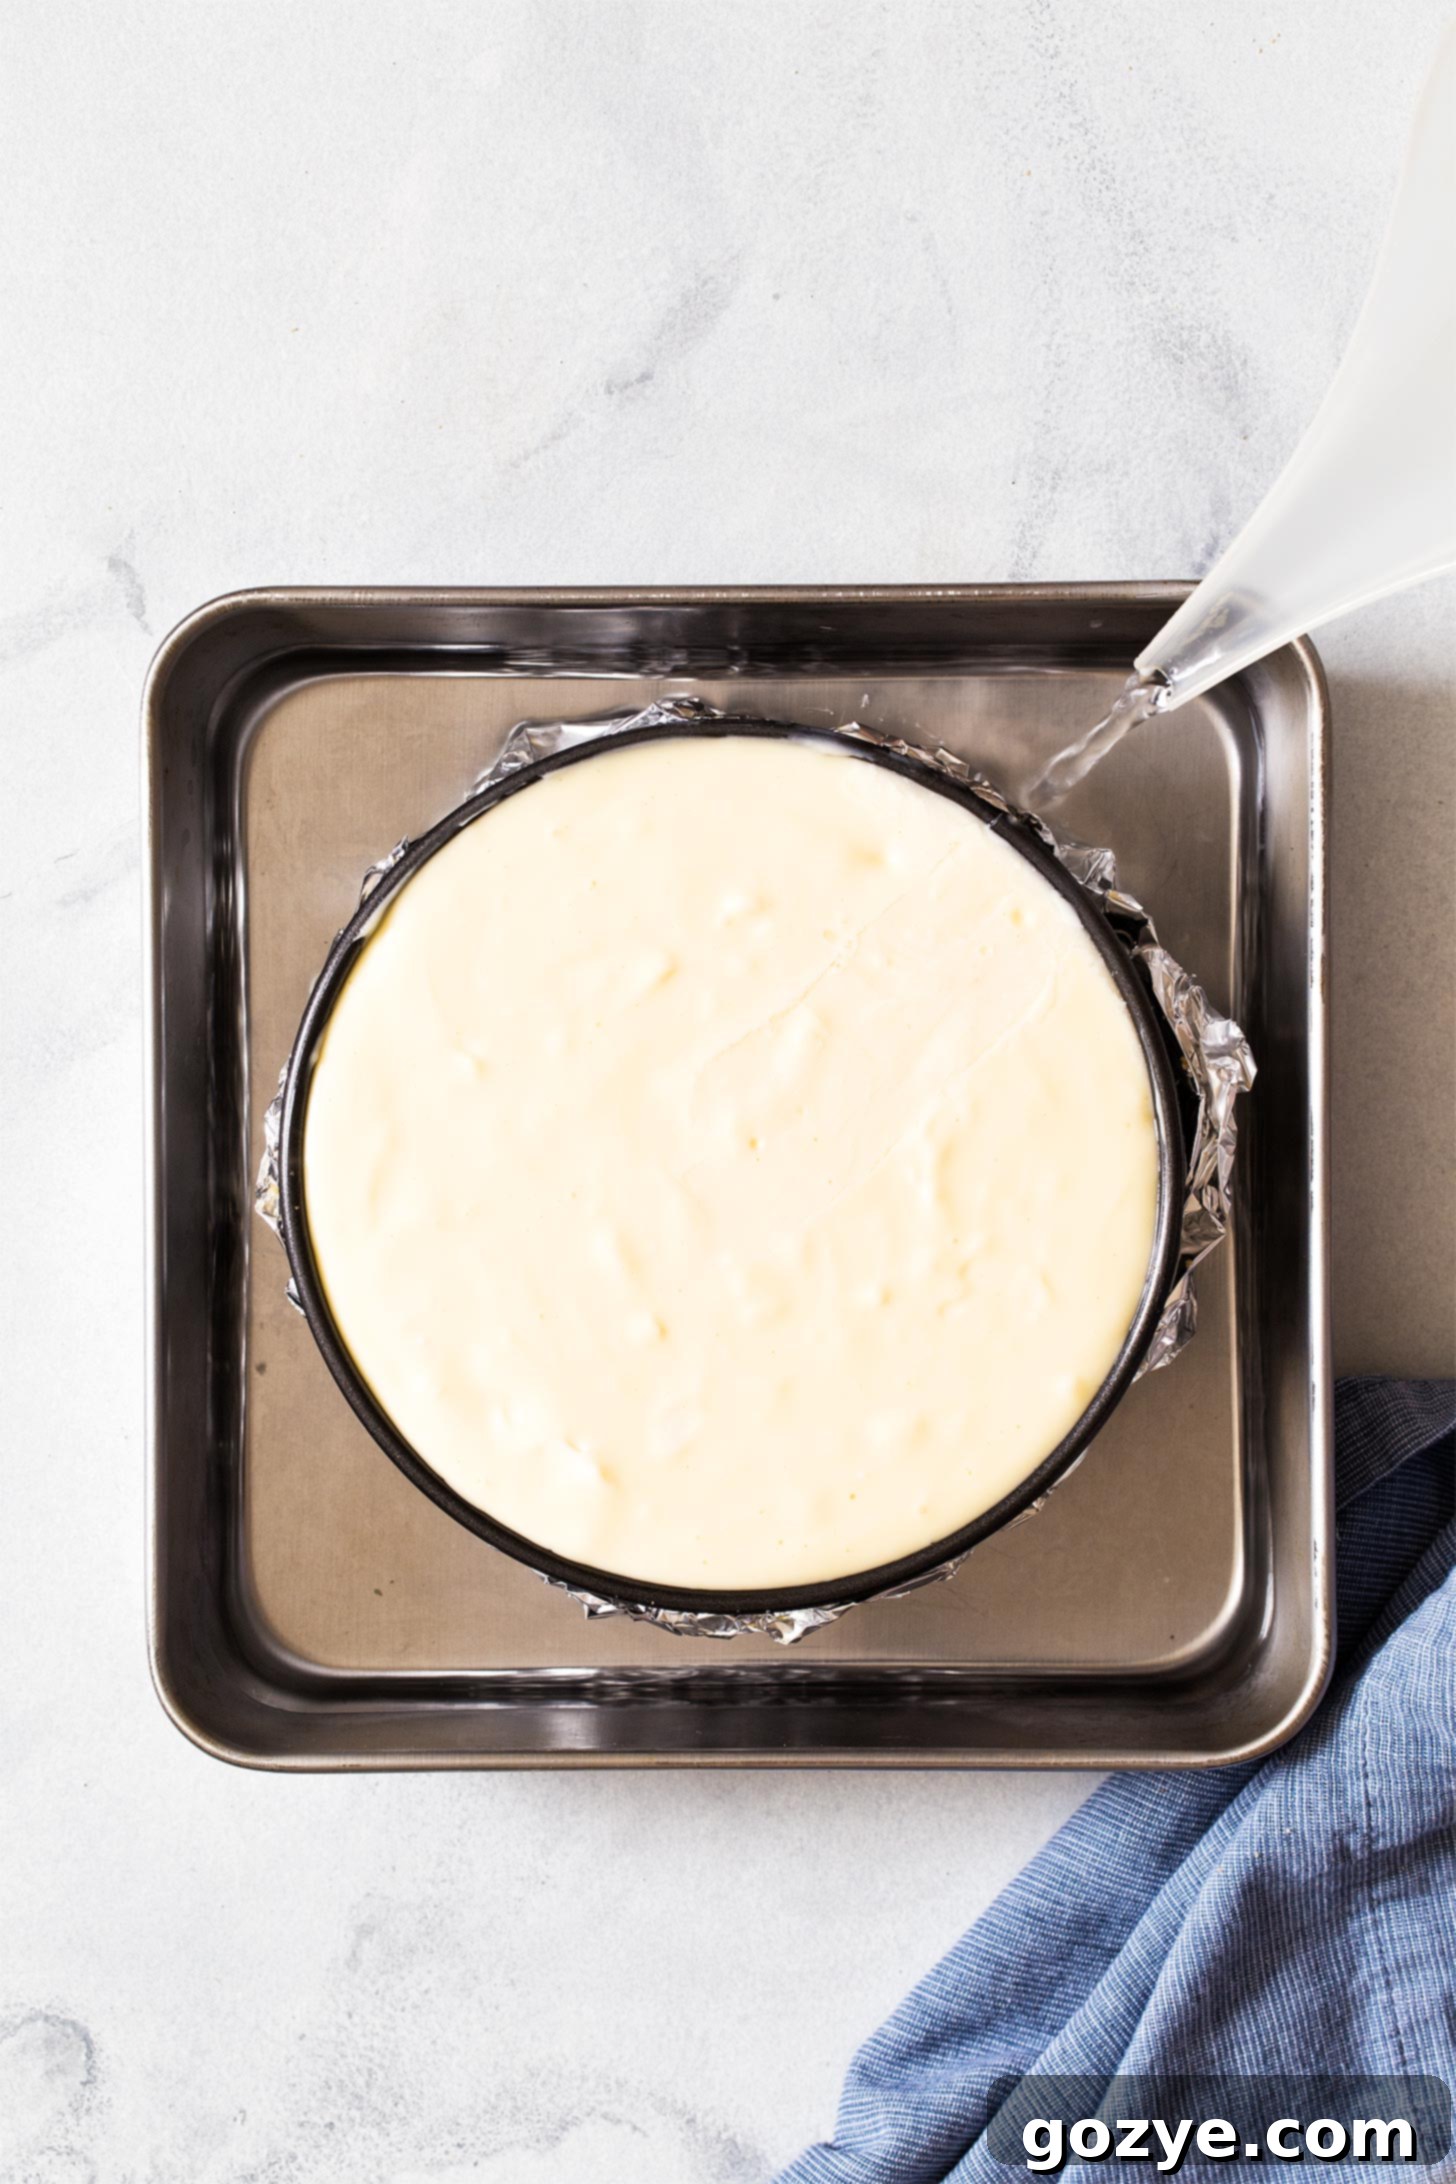
How To Make A Water Bath for Cheesecake
Creating a water bath might sound intimidating, but it’s a simple process that makes a huge difference in your cheesecake’s final texture and appearance. Here’s how to do it effectively:
- Wrap Your Springform Pan: Before adding the batter, tightly wrap the outside of your 6-inch springform pan with heavy-duty aluminum foil. Use at least two layers, extending up the sides. This is crucial to create a waterproof barrier and prevent any water from seeping into your crust, which would make it soggy. Ensure there are no gaps or tears in the foil.
- Prepare the Outer Pan: After you’ve filled your cheesecake pan with the batter, place it carefully inside a larger roasting pan. An 8×8 inch square pan or a slightly larger oven-safe dish typically works best for a 6-inch springform.
- Add Hot Water: Once the springform pan is securely in the larger pan, pour hot (preferably boiling or near-boiling) water into the outer pan. Fill it until the water comes about halfway up the sides of your foil-wrapped springform pan. Be extremely careful not to accidentally splash any water over the top edge of the foil and into the cheesecake batter itself.
- Transfer to Oven: Now, carefully transfer this entire setup to your preheated oven. It’s often easier to place the empty roasting pan with the springform in the oven first, and then pour the hot water in once it’s already on the oven rack, minimizing the risk of spills while carrying a heavy, hot pan.
This simple step ensures a perfectly moist baking environment, leading to a smooth, uncracked, and evenly cooked 6-inch cheesecake.
How Do You Know When Your Cheesecake Is Done Baking?
Determining the doneness of a cheesecake can be one of the trickiest parts of the baking process. Unlike cakes that firm up completely, cheesecake is technically a custard, meaning it will retain a slight jiggle even when perfectly baked. If your cheesecake doesn’t wiggle at all, it’s likely overbaked, which can lead to a dry texture and, ironically, cracks.
- The Jiggle Test: Gently shake the pan. The edges of the cheesecake should appear firm and lightly golden brown. The center, however, should still have a slight, almost custardy jiggle, like a firm gelatin. This means it will continue to set as it cools. If the entire cheesecake jiggles like liquid, it needs more time.
- Internal Temperature: The most accurate and reliable method for ensuring perfect doneness is to use a digital instant-read thermometer. Insert the thermometer into the center of the cheesecake (about an inch from the edge) when you suspect it’s almost done. A perfectly baked cheesecake should register an internal temperature of 150°F (65°C).
Yes, inserting a thermometer will leave a small hole (or two) in your beautifully baked cheesecake. But don’t worry! This is a minor imperfection that can be easily masked with your chosen garnish, such as a generous dollop of cherry pie filling or a swirl of whipped cream. It is far better to have a tiny hole and a perfectly cooked, creamy cheesecake than an underbaked one that doesn’t set, or an overbaked one that’s dry and cracked.
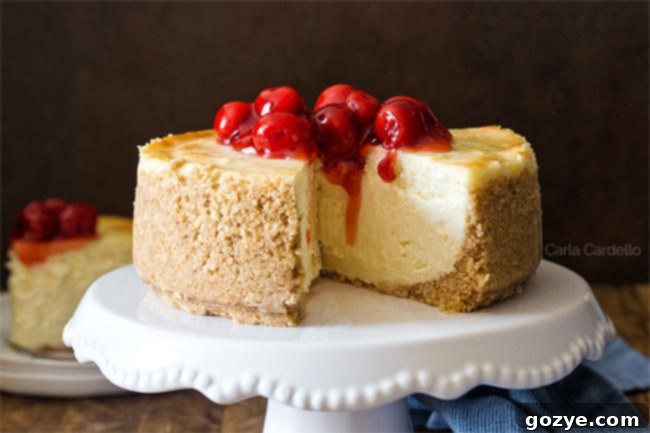
How To Decorate A 6 Inch Cheesecake for Any Occasion
A plain 6-inch cheesecake, with its smooth, creamy surface, is truly a blank canvas for your creativity! The possibilities for decoration are virtually endless, allowing you to tailor your small dessert to any taste or occasion.
- Classic Cherry: As seen in the photos, I chose canned cherry pie filling for a classic, vibrant look and taste. Canned filling is convenient, especially when fresh cherries are out of season. However, if you have the time and fresh fruit, consider making your own homemade cherry pie filling for an even fresher flavor. Have leftover cherry pie filling? Don’t let it go to waste! Check out my list of 10+ Cherry Pie Filling Desserts for more ideas.
- Berry Bliss: If cherry isn’t your favorite, switch it up with other berries. A homemade strawberry sauce, lush strawberry pie filling, or a swirl of tangy strawberry curd would be exquisite, creating a smaller version of my popular strawberry swirl cheesecake. Blueberry, raspberry, or mixed berry toppings are also fantastic choices.
- Chocolate Indulgence: For chocolate lovers, a decadent topping is a must. Cover your cheesecake with a rich, glossy ganache (learn how to make ganache with step-by-step photos for a perfect pour), or create a lighter, chocolatey topping with chocolate whipped cream. A sprinkle of chocolate shavings or mini chocolate chips would add a lovely texture.
- Caramel Dream: Drizzle warm caramel sauce over your cheesecake, perhaps with a sprinkle of sea salt for a salted caramel delight. Toasted pecans or walnuts would make a perfect accompaniment.
- Whipped Cream Wonders: A simple yet elegant topping is freshly whipped cream. You can infuse it with different flavors, like a hint of honey for honey whipped cream, or a touch of almond extract for an extra layer of flavor.
- Fresh Fruit Fest: During peak season, arrange a colorful medley of fresh berries, sliced kiwi, or mango artfully on top of your cheesecake for a naturally sweet and beautiful presentation. A light glaze can make the fruit shine.
Why Did My Cheesecake Crack? (And How to Prevent It)
There are few things more disheartening than pulling a cheesecake out of the oven only to see a large crack marring its smooth surface after all that effort. But don’t worry, cracks are common, and understanding their causes can help you prevent them next time!
- Overbeating the Batter: While you want a smooth cheesecake batter, overbeating, especially after adding the eggs, incorporates too much air. This excess air causes the cheesecake to puff up significantly during baking. As it cools, the trapped air escapes, and the cheesecake sinks more than it should, leading to tears and cracks.
Solution: Beat the cream cheese and sugar until smooth, but once the eggs are added, beat only until just combined. Mix on low speed and scrape the bowl often. A few small lumps are better than overbeating.
- Overbaking the Cheesecake: It’s tempting to bake until the cheesecake looks completely set, but overbaking is a primary culprit for cracks. An overbaked cheesecake loses too much moisture, causing the top to dry out and eventually crack as it cools and contracts.
Solution: Use a water bath to ensure even, gentle baking. More importantly, rely on an instant-read thermometer to confirm doneness (150°F / 65°C) rather than just visual cues. The slight jiggle in the center is key!
- Cheesecake Sticking to the Pan: As cheesecake cools, it naturally deflates slightly. If the edges of the cheesecake are stuck firmly to the sides of the springform pan, they won’t be able to contract evenly with the rest of the cake. This tension can cause the center or top to crack.
Solution: Immediately after removing the cheesecake from the oven, gently run a thin, sharp knife around the entire edge of the cheesecake, separating it from the pan. This allows it to contract freely.
- Drastic Temperature Changes: Cheesecakes are sensitive to sudden changes in temperature. Opening the oven door too frequently or too early can cause the oven temperature to drop quickly. This abrupt shift can shock the delicate custard, leading to cracking. Rapid cooling outside the oven can also contribute.
Solution: Try to minimize opening the oven door during baking. Only check for doneness towards the end of the baking time. After baking, allow the cheesecake to cool gradually, first in the water bath, then at room temperature, before chilling in the refrigerator.
Why Is My Cheesecake Batter Lumpy?
Lumpy cheesecake batter is a common issue, and almost always, the culprit is ingredients that are too cold. For a silky-smooth cheesecake, temperature truly matters.
The primary reason for lumps is usually that your cream cheese and eggs were not at true room temperature when you started mixing. Cold cream cheese is stiff and doesn’t blend smoothly with sugar and other ingredients, leading to small, unmixed chunks. Similarly, cold eggs can cause the cream cheese mixture to seize or curdle slightly, preventing a homogeneous batter.
Solution: Always ensure your cream cheese and eggs sit out on the counter until they are no longer cold to the touch. This typically takes about 1.5 to 2 hours, depending on how warm or cool your kitchen is. In warmer months, it might take less time; in winter, it might take a bit longer. For cream cheese, gently press it—it should yield easily without resistance. For eggs, they should feel neutral, not cool.
- Quick Tip for Cream Cheese: If you’re short on time and your cream cheese is still too cold, you can microwave it (without the foil wrappers!) in 5-10 second increments on low power. Check after each interval and gently press until it’s softened and pliable but not melted. Be very careful not to accidentally melt it, as this will change its structure.
- Quick Tip for Eggs: To warm up cold eggs quickly, place them in a bowl of warm (not hot!) water for about 10-15 minutes, or until they no longer feel cool.
What To Do If My Cheesecake Batter Is Lumpy
Once your cheesecake batter is lumpy, it’s unfortunately very difficult to completely smooth it out through conventional beating. Those lumps of unmixed cream cheese won’t magically melt away in the oven; they’ll remain as unsightly pockets in your baked cheesecake.
While prevention is key (room temperature ingredients!), if you find yourself with a lumpy batter, here are a couple of last-resort solutions:
- Use a Blender or Food Processor: Carefully transfer your lumpy batter to a blender or food processor. Pulse a few times until the batter appears smoother. Be aware that this method can incorporate a significant amount of air into the batter, which, as discussed, can increase the risk of cracking during baking. However, a crack is often easier to cover with a garnish than prominent lumps throughout the cheesecake.
- Strain the Batter: Another option is to carefully push the batter through a fine-mesh strainer. This will separate out any stubborn lumps, leaving you with a much smoother mixture. You might lose a small amount of batter in the process, as some of the lumps might be too large to pass through, but the result will be a far more appealing texture for your 6-inch cheesecake.
Remember, even if you have to resort to these fixes, a delicious homemade cheesecake is still within reach!
More Small Cheesecake Recipes to Love
If you’ve enjoyed making this 6-inch cheesecake for two, you’ll love exploring these other delightful small cheesecake recipes, perfect for intimate desserts or when you just don’t need a huge, full-sized cake:
- 6 Inch Pumpkin Cheesecake: A seasonal favorite, perfect for fall!
- Chocolate Cheesecake with Oreo Crust: Rich and decadent for chocolate lovers.
- Red Velvet Oreo Cheesecake: A beautiful and flavorful choice.
- Peanut Butter Cheesecake: For those who crave the classic combo.
- Air Fryer Cheesecake: A surprisingly quick and easy method.
- Loaf Pan Cheesecake: Cheesecake bars perfect for slicing and sharing.
6 Inch Cheesecake Recipe
4-6 servings
20 minutes
1 hour 15 minutes
4 hours
5 hours 35 minutes
Looking for a small, perfectly creamy cheesecake? Our 6 Inch Cheesecake recipe is a delightful dessert for two, ideal for any special occasion. Learn all the tips for a crack-free bake!
Ingredients
- 1 + 1/2 cups graham cracker crumbs
- 6 tablespoons unsalted butter, melted
- 1/4 teaspoon table salt
- 16 ounces (2 blocks) full-fat cream cheese, at room temperature (do not use low-fat or fat-free)
- 2/3 cup + 2 tablespoons granulated sugar
- 2 large eggs, at room temperature
- 1 teaspoon vanilla extract
- Cherry pie filling, fresh fruit, or desired topping, for garnish
Instructions
- Preheat oven to 325F (160°C). Lightly grease a 6×2 or 6×3 inch springform pan with cooking spray. Tightly wrap the outside of the pan with at least two layers of heavy-duty aluminum foil to prevent water seepage.
- In a large bowl, mix together the graham cracker crumbs, 2 tablespoons sugar, melted butter, and salt until well combined. Press this mixture firmly into the bottom and slightly up the sides of the prepared springform pan to form a compact crust.
- In another large mixing bowl (using a paddle attachment if using a stand mixer), beat together the room-temperature cream cheese and remaining granulated sugar on medium-high speed until the mixture is very light, smooth, and fluffy, about 2-3 minutes. Scrape down the bowl thoroughly as needed to ensure no lumps.
- Beat in the room-temperature eggs, one at a time, mixing just until each is incorporated (about 1 minute per egg). Do not overbeat once the eggs are added. Stir in the vanilla extract until just combined.
- Carefully transfer the smooth cheesecake batter into the prepared crust in the springform pan. Gently tap the pan on the counter a few times to release any air bubbles. Place the springform pan inside a larger oven-safe roasting pan (an 8×8 inch pan or larger).
- Pour hot (preferably boiling) water into the outside roasting pan until the springform pan is about halfway submerged. Be extremely careful not to get any water inside the foil or the cheesecake batter.
- Carefully transfer the roasting pan with the cheesecake to the preheated oven. Bake for 65-75 minutes, or until the edges of the cheesecake are set and lightly browned, the center has a slight jiggle (like firm gelatin), and an internal temperature registers 150°F (65°C) with an instant-read thermometer.
- Remove the cheesecake from the oven. Immediately run a thin knife along the edge of the cheesecake to loosen it from the pan. Allow the cheesecake to cool in the water bath for 15 minutes.
- Carefully remove the springform pan from the water bath. Let it cool completely at room temperature for 1 hour.
- Once cooled, cover the cheesecake with plastic wrap and refrigerate for at least 4 hours, or preferably overnight, to allow it to fully set and firm up before garnishing and serving.
Store any leftover cheesecake in an airtight container in the refrigerator for up to 5-7 days.
Notes
- Craving more delightful 6-inch cheesecake recipes? Explore our collection including Chocolate Cheesecake with Oreo Crust, Small Pumpkin Cheesecake, Red Velvet Oreo Cheesecake, and Peanut Butter Cheesecake.
- Want to use a different pan size? We have recipes for various springform pans, including our 7 Inch Cheesecake Recipe, 4 Inch Cheesecake, 9 Inch Classic Cheesecake, and Mini Cheesecakes (baked in a muffin pan).
Recommended Products
As an Amazon Associate and member of other affiliate programs, I earn from qualifying purchases.
- 6 Inch Springform Pan
- Digital Thermometer
Did you make this recipe?
Let me know what you think! Rate the recipe above, leave a comment below, and/or share a photo on Instagram using #HITKrecipes
This comprehensive guide to the 6 Inch Cheesecake recipe was first published on October 9, 2020, and has been continuously updated to provide the best tips and tricks for perfect results.
