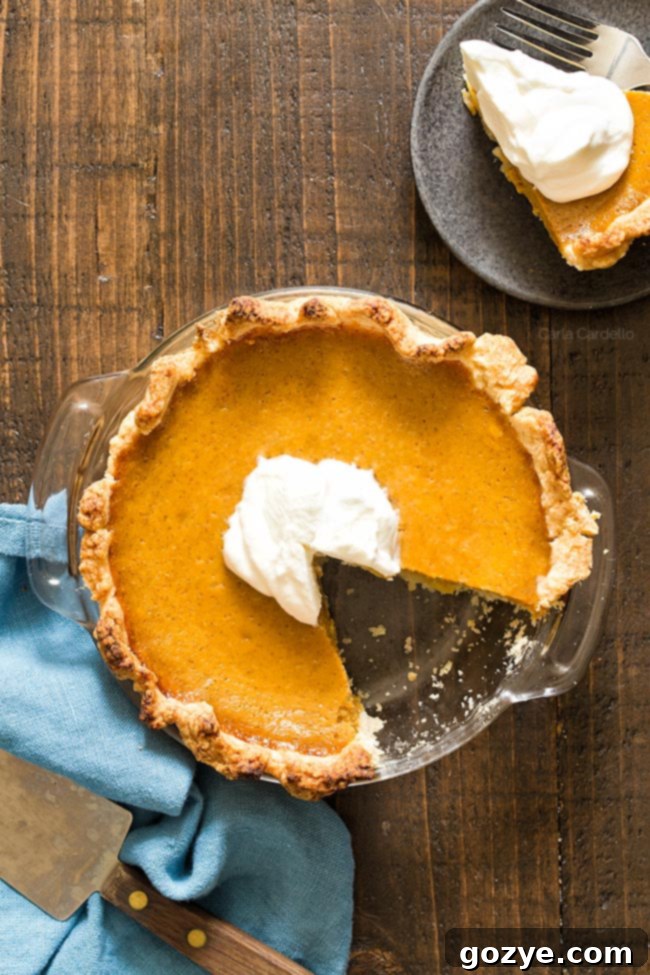
Easy Small Pumpkin Pie Recipe (6-Inch) – Your Perfect Dessert for Two!
Are you planning a cozy Thanksgiving celebration for two this year, or simply craving the comforting flavors of fall in a manageable portion? Look no further! This recipe guides you through baking a perfect Small Pumpkin Pie from scratch, specifically designed for a 6-inch pie pan. We’ll also share an easy and convenient substitute for evaporated milk, ensuring you can enjoy this classic dessert without any hassle. Get ready to impress with this delightful mini masterpiece!
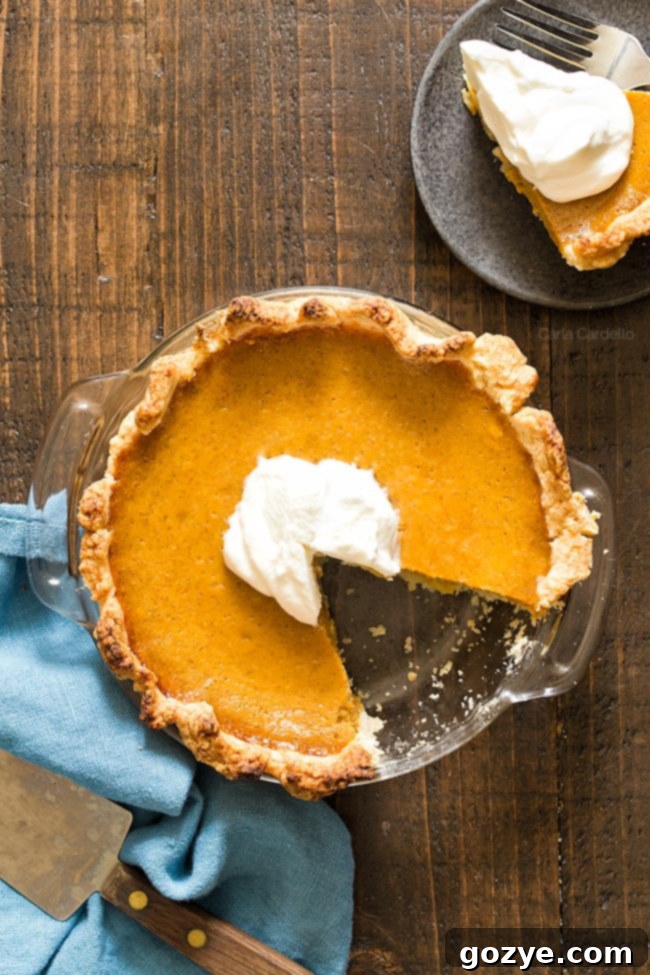
Every year, as the autumn leaves begin to fall and the holiday season approaches, I take stock of my collection of Thanksgiving recipes. It’s always a surprise to discover what essential dishes might be missing from my repertoire. And honestly, it was quite astonishing to realize I didn’t have a traditional, straightforward pumpkin pie recipe! While my blog features delightful variations like Mini Deep Dish Pumpkin Pies, an Eggless Pumpkin Pie for Two, and even adorable Pumpkin Pie Cupcakes, the quintessential classic had been overlooked.
Given my passion for creating desserts perfectly portioned for two, it was only natural that my next creation had to be this Small Pumpkin Pie. This recipe is essentially a scaled-down version of the beloved traditional pumpkin pie, expertly baked in a 6-inch pie plate. It’s the ideal solution for small gatherings, intimate dinners, or when you simply want to enjoy a slice (or two!) of homemade pie without the daunting size of a standard 9-inch dessert.
Initially, I faced a delightful dilemma: which 6-inch pan would yield the best results? Should I use a classic glass plate, a convenient disposable aluminum pan, a versatile springform pan, or even a simple cake pan? To settle this burning question and ensure you could easily replicate this recipe with whatever you have on hand, I turned to my amazing community on social media for their input. Interestingly, the results were quite split, with no single pan emerging as the clear favorite.
This indecision turned into an exciting opportunity! I decided to test my small pumpkin pie recipe in all of these popular pan types. This extensive testing means I can now confidently guide you, no matter which pan you choose to use. The good news is, you can achieve a delicious small pumpkin pie with what’s already in your kitchen!
This 6-inch pumpkin pie recipe is rooted in tradition, drawing inspiration from the famously reliable Libby’s pumpkin pie recipe. However, I’ve incorporated one crucial change (besides the size, of course) that I believe elevates the result to an even higher level of perfection. Can you guess what it is? Hint: it involves ensuring a perfectly flaky crust every single time.
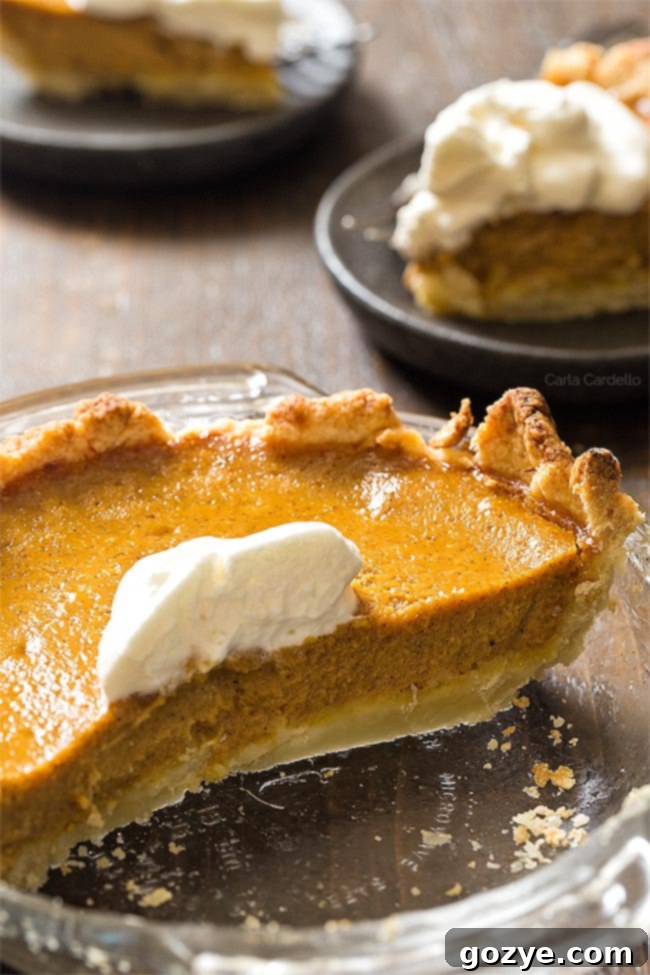
Finding Your Perfect 6-Inch Pie Plate
A 6-inch pie plate isn’t a common find in every grocery or department store, which can sometimes make them a bit elusive. I personally found mine online after a bit of searching. There weren’t a plethora of options that truly captured my interest, but I ultimately settled on this reliable 6-inch glass pie plate (Amazon affiliate link). It’s a versatile choice that’s perfect for many small batch baking projects.
If you opt for a glass pie plate, there’s a crucial safety tip you need to remember: never place cold glass directly onto a hot oven rack or a preheated baking sheet. The sudden and drastic temperature change can cause the glass to shatter, creating a hazardous situation and ruining your delicious pie. To prevent this, always ensure your glass pie plate is placed on a room-temperature baking sheet before it goes into a hot oven. This simple step protects both you and your pie.
Now that you’ve got your perfect small pie plate, why not explore other delectable recipes? Check out my Mini Lemon Meringue Pies, which also features a fantastic 6-inch version for another delightful dessert for two.
Can You Use Disposable Pie Pans for Your Small Pumpkin Pie?
Absolutely! Disposable pie pans are a perfectly viable and convenient option for baking your small pumpkin pie. I’ve personally tested this mini pumpkin pie recipe in these aluminum foil mini pie pans, which I also purchased online (Amazon affiliate link). They are a great choice for easy cleanup, potlucks, or when you want to gift a pie.
One thing I noticed with disposable pans is that they tend to be slightly less deep than their glass counterparts. This means you might find yourself with a bit of extra pie dough and filling. Don’t let that go to waste! You can easily use the leftover dough and filling to create a charming second mini pie. Simply bake it in a ramekin right alongside your 6-inch pie. It’s a fantastic way to maximize your ingredients and get an extra treat!
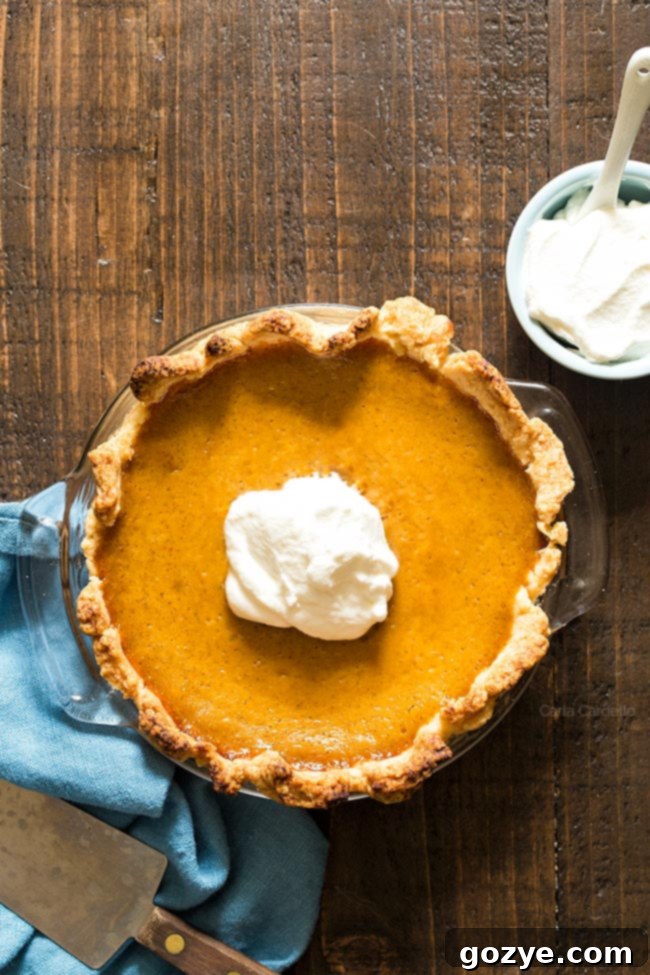
Do You Absolutely Need a Traditional Pie Dish to Make a Pie?
While a classic pie dish is undoubtedly the easiest and most traditional way to bake and serve your small pumpkin pie, it’s not the only option. You can certainly get creative with other bakeware you might have on hand. For instance, a 6-inch cake pan or a 6-inch springform pan (Amazon affiliate links) can also work beautifully.
If you choose a springform pan, serving is a breeze. The removable side allows you to simply release the pie from the pan, giving you clean, beautiful slices just as you would with a regular pie plate. It’s an excellent alternative, especially if you want to showcase your pie without the pan.
Using a cake pan, however, presents a bit more of a challenge when it comes to cutting and serving. Because pumpkin pie has a delicate, custard-like filling, you can’t invert it onto a plate like you would a sturdy cake. This would likely result in a messy disaster! Instead, you’ll need to carefully remove each slice one at a time directly from the cake pan. It requires a gentle touch, but it’s definitely achievable if a cake pan is your only option.
How Many Servings Does a 6-Inch Pie Provide?
A beautifully baked 6-inch pie is remarkably versatile and can typically be cut into 4 to 6 slices. This makes it an absolutely ideal dessert for two people, ensuring generous portions without overwhelming leftovers. While the slices from a 6-inch pie will naturally be shorter than those from a standard 9-inch pie, they are still wonderfully satisfying and perfect for an intimate meal.
This smaller size is also fantastic for portion control, making it easier to enjoy a delicious dessert without feeling overindulgent. It’s truly the perfect way to enjoy a classic holiday treat on a smaller scale, providing just enough for you and your companion to savor.
Not a fan of pumpkin, or just looking for more small-batch pie options? Don’t worry! I have you covered. Try my equally delicious Small Pecan Pie or my comforting Small Apple Pie instead. Both are perfect for small gatherings and offer different flavor profiles to suit any preference.
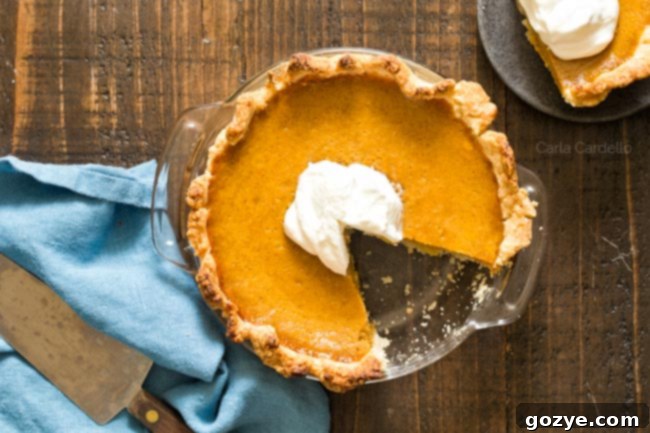
Essential Ingredients for Your Small Pumpkin Pie
Crafting this delightful small pumpkin pie from scratch requires a simple yet powerful combination of ingredients that come together to create that iconic, comforting flavor. Here’s a detailed look at what you’ll need and why each component is vital:
- Canned Pumpkin Puree: This is the star of our show! Using canned pumpkin puree is a fantastic shortcut that saves you the time and effort of roasting and pureeing a fresh pumpkin. It’s ready-to-use and consistently smooth. While we call it “pumpkin puree,” it’s worth noting that commercially canned pumpkin is often made from a blend of various winter squash varieties, specifically chosen for their color, texture, and flavor, which are perfect for pies. Just be sure to grab 100% pure pumpkin, not pumpkin pie filling.
- Granulated Sugar: It wouldn’t be a dessert without a touch of sweetness! Sugar not only sweetens the filling but also helps with the texture and caramelization, enhancing the overall flavor balance of the pie.
- Egg: The egg is a crucial component because pumpkin pie, at its heart, is a custard. The egg acts as a binder, providing the necessary structure and richness that gives the filling its signature silky-smooth texture when baked. It’s what transforms a simple puree into a luscious custard.
- Ground Cinnamon, Nutmeg, Ginger, and Clove: This aromatic quartet is what gives pumpkin pie its unmistakable, warm, and inviting flavor. Often referred to collectively as “pumpkin pie spice,” these ground spices are essential. Cinnamon brings a sweet, woody note; nutmeg offers a slightly sweet, pungent depth; ginger provides a warm, spicy kick; and clove adds a rich, intense aroma. Together, they create a harmonious blend that defines the taste of fall.
- Salt: Don’t underestimate the power of a pinch of salt in sweet dishes! Salt isn’t just for savory foods; it’s a critical flavor enhancer that brightens and balances all the other ingredients, making the sweet and spicy notes truly pop. It prevents the pie from tasting flat.
- Vanilla Extract: Much like salt, vanilla extract is another magical flavor enhancer. If your desserts ever taste like they’re “missing something,” a splash of real vanilla is often the answer. Make sure to use high-quality, real vanilla extract for the best flavor, avoiding imitation vanilla which can have an artificial taste.
- Evaporated Milk: This is a shelf-stable, canned milk product where about 60% of the water has been removed from fresh milk through evaporation. The removal of water results in a thicker, richer, and creamier consistency, which in turn adds wonderful body and richness to your pumpkin pie filling. Its concentrated nature provides a depth of flavor that complements the pumpkin perfectly.
- Small Pie Crust: A pie isn’t a pie without its crust! While a homemade pie crust will elevate your small pumpkin pie to an absolutely transcendent level of deliciousness – offering unparalleled flakiness and buttery flavor – I understand that time isn’t always on your side. For convenience, you can certainly buy pre-made pie dough. Just remember to roll it out and cut it to fit your 6-inch pan perfectly. The crust provides that essential textural contrast to the smooth, creamy filling.
Since this recipe uses only half a can of pumpkin, you’ll likely have some leftover puree. Don’t let it go to waste! Get creative and serve up some savory pumpkin mac and cheese for dinner. It’s a delicious way to use up those extra ingredients and enjoy pumpkin in a whole new way!
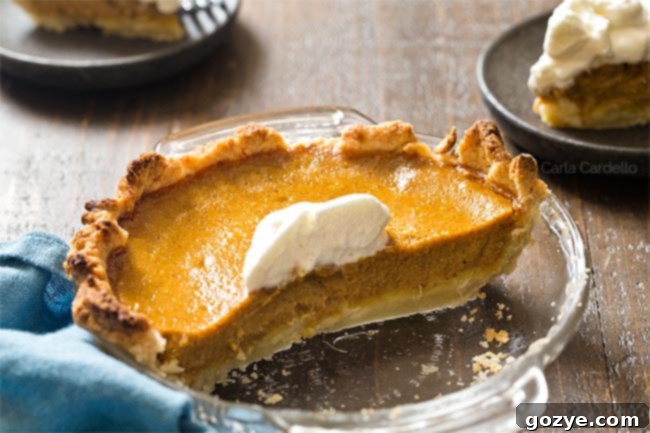
Canned Pumpkin Puree vs. Pumpkin Pie Filling: Know the Difference
This is a common point of confusion, but it’s crucial to understand: canned pumpkin puree and pumpkin pie filling are NOT the same thing. Using the wrong one can significantly alter the taste and texture of your pie, and not in a good way!
Canned pumpkin puree is just that: 100% pure, cooked, and mashed pumpkin (or winter squash blend). It contains no added sugars, spices, or other ingredients. It’s a blank canvas, allowing you to control the flavor profile of your pie with your own spices and sweeteners.
Pumpkin pie filling, on the other hand, is a pre-mixed product. It comes sweetened and already seasoned with the typical pumpkin pie spices. If you were to use pumpkin pie filling in a recipe that calls for pure pumpkin puree, your pie would end up excessively sweet and potentially over-spiced, as you’d be adding more sugar and spices on top of what’s already in the can.
To avoid any baking mishaps, always double-check the label on the can. Ensure it clearly states “100% Pure Pumpkin” and not “Pumpkin Pie Mix” or “Pumpkin Pie Filling.” This small detail makes a huge difference in the final outcome of your delicious small pumpkin pie!
The Best Substitute for Evaporated Milk in Pumpkin Pie
Let’s delve a bit deeper into evaporated milk and why you actually have a fantastic alternative right in your fridge! While evaporated milk provides a rich, creamy texture due to its concentrated nature, canned products can be particularly inconvenient for small-batch baking. Most recipes, including this one, won’t require an entire can, leaving you with leftovers and the nagging question of what to do with them. It can be a waste and a frustration.
My 6-inch pumpkin pie recipe uses only about half of a small 5-ounce can of evaporated milk. To simplify things and eliminate waste, you can easily substitute it with a combination of fresh dairy: use 3 tablespoons of heavy cream mixed with 2 tablespoons of whole milk. This blend perfectly mimics the fat content and richness of evaporated milk, ensuring your pie maintains its creamy, luscious texture and flavor profile.
The fat content is genuinely important here, as it contributes significantly to the pie’s body and mouthfeel. Therefore, please avoid using skim milk or low-fat milk for this substitute, as it will result in a thinner, less rich filling. Stick to whole milk and heavy cream for the best results!
Can I Substitute Sweetened Condensed Milk for Evaporated Milk?
A common question often arises about substituting sweetened condensed milk for evaporated milk. The answer is a resounding no, you cannot substitute sweetened condensed milk for evaporated milk in this recipe or most other savory or subtly sweet applications.
Sweetened condensed milk is an entirely different product. While it is also a concentrated milk, it has a significant amount of sugar added to it, making it much thicker, stickier, and intensely sweet. Using it in place of evaporated milk would make your pumpkin pie overwhelmingly sweet and could throw off the entire balance of the recipe, likely leading to a dessert that is far too sweet and has an incorrect texture. Always double-check your cans to ensure you have the correct type of milk product for your baking needs.
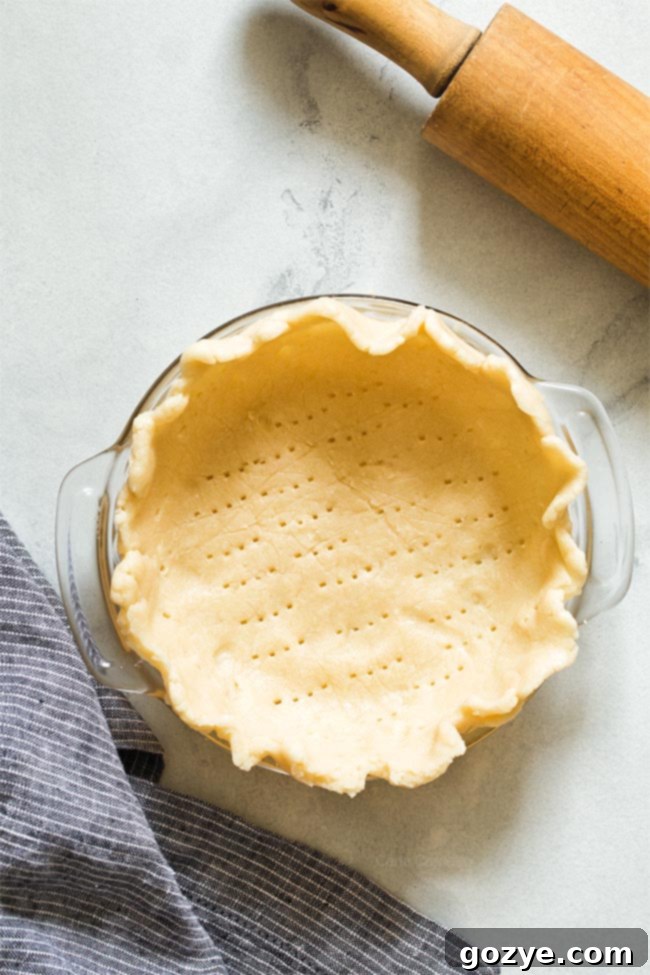
Crafting the Perfect Pumpkin Pie Crust for Your 6-Inch Pie
Since we’re creating a beautifully portioned 6-inch pumpkin pie, you’ll naturally need a pie crust that is perfectly sized for a 6-inch pan. While finding pre-made 6-inch pie crusts can be a challenge in most grocery stores, don’t let that deter you! This is where making your own becomes a rewarding experience, and I promise it’s much easier than you might think.
I highly recommend using my dedicated Small Pie Crust recipe. It’s specifically designed for smaller pies and can be easily made by hand, or even quicker with the help of a food processor. A food processor makes quick work of cutting the butter into the flour, which is key to a flaky crust, resulting in a dough that’s ready for chilling in minutes. The effort of a homemade crust truly elevates the entire pie, lending a rich, buttery flavor and an incredible flaky texture that store-bought crusts simply can’t match.
However, I understand that the idea of homemade pie crust can induce a bit of panic for some, or perhaps it’s the eve of Thanksgiving, and time is of the essence. No worries at all! You can absolutely achieve a fantastic pie with store-bought dough. Simply purchase a standard-sized pre-made pie dough, roll it out evenly, and then cut it to fit your 6-inch pan. You’ll need to roll it to approximately an 8-inch circle to ensure you have enough dough to trim, crimp, and decorate the edges of your crust to perfection. This way, you still get that homemade look and feel without the added time of making dough from scratch. The most important thing is that you’re baking and enjoying a delicious pie!
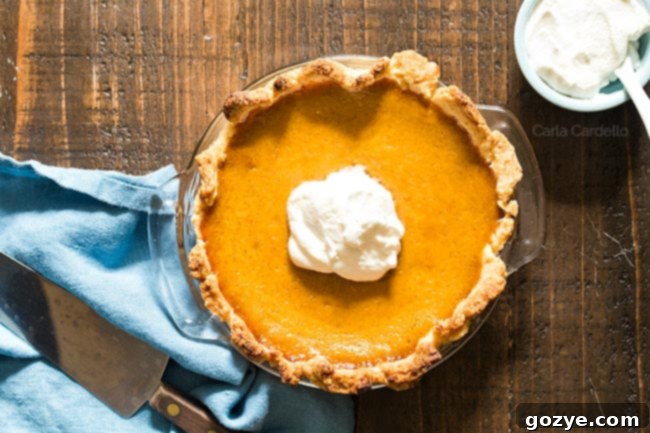
Step-by-Step Guide: How To Make A Small Pumpkin Pie
Making a delicious small pumpkin pie from scratch involves two primary components: preparing the pie crust and then crafting the luscious filling. Let’s break down each part to ensure your pie is a resounding success.
Part 1: The Perfect Pie Crust Foundation
First and foremost, you’ll want to prepare your 6-inch pie crust. As I mentioned earlier, I highly recommend using my small pie crust recipe for the best results. That particular post includes detailed, step-by-step photos and helpful tips to guide you through the process, so I won’t rehash every single detail here. But once you have your dough prepared and chilled, there’s one crucial, and sometimes controversial, step we need to discuss for pumpkin pie: blind baking.
Do You Really Need to Blind Bake the Crust for Pumpkin Pie?
This is a question that often sparks debate among bakers, but for pumpkin pie, my answer is a firm YES. When I first embarked on developing my 6-inch pumpkin pie recipe, I initially followed the method found in many traditional recipes, including Libby’s famous pumpkin pie recipe (albeit scaled down). This method typically involves pouring the filling into an unbaked pie crust and baking both components together.
Based on my extensive baking experience, I immediately anticipated two common issues with this approach:
- A Soggy Crust: When a wet, custard-like filling is poured directly into an unbaked crust, the dough inevitably absorbs moisture from the filling. This prevents the crust from properly crisping up and developing that desirable tender, flaky texture. Instead, you’re often left with a disappointingly soggy bottom crust.
- An Overbaked, Cracked Filling: Baking the filling and crust simultaneously, often at a higher initial temperature, significantly increases the risk of overbaking the delicate custard filling. Custards are sensitive to heat; too much, or too high a temperature, can cause them to become firm and crack on the surface.
For the sake of thorough testing, I proceeded with the unbaked crust method. And, as predicted, my experimental pie suffered from both a cracked surface and a noticeably soggy pie crust. It was clear that a different approach was needed to achieve perfection.
To remedy both of these issues, the solution is to blind bake the pie crust. This means you bake the pie crust on its own, without any filling inside, until it’s partially or fully cooked. Here’s why this method is superior:
- Crispy, Flaky Crust: Blind baking allows the crust to bake through and crisp up beautifully without absorbing any moisture from the filling. This results in a truly tender, golden, and flaky crust that holds up perfectly to the creamy filling.
- Perfectly Set Filling: By pre-baking the crust, you can then bake the custard filling at a lower, more controlled temperature. This gentler heat ensures the custard sets slowly and evenly, preventing it from overcooking, cracking, and achieving that wonderfully smooth, delicate texture we all love in a pumpkin pie.
Embrace the blind baking step; it’s the secret to a professional-quality small pumpkin pie!
Baking Your Perfect Small Pumpkin Pie
Once your pie crust is blind baked and cooling down, it’s time to turn your attention to the star of the show: the rich and flavorful pumpkin filling. The beauty of this filling is its simplicity – you won’t even need a stand mixer or a hand mixer! All you require is a trusty whisk and a little bit of elbow grease.
To prepare the filling, begin by combining the canned pumpkin puree, granulated sugar, egg, our signature blend of cinnamon, nutmeg, ginger, and cloves, and a touch of vanilla extract in a large bowl. Whisk these ingredients together until they are thoroughly combined and smooth. This ensures all the flavors are well distributed. Next, slowly whisk in your evaporated milk (or the suggested heavy cream and whole milk substitute) until the mixture is uniform and creamy. Avoid overmixing, as this can introduce too much air and affect the final texture.
Carefully pour the prepared filling into your cooled, blind-baked pie crust. Place the pie onto your room-temperature baking sheet (remember the glass safety tip!) and bake it in your preheated oven at 350°F (175°C) for approximately 40-45 minutes. The baking time can vary slightly depending on your oven, so it’s always best to keep an eye on it.
How To Know When Your Small Pumpkin Pie Is Truly Done
Determining the perfect doneness for pumpkin pie can be another slightly controversial topic. Many recipes will instruct you to bake until a knife or toothpick inserted into the center comes out clean. However, this is where a key distinction comes into play: pumpkin pie is a custard, much like a cheesecake is custard-based. And custards behave differently than cakes or bread when baking.
If a toothpick inserted into the center of your pumpkin pie comes out completely clean, chances are you’ve already overbaked it. An overbaked custard will be firm, dry, and prone to cracking. A perfectly baked pumpkin pie will still have a slight “wiggle” or jiggle in the very center (about a 1-inch circle) when you gently shake the pie dish. The edges should be set and firm, but the middle should still be just slightly soft, almost like firm jello.
The most accurate and reliable way to know when your pumpkin pie is perfectly done is by using a digital instant-read thermometer. Insert the thermometer into the center of the pie (avoiding the crust) – the internal temperature should register between 160°F (71°C) and 170°F (77°C). Through my testing, I found this temperature range to be ideal after about 40 minutes in a gas oven. This method takes the guesswork out of baking and ensures a perfectly creamy, uncracked filling every time. And if you’re worried about the small hole from the thermometer, don’t be! That’s what a generous dollop of homemade whipped cream or a luscious swirl of maple whipped cream is for, covering it up beautifully and adding another layer of deliciousness.
Why Did My Pumpkin Pie Crack? Troubleshooting Tips
If you pull your beautiful small pumpkin pie out of the oven only to find unsightly cracks marring its surface, don’t despair! This is a very common issue, and it almost always points to one primary cause: your pie was overbaked.
As we discussed, pumpkin pie is a delicate custard. When custards are subjected to too much heat or baked for too long, the proteins in the eggs tighten excessively, causing the filling to contract and the surface to crack. Think of it like a perfectly smooth sheet of ice that breaks when stressed too much.
To prevent cracks in your next pie, here are the key steps to follow:
- Use a Digital Thermometer: This is your best friend for pumpkin pie. Relying on the visual “jiggle” or the “clean toothpick” test can be misleading. A digital thermometer will give you an exact internal temperature, ensuring you pull the pie from the oven at precisely the right moment (between 160°F-170°F).
- Trust the Temperature, Not the Time: While recipe times are a guide, every oven is different. Focus on reaching the correct internal temperature rather than strictly adhering to the minute count.
- Invest in an Oven Thermometer: Your oven’s internal thermometer might not always be accurate. An inexpensive oven thermometer placed inside will tell you the true temperature of your oven, ensuring you’re genuinely baking your pie at a consistent 350°F (175°C). Inaccurate oven temperatures are a frequent culprit behind baking failures.
By implementing these simple yet effective tips, you’ll be well on your way to baking a perfectly smooth, uncracked small pumpkin pie every single time!
Does Pumpkin Pie Need to Be Refrigerated?
Yes, absolutely! Given its egg and dairy-based custard filling, pumpkin pie is perishable and requires refrigeration to maintain its safety and freshness. After your freshly baked pie comes out of the oven, allow it to cool completely to room temperature for at least 2 hours. This gradual cooling prevents condensation from forming and helps the pie set properly. Once it has cooled, carefully cover it and transfer it to the refrigerator.
When covering your pie, be mindful of the delicate surface. Do not place plastic wrap directly onto the surface of the pie. Trust me on this – it will stick to the filling, rip the surface, and create a messy situation. If you must use plastic wrap, a clever trick is to insert a toothpick (or two, if needed) into the center of the pie before tenting the plastic wrap over it. This creates a small dome, preventing the plastic from touching the surface of your beautiful pie. Alternatively, use an inverted bowl or a pie carrier with a lid.
Can You Serve Pumpkin Pie Right Away?
While technically you could dig into your pie approximately 2 hours after it’s baked and cooled to room temperature, for the absolute best flavor and texture, it is highly recommended to refrigerate your pumpkin pie overnight.
Allowing the pie to chill overnight does wonders for flavor development. The spices meld more deeply, and the custard has ample time to fully set and firm up, resulting in a superior slice. Personally, I find that pumpkin pie tastes significantly better when served cold, offering a refreshing contrast to its warm, inviting spices. So, plan ahead if you can, and let your pie rest for a night in the fridge for an unforgettable experience.
How Long Does Pumpkin Pie Last in the Fridge?
Planning to get a head start on your holiday baking? This 6-inch pie is perfect for making in advance. You can confidently store your baked small pumpkin pie in the refrigerator for approximately 3 to 4 days. Ensure it’s properly covered to prevent it from drying out or absorbing any refrigerator odors.
If you plan to serve your pie with homemade whipped cream, it’s best to prepare the whipped cream as close to serving time as possible. Homemade whipped cream tends to deflate and lose its airy texture after about 24-48 hours in the fridge, so for optimal freshness and presentation, whip it up just before enjoying your pie.
Can You Freeze Pumpkin Pie?
Yes, you absolutely can freeze your freshly baked small pumpkin pie, making it an excellent option for long-term storage or holiday meal prep. After your pie has completely cooled to room temperature (for about 2 hours), wrap it tightly first in plastic wrap, then in aluminum foil, or place it into a freezer-safe bag or container. It will keep well in the freezer for up to 1 month. Freezing it for much longer than that may compromise the delicate custard texture.
To serve your frozen pie, the thawing process is crucial to maintain its quality and prevent a soggy crust. Always thaw your pie overnight in the refrigerator. Resist the temptation to thaw it at room temperature, as this rapid thawing can cause the filling to “weep” or release moisture, leading to a watery, soggy crust. A slow thaw in the fridge ensures the filling reabsorbs its moisture properly, keeping your crust flaky and delicious.
What To Serve With Your Small Pumpkin Pie
If you’re making my small pumpkin pie, chances are you’re getting ready for a special occasion like Thanksgiving or Christmas, but scaled for a smaller group. Here are some fantastic holiday recipes for two that pair perfectly with your pie, ensuring a complete and delicious meal:
- Stuffed Cornish Hen: A delightful and elegant main course for two.
- Caramelized Onion and Cranberry Stuffed Turkey Breast: All the flavors of turkey without the fuss of a whole bird.
- Vegan Stuffed Butternut Squash: A hearty and flavorful vegetarian option.
- Creamy Garlic Mashed Potatoes For Two: The ultimate comforting side dish.
- Homemade Gravy Without Drippings: Rich and savory, perfect for smaller roasts.
- Homemade Cranberry Sauce Recipe (Small Batch): Fresh, tangy, and so much better than canned.
For a comprehensive list of all my small-batch holiday recipes, be sure to check out my full Thanksgiving For Two and Christmas For Two menus. They’re packed with ideas to make your intimate holiday celebrations truly special!

Small Pumpkin Pie
4-6 servings
30 minutes
40 minutes
2 hours
3 hours 10 minutes
Cooking Thanksgiving for two? This Small Pumpkin Pie recipe is perfect! Baked from scratch in a 6-inch pie pan, it includes an easy substitute for evaporated milk, ensuring a delicious and manageable holiday dessert.
Ingredients
- 1 recipe Small Pie Crust (get recipe here)
- 1/2 cup canned pumpkin puree (ensure it’s 100% pure pumpkin, not pumpkin pie mix)
- 1/4 cup granulated sugar
- 1 egg, at room temperature
- 1/2 teaspoon ground cinnamon
- 1/4 teaspoon ground nutmeg
- 1/4 teaspoon ground ginger
- 1/4 teaspoon salt
- 1/8 teaspoon ground clove
- 1/2 teaspoon vanilla extract (pure vanilla for best flavor)
- 5 tablespoons evaporated milk (or substitute: 3 tablespoons heavy cream + 2 tablespoons whole milk)
- Whipped cream, for serving (get recipe here)
Instructions
- Prepare your Small Pie Crust dough as directed in the recipe and chill it for at least 1 hour. This chilling step is essential for a flaky crust. You can find detailed step-by-step photos and directions here.
- Once chilled, roll your dough into an 8-inch circle, aiming for a thickness between 1/8 to 1/4 inch. You can achieve this by rolling it out between two sheets of plastic wrap or on a lightly floured surface. If the dough becomes sticky or too warm to handle, simply refrigerate it for another 15 minutes until it’s cold and firm again.
- Carefully transfer the rolled dough into your chosen 6-inch ungreased glass pie plate, a 6-inch greased disposable pie plate, a 6×2 inch greased springform pan, or a 6×2 inch greased cake pan. Don’t worry if the dough tears; you can easily patch it back together in the pan with your fingers.
- Trim off any excess dough from the edges and then crimp or shape the crust as desired for a beautiful presentation. Prick the bottom of the crust all over with a fork (this prevents bubbling during baking), then refrigerate the prepared crust for at least 30 minutes to firm up.
- Preheat your oven to 400°F (200°C). Prepare a room-temperature baking sheet to place your pie pan on (especially if using a glass pan).
- For blind baking, line the pie crust with a piece of greased aluminum foil, ensuring the greased side faces down and touches the dough. Gently fill the foil-lined crust with pie weights, such as dried lentils or beans, to hold its shape during baking.
- Place your pie pan onto the room-temperature baking sheet and bake for 15 minutes. Important Safety Note: Do not place a cold glass pie pan directly onto a hot oven rack or a hot baking sheet. The sudden temperature change can cause the glass to shatter. Always use a room-temperature baking sheet.
- After 15 minutes, carefully remove the foil and pie weights. Continue to bake the crust for another 5 minutes, or until the bottom appears golden brown and no longer looks raw or wet. This ensures a fully cooked and flaky base.
- Once the crust is blind-baked, reduce your oven temperature to 350°F (175°C) and allow the crust to cool slightly while you prepare the delicious filling.
- For the filling: In a large mixing bowl, whisk together the pumpkin puree, granulated sugar, egg, cinnamon, nutmeg, ginger, cloves, salt, and vanilla extract until well combined and smooth. Gradually and slowly whisk in the evaporated milk (or your heavy cream and whole milk substitute) until the mixture is uniform and creamy.
- Carefully transfer the pumpkin filling into the warm, blind-baked pie crust. Bake for 40-45 minutes, or until the center is mostly set with just a slight, gentle wiggle (about a 1-inch circle) when you gently shake the pan. The most accurate way to check for doneness is with a digital thermometer: the internal temperature should read between 160°F (71°C) and 170°F (77°C). If your pan is slightly smaller than 6 inches and not all the filling fits, place any remaining filling in a small ramekin and bake it on the same tray alongside your pie.
- Allow the baked pie to cool completely at room temperature for at least 2 hours. This crucial step allows the custard to fully set. Once cooled, cover the pie carefully (avoiding direct contact with plastic wrap on the surface) and refrigerate it until you are ready to serve. This pie tastes best chilled, ideally after being refrigerated overnight. Serve with a generous dollop of homemade whipped cream. Store any leftovers in the refrigerator for up to 3 days.
Notes
- Looking for more delicious 6-inch pie recipes perfect for small gatherings? Don’t miss my Small Pecan Pie, my comforting Small Apple Pie, and my bright and tangy Mini Lemon Meringue Pie.
- No 6-inch pan on hand or prefer a different format? Check out my Mini Deep Dish Pumpkin Pies (For Two) or my Eggless Pumpkin Pie recipes for equally delightful pumpkin desserts.
- Baking for the holidays and need more ideas for two? Explore my specially curated Thanksgiving For Two and Christmas For Two menus for perfect recipe pairings to complete your festive meal.
- Got extra pumpkin puree after making this pie? Don’t let it go to waste! Discover a variety of other creative and delicious pumpkin recipes on my blog, from sweet treats to savory dishes.
Recommended Products
As an Amazon Associate and member of other affiliate programs, I earn from qualifying purchases.
- 6 Inch Pie Plate
- 6 Inch Disposable Pie Plates
- 6 Inch Springform Pan
- 6 Inch Cake Pan
Did you make this recipe?
Let me know what you think! Rate the recipe above, leave a comment below, and/or share a photo on Instagram using #HITKrecipes
