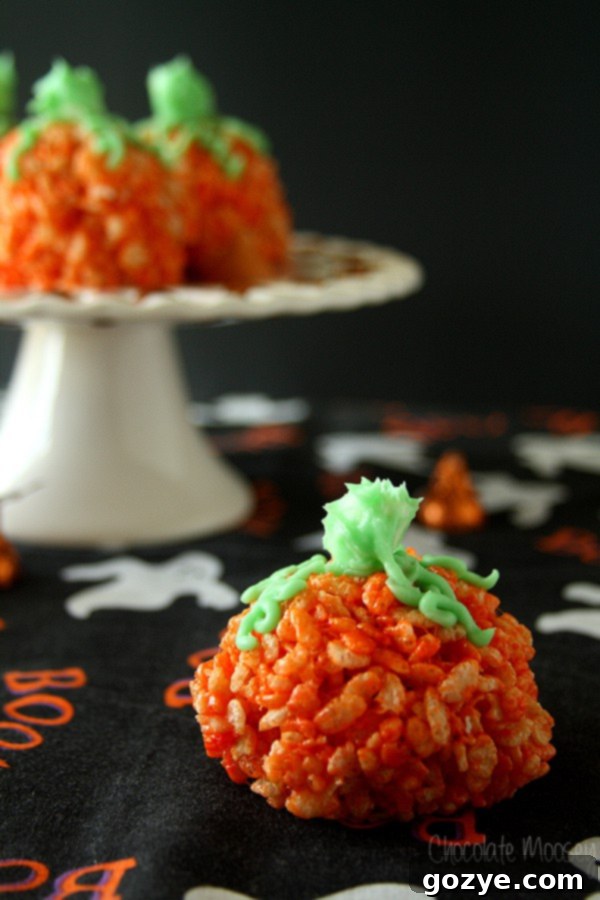
Spooky Sweet Surprise: Easy Candy-Stuffed Rice Krispie Pumpkins for Halloween!
Get ready for a treat that’s more charming than chilling! These delightful Rice Krispie Pumpkins are the ultimate kid-friendly Halloween dessert, each one holding a sweet, hidden candy surprise in the middle. Perfect for parties, trick-or-treaters, or simply enjoying the festive season at home.
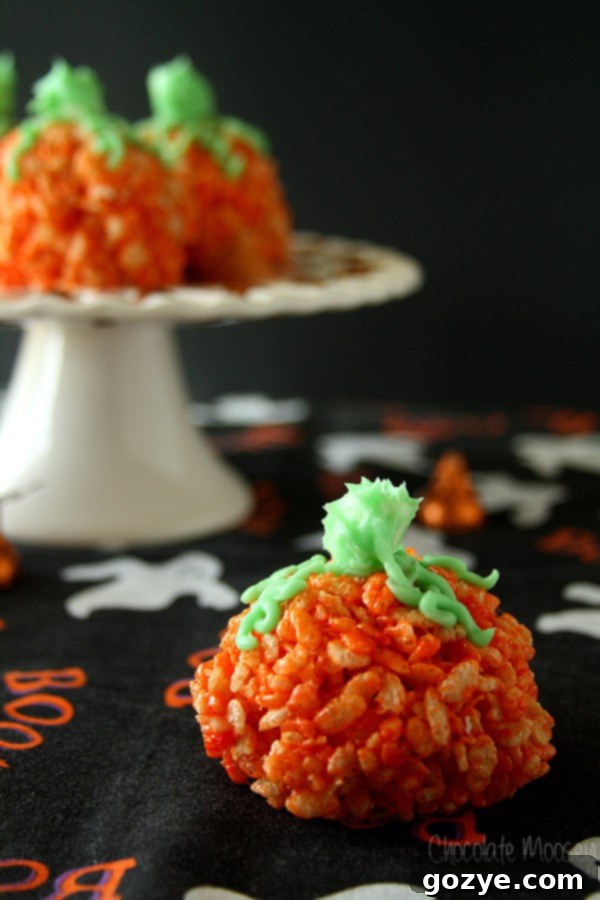
Happy Halloween, everyone! Well, not quite yet, but with October in full swing, it’s the perfect time to get a head start on all things spooky, sweet, and spirited. While some embrace the gory and frightening aspects of Halloween, I’ve always leaned towards the charming and whimsical side of this fun holiday. No masked chainsaw maniacs or sparkly vampires for me, thank you very much! And despite growing up in Western Pennsylvania, where zombies are practically a local legend, they’re not my cup of tea either.
Some might call me a party pooper, but I prefer to think of myself as an enthusiast for the *cute* Halloween aesthetic. Give me all the black and orange décor, the comforting warmth of pumpkin pie, and the playful mischief of black cats. My heart belongs to peanut butter pumpkins, Cadbury Scream Eggs, and all things delightfully festive. I even have a giant ceramic Halloween cupcake and a matching cupcake shirt!
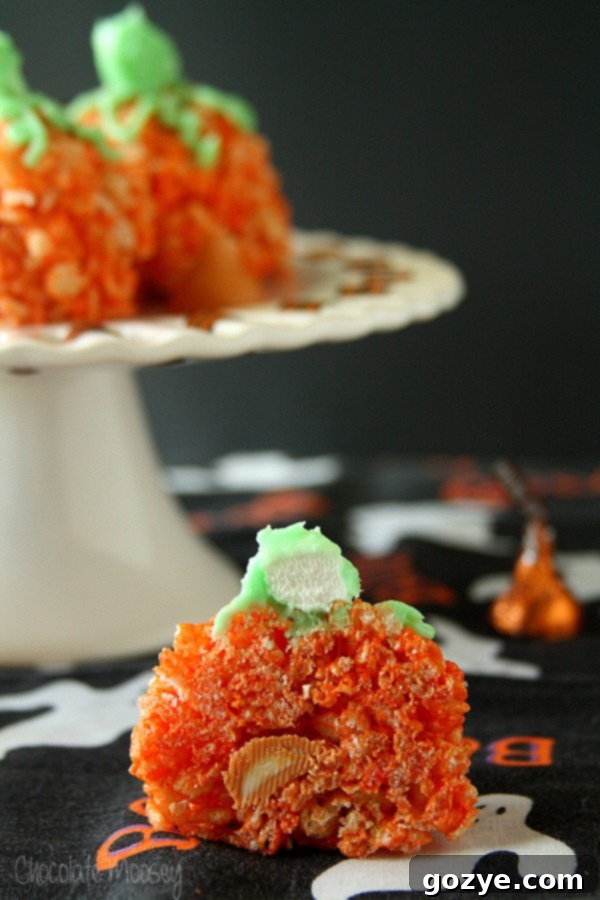
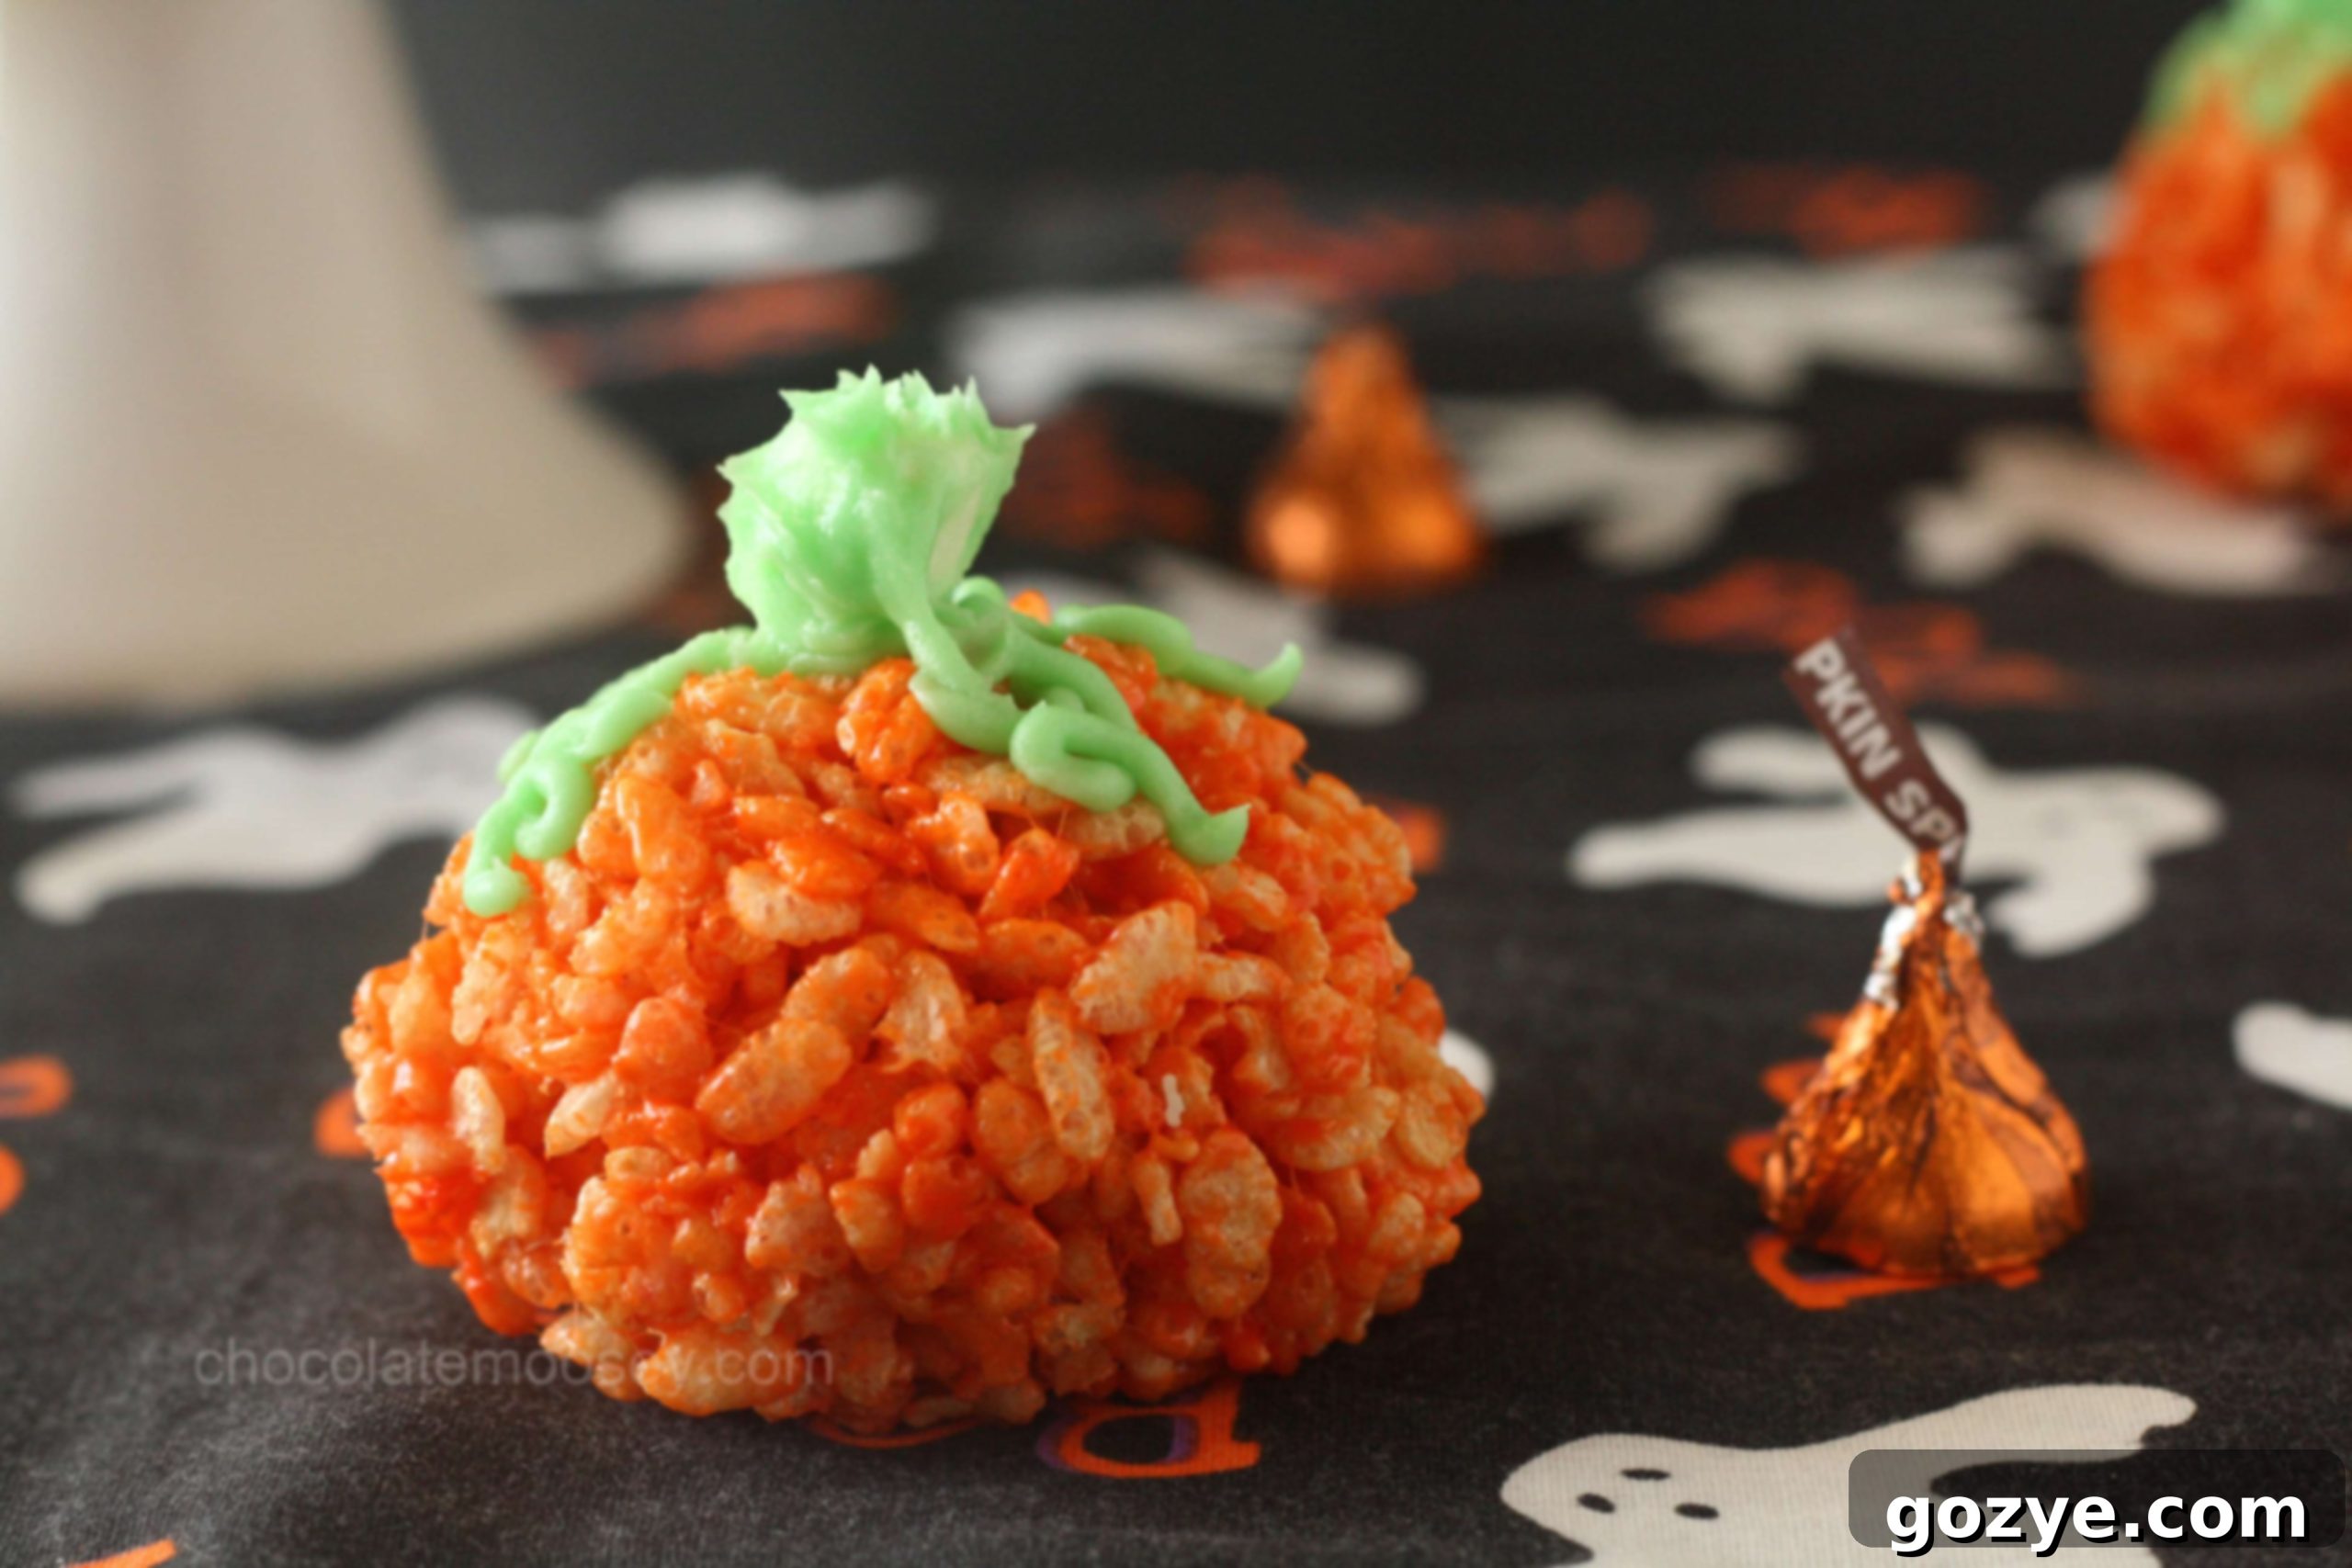
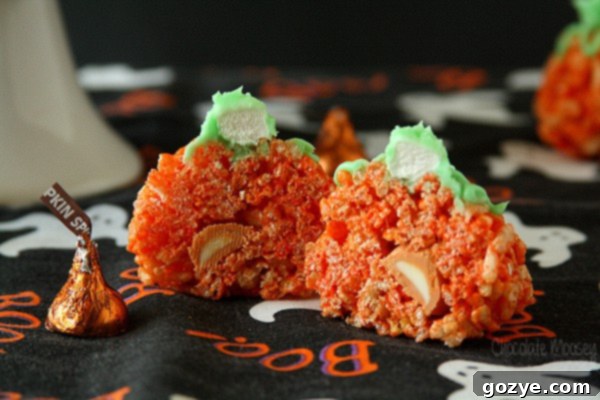
So, in the spirit of all things adorable and edible, I’m thrilled to share this recipe for Rice Krispie Pumpkins. These aren’t just any rice krispie treats; they’re shaped like festive pumpkins and, best of all, they come with a delightful, hidden candy surprise tucked right inside! It’s everyone’s favorite crispy cereal treat transformed into a seasonal masterpiece that’s as fun to make as it is to eat. While there’s a touch of decorating involved, I promise it’s incredibly easy and adds so much charm.
I first discovered the concept for these ingenious pumpkin rice krispie treats in a newspaper, tucked away with the Sunday coupons my dad always hands me. The idea instantly captivated me: not only are they adorable pumpkin shapes, but they also conceal a piece of candy in their core. It’s like a mini edible piñata! For a truly autumnal vibe, I opted for pumpkin spice kisses, which perfectly complement the theme. However, the beauty of this recipe is its flexibility – any “fun-sized” candy will work perfectly. Think classic peanut butter cups, 3 Musketeers, Snickers, Milky Way, or really, any small individually wrapped chocolate or candy that brings you joy.
And these delightful pumpkin rice krispies aren’t just for Halloween! Imagine them gracing your Thanksgiving table as a wonderfully cute and edible centerpiece, bringing smiles to all your guests. Whether you’re whipping up these rice krispie treat pumpkins for a fun family activity, as charming party favors, or as a clever way to utilize leftover Halloween candy, one thing is certain: they are anything but scary. They embody the sweet, festive spirit of the season, making them a perfect addition to your fall baking repertoire.
Ingredients For Your Cute Rice Krispie Pumpkins
Creating these festive Halloween rice krispie treats is incredibly simple, requiring just a few key ingredients that are likely already in your pantry. Here’s what you’ll need to gather:
- Butter: Essential for both flavor and creating that perfectly soft, chewy texture. Butter helps lubricate the cereal, ensuring it binds together beautifully without being overly sticky.
- Mini Marshmallows: I highly recommend using mini marshmallows for a couple of reasons. Firstly, they melt more quickly and evenly, ensuring a smoother base for your treats. Secondly, we’ll reserve a few of these adorable little puffs to double as the pumpkin stems, which is a clever and convenient trick!
- Rice Cereal: The star of the show! You can’t have classic Rice Krispie treats without the crispy, airy rice cereal. Make sure it’s fresh for the best crunch.
- Food Coloring: Liquid food coloring, added by the drop, works wonderfully to achieve that vibrant pumpkin orange. While gel or paste food coloring can also be used, you’ll need to adjust the amount as they are much more concentrated. Don’t forget green for the stems and vines!
- Fun-sized Candy: This is where the surprise comes in! Since you’ll be wrapping the cereal mixture around the candy, it’s crucial to use the smallest, “fun-sized” varieties you can find. Popular choices include mini chocolate kisses, small peanut butter cups, or snack-sized Snickers, 3 Musketeers, or Milky Way bars.
- Buttercream Frosting: You’ll use this for decorating the green stems and piping charming little vines. My easy small batch buttercream frosting recipe is perfect for this, ensuring you have just enough without any waste.
The original recipe I found suggested using green gumdrops for the stems, but honestly, I’m not a huge fan of their texture or flavor. Since we’re already using mini marshmallows for the base, it’s much simpler and tastier to just save a few, tint them green with frosting, and use them as adorable, edible stems!
Short on time or prefer a simpler approach? No problem! You can easily adapt this recipe. Simply add orange food coloring to my Small Batch Rice Krispie Treats recipe, prepare them in a loaf pan, and then decorate the cooled slab with green frosting to create a delightful autumn-themed treat without the individual shaping.
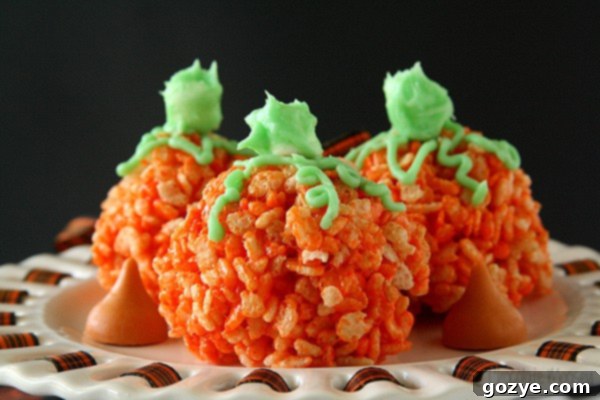
How To Make Delicious Pumpkin Rice Krispie Treats with a Hidden Surprise
Crafting these festive pumpkin rice crispy treats is a straightforward and fun process. Follow these steps for perfectly shaped, candy-stuffed delights:
- Melt the Butter: Begin by melting your butter in a large, wide pot. A heavy-bottomed Dutch oven (affiliate link) works wonderfully as it distributes heat evenly, preventing scorching. Use low heat to ensure the butter melts gently.
- Add Marshmallows and Coloring: Once the butter is fully melted, add the mini marshmallows to the pot. Stir continuously with a wooden spoon or heat-resistant spatula until they are about 90% melted. This is a crucial step! Remove the pot from the heat as soon as they reach this stage to prevent the marshmallows from overcooking, which can lead to hard treats. Now, stir in your orange food coloring until the marshmallow mixture is a vibrant pumpkin hue and completely smooth.
- Stir in the Cereal: Quickly add the rice cereal to the colored marshmallow mixture. Stir gently but thoroughly until every single piece of cereal is evenly coated. Work efficiently, as the mixture will start to cool and become less pliable.
- Shape the Pumpkins Around Candy: This is the magic part! Using a 1/2 cup measuring cup as a guide, scoop out a portion of the warm cereal mixture. Flatten it slightly in your palm, place one fun-sized candy piece in the center, and then carefully mold the cereal mixture around the candy, shaping it into a compact ball. If the mixture is too sticky, lightly grease your hands with a little butter or cooking spray, or use a piece of greased parchment paper to help you shape them without sticking. Repeat this process for all remaining cereal and candy pieces.
- Add Stems and Vines: Now for the charming details! Add a few drops of green food coloring to your prepared buttercream frosting and mix until you achieve a lovely green color. Take your reserved mini marshmallows and gently coat them in the green frosting. Press one marshmallow stem into the top center of each pumpkin-shaped treat. Transfer the remaining green buttercream into a piping bag fitted with a small round tip (or simply snip a tiny corner off a Ziploc bag). Pipe delicate, curling vines onto each pumpkin to give them that authentic, whimsical look.
These delightful pumpkin rice krispies are truly best enjoyed the day they are made, when their texture is perfectly soft and chewy. However, if you have any leftovers, you can store them in an airtight container at room temperature for up to 3 days. They make for a wonderful treat that stays fresh enough for a few days of enjoyment!
Rice Krispie Pumpkins FAQ
The most common reason for rice crispy treats turning hard is overcooking the marshmallows. It’s crucial to use low and slow heat when melting them. Remove your pot from the heat as soon as the marshmallows are about 90% melted. The residual heat will continue to melt them fully as you stir in the cereal. Overcooking the sugar in the marshmallows causes them to become brittle and hard once cooled.
Yes, absolutely! While these treats are best enjoyed the day they’re made for optimal freshness and chewiness, you can certainly prepare them one day ahead of time. Simply store them in an airtight container at room temperature, and they’ll remain delicious for up to 3 days. This makes them a great option for party planning!
Working with warm rice krispie treat mixture can be sticky! The best way to prevent it from adhering to your hands is to lightly grease your hands with butter or cooking spray before shaping. Alternatively, you can use a piece of greased parchment paper to press and mold the treats. Not only will this prevent sticking, but it also helps protect your hands from the warmth of the mixture.
Absolutely! The beauty of these Rice Krispie Pumpkins is their versatility. While pumpkin spice kisses were chosen for a seasonal touch, any fun-sized, individually wrapped candy will work. Think mini chocolate bars like Snickers, Milky Way, 3 Musketeers, or even peanut butter cups. Just ensure they are small enough to be easily encased within the cereal mixture.
To keep your Rice Krispie Pumpkins fresh and soft, store them in an airtight container at room temperature. Avoid refrigerating them, as the cold can cause the treats to harden and lose their chewy texture. Enjoy them within 3 days for the best quality.
More Delightful Halloween & Fall Recipes
If you’ve enjoyed creating and devouring these adorable Halloween rice krispie treats, you’re in for more festive fun! Here are some other cute and delicious Halloween recipes to add to your seasonal baking and party plans:
- Halloween Candy Corn Chocolate Popcorn: A sweet and salty snack perfect for movie nights.
- Spooky & Sweet Halloween Truffles: Elegant yet festive bite-sized delights.
- Colorful Candy Corn Cupcakes: A classic Halloween candy reimagined as a fluffy cupcake.
- Red Apple Cider Sangria (aka Halloween Sangria): A grown-up, festive beverage perfect for gatherings.
Rice Krispie Pumpkins
8 pumpkins
30 minutes
10 minutes
40 minutes
These adorable Rice Krispie Pumpkins are the perfect kid-friendly Halloween treat, each one stuffed with a delightful candy surprise in the middle. Easy to make and fun to decorate!
Ingredients
- 2 tablespoons butter (add 1/4 teaspoon salt if unsalted)
- 5 ounces mini marshmallows (roughly 3 cups) + 8 mini marshmallows reserved for stems
- 3 cups rice crispy cereal
- Orange and green liquid food coloring
- 8 fun-sized candy pieces such as chocolate kisses, peanut butter cups, Snickers, or Milky Way, unwrapped
- 1 recipe Small Batch Buttercream Frosting
Instructions
- In a Dutch oven or large wide pot over low heat, melt the butter (add the salt if using).
- Once melted, add the marshmallows and stir with a wooden spoon until 90% melted*. Don’t overcook or you’ll end up with hard treats.
- Turn off the heat and stir in orange food coloring and cereal until everything is coated.
- Using a 1/2 cup measuring cup, scoop out the cereal mixture and shape around one piece of candy into a ball. If it’s sticking to your hands, use a greased piece of parchment paper for handling. Repeat with remaining cereal.
- Add green food coloring to the buttercream then fold in the mini marshmallows until coated. Attach to the top of each pumpkin. Transfer the rest of the buttercream into a piping bag and pipe vines.
Treats are best eaten the day they’re made, but you can store them in an airtight container for up to 3 days.
Notes
- *It’s very important you melt the marshmallows on low heat and pull when they’re almost fully melted. The longer you cook the sugar, the harder the marshmallows get. Overcooked marshmallows = hard treats!
- If your treats do get a bit hard, you can microwave them for 10-15 seconds before eating to soften them up.
- Don’t want to shape individual pumpkins? Add orange food coloring to my Small Batch Rice Krispie Treats then frost the entire pan with green buttercream for a simpler festive treat.
- Enjoyed this recipe? Explore more fun Halloween treats like my Halloween Popcorn and Halloween Truffles.
Recommended Products
As an Amazon Associate and member of other affiliate programs, I earn from qualifying purchases.
- Dutch Oven
Did you make this recipe?
Let me know what you think! Rate the recipe above, leave a comment below, and/or share a photo on Instagram using #HITKrecipes
Originally published on October 28, 2012, this timeless recipe continues to bring joy and a sweet surprise to Halloween festivities every year!
