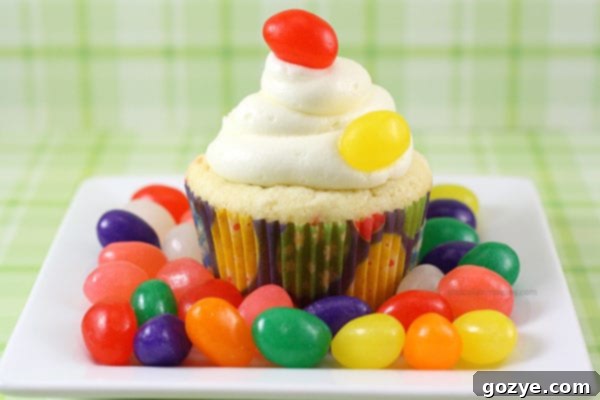
Irresistible Jelly Bean Cupcakes: Your Guide to a Fun & Flavorful Treat
Do you have that one recipe? The one you bookmark, pin, or dog-ear in a cookbook, promising yourself every year that “this will be the year” you finally make it? For me, that elusive treat was a jelly bean bundt cake. For over five years, this vibrant, festive cake sat patiently on my culinary wish list, always intended for Easter, yet never quite making it from page to plate.
This year, however, things were different. I made a conscious effort, bought the bag of colorful jelly beans, and declared it a mission. And a mission accomplished it was! While the original recipe called for a full bundt cake, a craving for individual portions and the sheer joy of creating a smaller, more manageable dessert led me to adapt it into these delightful jelly bean cupcakes. The result? Pure, unadulterated buttery bliss, packed with sweet, chewy surprises.
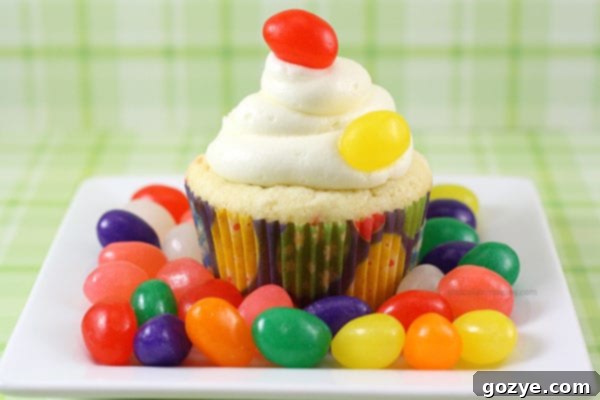
Why These Jelly Bean Cupcakes Are a Must-Try
Admit it – whether it’s after Easter, a birthday party, or just a sweet craving, you likely have a bag of jelly beans somewhere. And if you’re looking for a fun, creative, and utterly delicious way to use them, these cupcakes are your answer. They’re not just a novelty; they’re a truly satisfying bake that stands out from your average cupcake. The original recipe describes them as a “buttery bundt cake,” and that perfectly captures the essence of these cupcakes. They possess a delightful richness and a slightly denser, more substantial texture than many lighter, fluffier cupcake recipes. Yet, they remain wonderfully moist and incredibly flavorful, making them a hearty and comforting treat.
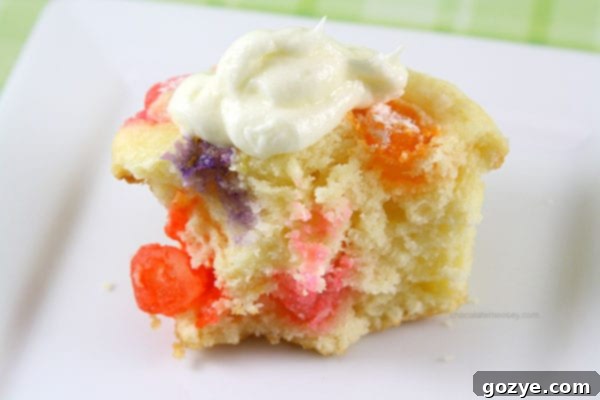
The magic truly happens with the jelly beans themselves. When baked, they don’t entirely vanish. Instead, they soften and partially melt, creating intriguing pockets of chewy, candy goodness throughout the cake. Imagine the familiar taste of a jelly bean, but with a wonderfully soft, almost jam-like texture that melts in your mouth alongside the tender cake. It’s an unexpected and delightful textural contrast that elevates these cupcakes from simple to sensational. Each bite offers a burst of fruity sweetness, making them an exciting adventure for your taste buds.
The Secret Behind Perfect Jelly Bean Texture
Many home bakers worry about adding candies to batter, fearing they’ll all sink to the bottom or completely dissolve. With jelly beans, there’s a simple trick to ensure they remain beautifully dispersed and contribute their unique chewiness. Tossing the cut jelly beans in a small amount of flour before adding them to the batter creates a barrier that helps suspend them throughout the cupcake as it bakes. This ensures that every bite is filled with those delightful, softened pockets of candy.
The beauty of the jelly bean’s composition is that while the outer shell may soften, the interior retains enough structure to offer a distinct, pleasant chew. This transformation from firm candy to a tender, fruit-flavored surprise is what makes these cupcakes so special. Experiment with different jelly bean flavors – a mix of classic fruit flavors will create a vibrant rainbow, while specific gourmet jelly beans can infuse subtle, sophisticated notes into your cake. Whether you prefer cherry, lemon, or a medley of all your favorites, the jelly beans will add a playful element that is both visually appealing and incredibly tasty.
Cream Cheese Frosting: A Tangy Sweet Balance
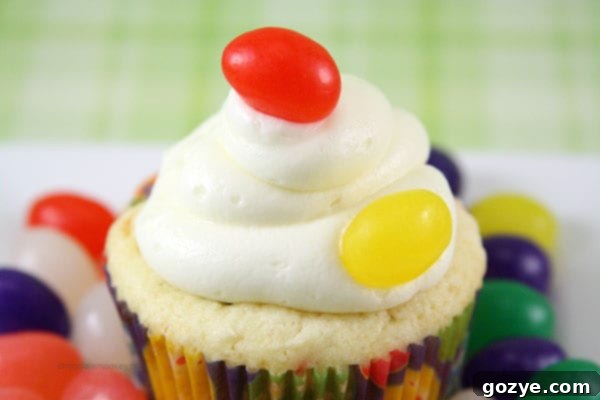
What better to complement a rich, buttery cupcake than a luscious, tangy cream cheese frosting? Given that there’s cream cheese thoughtfully incorporated into the cupcake batter itself, it was a natural and harmonious choice for the topping. The subtle tang of the cream cheese cuts through the sweetness of the cake and the jelly beans, creating a perfectly balanced flavor profile that is utterly addictive. It’s light, fluffy, and provides a creamy contrast to the cupcake’s tender crumb and the chewy jelly bean pieces.
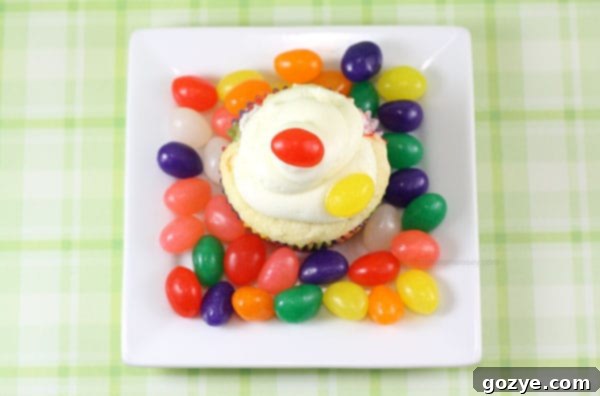
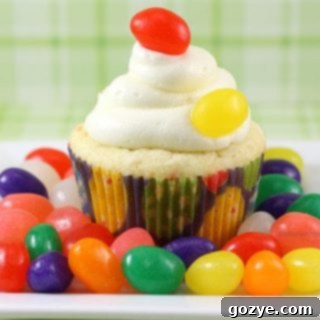
When it comes to frosting, presentation can be half the fun! I confess, I was trying out a new frosting tip when I made these, so my piping wasn’t quite as elaborate as some of my past creations. For fellow bakers looking to refine their frosting game, there are countless fantastic tutorials available online. From classic star tips to elegant ruffles, mastering different piping techniques can transform a simple cupcake into a work of art. My usual star tip swirl method is reliable, but sometimes it’s fun to experiment. Remember to ensure your cupcakes are completely cooled before frosting to avoid a melted mess!
Beyond Easter: Making the Most of Leftover Candy
So, you’ve conquered the jelly bean cupcakes, but what about the rest of your holiday candy stash? Are you a purist, enjoying your treats straight from the box or wrapper, savoring each piece individually? Or do you, like me, find joy in transforming these seasonal delights into new and exciting culinary adventures? Integrating leftover candy into desserts is a fantastic way to extend their shelf life and surprise your taste buds.
Think beyond just cupcakes! Last year, I experimented with Cadbury Creme Egg ice cream, and it was a revelation. For those boxes of Peeps, consider making gourmet s’mores, baking them into brownies for a chewy, marshmallowy topping, or even creating a colorful Peeps crispy treat. Leftover chocolate eggs can be chopped and folded into cookies, melted down for a rich ganache, or used to decorate cakes. Even hard candies can be crushed and sprinkled over ice cream or used to make stained-glass cookies. The possibilities are truly endless, limited only by your imagination!
Essential Tips for Baking Flawless Cupcakes
Achieving bakery-quality cupcakes at home is easier than you think with a few key considerations:
- Room Temperature Ingredients: Always ensure your butter and cream cheese are softened to room temperature. This allows them to cream together smoothly with the sugar, creating a light and airy base for your batter and preventing lumps.
- Don’t Overmix: Once you add the dry ingredients, mix just until combined. Overmixing develops the gluten in the flour too much, resulting in tough, dry cupcakes. A few small lumps are perfectly fine!
- The Flour Toss for Jelly Beans: As mentioned, tossing your cut jelly beans in 1 teaspoon of flour before adding them to the batter is crucial. This light coating helps them stay suspended evenly throughout the cupcakes instead of sinking to the bottom.
- Filling Cupcake Liners: For perfectly domed cupcakes, fill your liners about two-thirds full. This leaves enough room for them to rise without overflowing.
- Proper Cooling is Key: Allow your cupcakes to cool in the pan for about 10 minutes before transferring them to a wire rack to cool completely. Frosting warm cupcakes will only lead to a melted, runny mess. Patience is a virtue here!
- Storage: Store frosted cupcakes in an airtight container at room temperature for up to 2-3 days, or in the refrigerator for up to 5 days. If refrigerating, let them come to room temperature before serving for the best texture and flavor.
Endless Possibilities: Variations to Try
While this recipe for Jelly Bean Cupcakes is fantastic as is, feel free to unleash your creativity and try some delicious variations:
- Jelly Bean Selection: Play with different brands or flavor profiles of jelly beans. Want a sour twist? Use sour jelly beans. Prefer gourmet flavors? Opt for specialty blends. The possibilities are endless!
- Frosting Flavors: While cream cheese frosting is a divine match, consider other options. A classic vanilla buttercream, a vibrant lemon frosting for extra tang, or even a light chocolate ganache could be delightful.
- Color Pop Batter: For an extra festive touch, divide your batter and add a few drops of food coloring to each portion before layering them into the cupcake liners for a tie-dye effect!
- Mix-Ins Beyond Jelly Beans: Feel free to experiment with other small, chewy candies. Gummy bears, mini fruit chews, or even chopped soft caramels could provide a similar textural surprise.
- Mini Cupcakes: For bite-sized treats perfect for parties, use a mini cupcake pan. Just remember to reduce the baking time accordingly (typically 12-15 minutes).
- Spice It Up: A pinch of cinnamon or nutmeg in the batter can add a warming note that complements the sweet jelly beans beautifully.
Jelly Bean Cupcakes
6 cupcakes
Buttery cupcakes infused with colorful jelly beans, perfectly topped with a tangy cream cheese frosting – ideal for Easter or any festive occasion!
Ingredients
- 1/4 cup jelly beans (and a few for garnish)
- 2/3 cup + 1 tsp all-purpose flour
- 1/2 cup granulated sugar
- 1/3 cup unsalted butter, softened
- 3 oz cream cheese, softened
- 1/2 tsp vanilla extract
- 1 large egg
- 1/2 tsp baking powder
- Pinch of salt
Cream Cheese Frosting:
- 2 oz cream cheese, softened
- 1/4 cup unsalted butter, softened
- Pinch of salt
- 1 cup powdered sugar (confectioners’ sugar)
Instructions
- Preheat your oven to 325°F (160°C). Line a standard cupcake pan with six paper liners. Set the prepared pan aside.
- Carefully cut the jelly beans in half. In a small bowl, toss the cut jelly beans with 1 teaspoon of flour. This crucial step helps prevent them from sinking to the bottom of your cupcakes during baking.
- In a large mixing bowl, beat together the sugar, softened butter, softened cream cheese, and vanilla extract until the mixture is light, fluffy, and well blended. Beat in the egg until fully incorporated.
- Add the remaining 2/3 cup of flour, baking powder, and pinch of salt to the wet ingredients. Mix on low speed just until the dry ingredients are combined with the wet ingredients. Do not overmix. Gently fold in the flour-tossed jelly beans.
- To fill each cupcake liner, scoop a small amount of batter into the bottom, sprinkle with a few of the remaining jelly beans, then cover with another scoop of batter. This layering technique helps ensure an even distribution of jelly beans. If you have any extra jelly beans, you can gently press them into the tops of each filled cupcake for added decoration.
- Bake for 24-26 minutes, or until a wooden toothpick inserted into the center of a cupcake comes out clean. Allow the cupcakes to cool in the pan for 10 minutes before carefully transferring them to a wire cooling rack to cool completely.
For the Cream Cheese Frosting:
- In a medium bowl, beat together the softened cream cheese, softened butter, and a pinch of salt until the mixture is creamy and smooth.
- Gradually add the powdered sugar, beating on low speed until combined, then increase to high speed and beat for another few minutes until the frosting is light and fluffy.
- Once the cupcakes are completely cool, pipe the cream cheese frosting onto each cupcake. Garnish with a few whole jelly beans for a final festive touch. Serve and enjoy!
Did you make this recipe?
Let me know what you think! Rate the recipe above, leave a comment below, and/or share a photo on Instagram using #HITKrecipes
Whip Up Some Joy Today!
There’s an undeniable joy in baking, especially when the result is as vibrant and delicious as these jelly bean cupcakes. They are a testament to the fact that sometimes, the best recipes are the ones we finally get around to making, perhaps with a creative twist. Whether you’re making them for Easter, a birthday, or simply to bring a smile to your face, these cupcakes are guaranteed to be a hit.
So, don’t let those jelly beans sit idle! Gather your ingredients, follow these simple steps, and prepare to delight in a truly unique and irresistible treat. We’d love to hear about your baking adventures. If you try this recipe, please rate it above, leave a comment below, or share your beautiful creations on Instagram using the hashtag #HITKrecipes. Happy baking!
Source: Adapted from the book Pillsbury Cakes Unlimited, 1984
