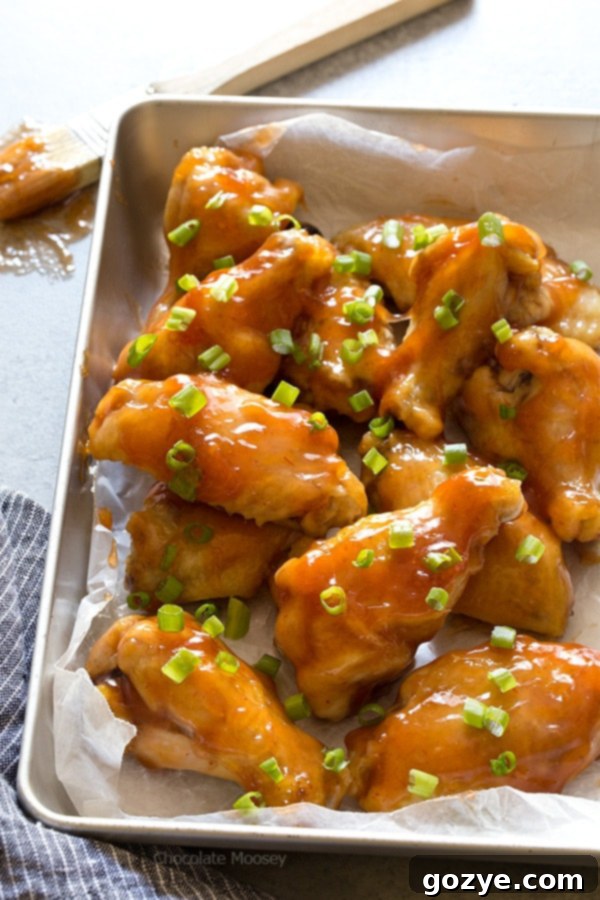
Crispy Oven Baked Sweet and Sour Chicken Wings: Easy Homemade Recipe
Craving that irresistible sweet and sour flavor but want the convenience and crispiness of homemade chicken wings? Look no further! This comprehensive guide will show you how to master the art of making **Crispy Oven Baked Sweet and Sour Chicken Wings** from scratch, complete with a tantalizing homemade sauce. Forget soggy takeout; these wings boast a perfectly crisp skin and are coated in a vibrant, tangy-sweet glaze that will have everyone asking for more. Whether you’re planning a lively tailgating party, a casual pizza night with family, or simply seeking a delicious dinner idea, these wings are an absolute crowd-pleaser.
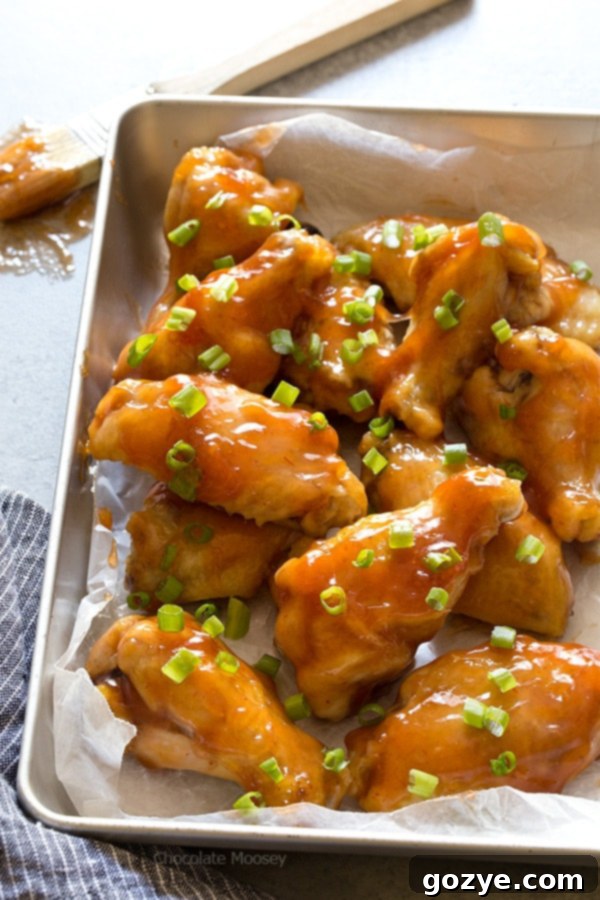
As the leaves begin to change and the air turns crisp, there’s an undeniable feeling that it’s “wing season.” While chicken wings are often synonymous with exciting sports events like tailgating and Super Bowl parties, for many of us, they’re a beloved staple enjoyed any night of the week. My personal love for wings means they frequently make an appearance on our dinner table, often alongside pizza or hoagies when family visits. There’s just something about their savory, bite-sized perfection that makes them universally appealing.
However, the cost of ordering wings from restaurants can quickly add up, making it an expensive habit. This is precisely why I’ve perfected the art of making them at home. Buying chicken wings in bulk – typically a 3-4 pound bag, which conveniently provides 2-3 meals – allows for significant savings. The process is straightforward: bake them in the oven until gloriously crisp, then generously toss them in a flavorful sauce. While classic baked buffalo chicken wings and sweet chili wings are always popular choices, the idea for these irresistible Sweet and Sour Chicken Wings has been simmering for a while. It was one of those “long-lost recipes” patiently tucked away, waiting for the perfect “wing season” moment to shine – because, let’s be honest, who really wants to bake wings in the peak of summer?
These wings offer a delightful culinary journey, reminiscent of the sweet and sour chicken you’d typically enjoy at your favorite Chinese restaurant. The key difference? Instead of deep-fried chicken pieces, we’re using perfectly baked wings, enveloped in that same vibrant, glossy sauce. It’s the ultimate way to savor the authentic taste of Chinese cuisine right in your own kitchen, all without needing to pick up a takeout menu or brave the drive-thru. Prepare yourself for a burst of flavor that balances sweetness and tang in every single bite.
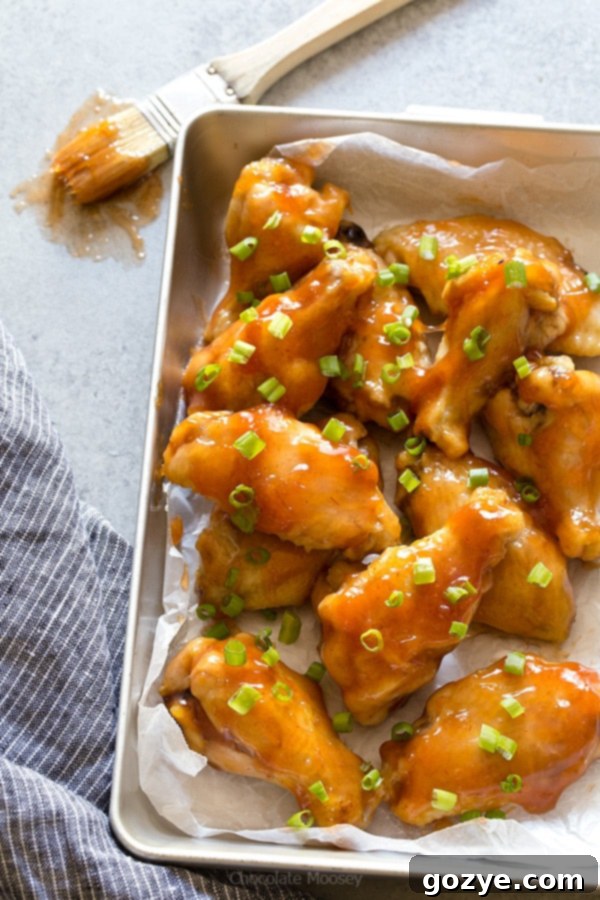
Understanding the Classic: What Exactly is Sweet and Sour Chicken?
Sweet and sour chicken is a beloved and iconic dish originating from Chinese cuisine, renowned for its distinctive balance of contrasting flavors. Traditionally, it features succulent pieces of chicken, often breaded and deep-fried to a golden crisp, then generously coated or dipped into a vibrant, glossy sauce. While the classic preparation involves fried chicken, our oven-baked wing version captures all the essence of the sauce with a healthier, less messy cooking method for the chicken itself.
The magic of sweet and sour lies in its harmonious blend of tastes. The “sweet” component in our homemade sauce primarily comes from the natural sugars in **pineapple juice** and the rich, molasses notes of **brown sugar**. An often-overlooked contributor to both sweetness and the sauce’s characteristic bright red hue is **ketchup**, which also adds a subtle tang.
Complementing this sweetness is the “sour” element, which is predominantly provided by **vinegar**. This acidic ingredient cuts through the richness, creating a dynamic flavor profile that is incredibly addictive. The interplay of these sweet and sour notes creates a complex, mouth-watering experience that defines this classic dish and makes it a favorite across the globe. Our recipe brings this restaurant-quality flavor directly to your home kitchen.
Essential Ingredients for Your Crispy Sweet and Sour Chicken Wings
Crafting these perfectly balanced sweet and sour wings requires a few key ingredients, each playing a crucial role in achieving that sought-after flavor and texture. Here’s a detailed look at what you’ll need:
- Chicken Wing Pieces: The foundation of our dish! Chicken wings are typically composed of three distinct parts: the drumette (resembling a miniature drumstick), the flat (often described as looking like a safety pin due to its two small bones), and the tip. For convenience and to save prep time, you can readily purchase pre-cut drumettes and flats from most grocery stores. If you opt for whole wings, simply separate them at the joints; the tips can be saved and frozen to add incredible depth to homemade chicken broth. Ensure your wings are thawed and thoroughly patted dry before cooking – this is a critical step for maximum crispiness.
- Vegetable Oil: A neutral oil like vegetable or canola oil is ideal for brushing onto your wings before baking. Its role is twofold: it helps the chicken skin achieve a beautiful golden-brown color and, crucially, contributes to that coveted crispy texture by facilitating heat transfer. Choose an oil with a relatively high smoke point to prevent burning at oven temperatures.
- Salt (preferably Kosher): More than just a seasoning, salt enhances the natural savory flavors of the chicken. Kosher salt is often preferred by chefs because its larger, coarser flakes are easier to distribute evenly, providing a consistent seasoning and sticking better to the surface of the chicken compared to finer table salt.
- Pineapple Juice: This tropical fruit juice is a powerhouse of flavor in our sweet and sour sauce. It provides a natural, vibrant sweetness and a delicate acidity that brightens the entire sauce profile. It’s a key component that contributes to the signature tangy notes.
- Brown Sugar: Offering a deeper, more complex sweetness than white sugar, brown sugar introduces rich, caramel-like undertones to the sauce. Beyond flavor, its molasses content aids in caramelization during cooking, contributing to the glossy, appetizing glaze on the wings.
- White Distilled Vinegar: This is the primary source of the “sour” in our sweet and sour sauce. White distilled vinegar delivers a clean, sharp tang that beautifully contrasts with the sweetness, creating that essential flavor balance. Apple cider vinegar can be a substitute if needed, though it will impart a slightly different flavor profile.
- Ketchup: Beyond its role in adding an umami-rich sweetness, ketchup is vital for giving the sweet and sour sauce its characteristic bright reddish-orange color. It also contributes a subtle, familiar tang that many associate with classic sweet and sour preparations.
- Cornstarch: The secret to a perfectly thick, glossy, and clingy sauce! Cornstarch acts as a thickening agent, ensuring the sweet and sour sauce isn’t watery but rather rich enough to beautifully glaze each wing. It’s often whisked into a “slurry” with a cold liquid before being added to hot mixtures to prevent lumps.
- Green Onion (for garnish): While optional, a sprinkle of freshly chopped green onion adds a delightful pop of color and a mild, fresh oniony flavor, providing a pleasant contrast and finishing touch to the rich wings.
Mastering Crispy Sweet and Sour Chicken Wings in the Oven
Achieving truly crispy, restaurant-quality sweet and sour chicken wings right from your oven is simpler than you might think, but it relies on a few crucial techniques. The goal is to render the fat and dry out the skin, allowing it to become golden and crunchy, rather than flabby or steamed.
The Roasting Rack Secret:
The absolute most important trick for baked crispiness is utilizing a **roasting rack set inside a baking pan**. This ingenious setup elevates the chicken wings, creating an air-circulating chamber beneath them. This allows hot air to envelop the entire surface of each wing, ensuring even cooking and crisping from all angles. Crucially, it also permits any rendered fat and juices to drip away into the pan below. If your wings were to sit directly on a baking sheet, they would simmer in their own moisture, resulting in a disappointingly soggy skin. This simple method, a technique I’ve relied on for years after learning it from resources like Bon Appétit, is a game-changer.
No dedicated roasting rack? No problem! A standard **cooling rack placed on top of a rimmed cookie sheet** works just as effectively. Just ensure it’s oven-safe.
Preparation for Perfection:
- Pat Dry: Before anything else, ensure your thawed chicken wings are thoroughly patted dry with paper towels. Excess moisture is the enemy of crispiness.
- Arrange Evenly: Place the prepared wings in a single layer on your greased roasting rack, making sure they aren’t touching or overlapping. This prevents steaming and promotes maximum airflow.
- Oil & Season: Lightly brush each wing with a neutral vegetable or canola oil. This helps conduct heat and encourages browning. Follow with a generous sprinkle of kosher salt to enhance flavor and aid in drawing out moisture.
Baking for Crispiness:
Preheat your oven to a robust **400°F (200°C)**. The high heat is essential for developing a crisp skin. Bake the wings for approximately **45-50 minutes**, or until they are beautifully golden brown, visibly crispy, and the internal temperature of the thickest part of the wing reaches a safe **165°F (74°C)**. You might even want to flip them once halfway through baking for even browning, though the rack often makes this less critical.
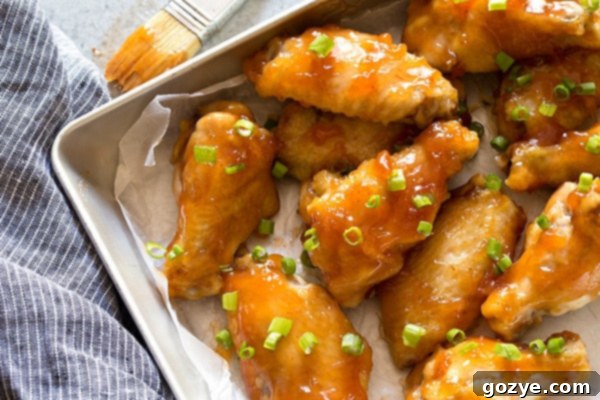
Crafting the Perfect Homemade Sweet and Sour Sauce
The magic truly happens with the sauce! While your chicken wings are busy crisping up in the oven, you’ll have the perfect window of time to prepare this vibrant, glossy sweet and sour sauce from scratch. Making it homemade ensures the freshest flavor and allows you to control the balance of sweetness and tang.
Sauce Preparation Steps:
- Combine Ingredients: In a medium to large saucepan, whisk together the pineapple juice, packed brown sugar, white distilled vinegar, and ketchup until thoroughly combined. At this stage, also add the cornstarch. Whisking the cornstarch in with the cold liquids *before* heating is crucial. This prevents lumps and ensures a smooth, silky sauce.
- Bring to a Boil: Place the saucepan over medium-high heat and bring the mixture to a rolling boil, stirring frequently. As it heats, the sugars will dissolve, and the flavors will begin to meld.
- Thicken to Perfection: Once the sauce reaches a boil, reduce the heat to low and continue to cook, stirring constantly, for about **5-8 minutes**. You’ll notice the sauce gradually thickening to a beautiful, glossy consistency that is perfect for coating your wings. It should be thick enough to cling to a spoon, but still pourable.
- Cool and Coat: Remove the sauce from the heat and allow it to cool slightly while your wings finish baking. A cooler sauce will thicken further and adhere better to the hot, crispy wings. Once the wings are out of the oven, immediately transfer them to a large bowl and generously toss them with the warm sweet and sour sauce until every piece is beautifully coated and glistening. Serve immediately to enjoy maximum crispiness and flavor!
Tips for Sauce Success:
- No Lumps: Always whisk cornstarch into cold liquid first. If you add it to a hot liquid directly, it will clump.
- Adjust Sweetness/Sourness: Taste the sauce once thickened. If you prefer it sweeter, add a pinch more brown sugar. If you like it tangier, a tiny splash more vinegar can be added. Remember to do this gradually!
- For a Spicier Kick: If you enjoy a little heat, a dash of sriracha or a pinch of red pepper flakes can be whisked into the sauce during the last few minutes of cooking.
Common Questions & Essential Tips for Wing Perfection
Do I Cover Chicken Wings When Baking in the Oven?
This is a frequently asked question, and the answer is a resounding **NO!** You absolutely should not cover your sweet and sour chicken wings while they are baking in the oven. Covering the pan traps steam, which is the nemesis of crispy skin. Instead of achieving that desirable golden, crunchy exterior, you’ll end up with a disappointingly flabby, steamed skin. The open-air exposure, especially when combined with a roasting rack, is vital for allowing moisture to evaporate and the skin to crisp up beautifully. Let them breathe and bake uncovered!
Expert Tips for the Crispiest Baked Wings:
Beyond the fundamental roasting rack technique, here are a few additional pro tips to ensure your sweet and sour wings reach their peak crispiness:
- Pat Wings Thoroughly Dry: We cannot emphasize this enough! Use paper towels to vigorously pat the chicken wings dry before seasoning and oiling. Removing as much surface moisture as possible is the single most important step for achieving a truly crispy skin.
- Use a Roasting Rack: As detailed above, a rack allows air to circulate evenly around the wings and prevents them from sitting in rendered fat, which would lead to sogginess.
- Don’t Overcrowd the Pan: Give your wings space! Arrange them in a single layer on the rack with a little breathing room between each piece. Overcrowding will lower the pan temperature and cause the wings to steam rather than roast, hindering crispiness. You might need to use two baking sheets if you’re making a larger batch.
- Consider Baking Powder (Optional but Effective): For an extra crispy boost, some home cooks swear by tossing the *dry* wings with a small amount of baking powder (about 1 teaspoon per pound of wings) along with the salt before adding oil. The baking powder helps to raise the skin’s pH, which leads to better browning and a shatteringly crisp texture. Make sure it’s aluminum-free baking powder to avoid any metallic taste.
- Monitor Internal Temperature: Always use a meat thermometer to ensure the chicken reaches a safe internal temperature of 165°F (74°C). While crispiness is important, food safety is paramount.
Perfect Pairings: What to Serve with Your Sweet and Sour Chicken Wings
These delicious crispy oven-baked sweet and sour chicken wings are incredibly versatile and pair wonderfully with a variety of side dishes, making them suitable for almost any occasion. Here are some ideas to complete your meal:
- Classic Asian Sides: Serve them alongside fluffy white or brown rice to soak up every last drop of that incredible sauce. Steamed or stir-fried vegetables like broccoli, snow peas, bell peppers, or carrots make a great, healthy complement. Egg rolls or spring rolls are also fantastic additions if you’re aiming for a full takeout-style experience at home.
- For Game Day & Parties: Alongside your favorite pizza, these wings are an absolute must-have. They also shine at tailgating parties or Super Bowl gatherings. Consider serving them with other finger foods like potato skins, sliders, or a fresh, crisp green salad to balance the richness.
- Simple & Fresh: A simple side salad with a light vinaigrette can cut through the richness of the wings, offering a refreshing contrast. Coleslaw or a quick cucumber salad also work beautifully.
- Noodle Dishes: A side of simple lo mein or sesame noodles would perfectly round out this meal, bringing more of that beloved Asian-inspired flavor to your table.
However you choose to serve them, these sweet and sour chicken wings are guaranteed to be the star of the show!
Make-Ahead, Storage, and Reheating Tips for Convenience
Planning ahead or dealing with leftovers? Here’s how to manage your delicious sweet and sour chicken wings:
Make-Ahead:
- Wings: You can season the raw wings with salt and oil a few hours in advance and keep them refrigerated. However, for maximum crispiness, it’s best to bake them fresh.
- Sauce: The sweet and sour sauce can be made up to 2-3 days in advance and stored in an airtight container in the refrigerator. Reheat gently on the stovetop over low heat, whisking until smooth and warm, before tossing with freshly baked wings.
Storage:
Leftover sweet and sour chicken wings should be stored in an airtight container in the refrigerator within two hours of cooking. They will remain fresh and delicious for **3-4 days**.
Reheating for Best Results:
To bring your leftover wings back to life with as much crispiness as possible, avoid the microwave!
- Oven/Toaster Oven: Preheat your oven or toaster oven to 350°F (175°C). Place the wings in a single layer on a baking sheet (preferably with a small rack). Reheat for 10-15 minutes, or until heated through and the skin has re-crisped. This method yields the best results.
- Air Fryer: For quick reheating and great crispiness, an air fryer is excellent. Reheat at 375°F (190°C) for 5-8 minutes, shaking the basket halfway through, until hot and crispy.
Creative Variations to Customize Your Wings
While this classic sweet and sour chicken wing recipe is perfect as is, feel free to get creative and tailor it to your taste preferences. Here are a few ideas for delicious variations:
- Add a Spicy Kick: If you love a bit of heat, whisk in 1-2 teaspoons of sriracha sauce or a pinch of red pepper flakes to the sweet and sour sauce while it’s simmering. Adjust to your desired level of spice!
- Ginger and Garlic Infusion: For an extra layer of aromatic flavor, sauté 1 teaspoon of grated fresh ginger and 1-2 cloves of minced garlic in a little oil before adding the other sauce ingredients. This will deepen the Asian-inspired profile.
- Orange Zest Brightness: A teaspoon of orange zest added to the sauce can introduce a bright, citrusy note that complements the pineapple beautifully and adds another dimension of freshness.
- Bell Pepper & Onion Garnish: For added texture and flavor, finely chop some red or green bell peppers and a little white onion. You can gently sauté these and toss them with the wings and sauce, or simply sprinkle them over the top as a fresh garnish alongside the green onions.
- Honey Glaze: While brown sugar is great, you could experiment with replacing some or all of it with honey for a slightly different kind of sticky sweetness in the sauce.
These variations allow you to put your own unique spin on this already fantastic recipe, making it a regular favorite in your culinary repertoire.
More Delicious Crispy Baked Chicken Wings Recipes
Looking for more easy wing recipes? Check out these oven baked wing recipes:
- Curry Chicken Wings
- Taco Wings
- Honey Barbecue Wings Recipe
- Salt and Vinegar Wings
Recommended Kitchen Tools (Affiliate Links)
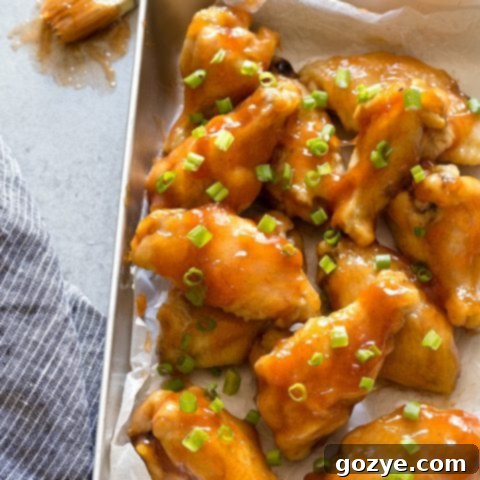
Sweet and Sour Chicken Wings
12 wing pieces
15 minutes
50 minutes
1 hour 5 minutes
Learn how to make perfectly crispy Sweet and Sour Chicken Wings in your oven with a vibrant, homemade sweet and sour sauce. Ideal for game days, family dinners, or any occasion.
Ingredients
- 12 wing pieces (drumettes and flats separated), thawed and patted dry
- 2 tablespoon vegetable oil
- Salt, to season (preferatly kosher)
- 1/2 cup canned pineapple juice
- 1/4 cup packed brown sugar
- 3 tablespoons white distilled vinegar
- 3 tablespoons ketchup
- 1 1/2 tablespoons cornstarch
- Green onion, for garnish
Instructions
- Preheat oven to 400F (200°C). Line the bottom of a roasting pan or cookie sheet with foil. Place a roasting or cooling rack on top then grease with cooking spray.
- In a large bowl, toss together the wings, oil, and salt. Place wings onto rack in the pan then bake for 45-50 minutes or until internal temperature reaches 165F (74°C) and wings are golden and crispy.
- Meanwhile, in a large saucepan whisk together the pineapple juice, brown sugar, vinegar, ketchup, and cornstarch. Bring to a boil over medium-high heat.
- Once boiling, reduce the heat to low and cook, stirring constantly, until thickened and glossy, about 5-8 minutes.
- Once the wings are done, transfer them to a large bowl, toss generously with the warm sweet and sour sauce until evenly coated, then garnish with green onion. Serve immediately.
Notes
- For more irresistible baked wing recipes, explore my Sweet Chili Wings, Buffalo Chicken Wings, Curry Chicken Wings, Taco Wings, Honey Barbecue Wings, and Salt and Vinegar Wings.
- For extra crispy wings, ensure they are patted thoroughly dry before baking. For an even crispier skin, you can optionally toss the dry wings with 1 teaspoon of aluminum-free baking powder per pound of wings along with the salt before oiling.
- Leftover wings can be stored in the refrigerator for 3-4 days and are best reheated in the oven or air fryer to regain crispiness.
Recommended Products
As an Amazon Associate and member of other affiliate programs, I earn from qualifying purchases.
- Roasting Pan with Rack
Did you make this recipe?
Let me know what you think! Rate the recipe above, leave a comment below, and/or share a photo on Instagram using #HITKrecipes
Originally published October 13, 2016. Last updated [Current Date] for enhanced content and clarity.
