From Disaster to Delicious: Mastering Coconut Lime Cookies & Preventing Cookie Spread
This post is dedicated to my incredible best friend, Mary, because I know she’ll be laughing hysterically as she reads through my latest kitchen escapades. Baking, as many of you know, is often a journey filled with unexpected turns, and sometimes, those turns lead straight into a delicious (or not-so-delicious) mess. This particular saga, involving coconut and lime cookies, is a testament to the fact that even the most straightforward recipes can present unique challenges, and that collaborative problem-solving is often the sweetest ingredient of all.
The Initial Meltdown: My First Attempt at Coconut Lime Cookies
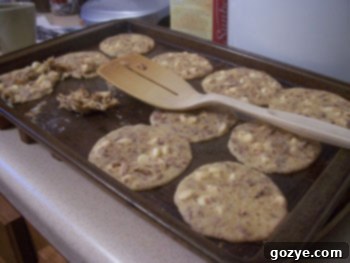
Last week, inspired by a delightful recipe from Mary (whose blog link, sadly, is no longer active), I embarked on what I hoped would be a simple baking session: coconut and lime cookies. The promise of a tropical, zesty treat was tantalizing. However, the reality was a stark contrast to my culinary dreams. The moment I pulled them from the oven, my heart sank. What started as promising dough balls had morphed into a single, expansive sheet of thinly spread, interconnected cookie-like material. They weren’t just flat; they were practically fused to the baking sheets, refusing to yield without a significant fight and leaving behind a sticky, stubborn residue.
The visual was undeniably comical, even if the cleanup wasn’t. It was clear I had encountered a classic baking conundrum: excessive cookie spread. My beautiful, round cookies had decided to stage a dramatic rebellion, transforming into an unrecognizable, unappetizing landscape. The texture was equally disappointing – thin, greasy, and devoid of the satisfying chewiness I craved. This initial disaster was the catalyst for a deeper dive into cookie science and a fun, shared experiment with Mary.

Seeking Expert Advice: Mary’s Wisdom on Cookie Spread
Naturally, after such a spectacular failure, I turned to the recipe’s originator for guidance. I reached out to Mary, sharing my tale of woe and asking if she had ever encountered similar issues with her dough, perhaps suggesting that chilling was the missing step. Her response was a treasure trove of invaluable insights, explaining the potential culprits behind my cookies’ epic spread.
Mary pointed out two primary suspects: my butter might have been too soft, and my choice of margarine could have exacerbated the problem. Let’s delve into the science behind this. Butter, especially when softened beyond a cool room temperature, has a lower melting point. This means it melts much faster in the oven, causing the cookie dough to lose its structure and spread prematurely before the flour and egg proteins have a chance to set. Margarine, often containing more water and different emulsifiers than butter, can behave even more unpredictably, contributing to an even greater spread.
She also suggested that adjusting the flour and sugar ratios could help stabilize the cookie’s structure by promoting better gluten development. Flour provides the crucial framework for cookies; too little, and the dough can’t hold its shape. Sugar, while essential for flavor and tenderness, can also contribute to spreading if not properly balanced, as it melts and thins the dough. Our conversation quickly evolved into a joint mission: we decided we would both experiment further with the ingredients and techniques, aiming to crack the code for the ultimate coconut lime cookie and share our findings.
My Kitchen Experiment: Temperature, Extracts, and Unexpected Surprises
With a renewed sense of purpose, I embarked on my side of the experiment. My focus was on the temperature of the fat and the dough, while Mary tackled the intricacies of flour variations. Since I had run out of coconut (a minor setback, but a good reminder to always check your pantry!), this batch would be lime-centric, allowing me to isolate the structural issues.
My first step was to address the issue of soft fat. I took a stick of margarine (my current go-to, though I was starting to question its loyalty in cookie-making) and froze it for 20 minutes before beating. The goal was to ensure the fat was firm, slowing down its melt in the oven. I planned two variations: one with rum extract for a hint of warmth, and another with vanilla extract for a classic touch.
However, my ambition quickly collided with reality. Lacking the time to make two completely separate batches, I decided to split the dough. This is where things got a bit… imprecise. Since the extracts needed to be incorporated before the flour, I split the wet batter into two bowls. Being “not good at guessing,” as I put it, I simply poured. Unsurprisingly, the vanilla bowl ended up with significantly more batter than the rum bowl. Then, I halved the flour mixture, carefully measuring 1/4 cup for each bowl. This meant my meticulously measured flour was now being added to disproportionate amounts of wet ingredients – a recipe for inconsistency, indeed.
As I mixed, the differences became immediately apparent. In the rum bowl, the dough came together beautifully – cohesive, pliable, and just firm enough. It felt right. The vanilla bowl, however, seemed stubbornly wet and sticky. I cautiously added an extra 1/4 cup of flour, but I was hesitant to add too much, fearing tough cookies. While it improved slightly, it still didn’t have the same pleasing consistency as the rum dough. This highlighted a crucial baking lesson: precision in ingredient ratios, especially flour, is paramount.
Next, I chilled both portions of dough in the fridge for 15 minutes before rolling them into uniform balls. To further combat spreading, I then placed my empty cookie sheets in the freezer for 20 minutes while the oven preheated. My strategy was to ensure every element, from the fat in the dough to the baking surface, was as cold as possible, providing maximum resistance against premature spreading.
The Moment of Truth: Baking and Unveiling the Results
With great anticipation, I loaded the chilled dough balls onto the frosty sheets and slid them into the preheated oven. I initially baked them for 10 minutes, then, seeing they weren’t quite done, added another 2 minutes.
The Rum Batch: A Surprising Success!
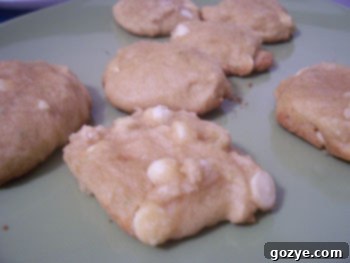
To my delight, the rum batch, baked on the bottom rack, emerged from the oven looking remarkably good! They held their shape beautifully, with perfectly crisp edges and a soft, chewy interior. The aroma of lime and a subtle hint of rum filled the kitchen. They were golden-brown, evenly baked, and, most importantly, they hadn’t spread into an indistinguishable mass. This felt like a small victory, a testament to the power of cold dough and proper flour-to-liquid ratios.

The Vanilla Batch: Another Spreading Saga
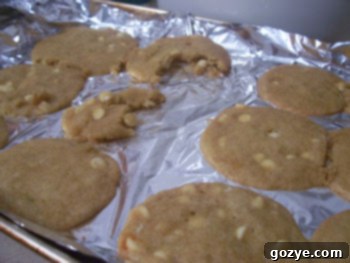
The vanilla batch, however, repeated the unfortunate performance of the first attempt. Despite all my efforts, these cookies spread significantly more than their rum-flavored counterparts. They were soft, overly thin, and clung desperately to the baking sheets. Frustrated, I put them back in the oven again, and again, and again, hoping they would firm up, but they steadfastly refused to harden. Eventually, I pulled them out, resigned to their fate, and let them cool completely before attempting to remove them.

My Conclusions and Learnings from the Experiment
My kitchen adventure yielded some valuable, albeit sometimes messy, insights:
- Margarine vs. Butter: While I successfully used margarine in the rum batch, I still wonder if butter would have provided an even better structure and, critically, made the cookies less prone to sticking. Butter’s higher fat content and different composition often provide a more stable dough structure and contribute to a richer flavor and crisper texture compared to many margarines.
- The Power of Cold: Keeping the dough cold, whether by chilling the dough itself or freezing the cookie sheets, is undeniably crucial for minimizing spread. This allows the cookie’s structure to set before the fat completely melts.
- Flour is Fundamental: My vanilla batch’s failure strongly suggests it simply needed more flour to achieve the correct consistency and structural integrity. The uneven distribution of flour due to my guessing game was a critical flaw. Too little flour, and you get a pancake; too much, and you get a dry, crumbly puck.
- Precision Matters: Baking is a science. While I tried to be scientific in my approach, my imprecise splitting of the wet ingredients sabotaged one half of my experiment. Accurate measurement, especially for dry ingredients, cannot be overstated.
Mary’s Parallel Experiment: Different Paths, Shared Insights
Meanwhile, Mary was conducting her own flour-focused experiments. She used more flour and a little more leavener in her recipe, which resulted in a delightful, cake-like cookie. Interestingly, she still preferred her very first batch of coconut lime cookies, describing them as flat and crisp, yet wonderfully chewy. This highlights that “perfect” can be subjective and depends on individual texture preferences. My goal was a chewier, less spread-out cookie, while her initial result leaned towards a crispier profile.
We both arrived at one universal conclusion about the flavor: the lime, while delicious, consistently overpowered the coconut. (In my very first batch, I had used toasted coconut, which adds depth, but still couldn’t stand up to the vibrant lime.) This is a key insight for future recipe adjustments – perhaps a more subtle lime zest or a bolder coconut presence is needed. Additionally, Mary used dark chocolate chips in her version, while I used white chocolate chips, adding another minor variation to our shared journey.
Beyond the Batch: Universal Solutions for Preventing Cookie Spread
My baking misadventures and subsequent learning journey, coupled with Mary’s invaluable insights, underscore several universal principles for preventing cookie spread and achieving perfectly baked cookies every time. These tips are invaluable for any home baker:
1. Master the Fat: Temperature and Type
- Butter Temperature: The most common culprit for spreading is overly soft butter. Use butter that is cool, but pliable enough to indent slightly when pressed. If it’s too warm and greasy, it will melt too quickly in the oven.
- Butter vs. Margarine vs. Shortening: Butter (typically 80% fat, 20% water/milk solids) provides flavor and a good balance of crispness and chew. Margarine varies widely in fat content and can contain more water, leading to more spread. Shortening (100% fat) produces thick, soft, non-spreading cookies due to its higher melting point. Choose your fat wisely based on desired texture.
2. Flour Power: The Foundation of Structure
- Accurate Measurement: Always spoon flour into your measuring cup and then level it off with a straight edge. Scooping directly from the bag can pack in too much flour, while too little will result in excessive spreading.
- Flour Type: All-purpose flour is standard. Bread flour (higher protein) can create chewier cookies, while cake flour (lower protein) can make them more tender but also potentially more prone to spreading.
3. Sweet Balance: Sugar’s Role
- Granulated vs. Brown Sugar: Granulated sugar contributes to crispness and spread, as it melts and thins the dough. Brown sugar, with its molasses content, adds moisture and chewiness, and tends to reduce spread. A good balance of both often yields the best results.
- Sugar Quantity: While essential for flavor and texture, excessive sugar can lead to more spreading because it liquefies in the heat, thinning the dough.
4. The Chill Factor: Dough Temperature is Key
- Chilling Dough: This is a non-negotiable step for many recipes, especially those prone to spreading. Chilling allows the fat to re-solidify, making the dough firmer and delaying the melting process in the oven. This gives the flour and eggs more time to set the cookie’s structure before it spreads. Aim for at least 30 minutes, or even overnight for best results.
- Cold Baking Sheets: As I discovered, chilling your cookie sheets further slows down the initial spread by providing a colder surface for the dough.
5. Oven Dynamics: Heat and Placement
- Oven Temperature: An oven that’s too cool will give cookies more time to spread before they set. Ensure your oven is accurately calibrated (an oven thermometer is a great investment!).
- Even Baking: Bake cookies in the middle rack or, if using two racks, rotate them halfway through. My rum batch on the bottom rack had good results, but consistent heat distribution is generally preferred.
- Don’t Overcrowd: Give cookies ample space on the baking sheet to allow for proper air circulation and even baking.
6. Leavening Agents: The Rise and Spread
- Balance: Too much baking soda or baking powder can cause cookies to rise quickly and then collapse, leading to a flatter, spread-out cookie. Ensure your leavening agents are fresh, as old ones can also cause issues.
7. Post-Bake Protocol
- Cool on the Sheet: Allow cookies to cool on the baking sheet for 5-10 minutes before transferring to a wire rack. This allows them to firm up and prevents them from breaking.
The Journey Continues: Towards the Ultimate Coconut Lime Cookie
My messy, hilarious, and incredibly educational baking journey with the coconut lime cookies has been a true adventure. It’s a reminder that cooking and baking are as much about the process of discovery and learning from mistakes as they are about the final product. Thanks to Mary for embarking on this collaborative experiment with me and for all of her invaluable help and wisdom. Our combined efforts have certainly brought us closer to understanding the intricacies of cookie dynamics.
We both agree that there’s still more experimentation to be done to achieve that “ultimate” coconut lime cookie – the perfect balance of flavor, texture, and structure. Perhaps next time, we’ll try a different fat, adjust the lime-to-coconut ratio, or explore alternative leavening combinations. The quest for the perfect cookie continues, and I wouldn’t have it any other way. What are your go-to tips for preventing cookie spread? Share your wisdom in the comments below!