Crispy Baked Salt and Vinegar Wings: The Ultimate Homemade Recipe for Tangy Perfection
Experience the irresistible crunch and bold, tangy flavor of homemade Salt and Vinegar Wings! This recipe makes it incredibly easy to create crispy, oven-baked wings right in your kitchen, featuring a deeply flavorful marinade that will have everyone reaching for more. Whether you’re planning a cozy dinner for two or gearing up for the ultimate Super Bowl party, these wings are guaranteed to be a crowd-pleaser. Say goodbye to soggy takeout and hello to perfectly seasoned, intensely satisfying chicken wings!

After a much-needed break from the bustling pace of recipe development and other creative ventures, I’m thrilled to be back and sharing a recipe that perfectly blends simplicity with incredible flavor: these mouthwatering Salt and Vinegar Wings. There’s a certain magic to crafting comfort food at home, especially when it’s as satisfying as a batch of perfectly crispy chicken wings. During my time off, I rediscovered the joy of cooking from my vast collection of cookbooks, focusing on savory dishes that truly nourish the soul.
While the holidays often bring an abundance of sweet treats, I found myself craving bold, savory flavors that could cut through the richness. That’s when the idea for these baked Salt and Vinegar Wings really took hold. Having successfully transformed the iconic chip flavor into homemade potato chips and even popcorn, it felt only natural to apply the same irresistible tang to crispy chicken wings. The goal was to achieve that classic salty, sour punch without relying on hard-to-find ingredients like vinegar powder, opting instead for a vibrant liquid marinade.
Why You’ll Love These Crispy Salt and Vinegar Wings
- Unrivaled Crispy Texture: Learn the simple secret to achieving restaurant-quality crispy skin without a deep fryer.
- Bold, Tangy Flavor: The distinctive salt and vinegar taste is perfectly balanced, offering a truly addictive culinary experience.
- Easy to Make: With straightforward steps and common ingredients, even novice cooks can master this recipe.
- Versatile Serving: Ideal for a casual weeknight dinner, a fun game day snack, or a centerpiece for your next gathering.
- Healthier Alternative: Baking instead of frying significantly reduces fat content, making them a guilt-free indulgence.
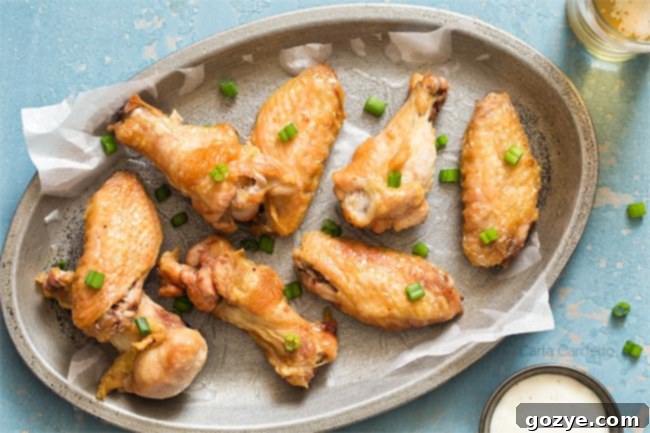
The Irresistible Allure of Salt and Vinegar Flavor
There’s something uniquely captivating about the combination of salt and vinegar. It’s a flavor profile that evokes nostalgia, often associated with beloved snacks like potato chips. The sharp, acidic kick of vinegar beautifully contrasts with the savory depth of salt, creating an explosion of taste that’s both refreshing and deeply satisfying. This recipe harnesses that iconic flavor and applies it to succulent chicken wings, elevating a simple dish into an unforgettable culinary experience.
Essential Ingredients for Your Salt and Vinegar Wings
To craft these perfect oven-baked salt and vinegar wings, you’ll need a handful of key ingredients, each playing a crucial role in developing that signature flavor and texture:
- Chicken Wing Pieces: For convenience and optimal crispiness, aim for pre-cut drumettes and flats. If you start with whole wings, you can easily separate them yourself. The drumette resembles a miniature drumstick, while the flat has two small bones and a flat shape. Save the wing tips for making a flavorful homemade chicken broth, or simply discard them.
- Distilled White Vinegar: This is the star of our tangy marinade. Distilled white vinegar provides that classic, sharp, and clean sour note that defines the “salt and vinegar” experience. While it’s my preference for a traditional taste, feel free to experiment with other vinegars like malt vinegar for a slightly sweeter, malty undertone, or apple cider vinegar for a fruitier, milder tang.
- Kosher or Sea Salt: Salt is more than just a flavor enhancer here; it’s half of the dish’s namesake! Kosher salt or sea salt are ideal choices due to their larger flake size, which allows for better control over seasoning and ensures the salt adheres beautifully to the wings. Avoid using regular table salt, as its finer grains can make the wings excessively salty very quickly.
- Vegetable Oil: A neutral oil like vegetable or canola oil is essential for promoting that coveted crispy skin. Brushing a thin layer of oil onto the wings helps conduct heat more efficiently, creating a beautifully golden and crunchy exterior. Its high smoking point also makes it suitable for baking at higher temperatures.
- Granulated Sugar: A small touch of sugar in the marinade helps to balance the intense acidity of the vinegar, rounding out the flavor profile and preventing it from being overwhelmingly sour. It also aids in caramelization, contributing to the wings’ golden color.
- Garlic Powder and Onion Powder: These pantry staples are powerhouse flavor boosters. They add an aromatic depth and savory complexity to the marinade, complementing the salt and vinegar without overpowering it. They seamlessly integrate into the liquid marinade, ensuring even distribution of flavor.
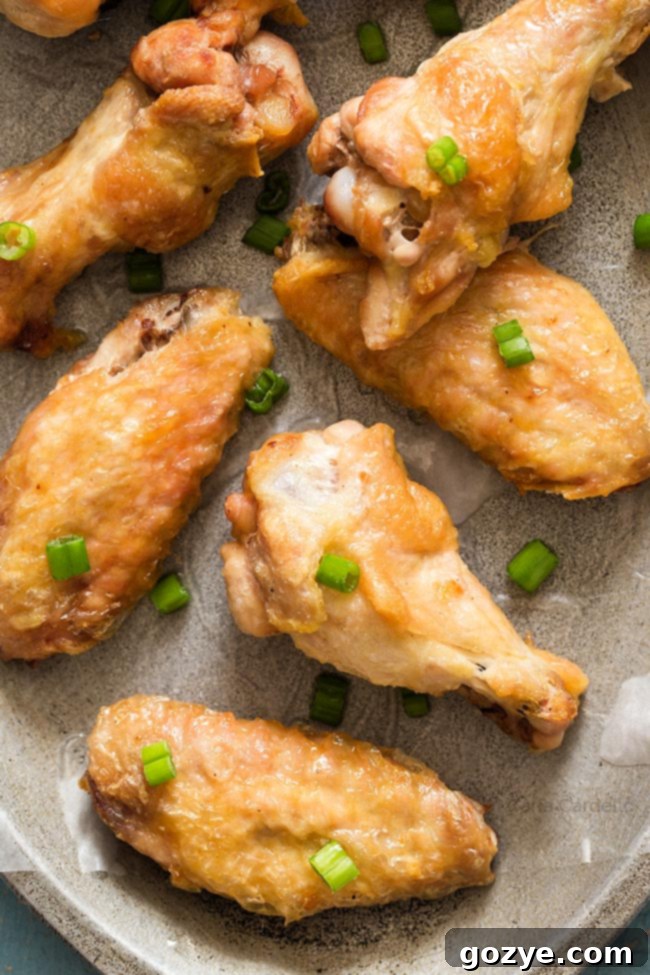
The Secret to Crispy Baked Chicken Wings: No Frying Required!
Achieving truly crispy chicken wings in the oven is simpler than you might think, and it doesn’t require a deep fryer or any complicated techniques. The key lies in creating the right environment for the wings to cook evenly and for their skin to render and crisp up. The best method involves using a roasting rack or a cooling rack set inside a baking pan.
This setup allows hot air to circulate all around each wing, ensuring even cooking and crisping on all sides. As the chicken fat renders during baking, it drips down through the rack and collects in the pan below, preventing the wings from sitting in their own fat and becoming soggy. Don’t have a dedicated roasting rack? A standard cooling rack placed on a rimmed baking sheet works perfectly well! Just ensure the baking sheet has a rim to catch any drips.
Another crucial step for maximum crispiness is to ensure your chicken wings are as dry as possible before baking. Excess moisture on the skin will steam rather than crisp, so a thorough pat-down with paper towels is non-negotiable for that ultimate crunch.

Step-by-Step Guide: Crafting Your Own Salt and Vinegar Wings
Follow these detailed steps to create your perfectly crispy and tangy Salt and Vinegar Wings:
1. Master the Marinade
The journey to flavor town begins with our potent salt and vinegar marinade. In a measuring cup or small bowl, whisk together the distilled white vinegar, kosher salt, granulated sugar, garlic powder, and onion powder. Stir diligently until the salt and sugar have mostly dissolved. This ensures that the flavors are evenly distributed. Crucially, reserve half of this mixture to toss with the wings *after* they’ve baked. This dual application intensifies the tanginess.
Next, place your chicken wing pieces into a shallow dish or a heavy-duty freezer bag. Pour the remaining half of the vinegar mixture over the wings, making sure they are as submerged as possible. This intimate contact with the marinade is what infuses them with that incredible salt and vinegar flavor. Refrigerate for 2-4 hours. This marination time is vital for flavor absorption – don’t skip it!
2. Prepare for Baking
Once the marination is complete, it’s time to get ready for baking. Preheat your oven to a crisp-inducing 400°F (200°C). Line the bottom of a roasting pan or a large cookie sheet with aluminum foil for easier cleanup. Place a roasting rack or cooling rack on top of the foil-lined pan, and generously grease the rack with cooking spray to prevent sticking.
Remove the wings from the marinade, discarding the used liquid. This step is critical: pat the wings *completely dry* with paper towels. Any residual moisture will create steam in the oven, hindering the crisping process. Dry wings are happy, crispy wings!
3. Bake to Golden Perfection
Arrange the dried wings in a single layer on the prepared roasting rack, ensuring there’s space between each wing for optimal air circulation. Brush each wing piece lightly on all sides with vegetable oil, then sprinkle a touch more salt over them. The oil helps the skin crisp up beautifully and achieve a golden-brown color.
Bake for approximately 45-50 minutes, or until the internal temperature of the thickest part of the wing reaches 165°F (74°C) and the skin is wonderfully golden and crispy. You might even want to flip them halfway through for even browning, though the rack method usually ensures good all-around crisping.
4. The Final Tangy Toss
As soon as the wings come out of the oven, transfer them to a large mixing bowl. Pour the reserved vinegar mixture over the hot wings and toss immediately to coat them evenly. The heat from the wings will help the marinade adhere and release its aromatic tang. Serve these crispy, flavorful Salt and Vinegar Wings right away, perhaps garnished with some sliced green onions for an extra touch of freshness.
Frequently Asked Questions About Salt and Vinegar Wings
Do I cover wings when baking?
Absolutely not! Covering your wings while baking will trap steam, resulting in soft, soggy skin rather than the desired crispy texture. For truly crispy wings, always bake them uncovered on a rack.
Can I use frozen wings for this recipe?
Yes, but you must thaw them completely first. Pat them thoroughly dry after thawing and before marinating. Freezing and thawing can sometimes add extra moisture, so ensure they are bone-dry for the best crispiness.
How long can I marinate the wings?
For these Salt and Vinegar Wings, 2-4 hours is ideal. Marinating for much longer than 4 hours, especially with a strong acidic marinade like vinegar, can start to break down the chicken’s proteins too much, potentially leading to a slightly mushy texture. Stick to the recommended time for optimal flavor and texture.
Can I make these in an air fryer?
Yes, you can! After marinating and patting dry, arrange the oiled and salted wings in a single layer in your air fryer basket, making sure not to overcrowd it. Air fry at 375°F (190°C) for 20-25 minutes, flipping halfway, until crispy and cooked through. Toss with the reserved marinade immediately after air frying.
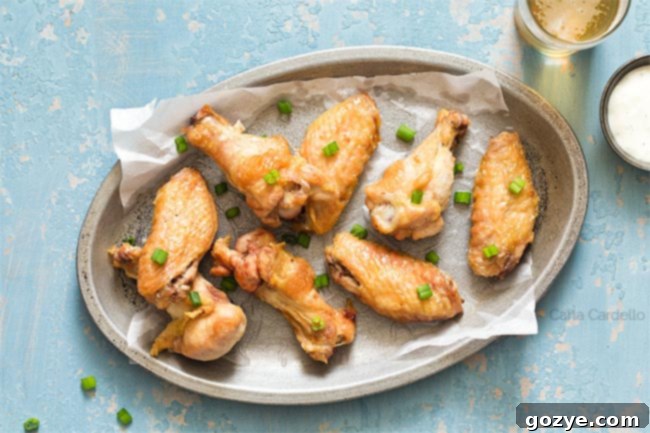
Serving Suggestions & Perfect Pairings
These Salt and Vinegar Wings are fantastic on their own, but they also pair wonderfully with a variety of sides and dips. For a complete meal, consider serving them alongside a creamy coleslaw, a fresh garden salad, or some roasted potatoes. If you’re hosting a game day, offer a cool ranch or blue cheese dip for contrast, or a simple side of celery and carrot sticks. Their bold flavor also stands up well to a crisp lager or a dry white wine.
Storage and Reheating Tips
Leftover Salt and Vinegar Wings can be stored in an airtight container in the refrigerator for up to 3-4 days. To reheat and restore some crispiness, place them on a baking sheet in a preheated oven (around 350°F / 175°C) for 10-15 minutes, or until heated through and crisp again. An air fryer is also excellent for reheating, offering crispy results in about 5-7 minutes at 350°F (175°C).
More Crispy Baked Chicken Wings to Love
If you’ve fallen in love with these crispy baked wings, you’re in luck! There’s a whole world of easy, oven-baked wing recipes waiting for you to explore. Expand your wing repertoire with these other fantastic flavors:
- Sweet and Sour Chicken Wings
- Curry Chicken Wings
- Baked Buffalo Chicken Wings
- Mexican Chicken Wings
- Honey Barbecue Wings
And if you’re a true salt and vinegar enthusiast, be sure to check out these other recipes that capture the magic of this flavor combination:
- Homemade Salt and Vinegar Chips
- Salt and Vinegar Popcorn

Salt and Vinegar Wings
12 wings
15 minutes
45 minutes
2 hours
3 hours
These crispy baked Salt and Vinegar Wings are easy to make at home with its salty and tangy marinade! Serve them for dinner or for your Super Bowl watching.
Ingredients
- 12 wing pieces (drumettes and flats), thawed and patted dry
- 1 cup white distilled or apple cider vinegar
- 1 tablespoon kosher or sea salt (do not use table salt or it’ll be too salty)
- 1 teaspoon granulated sugar
- 1/2 teaspoon garlic powder
- 1/2 teaspoon onion powder
- 2 tablespoons vegetable oil
- Sliced green onion, for garnish
Instructions
- Add the wings to a shallow baking dish or freezer bag.
- Whisk together the vinegar, salt, sugar, garlic powder, and onion powder until salt and sugar have mostly dissolved. Reserve half of the mixture for later.
- Pour the remaining half over the chicken, making sure the wings are as submerged as possible. Refrigerate 2-4 hours.
- Preheat oven to 400F. Line the bottom of a roasting pan or cookie sheet with foil. Place a roasting or cooling rack on top then generously grease with cooking spray.
- Remove the wings from the marinade and discard the marinade. Pat wings completely dry.
- Place the wings in a single layer on the roasting rack. Brush each side with the oil then sprinkle a touch of salt on each one. Bake 45-50 minutes until internal temperature reaches 165F.
- When the wings are done, toss with the reserved vinegar mixture then serve immediately with green onion on top.
Notes
- Liked this wing recipe? Check out my Sweet Chili Wings, Buffalo Chicken Wings, Curry Chicken Wings, Mexican Chicken Wings, Honey Barbecue Wings, and Sweet and Sour Wings.
- Love salt and vinegar? Check out my Salt and Vinegar Chips and Salt and Vinegar Popcorn.
Recommended Products
As an Amazon Associate and member of other affiliate programs, I earn from qualifying purchases.
- Roasting Pan
Did you make this recipe?
Let me know what you think! Rate the recipe above, leave a comment below, and/or share a photo on Instagram using #HITKrecipes
